In this article, we will discuss the concept of Git tags and how the git tag command does work. We will cover various kinds of tags, how to create new tags, tag listing, and deletion of a tag, and more in this article. A few commands we have executed on the Ubuntu 20.04 system, which we will elaborate on in the rest of the section.
Create a new Tag
There are following two different types of Git tags:
- Annotated tags
- Lightweight tags
Annotated tags
The annotated tags are saved as a full object in the database of Git. These types of tags store some extra metadata information such as the name of the tagger, tagger email id, and date. Annotated tags stores with a tagging message. It is best practice suggested in git is to store git tags in the form of annotated tags over lightweight. Using the annotated tags, you can store all the associated meta-data in the database.
To create an annotated tag, open the terminal application by pressing Ctrl+Alt+t and run the following command:
In the above command, we have tagged the current HEAD by using the git tag command. The user provides a tag name ‘Release_1_0’ with the -a option, and the tag message is provided with the –m option.
Lightweight tags
This type of tags is used for ‘bookmarks’ to a commit; Lightweight tags are just a name or a specific pointer to a commit. Lightweight tags are useful for quick link creation to relevant commits.
The following command is used to create lightweight tags:
Example:
In the following example, let’s suppose we have created a lightweight tag with the name ‘Release_1_0’.
These types of tags are stored in the current working .git project repository.
View Tags
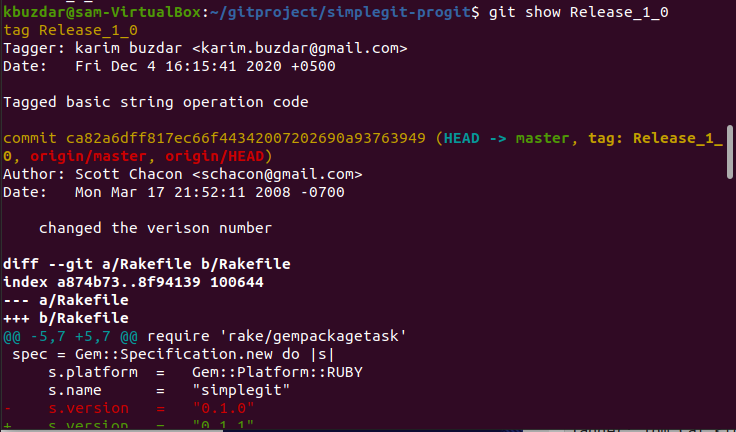
Once you have created tags, you can show tag details by using the following command:
In the above command, we have printed the tag ‘Release_1_0’ details. In the following image, the tag details are displayed:
Listing Tags
You can also display all the tags names by using the following Git tag command with option –l:
Removing or Delete Tags
First, to list all store tags in a repository, run the below-given command:
Now, using the following command, you can remove or delete tags from the remote as well as the local repository.
Conclusion
We have learned how to use Git tags in this article. Tagging is a useful feature through which you can create a clone image of a Git repo. You can give a better, some meaningful name to a specific git project. According to your convenience, you can create two different types of tags, annotated or lightweight, which we have discussed above. I hope now you have a better understanding of the usage of Git tags in your Git project repo.


