In this article, we will give you an idea about how to use Git submodules in an external Git repo in the Linux system.
Prerequisites
Make sure that Git is already installed on your system.
To verify the installation of Git, type the following command on your terminal:
We have implemented all commands related to Git submodules on CentOS 8 Linux distribution that we will discuss in detail in the below-mentioned steps:
When do Git Submodules should be used?
For strict version management of your project’s external dependencies, then you can use Git submodules features. The following are scenarios for where you can use git submodules:
- When a subproject or external component is changing rapidly, or upcoming changes may break the configured API, then, in this situation, lock the code for a particular commit for your project safety.
- When you have a specific project with a third party, and they want to integrate a new release inside your project.
Add new Git Submodule
The Git submodule add command is used to add a new submodule to an existing Git repository. Open the terminal from the left sidebar panel in the CentOS 8 system. Using the following example, we can explain better, in which we will create a new empty Git repository and then add Git submodules.
$ cd git-submodule-demo/
$ git init
In the above-mentioned commands, first, we have created a new directory with the name ‘git-submodule-demo’ and navigate in this directory. We have initialized this directory as a new Git repository.
Now, add a new Git submodule by using the ‘git submodule add’ command in which we have used URL as a parameter that refers to a particular Git repository. We have added a submodule ‘awesomelibrary’ in the above newly created repository.
Git will clone this submodule. Once the submodule process is completed, you can check the current status of your git repository by running the following command:
When you run the above-given command on the CentOS 8 terminal, you will notice two new files are in this repository. One is ‘.gitmodules’ and ‘awesomelibrary’. Now, you can commit these files into the original Git repository by executing the ‘git add’ and ‘git commit’ commands.
Clone Git Submodules
Clone the submodules using the Gsit clone command. The below command will create directories that contain submodules, but you can’t see the file inside them.
There are two additional commands used to create submodule files. One is the ‘.git submodule init’ that copies ‘.gitmodules’ mapping into the local ‘.git/config’ file. The ‘git submodule update’ command updates all data of the submodule project and verifies the changes into the parent project.
$ git submodule update
Now, we will navigate into the awesomelibrary submodule directory. We will create a text file with the name ‘new_awesome.txt’ by adding some content.
$ git checkout -b new_awesome
$ echo "new awesome file" > new_awesome.txt
$ git status
Here, we will add and commit changes to this new file to the submodule.
$ git commit -m "added new awesome text file"
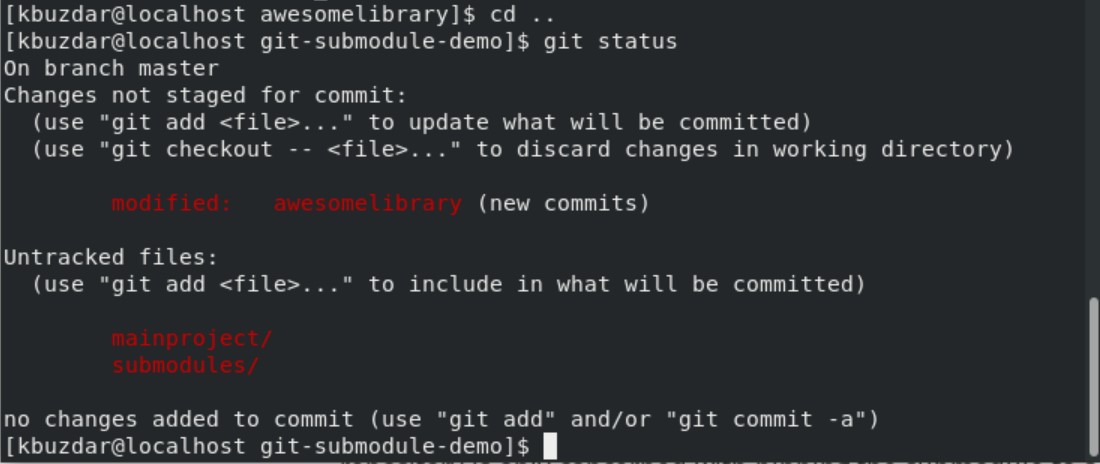
Now, navigate into the parent repository and review the status of the parent repository.
$ git status
As you can see, ‘awesomelibrary’ has been modified.
Conclusion
We have seen in this article that by using the Git submodule, you can easily use the Git repo as an external dependency management tool. Go through with the uses and drawbacks of Git submodules before implementing this Git feature and then adopt it.


