WireGuard is a popular point-to-point open-source communication protocol that is used to create a secure and fast Virtual Private Network tunnel. This VPN was designed for use in the Linux Kernel. WireGuard is a lightweight VPN that provides extremely fast speeds to users.
This article shows you how to install and set up WireGuard on your CentOS 8 system. The installation and setup of WireGuard are much easier than the already-existing VPNs, like OpenVPN, and this is a major reason behind its growing popularity in the Linux community.
Overview
This article is comprised of two sections:
- In the first section, we will install and configure a CentOS 8 machine that will act as a WireGuard VPN Server.
- In the second section, we will install and configure a CentOS 8 machine that will act as a WireGuard VPN Client.
Installing and Configuring WireGuard on a CentOS 8 Server
In this section, we will set up a CentOS 8 machine that will act as a server by installing WireGuard.
Step 1: Add EPEL and Elrepo Repositories
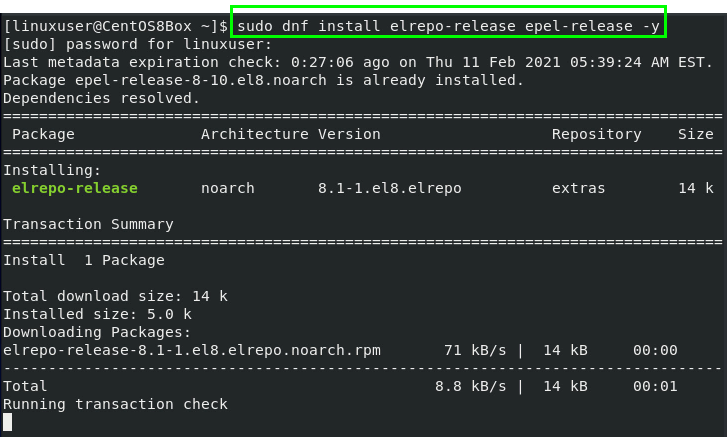
To get started with installing WireGuard on CentOS 8, first, add the EPEL and Elrepo repositories to install the kernel modules and WireGuard tools.
Now, after installing the required repositories, install the kernel modules and WireGuard tools.
Step 2: Install Kernel Modules and WireGuard Tools
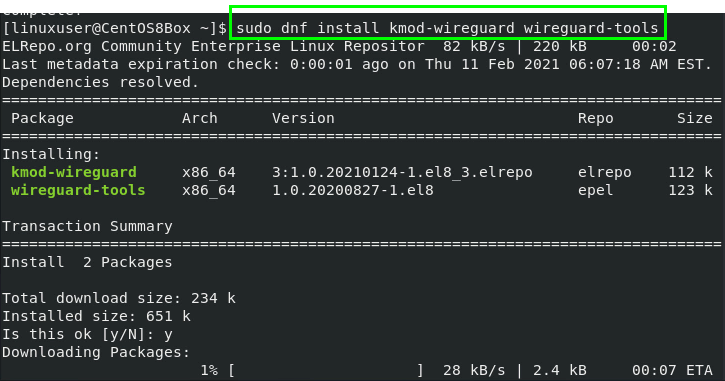
The kernel modules and WireGuard tools can be installed quickly from the EPEL and Elrepo repositories by issuing the following command:
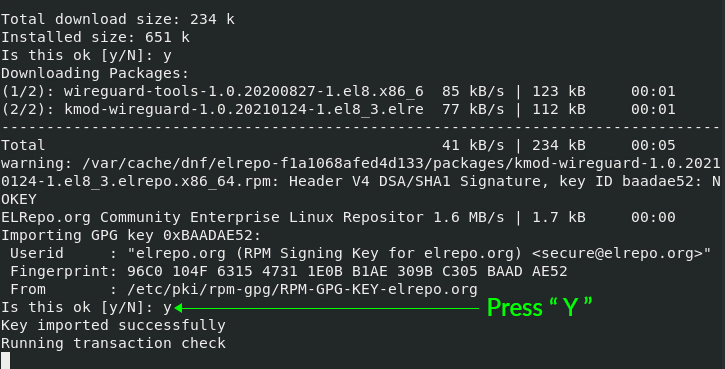
When you are prompted for permission to import and add the GPG keys to the CentOS 8 system, allow this action by typing “Y” and hitting “Enter.”
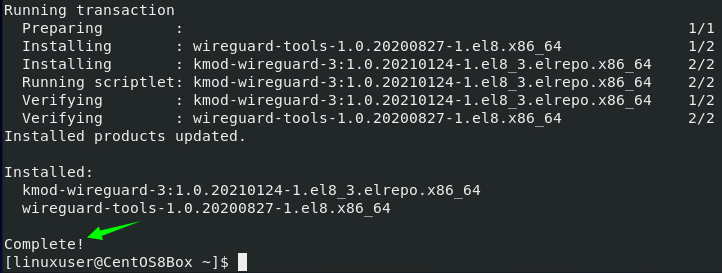
After successfully installing the WireGuard tools, we will now perform some configurations.
Step 3: Create Public and Private Keys
First, we will create a new ‘/etc/wireguard’ directory so that we can configure the VPN server in the directory. To create a new ‘/etc/wireguard’ directory in the CentOS 8 system, issue the following command.
After creating the directory, create the public and private keys using the “wg” and “tee” command-line tools. The command for creating private and public keys is as follows.
The generated key will be printed upon execution of the above command.
Step 4: Configuration of Tunnel Device for Routing VPN Traffic
To set up a device, create a configuration file in the ‘/etc/wireguard’ directory and open the file using the nano editor.
Before creating the configuration file, obtain the Private Key using the following command.
Save the private key somewhere; you will need this key later in the configuration file.
Now, create the “wg0.conf” file.
Add the content given below to the “/etc/wireguard/wg0.conf” file.
## IP Address of VPN server ##
Address = 192.168.18.200/24
## Save the configuration when a new client will add ##
SaveConfig = true
## port number of VPN server ##
ListenPort = 51820
## Private Key of VPN Server ##
PrivateKey = SERVER_PRIVATE_KEY
## Command to be executed before starting the interface ##
PostUp = firewall-cmd --zone=public --add-port 51820/udp && firewall-cmd --zone=public --add-masquerade
## Command to be executed before turning off the interface ##
PostDown = firewall-cmd --remove-port 51820/udp --zone=public && firewall-cmd --remove-masquerade --zone=public
This configuration file contains the following key terms:
- Address – the private IP address for the Interface (wg0).
- SaveConfig = true – saves the state of the interface on restart or shutdown of the server.
- ListenPort – the port where the WireGuard daemon listens.
- PrivateKey – the key that we have just generated.
- PostUp – this command will be executed before firing up the interface
- PostDown – this command will be executed before turning off the interface.
Now that you understand the Configuration file pretty well, you can save the file and exit using the keyboard shortcuts (CTRL + S) and (CTRL + X).
Step 5: Set Privileges of Configuration and “privatekey” File
Now, we will make the VPN server a bit more secure. A basic user should not have the privileges to read the configuration file and the ‘privatekey’ file. To provide access to these files, we will change the mode of these two files to 600. The command for setting the permissions is given below.
After finalizing the permissions, we will fire up the interface (wg0) using the wg-quick command-line tool.
Step 6: Start the Interface
To fire up the interface, issue the command given below:
If you have obtained the output shown in the screenshot above, you have successfully started the interface. We will now check the status of the interface.
Enable the interface to auto-start the interface on boot of the CentOS 8 server.
At this stage, the server setup has been completed. Now, if you want to set up this VPN server for NAT, you will need to enable IPv4 forwarding.
Step 7: Enable IPv4 Forwarding
To enable IPv4 forwarding for the NAT, create a “99-custom.conf” file in the “/etc/sysctl.d” directory using the nano editor.
Add the following content to the “/etc/sysctl.d/99-custom.conf”
net.ipv4.ip_forward = 1
To enable IPv6 forwarding, add the following content to the “/etc/sysctl.d/99-custom.conf” file, as well.
net.ipv6.conf.all.forwarding = 1
After enabling IPv4 forwarding, save the file and exit using the shortcuts (CTRL +S) and (CTRL + X).
Let us now move on to set up the WireGuard Client machine.
Installation and Configuration of WireGuard VPN on CentOS 8 Client
In this section, we will set up a CentOS 8 machine that will act as a client. The process of installing and configuring the WireGuard VPN client will be nearly the same as it was for the WireGuard VPN server.
Step 1: Add EPEL and Elrepo Repositories
First, we will add the EPEL and Elrepo repositories to install the kernel modules and WireGuard tools:
Now, after installing the required repositories, we will install the kernel modules and WireGuard Tools.
Step 2: Install Kernel modules and WireGuard Tools
The kernel modules and WireGuard tools can now be installed from the EPEL and Elrepo repositories by issuing the following command.
When you are asked for permission to import and add the GPG keys to the CentOS 8 system, allow the changes by typing “Y” and hitting “Enter.”
After the WireGuard tools have been successfully installed, the CentOS 8 Client machine needs to be configured, as well.
Step 3: Create Public and Private Keys
In this step, we will create a new ‘/etc/wireguard’ directory in the Client machine. To create the new ‘/etc/wireguard’ directory in your CentOS 8 system, enter the following command.
After creating the directory, create the public and private keys using the “wg” and “tee” command-line tools. The command for creating private and public keys is provided below.
The generated keys will now be printed.
Step 4: Configuration for Routing VPN Traffic
In this step, we will create a configuration file in the ‘/etc/wireguard’ directory and open it using the nano editor.
Before creating the configuration file, get the Private key using the following command.
Save the private key somewhere; you will need it later in the configuration file.
Now, create the “wg0.conf” file.
Add the content given below to the “/etc/wireguard/wg0.conf” file
## Private Key of VPN Client ##
PrivateKey = 8D8puLQCbUw+51wPE3Q7KutGxQhUvsy+a+DBgamb+3o=
## IP address of VPN Client ##
Address = 192.168.18.201/24
[Peer]
## Public Key of CentOS 8 VPN Server ##
PublicKey = VWndJ4oB7ZJwC/7UOm++OLDrbAxMPsR2yd0cl3sEkUI=
## set ACL ##
AllowedIPs = 0.0.0.0/0
## IP address and Port of CentOS 8 VPN Server ##
Endpoint = 192.168.18.200:51820
The configuration file contains the following key terms:
- PrivateKey – the key generated on the client machine.
- Address – the IP address for the Interface (wg0).
- PublicKey – the public key of the VPN server machine to which we want to connect.
- AllowedIPs – all allowed IP addresses for traffic flow using the VPN.
- Endpoint – we will provide the IP address and port number of the CentOS 8 server machine to which we want to connect.
We have now configured the client machine, as well. Save the file and exit using the keyboard shortcuts (CTRL + S) and (CTRL + X).
Step 5: Set Privileges of Configuration and “privatekey” File
Now, we will change the mode and set the privileges of the configuration file and “privatekey” file to 600. Enter the following command to set the permissions.
Now that we have finalized the permissions, we can fire up the interface (wg0) using the “wg-quick” command-line tool.
Step 6: Start the Interface
To fire up the interface, issue the command given below:
We have now successfully started the interface. Next, we will check the status of the interface.
Enable the interface to auto-start the interface on boot of the CentOS 8 server.
At this stage, the client is also set up.
Step 7: Add IP Address and Public Key of Client to CentOS 8 Server
The final step is to add the IP address and public key of the VPN client machine to the configuration file of the CentOS 8 WireGuard VPN server machine.
Return to the server machine and add the following content to the “/etc/wireguard/wg0.conf” file.
## Public Key of VPN Client ##
PublicKey = dmfO9pirB315slXOgxXtmrBwAqPy07C57EvPks1IKzA=
## IP Address of VPN Client ##
AllowedIPs = 192.168.10.2/32
After updating the configuration file of the VPN server, save the file and exit using the keyboard shortcuts (CTRL + S) and (CTRL + X).
The tunnel has now been established, and all the traffic will be passed through the CentOS 8 WireGuard VPN server.
Step 8: Verify Tunnel Connection
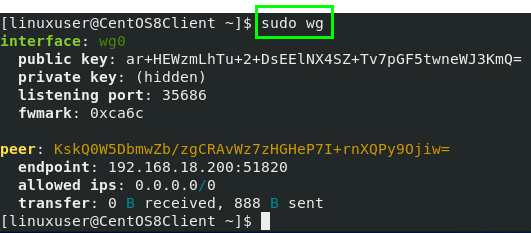
To verify that the CentOS 8 WireGuard VPN server has been installed and configured properly, issue the command given below to verify that traffic is flowing through the configured WireGuard VPN Server.
And that is it! You have configured and established the WireGuard VPN server successfully.
Conclusion
This article showed you how to install and configure WireGuard VPN on your CentOS 8 machine and set the system up as a VPN server. We also showed you how to set up a CentOS 8 WireGuard VPN Client and configure the client to route the traffic through the WireGuard VPN server.

