This tutorial will show you how to upgrade from Linux Mint 19.3 to Linux Mint 20. Remember that to upgrade to Linux Mint 20, you must be running a 64-bit version of Linux Mint 19.3. You cannot perform this upgrade from a 32-bit version of Linux Mint 19.3.
Note: To install or update any package in any Linux distribution, including Linux Mint, you must be a root user or a standard user with sudo privileges.
We will be using the command-line Terminal application for the installation process. To open the command-line Terminal, use the Ctrl+Alt+T keyboard shortcut.
Requirements
64-bit Architecture
As discussed earlier, to upgrade from Linux Mint 19.3 to 20, you must be running a 64-bit version of Mint 19.3. Otherwise, you will not be able to perform the upgrade. To check whether the current architecture is 64- or 32-bit, issue the following command in Terminal:
If the above output returns “amd64,” this means that the system is running 64-bit architecture, and an upgrade can be performed. However, if the output returns “i386,” this means that the system is running 32-bit architecture, and the upgrade cannot be performed.
Prerequisites
It is recommended to complete the following prerequisites before upgrading Linux Mint 19.3 to the latest release.
Install All Updates
Open the Update Manager in your system and install any available updates. To open the Update Manager, hit the super key on your keyboard and go to Administration > Update Manager.
Here, you will see a list of the available updates. Select all the updates and click Install Updates. You will then be prompted for the authentication password. Provide the password and click Authenticate, after which the updates will begin installing.
To perform the update via the command line, issue the following command:
Create a System Snapshot
Next, create a system snapshot, so that if anything goes wrong during the system update, you can revert to the previous release. You can use the Timeshift utility to create a system snapshot.
To open the Timeshift utility, hit the super key on your keyboard and go to Administration > Timeshift.
From the Timeshift utility, choose the destination for your system snapshot and click the Create button save the snapshot.
Purge PPAs and Third-Party Repositories
Often, applications are installed through PPAs or other third-party repositories. However, these repositories may cause problems during the upgrade. Therefore, it is recommended to purge all the PPAs and third-party repositories from your system before upgrading.
Hit the super key on your keyboard and go to Administration > Software Sources. In the Software Sources application, go to the PPAs tab, from which you will select the Additional Repositories tab to disable the repositories there. Then, go to the Maintenance tab and remove all the foreign packages.
Upgrading from Linux Mint 19.3 to 20
As all the prerequisites are completed, we will now move on to the upgrade process.
Install Upgrade Utility
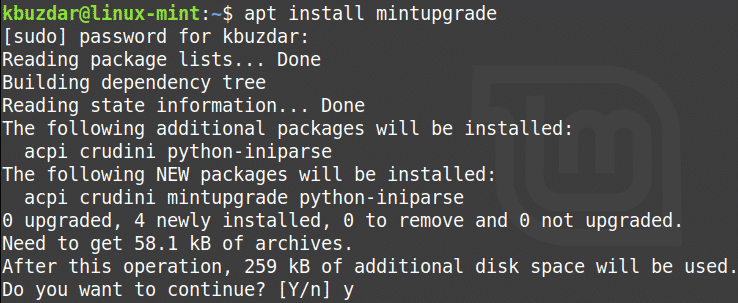
To upgrade Linux Mint from 19.3 to 20, you must first install the “Mintupgrade” command-line utility. Issue the following command in Terminal to install the Mintupgrade utility:
When prompted for the password, provide the sudo password.
After running the above command, the system might ask for confirmation that you want to continue the installation. Press “y” to continue, and after that, the installation will start on your system.
Run Upgrade Check
Once the required utility has installed, issue the following command in Terminal to run an upgrade check:
Follow the on-screen instructions to complete the check. Note that this command will not run the upgrade, and will only check to see what impact the upgrade will have on your system and which packages will be installed, upgraded, or removed.
Read the output of the above command carefully. If you are okay with the changes made by upgrading, then you can move on to the next step.
Download Updates
In this step, you will download the necessary packages and updates required to perform the upgrade. Issue the following command in Terminal to do so:
Upgrade to Linux Mint 20
Now, you can finally upgrade to Linux Mint 20. Issue the following command in the Terminal to do upgrade your system:
Wait patiently for this step to complete, as it will take some time to upgrade your Linux Mint 19.3 system to Linux Mint 20. Once the upgrade has completed, you can verify the upgrade by running the following command:
Finally, reboot the system to complete the upgrade process. After the reboot is completed, you will see the Linux Mint 20 Welcome screen.
Conclusion
Upgrading your Linux Mint 19.3 system to the latest release is easy, as we have demonstrated in this article. Now, you longer need to do a fresh install to have the latest Linux Mint 20 system, and you can upgrade directly from the previous release.


