Like other sports, e-sports broadcasting is becoming popular. The viewership of e-sports has expanded in the last several years due to the overwhelming engagement of gaming fans. Mainstream media has started showing interest in gaming because of its whopping audience. Amazon’s famous platform, Twitch, is one of the renowned streaming platforms. Besides Twitch, other platforms like YouTube, Facebook, Streamlabs, and Discord are also being used by gamers to stream games. You can even publish your recorded games on Youtube.
As we all know that Windows and gaming consoles are well-liked and accepted gaming platforms, but Linux is now slowly picking up the pace and becoming the third popular gaming platform, thanks to the support of Steam and many modern hardware manufacturers for Linux. There is a huge library of games on Linux, some have native support, and some work using third party plugins. This guide will focus on how to record games and stream on Linux. Let’s check how to get it worked:
Installing Open Broadcast Software – OBS on Ubuntu 20.04, 20.10:
Firstly, we need a program that can stream and record as well. OBS is a well-known broadcasting and recording application that is open-source and cross-platform. The installation process of OBS is similar to any other program installation on Linux.
Step 1:
OpenGL 3.2 is required for the OBS program to work on Linux.
Use the below-mentioned command to check OpenGL:
If there is an error, to fix it, try installing Mesa utilities using the command shown below:
Mesa is an open-source 3D graphics library that helps in rendering 3D graphics on different platforms by implementing OpenGL.
Step 2:
There are a couple of approaches to get OBS on Ubuntu. First is simply open Ubuntu Software Store and search “OBS” and install it.
It can be seen in applications.
The second approach of installing OBS is through the terminal. Use the command mentioned below to add the repository:
After that, update the packages list using:
To install the OBS program, use:
Open it:
Setting Up OBS for streaming and recording on Ubuntu 20.04, 20.10:
OBS has made the setup procedure quite easy. It will prompt you “Auto-Configuration Wizard” when it is first open. If for some reasons you can’t see it, click on tools and then” Auto-Configuration Wizard”:
The first thing, “Auto-Configuration Window” will show is “Usage information.” Usage information comes with two options. Since we are recording and streaming, therefore the first option will be checked. Click on the “Next” button:
Now, adjust the video settings, for example, frame rate and base resolution according to hardware capabilities:
After that, the wizard will present you with different streaming services; select one. I am selecting twitch; it will ask for the streaming key; click on the get stream key as shown in the image below:
To get a stream key, you must have a Twitch account: login and head towards the “Creator Dashboard” by clicking on the user’s icon, and then in the “Preferences” tab, “Primary Stream Key” can be found as shown in the images:
Copy the streaming key, and paste in the OBS as displayed in the above images. After that, OBS will perform various and tests for ideal settings:
Upon finishing, it will present the estimated configuration for the system. You can hit “Apply Settings” or go back to tweak settings:
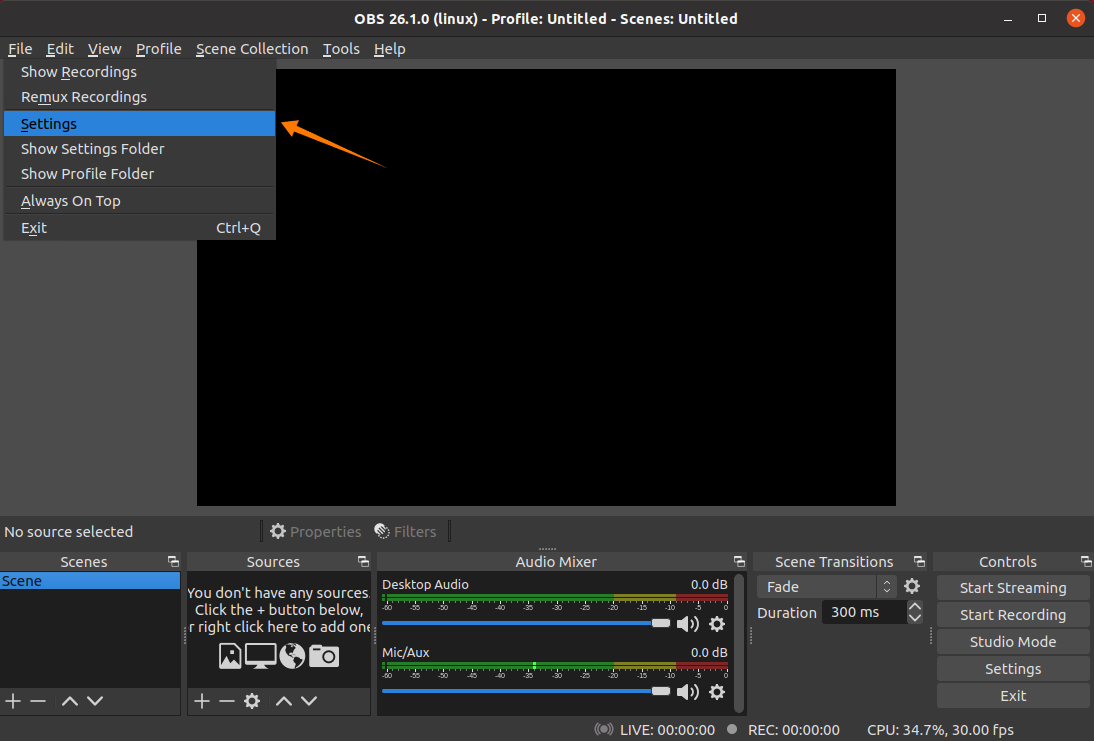
The setup is pretty much finished. But these settings can further be tweaked in the “Settings” option also. Click on “File” and then “Settings”:
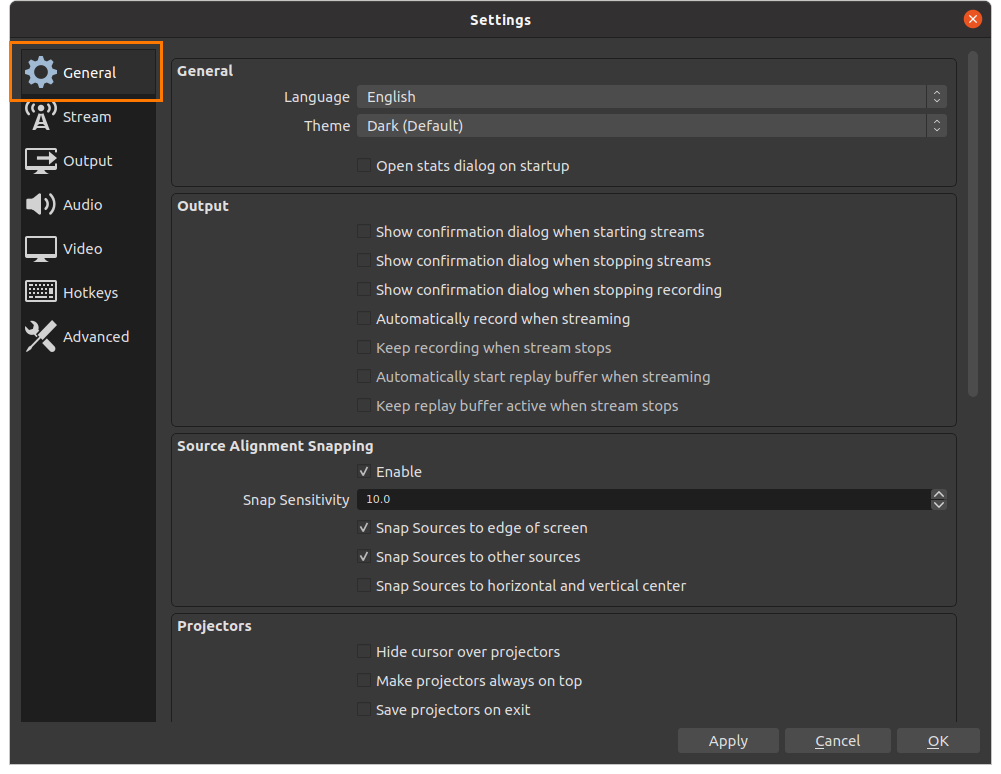
In the “General” tab, you can change language, theme and enable or disable various options; see the image:
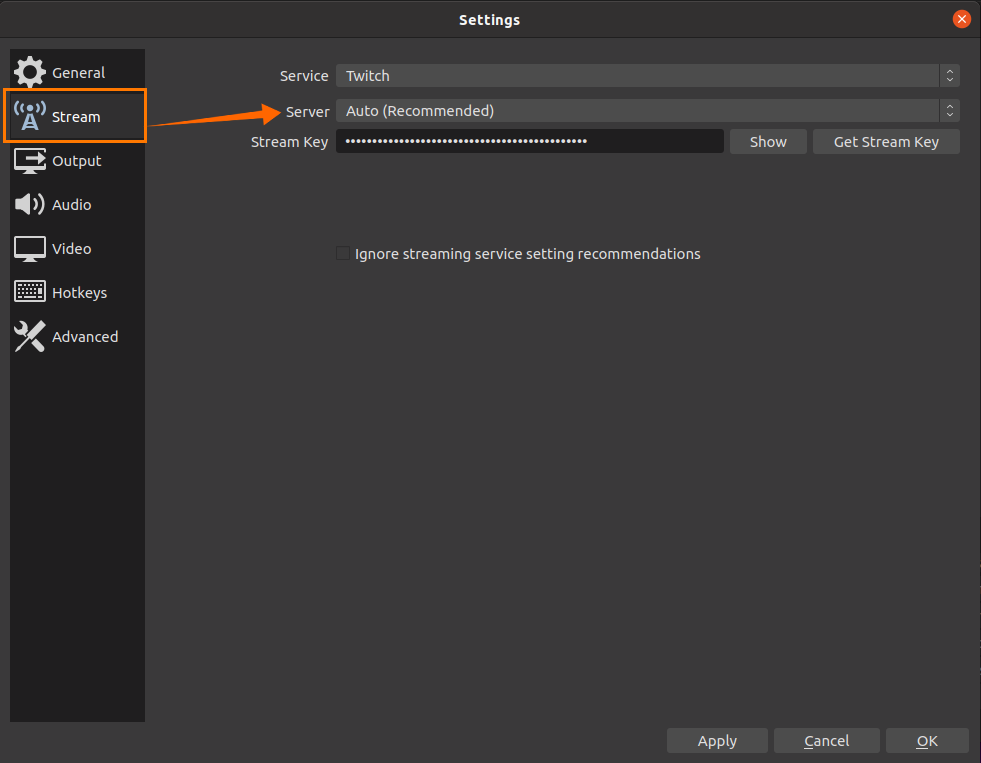
In the “Stream” tab, the streaming platform can be changed. It is recommended to leave server “Auto”:
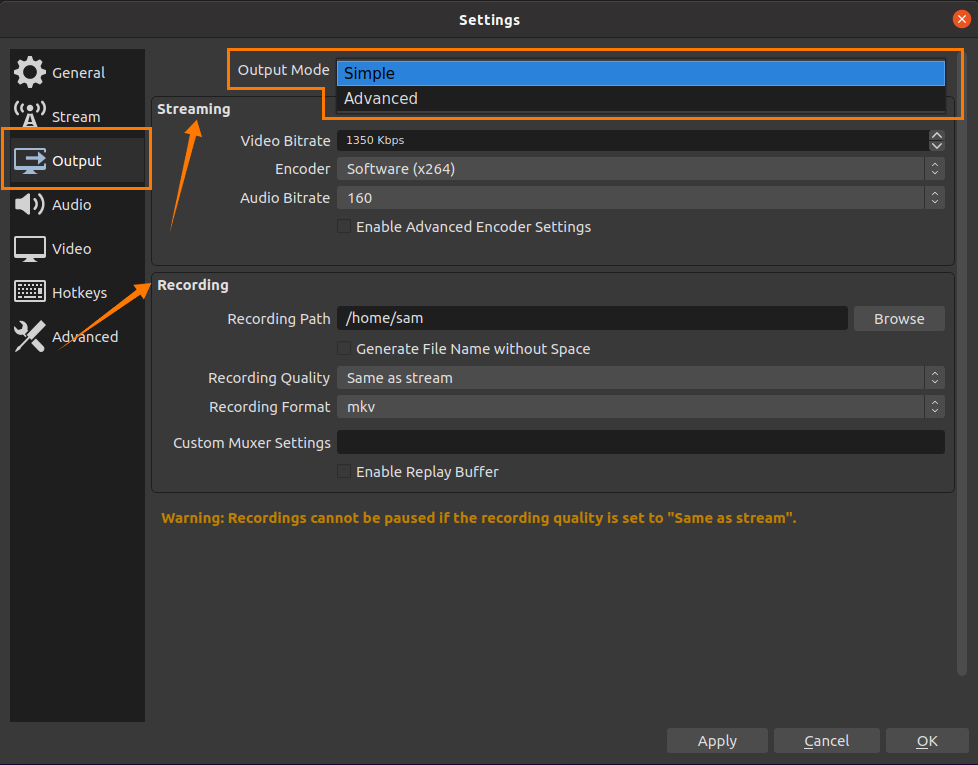
In the “Output” tab, there are two main options; the first one is “Simple,” and the second one is “Advanced.” The “Simple” output settings can be seen in the following image, where certain streaming and recording options are given to modify. Encoder, audio bit rate, saving path, recording format, and quality can be modified here:
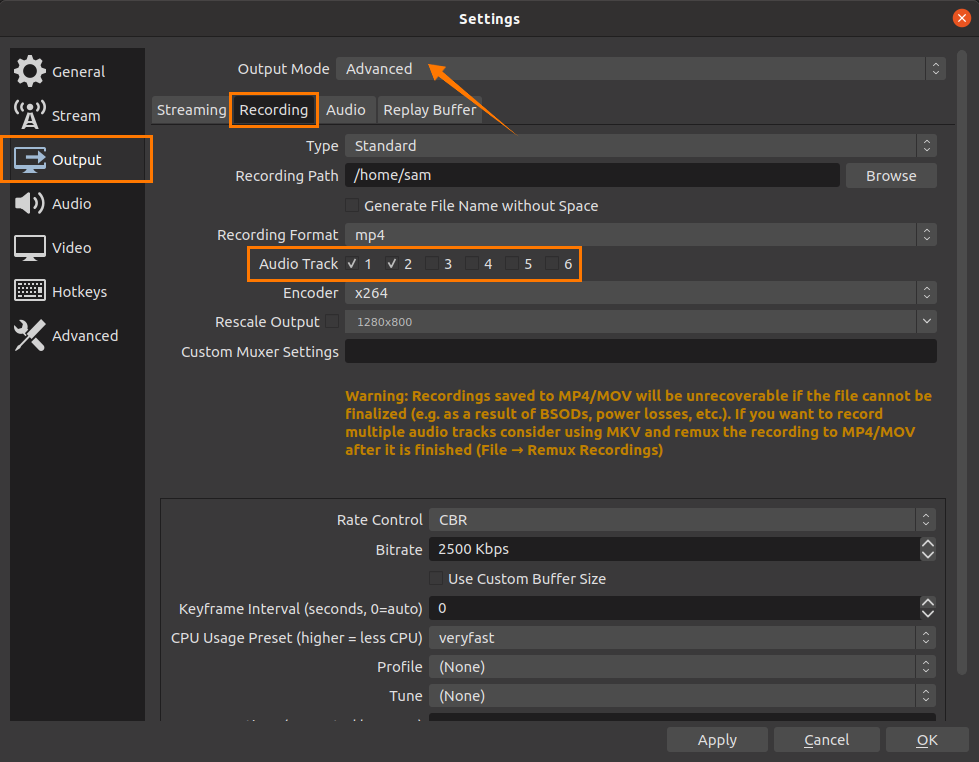
Simple settings are appropriate but if you want to further tweak the output settings, then open “Advanced” Settings. In advanced settings, many other options can be modified, including special audio channel settings. While recording, speech audio and game audio can be recorded on 2 different channels that help in editing the recorded footage:
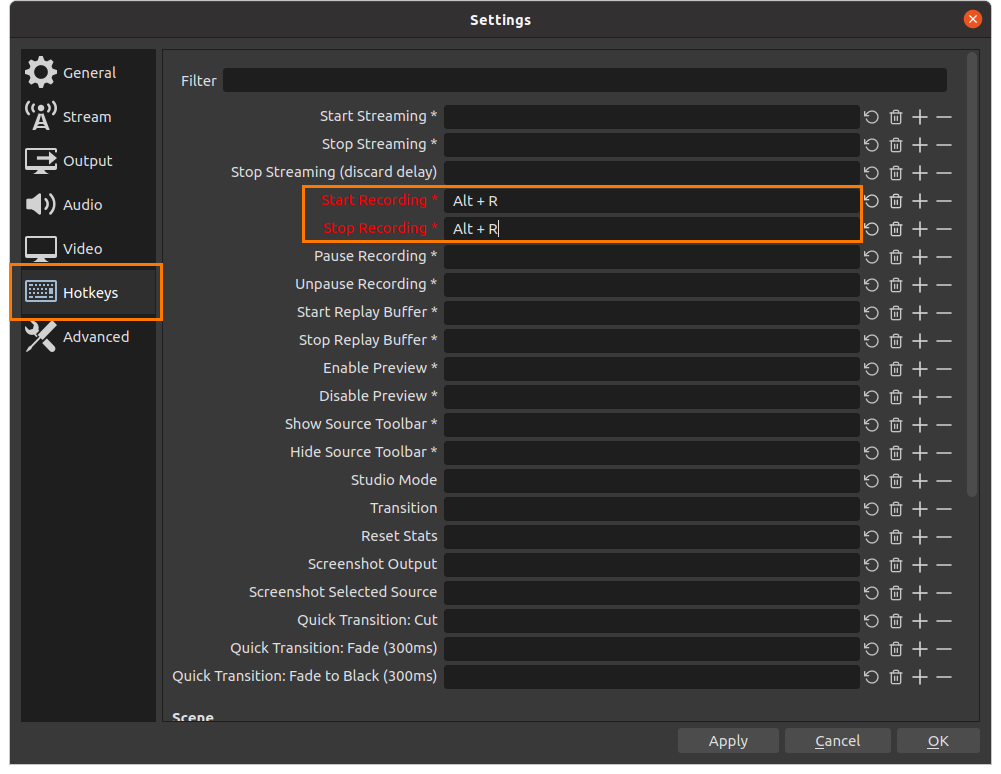
Hotkeys play a vital role while streaming or recording games; OBS has a dedicated tab in settings to set hotkeys as per your convenience:
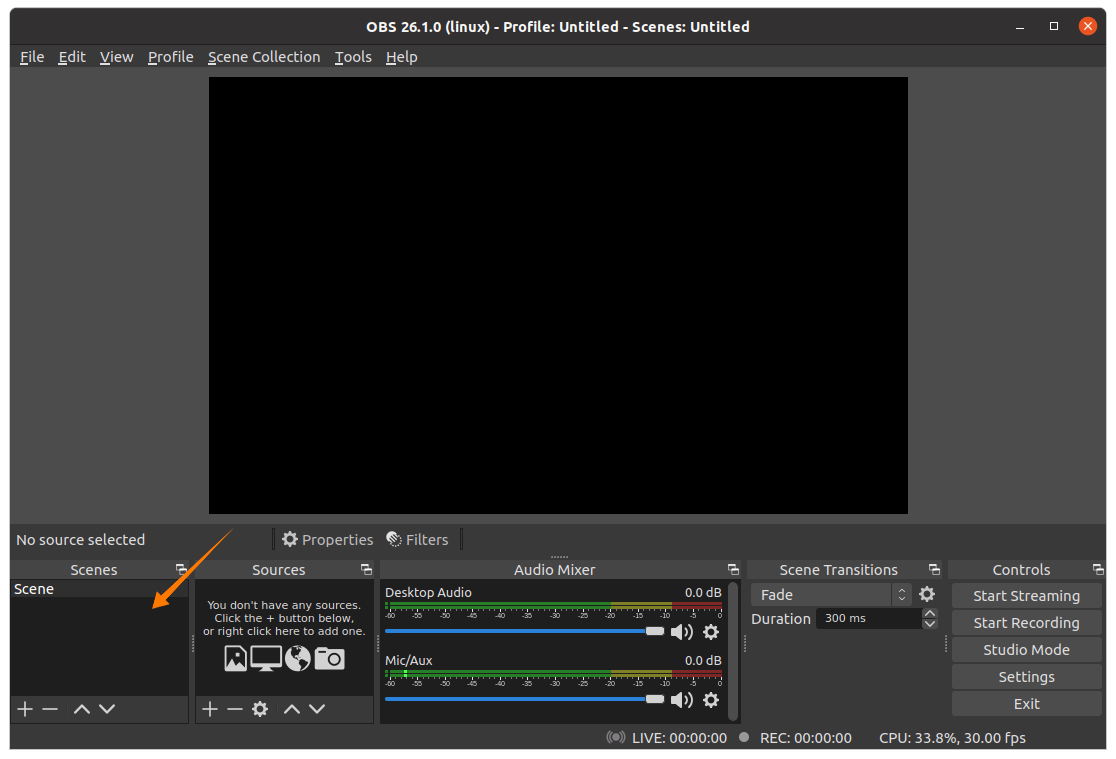
After setting up the OBS time to begin stream/record. On the main window, “Scenes” represent the canvases; these canvases can be resized and repositioned:
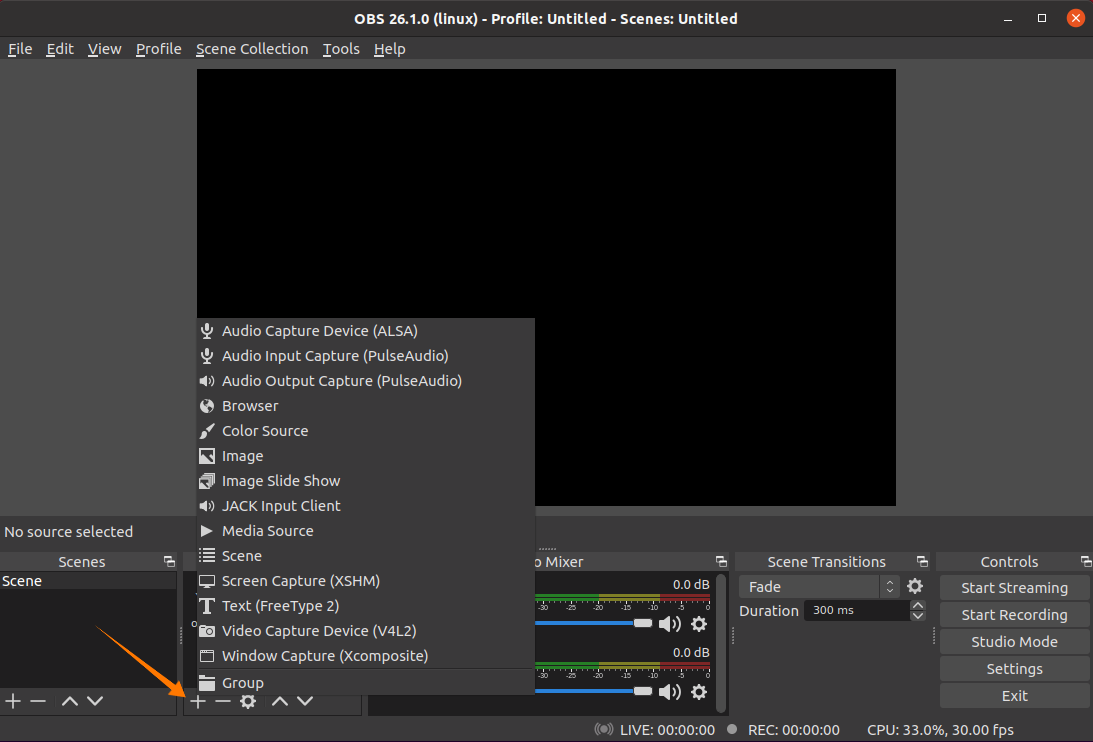
In the sources window, various sources can be added, for example:
- Screen Capture
- Audio Capture
- Image (Overlays)
- Text
- Video Capturing Device
- Browser
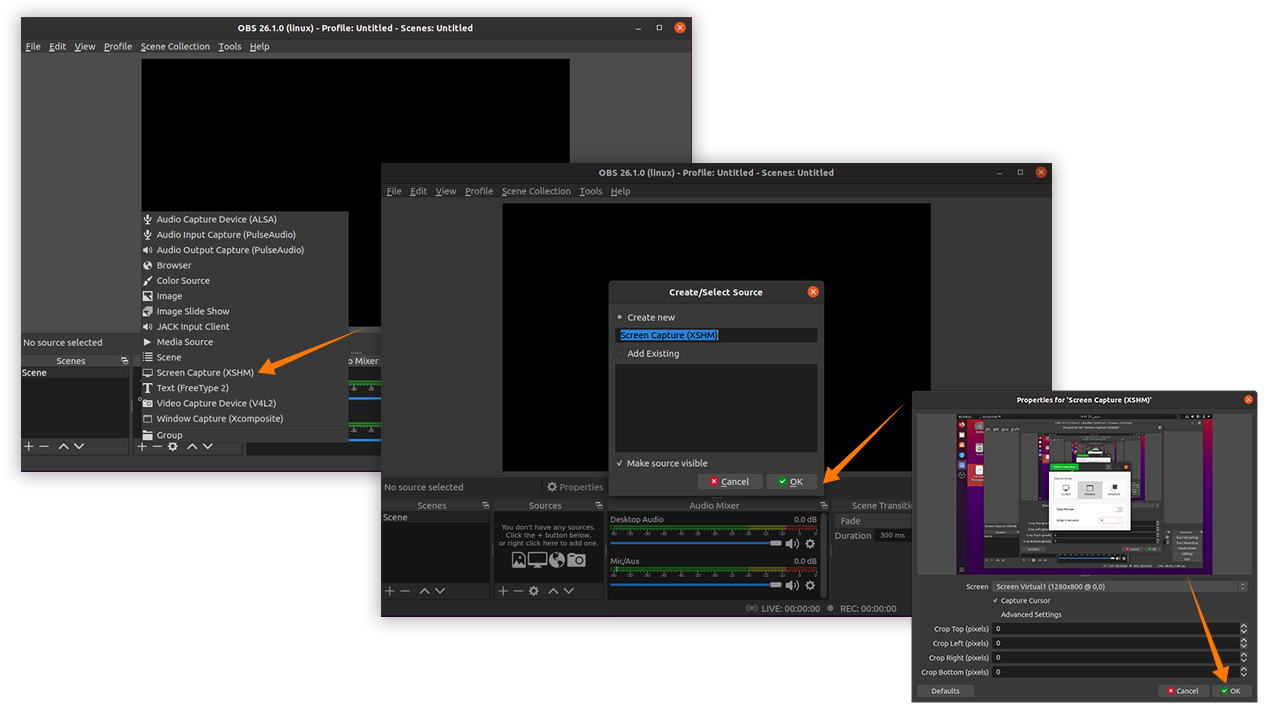
Click on the “+” button to add sources:
To add the screen capture, click on the “Screen Capture” option; a couple of windows will pop up, keep the default settings, and press “OK.” To make the mouse cursor visible, check the “Capture Cursor” option.
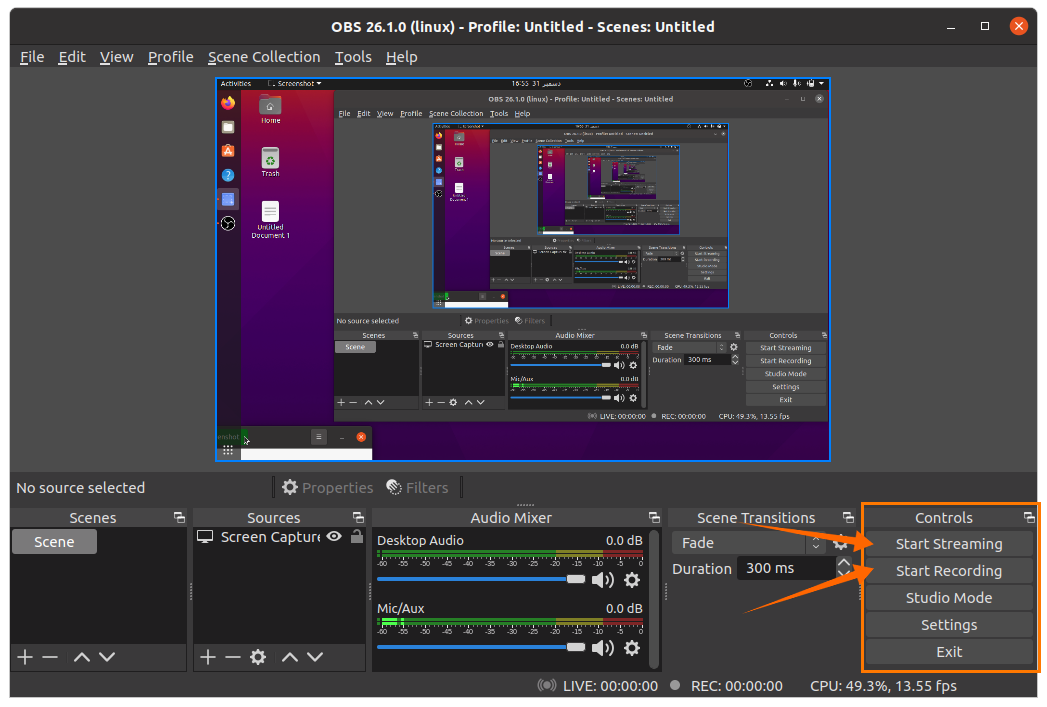
The screen capture source has been added; other sources like audio can also be added if you have attached the mic with the system. If you want to do both recording and streaming, first click on the “Start Recording” button and then “Start Streaming” or press the assigned hot keys:
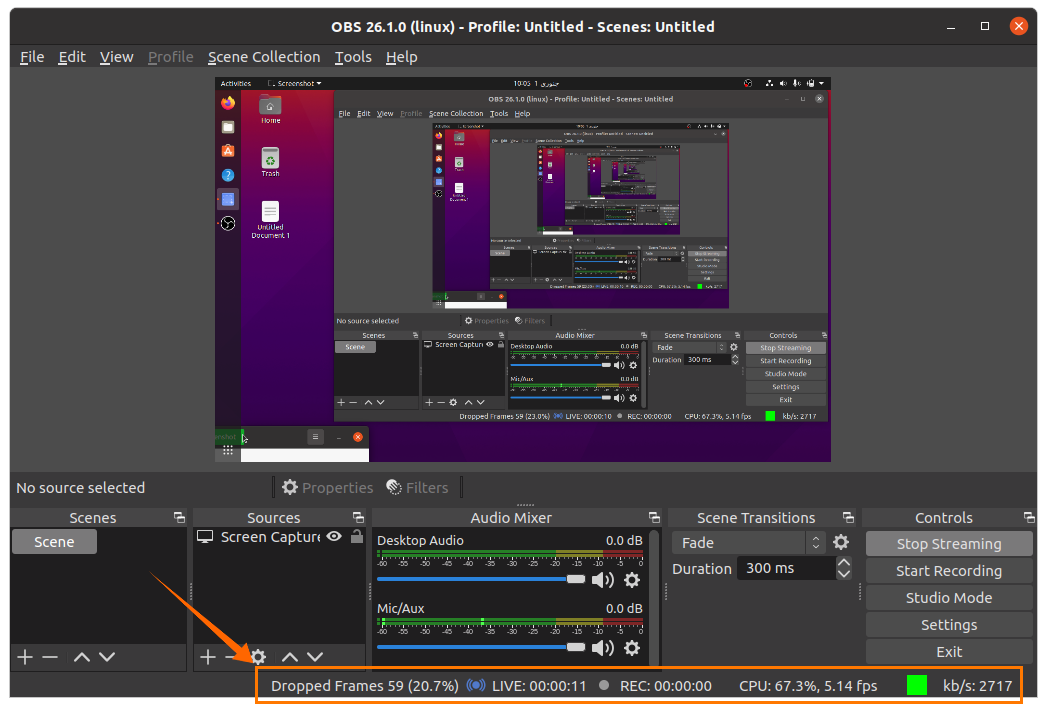
Stream status can be seen at the bottom bar:
Now time to play games; OBS will do its job.


