Installing and Managing Flatpak Packages
If you are using Ubuntu, its derivatives or other Linux distributions based on Ubuntu, you can run the following two commands to setup Flatpak packages:
$ flatpak remote-add --if-not-exists flathub https://flathub.org/repo/flathub.flatpakrepo
The second command adds the official Flathub repository that can be used to download and install Flatpak apps. It is possible to add other third party repositories by replacing the repository URL in the second command above. However, in general, you should stick to the default repository to avoid installing untested apps that may have security issues.
If you are using any other Linux distribution, follow this quick setup guide that covers installation instructions for over 25 Linux distributions.
Once you have completed Flatpak setup, you can go to the Flathub store to download any app of your choice. For instance, to install the Firefox Flatpak package, you can visit its listing on the Flathub store or search for it using the search bar on the Flathub website. Every listing on the Flathub page includes an installation command at the bottom of the page. You need to run this command in the terminal to install the package. Note that the command is the same for all Linux distributions. For the quoted case, you need to run the following command to install the Firefox flatpak package:
Note that while installing a Flatpak package, you may be asked to install additional packages and dependencies. This is normal as Flatpak packages install necessary packages and libraries as needed.
To remove an installed Flatpak package, you need to run the following command (replace ID of the package):
If you don’t remember the ID of the package, you can get it from the Flathub store listing page. Flatpak will also show you app suggestions if you only supply a partial name or ID. For instance, if you just use “firefox” in the above command, Flatpak will automatically present you with a choice to remove the Firefox package.
To update an installed Flatpak package, you need to run the following command (replace ID of the package):
To list all Flatpak packages installed on your Linux system, use the following command:
Many Linux distributions use Flatpak plugin in their software distribution app to facilitate easier installation and automatic updates. For more information on Flatpak usage, run the following two commands:
$ man flatpak
Installing and Managing Snap Packages
Ubuntu, its derivatives and most other Linux distributions based on Ubuntu come with Snap support enabled by default. You can search for snap packages in the GUI software center app as well as install them from the command line. Snap packages can be searched on the Snap Store website as well. Every listing in the snap store shows a command to install the listed app.
To add Snap support to other Linux distributions, you may need to install the “snapd” package first (similar to the Flatpak setup explained above). Follow the snapd setup guide available here for over 25 Linux distributions.
Once you have finished installing snapd, visit any listing on Snap store and run the specified command listed on the page. For instance, to install Android Studio Snap, you will need to run the following command:
To remove a Snap package, use the following command (replace application name as needed):
To list all Snap packages installed on your system, use the following command:
Note that you cannot disable snap updates. They are automatically installed on your system at periodic intervals. You can however, reschedule them or temporarily hold updates. A detailed guide on managing Snap updates is available here.
To learn more about Snap packages, run the following two commands:
$ man snap
Installing and Managing AppImage Packages
AppImage packages work similar to portable “exe” files you may have used on Windows. All you need to do is download an AppImage file and mark it executable to run the app. To make an AppImage file executable, run a command in the following format:
Once marked executable, double click on the executable AppImage file to launch the app. To remove an AppImage file, simply delete it from your hard drive storage.
Similar to Flatpak and Snap, an AppImage store is also available. However, unlike Snap and Flatpak, developers who distribute their apps in AppImage format don’t often list them in this centralized store. AppImage files are mostly distributed through source code repositories or from application websites.
In some cases, AppImage files may prompt you to create a launcher that appears in application menus and on desktop as a shortcut. If you have opted to create a launcher, you may want to remove it after deleting an AppImage file. To do so, just visit the location specified below and delete the associated “.desktop” file.
Conclusion
Flatpak, Snap and AppImage packages have provided novel ways to distribute applications across all major Linux distributions. They provide better security and make it easier for developers to distribute their apps. These new package formats are the future of Linux application packaging, especially for non-system third party apps.
]]>Snap apps are hosted in the Snap Store. At the time of this writing, there are thousands of open-source and proprietary apps available in the snap store.
In this article, I am going to show you how to use the Snap package manager on Ubuntu. So, let’s get started!
Searching for Snap Packages
To install a Snap package, you need to know the package’s name and whether it is available in the Snap package repository or not. To find this information, you can search the Snap package repository for your desired software/app from the command-line very easily.
For example, to search for the JetBrains PyCharm IDE, search for the packages that match the pycharm keyword with the following command:

The Snap packages that matched the pycharm keyword should be listed.
You should find the name of the Snap package, the version that is going to be installed by default, the name of the publisher, and its summary.

Knowing More About a Snap Package
Before you install a Snap package, you may want to know more about it.
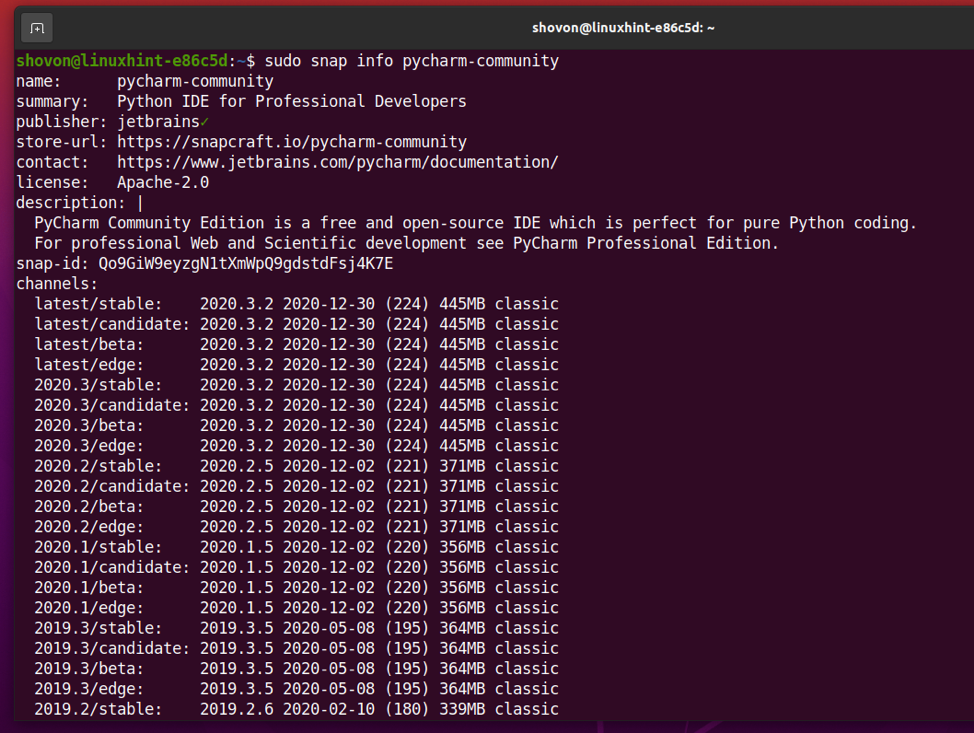
To know more about, let’s say, the Snap package pycharm-community, run the following command:

A lot of information about the pycharm-community Snap package should be displayed.

In the top section, you have the name, a summary, the publisher name, the Snap Store URL, the official page of the software/app it installs, the license, the description, and the ID of the Snap package.

In the bottom section, you have a list of all the available channels, or you can say versions of the software/app, you want to install. The latest/stable channel should be the default for all the Snap software/apps. If you want to install an older version of the software/app, you can specify the required channel during the installation of the Snap package.

Installing a Snap Package
To install the latest stable version of the PyCharm Community software/app, you can install the pycharm-community Snap package as follows:

If you want to install a specific version of the software/app from the Snap Store, you can specify the channel to use during installation with the –channel command-line option as follows:

Some Snap Store software/app will show you the following error message. This is because Snap software/apps use sandboxes for an extra layer of security. Sandboxing a Snap software/app will not let the software/app modify the filesystem outside the sandbox (its specified installation directory).
Some software/apps will need to modify the filesystem (i.e., a text editor or IDE). So, you can’t use the sandbox feature of Snap for these software/apps. To install the Snap Store software/apps that need to modify the filesystem, you must use the –classic command-line option during installation.

You can install a Snap Store software/app (i.e., pycharm-community) that does not use the sandboxing feature of Snap as follows:

The Snap software/app is being downloaded from the Snap Store, and it may take a while to complete.

At this point, the Snap package should be installed.

Once the PyCharm Community snap package is installed, you should be able to find it in the Application Menu of Ubuntu. You can run it just like any other apps.

Listing Installed Snap Packages
You can list all the Snap Store packages that are installed on your Ubuntu machine with the following command:

All the Snap Store packages that are installed on your computer should be listed.

Upgrading a Snap Package
Upgrading a Snap Store package is easy.
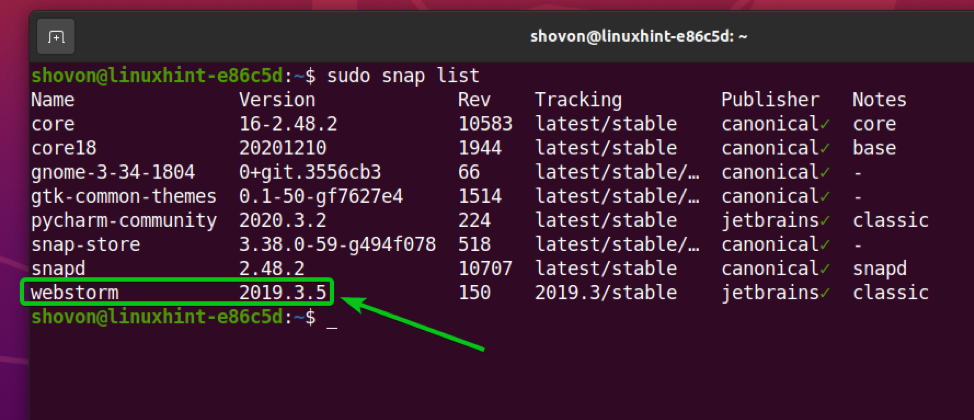
To demonstrate the process, I have installed the webstorm (JetBrains WebStorm IDE) Snap Store package on my Ubuntu machine, as you can see in the screenshot below.

You can upgrade the webstorm Snap Store app with the following command:

You can also upgrade to downgrade a specific channel of the app.
For example, I have the 2019.3/stable channel of the webstorm Snap Store app installed on my Ubuntu machine. And, let’s say, you want to upgrade to the latest/stable channel.

To upgrade the webstorm Snap store app to the latest/stable channel, you can run the following command:

The webstorm Snap Store app is being updated to the latest/stable channel.

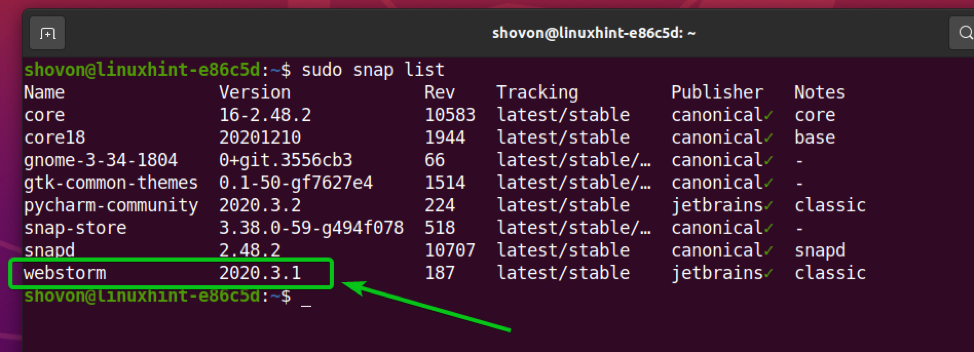
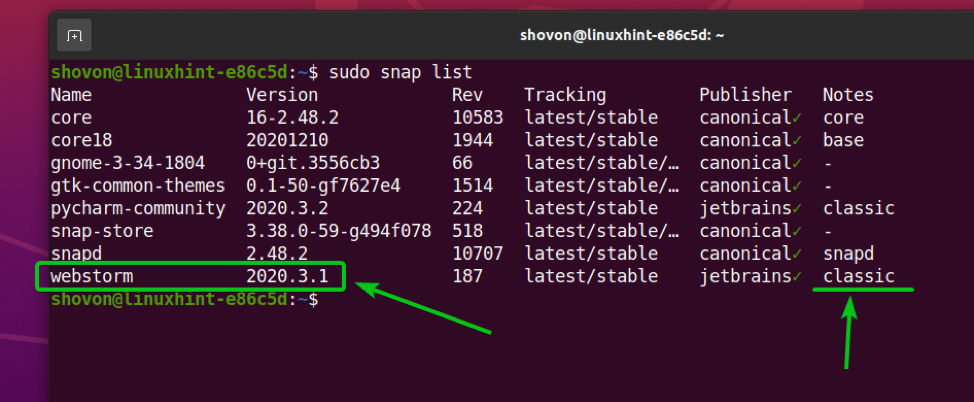
The webstorm app is upgraded to 2020.3.1, as you can see in the screenshot below.

Webstorm Snap app is upgraded to the latest/stable version 2020.3.1.

Disable and Enable Snap Apps
In a traditional package management system, you can only install, uninstall, or upgrade a package.
One big advantage of Snap Store apps is that you can disable an app if you no longer need it. When you disable a Snap Store app, it will still be available on your computer, but the Snap daemon won’t load the app. You can enable the app whenever you need it.
I think this is a very good solution. If you don’t need an app all the time, you can keep it disabled and enable it only when you need it. This may save a lot of memory on your computer.

Right now, the WebStorm IDE is installed on my Ubuntu machine from the Snap Store. So, I can now access it from the Application Menu of my computer.
To disable the webstorm Snap Store app, run the following command:

The webstorm Snap Store app should be disabled.

As you can see, the disabled option is added to the webstorm Snap Store app.

Now, you won’t find the WebStorm IDE app on the Application Menu of your computer.

To enable the webstorm Snap Store app again, run the following command:

The webstorm Snap Store app should be enabled.

The disabled option is removed from the webstorm Snap Store app once it is enabled.

Once you have enabled the webstorm Snap Store app, the WebStorm IDE should be available in the Application Menu of your computer again.

Uninstalling a Snap Package
If you don’t like a Snap Store app that you have installed, you can uninstall it easily.
For example, to remove the webstorm Snap Store app, run the following command:

The Snap Store app webstorm should be removed.

You can then see that the Snap Store app webstorm is not on the list anymore.

Conclusion
In this article, I have shown you how to search for Snap Store packages and find more information about a Snap Store package. I have shown you how to install, upgrade, enable/disable, and uninstall a Snap Store package. This article should help you get started with Snap package manager on Ubuntu.
]]>Snap store is a similar platform to Google app store as a user can download any Linux supported application easily from it. It is good to use the Snap store in your system to cover complete details on how to install Linux apps using the Snap store in this article. Snap store installation is almost the same for every Linux distro; read the article below to install snap store and download applications completely.
How to Install Snap Store in Linux
For installing apps using Snap store, download and install Snap store on your system, open the Linux terminal, and execute the below command:
The Snap store’s size is not big enough, and it will take moments to download the required file and install it in the system successfully.
Once you install the application, configure the files for using Snap store conveniently, use the command below to launch the application.
To configure the Snap store, you can install a secondary platform package of Gnome and connect it with your Snap store. Hence, open the Linux terminal and use the following command for installing “gnome-3-28-1804”.
After successfully connecting the Snap store with gnome-3-28-1804, open the Snap store application again using the below command, or you can open it from the app menu.
How to Install Linux Apps using the Snap Store
If you want to install apps using the Snap store, open the Snap store application, and you will see a Snap storefront. This Snap storefront consists of various categories like productivity, utilities, games, news, weather, and finance.
You can select a particular category, and the Snap store application will show a list of Snap apps. In case you want to install a specific application, then search it in the search box and click on install to download it to your system. A “description” category helps a user understand everything about a specific application before downloading it.
Conclusion
This article covers the Snap store’s complete information, with its installation process and procedure to install Linux apps using the Snap store easily. As explained in the above section, the Snap Store is an application that offers access to download multiple applications for the Linux system. It is excellent to have this type of application in the system to download some useful applications.
]]>What is Snapd?
Snapd needs to be installed on Linux system for using Snap distribution packages. Snapd offers various features like distribute, update, and run OS components and applications on Linux systems.
How to Install Snapd on Linux System
Now we will look at steps to install Snapd on different Linux systems.
Ubuntu 16.04: Snapd comes preinstalled with Ubuntu 16.04 LTS and above releases. So no additional steps required to install if you have Ubuntu 16.04 + and you can start using Snapd directly.
Ubuntu 14.04: For Ubuntu 14.04 or any other older release you need to open “Terminal” and enter following commands one by one to install Snapd.
$ sudo apt update
$ sudo apt install snapd
The user may require performing additional steps to use Snaps on Snapd like install missing pulseaudio to play music and sounds. Many recent Linux releases comes preinstalled with pulseaudio but it needs to be installed in older releases. To install pulseaudio just type this command in “Terminal”:
$ sudo apt install pulseaudio
Some users will be unable to launch URLs from snapd applications because snaps require optional packages to launch external browser sessions. To solve this problem just type the commands given below in “Terminal”:
$ sudo apt update
$ sudo apt install snapd-xdg-open
Now you are ready to start using Snaps on a Linux system.
How to Use Snaps?
Now that Snapd installation is complete you can start using different Snaps via “Terminal”.
Step01: To install Snaps and additional features you need to login to the Snap store. So sign-in to the Snap store as follows using your Ubuntu account.
$ sudo snap login [email protected]
Password: *********
2-factor: ******
Welcome!
Step02: Now you can find different snaps available on store for example find snap “hello”.
$ snap find hello
Name           Version  Developer  Notes  Summary
hello          2.10     canonical  -      GNU Hello, the "hello world" snap
hello-huge     1.0      noise      -      A really big snap
hello-world    6.1      canonical  -      Hello world example
Step03: Now install snap using snap name.
$ snap install hello
Step04: Now run snap as follows.
$ hello
Hello, world!
$ hello.universe
Hello, universe!
This how you can run different snaps on linux systems.
Supported Linux Distros
Previously software and applications developers needed to create different versions of theirs software and applications for various Linux releases. Snap universal distribution packages now work on some popular distros such as:
- Arch
- Debian
- Fedora
- Kubuntu
- Lubuntu
- Ubuntu GNOME
- Ubuntu Kylin
- Ubuntu MATE
- Ubuntu Unity
- Xubuntu
Snap packages also being tested on various distros like CentOS, Mint, Gentoo, Elementary, OpenSUSE, OpenWRT and RHEL.
Various Snap Applications
There are various Snap applications available for Linux system. Some of the popular applications are as follows:
- Jenkins
- Chat
- Notes
- Cassandra
- Freecad
- Shout
- Stellarium
- WebDM
- Hangups
- Krita
- VLC
- Blender
For more Snap applications go to Uappexplorer.
]]>