PostgreSQL is also very lightweight, easy to set up, and can be installed on several platforms, such as containers, VMs, or physical systems. Besides its default GUI, pgAdmin, Postgres also supports over 50 other IDEs, a third of which are free to use. This article will cover some of the most frequently asked questions (FAQs) about PostgreSQL.
Is PostgreSQL Free?
PostgreSQL is a free product that was released under the OSI-approved PostgreSQL license. This means that there is no fee required to use PostgreSQL, even for commercial purposes, though there are some third-party extensions and services that require a subscription or one-time fee.
Is PostgreSQL Open-Source?
Yes, PostgreSQL is open-source. PostgreSQL started out as a University of Berkeley project in 1986 and was released to the public on July 8, 1996, as a free and open-source relational database management system.
Is PostgreSQL Case-Sensitive?
PostgreSQL is case-sensitive by default, but in certain situations, it can be made case insensitive. For example, when creating a table in PostgreSQL, column and table names are automatically converted to lower-case to make them case insensitive. The same is also done for queries; this way, they match the already-converted column and table names.
Note that when you use quotes for the column or table name, such as “Amount,” the conversion does not occur. You will have to use quotes in your queries, as well, to prevent PostgreSQL from converting the queries to lowercase. You can also make column values case-insensitive using a PostgreSQL-specific keyword called CITEXT when creating columns. This keyword also allows a column declared as UNIQUE or PRIMARY KEY to be case-insensitive.
Is PostgreSQL Relational?
PostgreSQL was originally designed to be a relational database management system. It has since grown far beyond its original design, as PostgreSQL now supports some NoSQL capabilities, such as storing and retrieving data in JSON (JSONB), and key-value pairs (HSTORE). Unlike many NoSQL-only databases, the NoSQL capabilities of PostgreSQL are ACID-compliant and can be interfaced with SQL, like any other data type supported by PostgreSQL.
Why Should I Use PostgreSQL?
You must understand the needs of your product before choosing a database management system for that product. Usually, this choice comes down to whether to use a relational DBMS or a NoSQL database. If you are dealing with structured and predictable data with a static number of users or applications accessing the system, consider going for a relational database, such as PostgreSQL.
Besides choosing PostgreSQL because it is an RDBMS, there are several other features of this database management system that makes it one of the most popular systems available today. Some of these features include the following:
- Support for various data types, such as JSON/JSONB, XML, key-value pairs (HSTORE), point, line, circle, and polygon. You can also create custom data types.
- Foreign data wrappers that allow connection to other databases or streams, such as Neo4j, CouchDB, Cassandra, Oracle, and more, with a standard SQL interface.
- Ability to build out custom functions.
- Procedural languages, such as PL/PGSQL, Perl, Python, and more.
- Access to many extensions that provide additional functionality, such as PostGIS.
- Multi-version Concurrency Control.
- Multi-factor authentication with certificates and an additional method.
And so much more. You can see a full list of the features offered by PostgreSQL here.
PostgreSQL vs MySQL: Is PostgreSQL Better Than MySQL?
MySQL is the most popular database management system available today. It is light, easy to understand and set up, and very fast, particularly when dealing with high-concurrent read-only functions. The ease of use of MySQL makes it easier to find database admins for this database management system.
Having said that, MySQL lacks several of the features that come with PostgreSQL databases. To start with, PostgreSQL is not just a relational database management system, it is also an object-relational database management system. This means that PostgreSQL supports unique features, such as table inheritance and function overloading.
It performs better when dealing with complex queries under heavy load. It does, however, slow down when dealing with read-only operations.
PostgreSQL also has a wider range of data types available, and it allows you to create custom data types for your database. Perhaps its greatest advantage over MySQL is PostgreSQL’s extensibility. You can create PostgreSQL extensions to suit your use case.
For the most part, PostgreSQL is a better DBMS than MySQL. But in the end, it all comes down to your use case. If you are making a simple website or web application and you only need to store data, you are better off using MySQL. But if you are dealing with more complex, high-volume operations, consider going with PostgreSQL.
PostgreSQL vs MongoDB: Is PostgreSQL Better Than MongoDB?
A comparison between PostgreSQL and MongoDB is simply a comparison between relational database management systems and NoSQL databases. And the answer of which is better boils down to your use case; how you want to use and structure your data. Each DBMS contains characteristics that are useful in different situations.
If you are building an application with an unpredictable and dynamic data structure, you will want to go for a NoSQL database like MongoDB. NoSQL database management systems are known for their schema-less databases, meaning that the database structure does not have to be defined on creation. This makes NoSQL databases very flexible and easily scalable.
PostgreSQL is a better fit if you are working with data with a fixed, static structure that changes infrequently. PostgreSQL also has the advantage of SQL, a powerful and well-established query language. Relational database management systems are more appropriate for applications that require referential integrity, such as Fintech applications.
In recent years, both DBMS types have been adopting key features from the other. For example, as explained above, PostgreSQL supports key-value pairs and JSON data types, key features of NoSQL database management systems (DBMS). MongoDB now claims to be ACID compliant, a key feature of relational database management systems (RBDMS).
However, neither feature works like in the original DBMS type that supports it. For example, according to this article, MongoDB still has several issues with its ACID compliance. Also, while PostgreSQL supports JSON data types and key-value pairs, this system is not schema-less. You are still required to declare the structure upon creation.
PostgreSQL: How to Connect to A Database Server
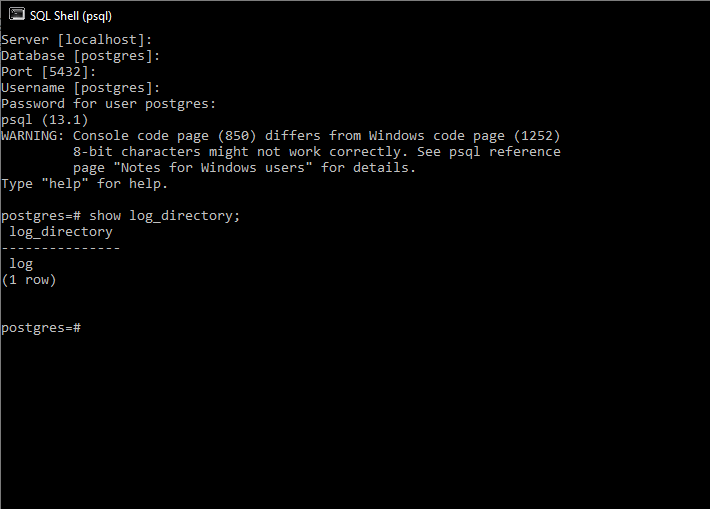
Before connecting to a database, make sure that you have downloaded and installed PostgreSQL on your operating system. Next, launch the psql application. This opens a dedicated command-line interface program for interfacing with the PostgreSQL database server.
Once the server has launched, you will be asked to fill in the following fields sequentially: server, database, port, username, and password. You can keep the default options that were set while installing PostgreSQL by hitting Enter for each query.

When you get to the password input field, enter the password you set during installation for the “postgres” user. Once that is done and your identity has been validated successfully, you will be connected to the database server.
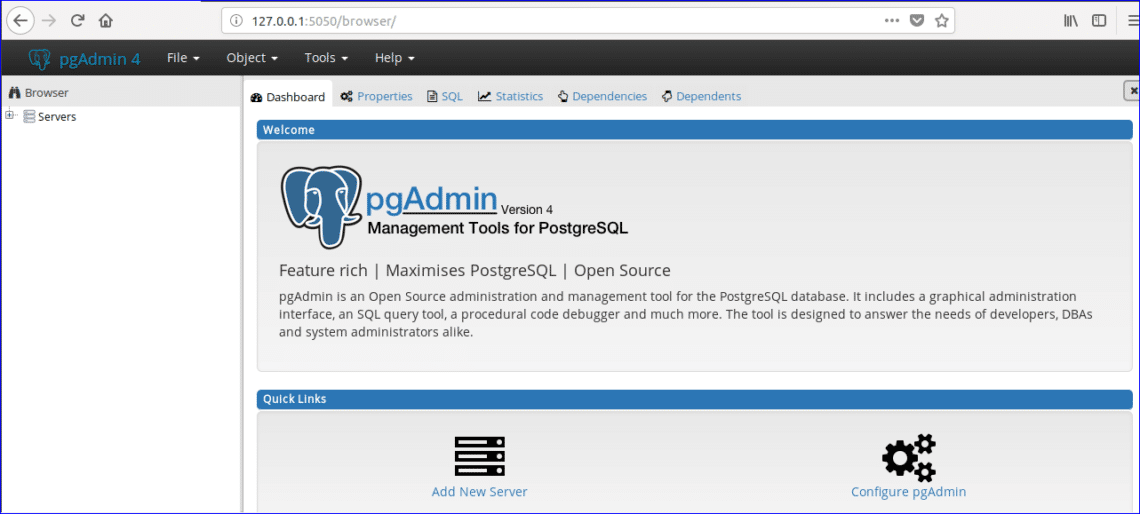
Another way to connect to a database is by using pgAdmin. pgAdmin is PostgreSQL’s GUI for interfacing with its database servers. To use pgAdmin, launch the application. This should open a web application on your browser. Right-click Servers in the top-left corner of the web app, then hover over Create and select Server… from the menu that pops up.

You can also click Add New Server under Quick Links. Whichever option you choose, you should now see a dialog box requesting some information.
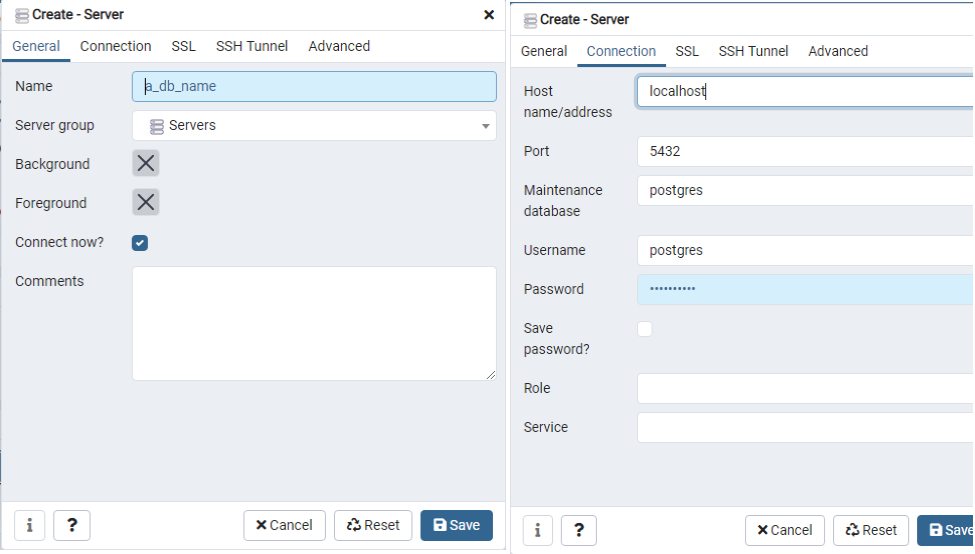
Enter a name for the server, then navigate to the Connection tab. Under the Connection tab, input “localhost” as your Host name/address, then type in the postgres user’s password that was set up during the installation. Click Save to save the server. The dialog box will close, and you will be connected to the database server automatically.
Where Are PostgreSQL Databases Stored?
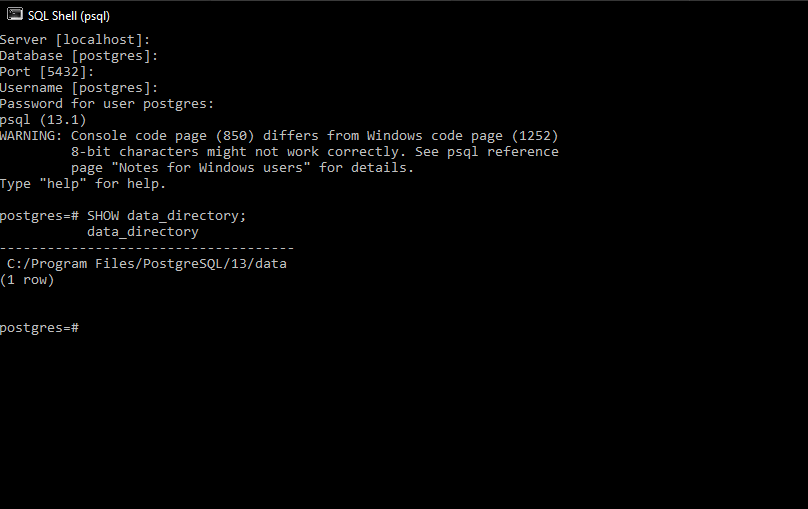
By default, PostgreSQL databases are stored in a data folder, but the location of this folder varies with the OS. On Windows, you will usually find it in either of the following locations: C:\Program Files (x86)\PostgreSQL\<version number>\data or C:\Program Files\PostgreSQL\<version number>\data.
On a Mac, if you installed PostgreSQL via homebrew, you will find it in /usr/local/var/postgres/data. Otherwise, it will be located in /Library/PostgreSQL/<version number>/data.
For Linux, the location varies with the Linux flavor. Sometimes, it is found in /usr/local/pgsql/data or /var/lib/postgresql/[version]/data.
To determine the location of the databases more accurately, enter the following command in psql:
PostgreSQL: How to Start the Database Server
Starting a PostgreSQL server is slightly different for each operating system. To start the server on Windows, first, locate the directory of the database. This is usually something like “C:\Program Files\PostgreSQL\10.4\data.” Copy the directory path, as you will need it in a moment. Then, launch Command Prompt and run the following command.
The path should be the database directory path you copied. To stop the server, simply replace “start” with “stop” in the above command. You can also restart it by replacing “start with “restart”.
When you attempt to run this command, you may get the following error: “pg_ctl isn’t recognized as an internal or external command.” To resolve this issue, add “C:\Program Files\PostgreSQL\9.5\bin” and “C:\Program Files\PostgreSQL\9.5\lib” to your system’s PATH environment variable.
For macOS, if you installed PostgreSQL with homebrew, use the following commands:
To start the database server manually, run the following command:
Make sure that the directory path is that of your database.
To start the database server now and relaunch at login, run the following command:
To stop the server for both scenarios, simply replace “start” with “stop.”
In Linux, before starting a database server, you must first set a password for the postgres user. No password is set by default on installation. You can set the password with the following command:
Of course, your password can be anything you choose it to be. Once the password is set, to start the server, enter the following command in the terminal:
To stop the server, replace “start” with “stop” in the command, just like with Windows and macOS.
PostgreSQL: How to Create A Database
To create a database, make sure that you are already connected to a database server. Follow the instructions above to do so. If you connected to the server via psql, enter the following command to create a database:
If you want to connect to your recently-created database, enter the following command:
You should now be connected to it.

If you connected to the server via pgAdmin, on the web app, right-click on Databases, hover over Create, and select Database…
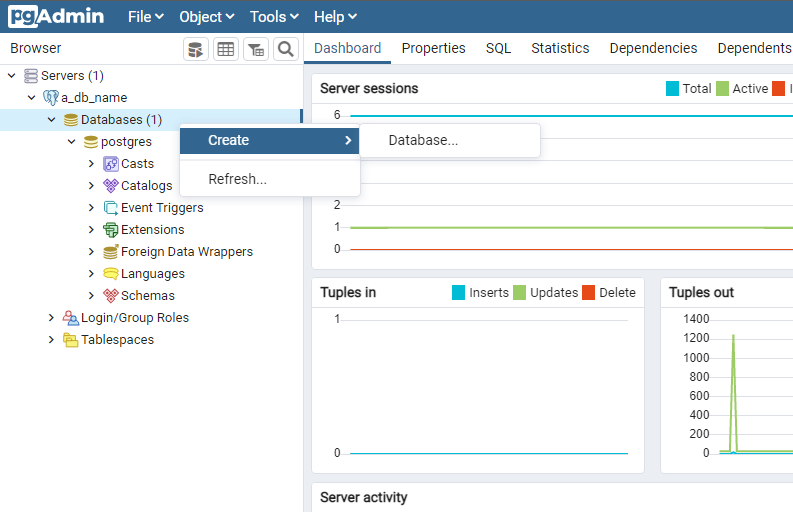
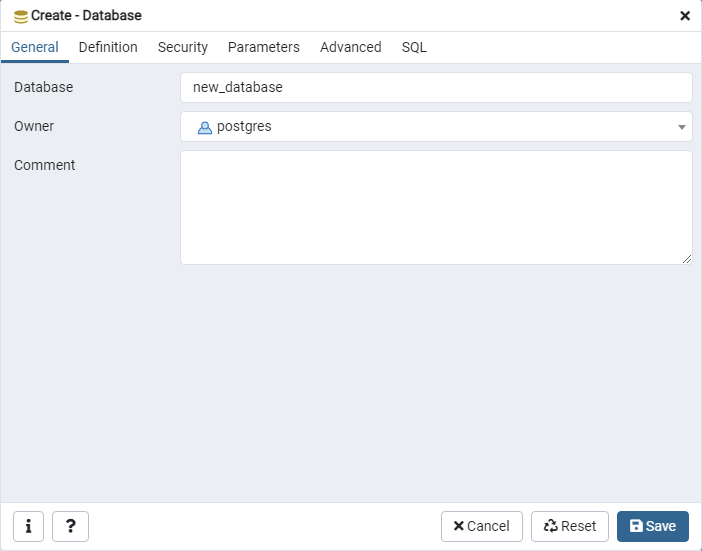
You should see a dialog box appear requesting certain details to create the database. You will need to input at least the name of the database to create the database. Enter a name in the Database field and click Save. You should now be able to see your recently-created database under Databases.
Where Are PostgreSQL Logs?
By default, PostgreSQL logs are stored in the log folder under the data folder, the default location for PostgreSQL databases. To confirm this, run the following command in psql:
Note that this command will only display a relative path, but the path should be located in the data folder.
Does PostgreSQL Have Stored Procedures?
Although PostgreSQL has always supported user-defined functions, it was not until its v11.0 release that it included support for Stored Procedures. To create a stored procedure in PostgreSQL, use the CREATE PROCEDURE statement. To execute a stored procedure, use the CALL statement.
Conclusion
PostgreSQL has seen active development for more than 30 years, having been created in the 1980s. During this time, PostgreSQL has matured significantly, and it is currently the second most popular database management system in the world, according to StackOverflow’s 2020 Annual Developer Survey.
Two major reasons for the popularity of PostgreSQL are its extensibility and the myriad of useful features available to its users. If you are selecting a DBMS for your project, and you have decided that you prefer an RDBMS over a NoSQL database, PostgreSQL would be an excellent choice for your application. ]]>
Even though I feel working in command-line is best way to learn anything in the world of application and software development, there are some limitations while working with databases in command-line. It requires great experience of working in command-line or it could get really messy for newbies as well as for professionals.
- Coding can be messy and confusing through command-line.
- Managing and browsing through databases and tables could be difficult to handle.
- Not everyone likes command-line window and finds it difficult to work on.
But GUI clients overcome these shortcomings of working in command-line and in addition to that offers some really great features which makes whole task of handling databases easier. Easy to use user interface, shortcut keys, easy access to files and databases are one of the key features that make GUI clients popular over command-line methods. So in this article I’m going to give you 5 best GUI clients for PostgreSQL which you can download and install on Ubuntu and other Linux distributions.
pgAdmin
pgAdmin is one of the most popular and feature-rich database administration and development platform especially developed for PostgreSQL. It is free and open-source GUI client and available for Ubuntu including Windows and Mac OS X.
pgAdmin is a feature-rich PostgreSQL client which supports multiple PostgreSQL versions, color syntax highlighting, procedural language debugger, create, view and edit all most widely used PostgreSQL objects such as database, columns, triggers, indexes and many more.
Apart from that it offers graphical query planning tool, a dashboard to monitor all the activities, highly customizable user interface, and ability to access remotely, etc.
To install pgAdmin on Ubuntu, run the following commands one-by-one in Terminal. Follow the instructions as prompted.
sudo apt-key add -
sudo sh -c 'echo "deb http://apt.postgresql.org/pub/repos/apt/
`lsb_release -cs`-pgdg main" >> /etc/apt/sources.list.d/pgdg.list'
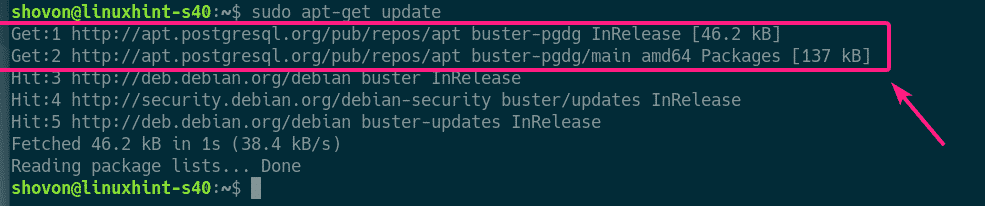
$ sudo apt-get update
$ sudo apt-get install pgadmin4 pgadmin4-apache2 -y
Navicat
Devloped by PremiumSoft CyberTech Ltd, Navicat is graphical database management and development software for popular database languages like PostgreSQL, MySQL, MariaDB, SQLite, Oracle and many more. It is feature-rich database management tool which comes with intuitive user interface.
It is powerful and yet easy to use database management tool which you will definitely love to work on. It is comes with dedicated SQL editor and builder which helps you perform the database programming with ease. Also you can assign the scheduled jobs to navicat and you will get email notification when it performs assigned job.
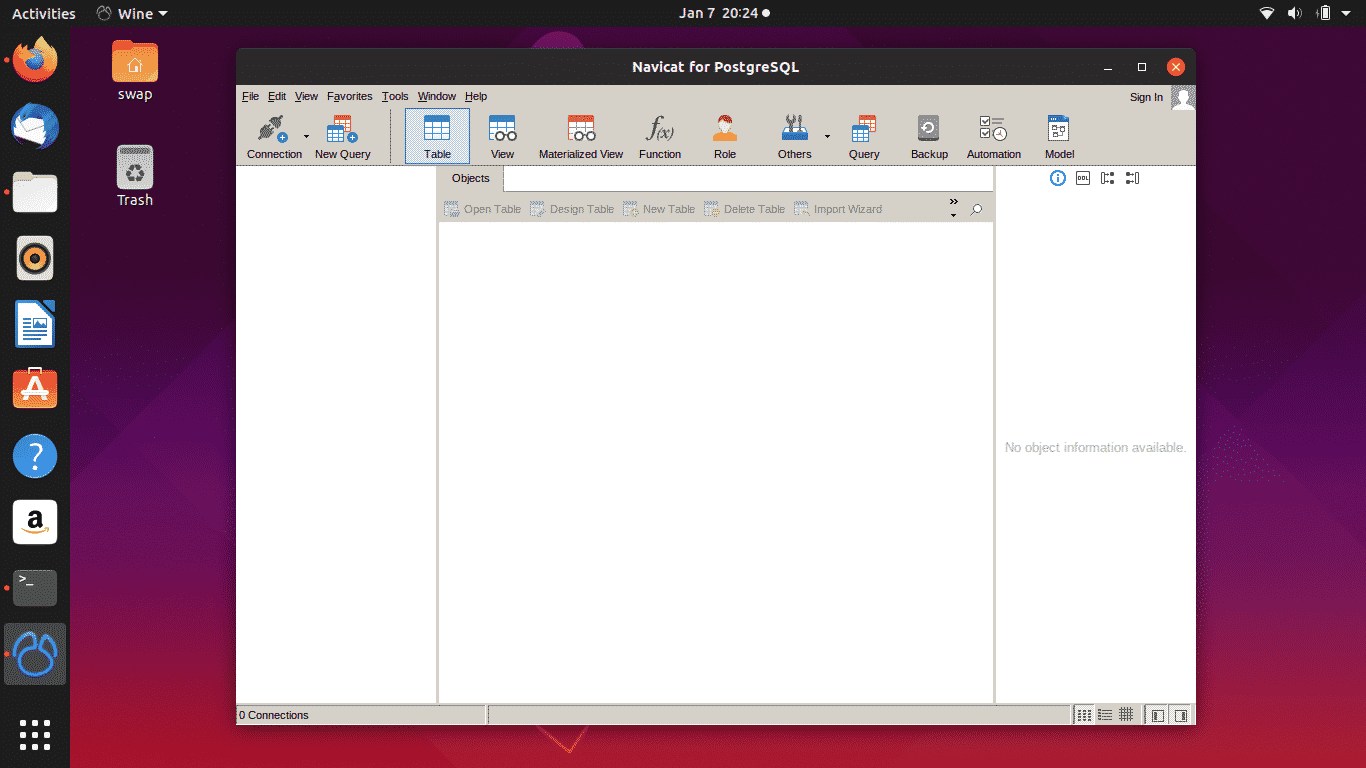
Yes it is not free unlike others but you can always try its free version and then decide whether to buy it or not. One thing that might lure you to use different PosgreSQL tool is that you need to buy separate license for PosgreSQL and MySQL platforms.
DataGrip
DataGrip is a multi-platform database administration tool developed. Devloped by JetBrains which is popular for producing excellent development tools for software programmers and developers. It ships-in with various popular database management tools such as Amazon Redshift, Apache Hive, Azure SQL Database, Microsoft SQL Server and includes PostgreSQL.
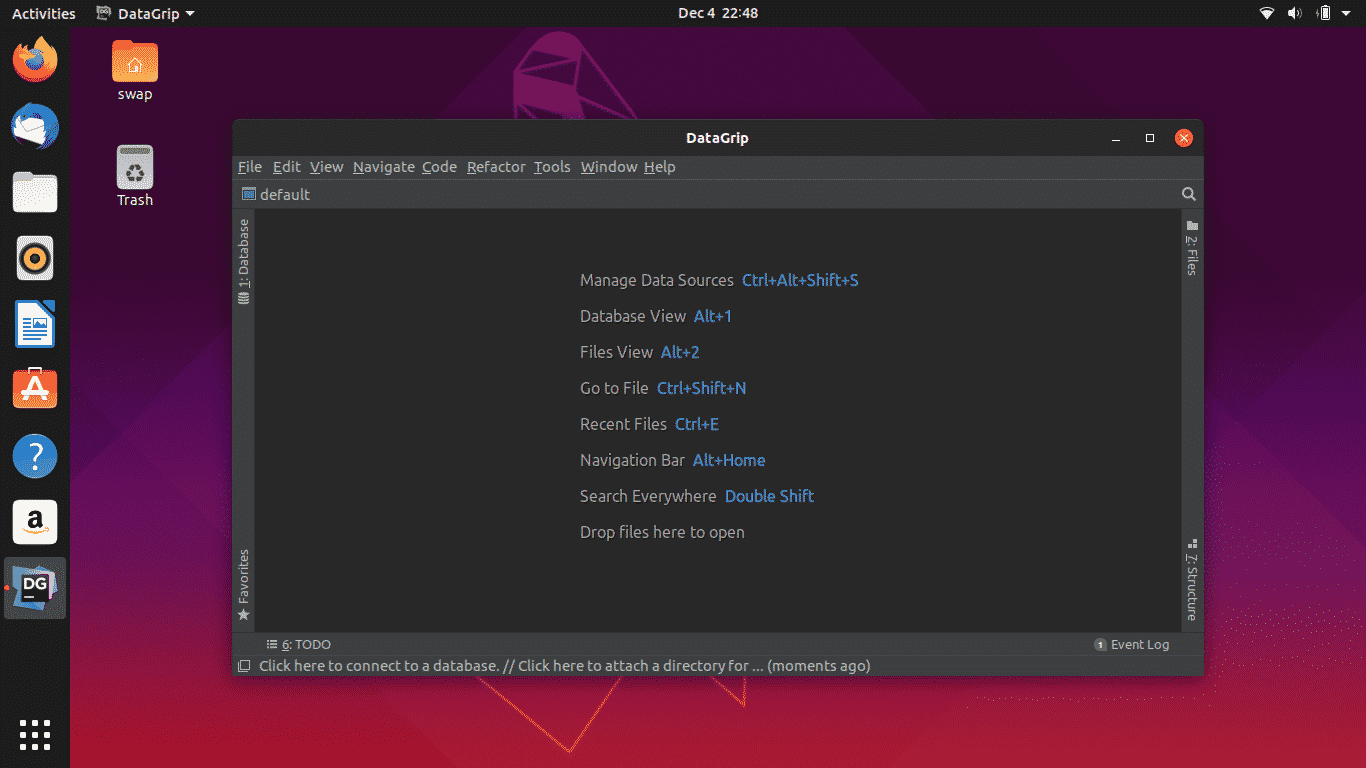
When it comes to features, it sports very friendly user interface which you will find very easy to use, context-sensitive code compilation, automatic bug detection, and version control integration. Apart from that it has powerful text editor which is very smart and advance, light and dark themes, highly customizable interface and import/export support.
DataGrip has everything a database administrator needs, but there is one thing that might lure you to use other clients and i.e. it is not free and slightly on expensive side.
OmniDB
OmniDB is an open-source web tools which offers graphical environment for Database Management. Till the time of writing this supports PosgreSQL 11 and older versions, Oracle, MySQL, MariaDB, and Firebird. It is a lightweight yet powerful browser based Database Management tool.
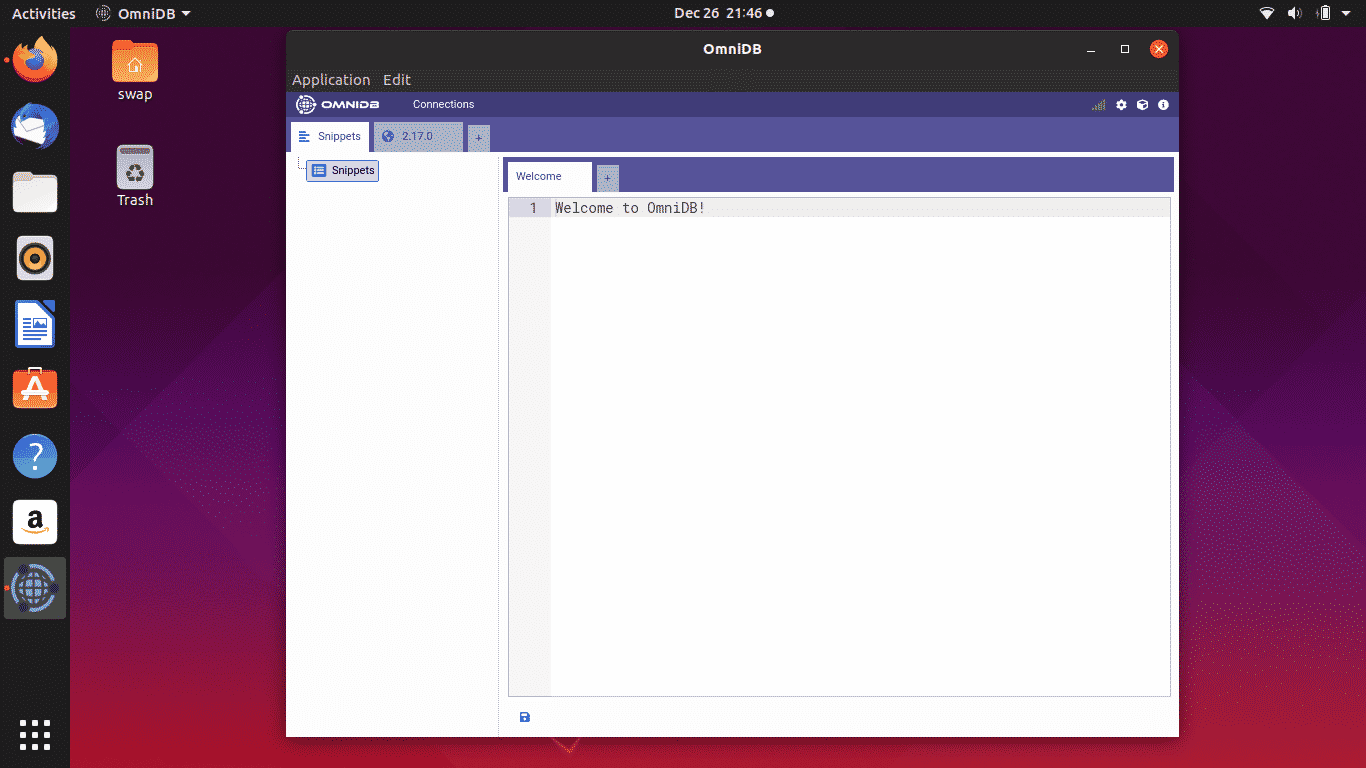
Despite not having dedicated interface its browser based user interface is quite responsive and easy to navigate. Smart SQL editor is one of the pros of this database tool which is highly configurable and offers contextual query compilation. As it has multi-user supports, developers have made safety a priority with encrypted personal information support.
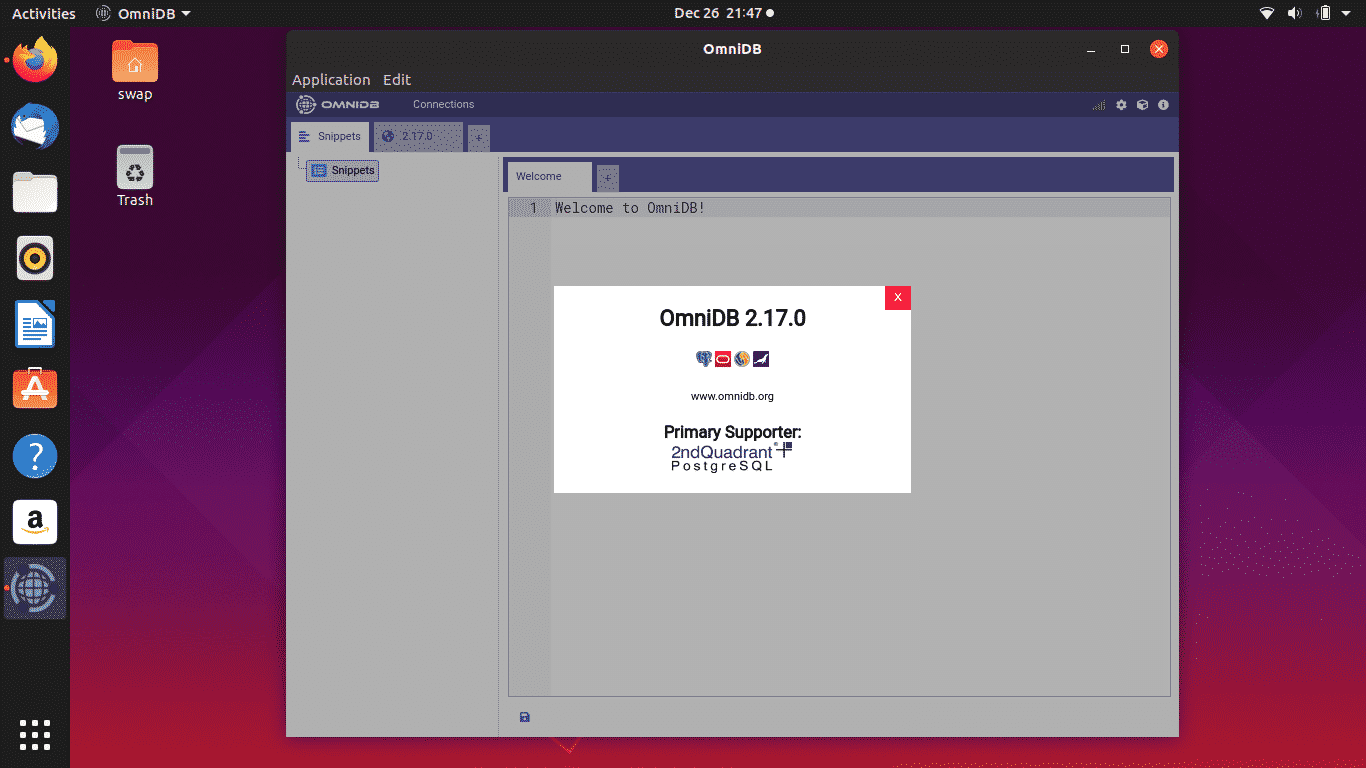
This tool makes the task of database management quite easy with interactive and responsive tables. All-in-all it is quite a package of database management tool.
DBeaver
DBeaver is a free and cross-platform PostgreSQL client and database administration tool. It is developed by open-source community especially for developers, database administrators, and analysts.

Apart from PostgreSQL, it supports other widely used database management tools such as SQL, SQLite, Firebird, Oracle and many others. It comes with simple yet attractive user interface which is very easy to use. Talking about the features, it offers connection to various data sources, visual query builder, metadata browser, ER diagrams, data and metadata search.
Beekeeper Studio
Beekeeper Studio is an open source database GUI with great PostgreSQL support. It supports a range of other SQL databases, and works well in Linux as the core maintainer is a full-time Linux desktop user.
Beekeeper has a clean and modern UI and lets you execute SQL queries and edit table data across multiple open tabs quickly and easily.
Beekeeper is a no nonsense PostgreSQL GUI that is perfect for software engineers and analysts who need to work with PostgreSQL and want a database UI that doesn’t get in the way. If you are a hard-core database user performing performance analysis and profiling, Beekeeper Studio is probably not for you (yet).
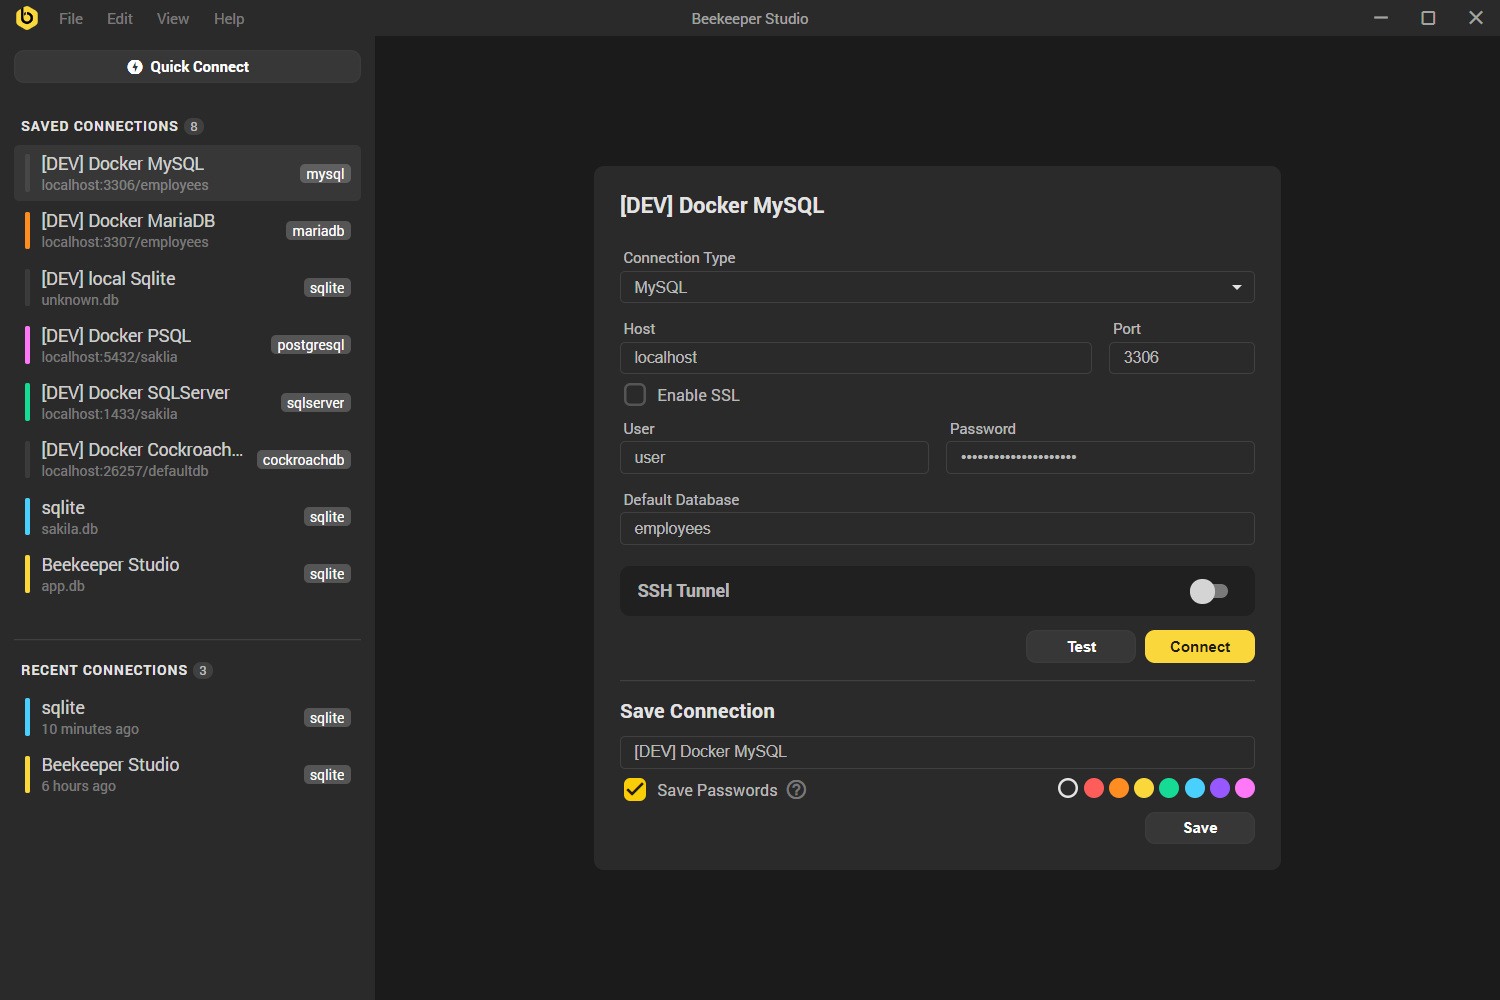 Beekeeper Studio Connect Screen |
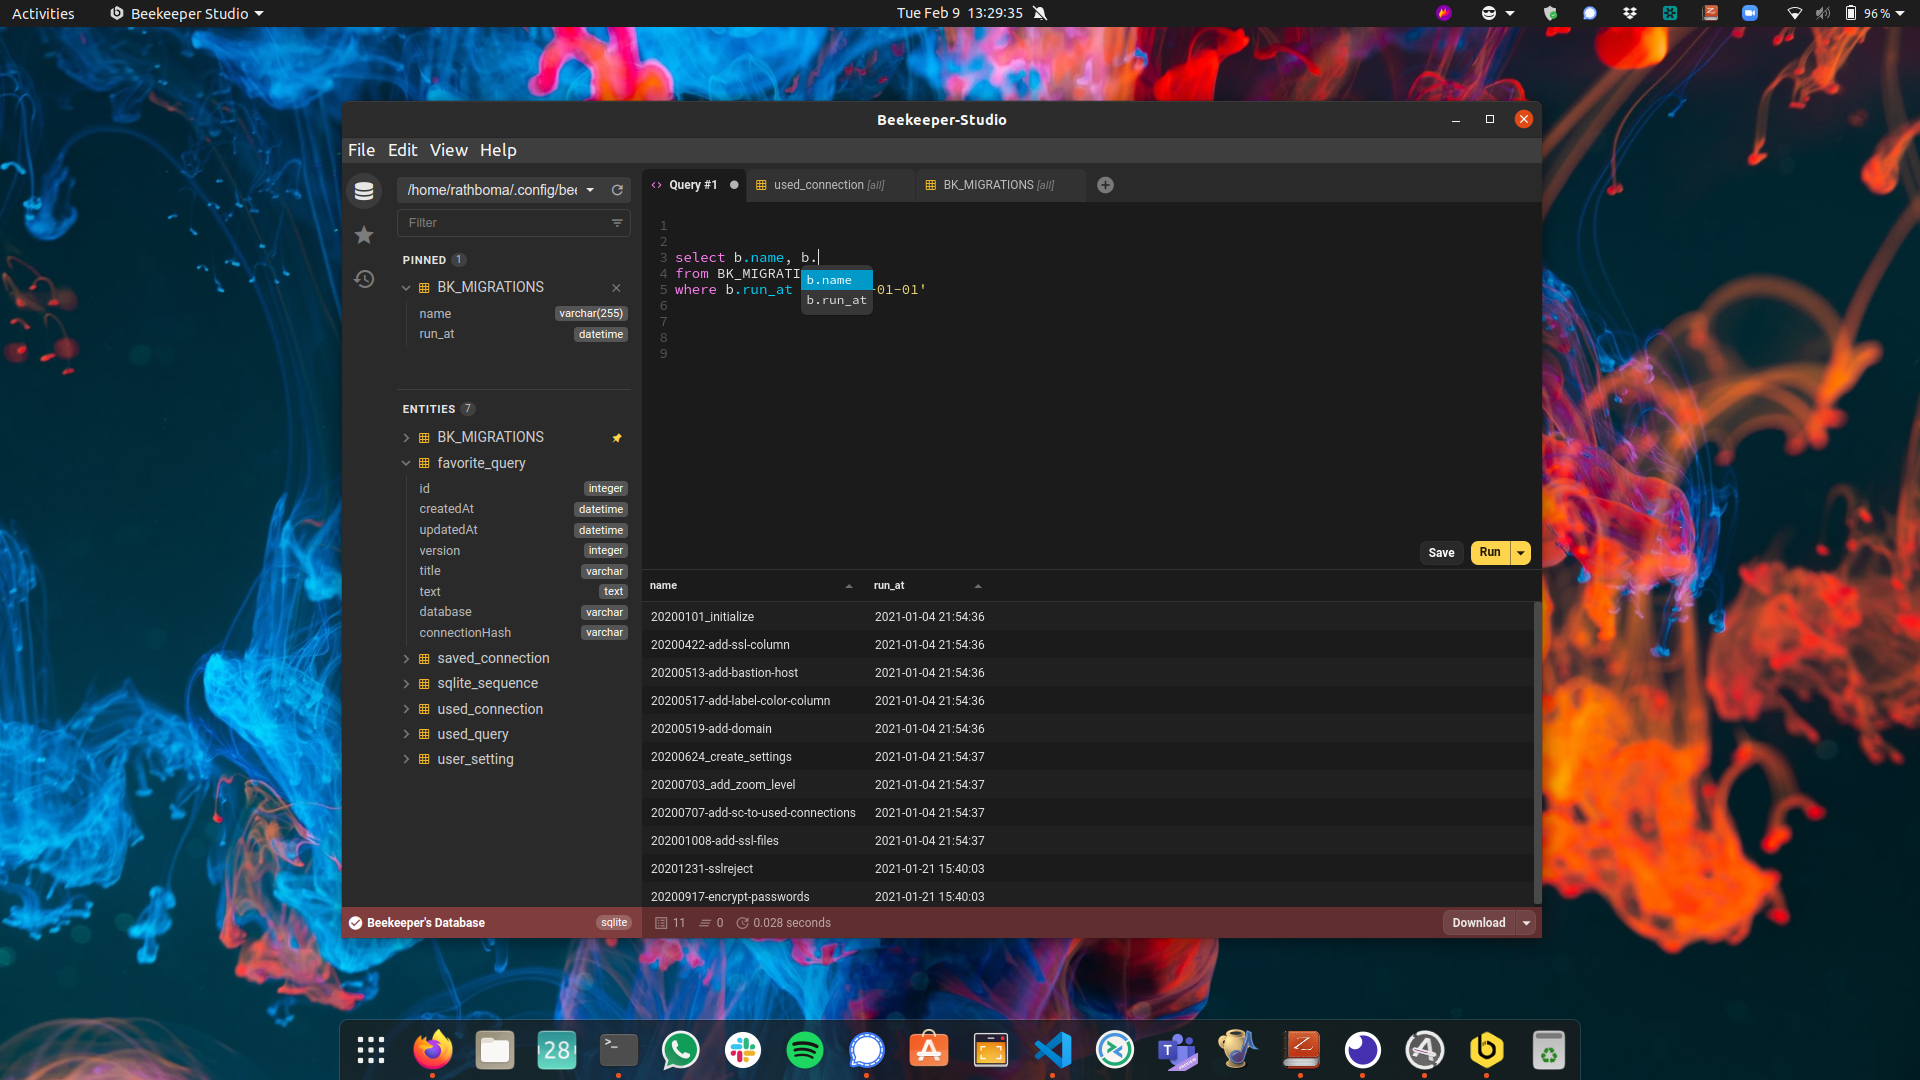 Beekeeper Studio SQL Editor |
Download Beekeeper Studio Here
So these are the Best GUI clients for PostgreSQL which you can download and use on Ubuntu. Feel free to share your views and queries at @LinuxHint and @SwapTirthakar. ]]>
In this article, you will learn how to install and get started with PostgreSQL on Ubuntu 20.04 system using the terminal.
Installation of PostgreSQL on Ubuntu 20.04
To install PostgreSQL on Ubuntu 20.04, you will perform the following steps:
Open the terminal using Ctrl + Alt + t and login as the root user on your system.
Update system packages
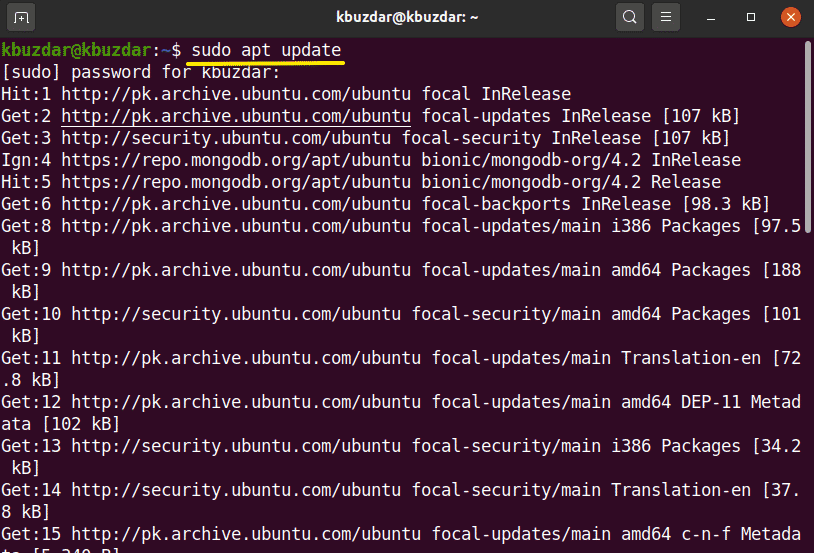
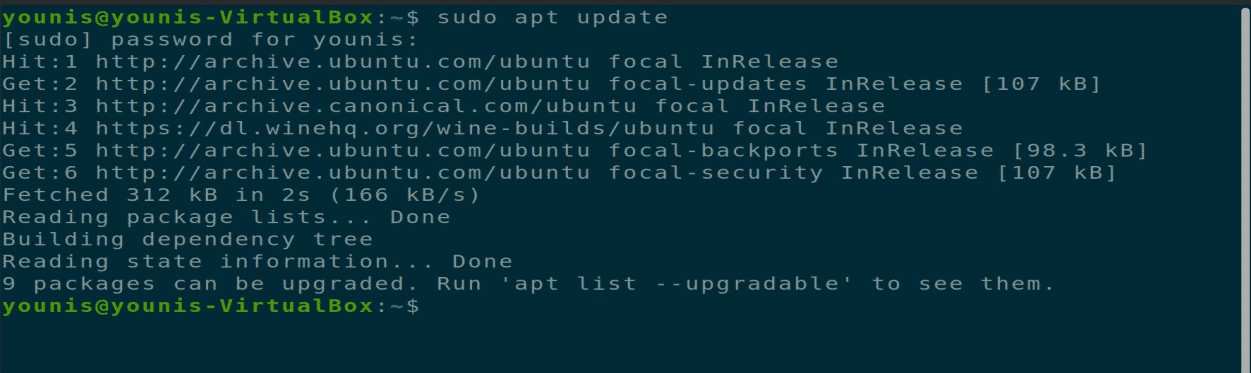
It is recommended that you should update your system packages before installing any new software package. For this purpose, type the following command to update the current working system packages:
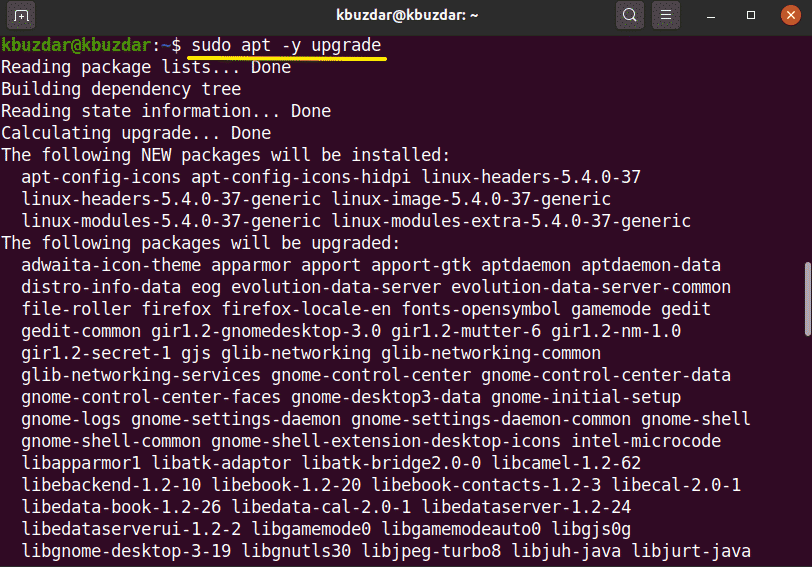
Using the following command to upgrade the installed packages:
Install PostgreSQL on Ubuntu 20.04
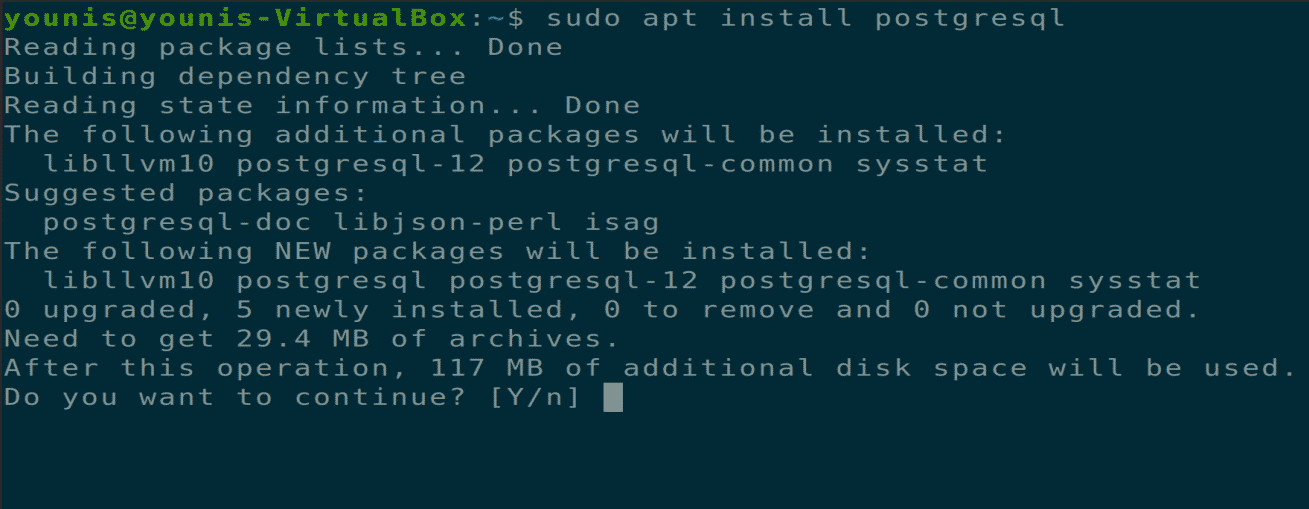
You can install PostgreSQL on Ubuntu 20.04 without configuring the Ubuntu repository. Use the following command to install PostgreSQL on Ubuntu 20.04:
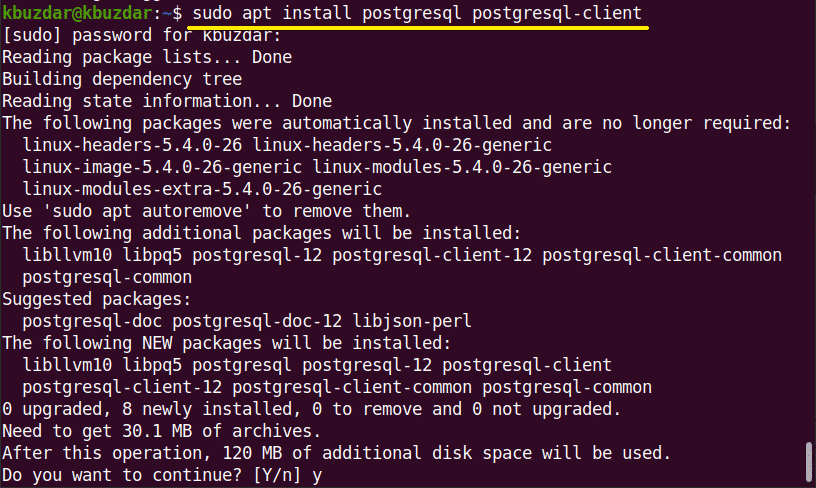
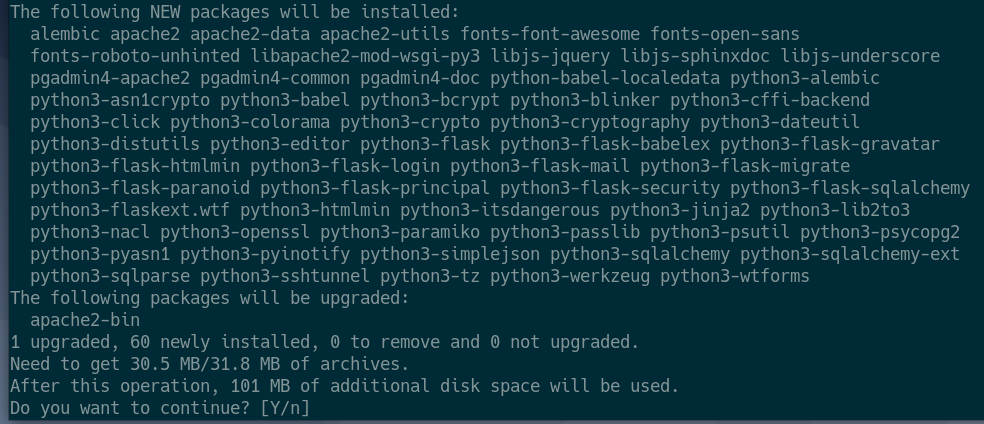
During the installation, a prompt will display on your system that will ask you to confirm the installation process that either you want to continue or not. You need to press ‘y’ to continue the installation.
After completing the installation of PostgreSQL, you will start, stop, and enable the PostgreSQL services using the following command:
$ sudo systemctl start postgresql.service
$ sudo systemctl enable postgresql.service

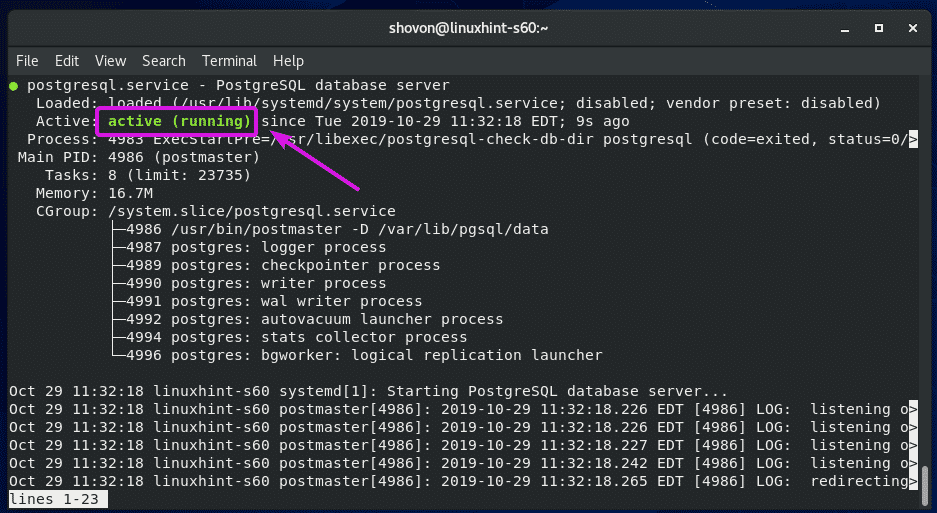
Now, to verify the PostgreSQL service status that either it is running on your system or not. Use the following command to check the service status:

Set PostgreSQL user password
You can change or create the user password for PostgreSQL. Using the following command, you can change the default user password for PostgreSQL:

The prompt will ask you to enter the new password then again retype the new password. After that, a confirmation notification will be displayed ‘password updated successfully’.
After successfully changing the new password, now on each PostgreSQL access, you need to enter a new reset password for confirmation.
Access PostgreSQL shell
PostgreSQL has been installed on your system. Now, you will log in to PostgreSQL as a user to access the databases and working shell using the following command:
Now, enter the following command to into the PostgreSQL shell:

Create a database and user roles
Here, the psql 12 is installed on my system. You can create new databases and users using interactive Postgresql shell as follows:
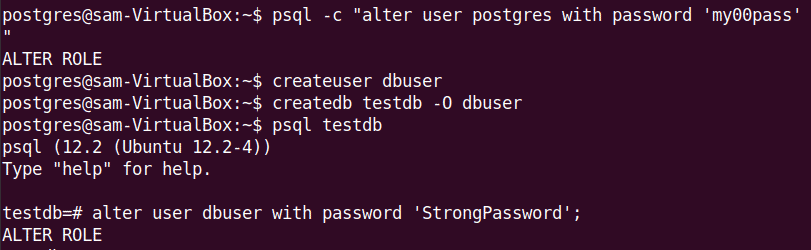
Now create a new user and database using the following command:
$ createdb samdb -O dbusersam
$ psql samdb
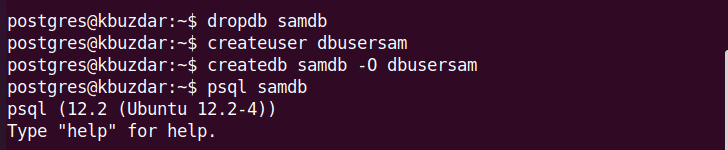
Change the role and password using the following command. The \q is used to quite from the shell.

Use the following command to list databases:

The PostgreSQL by default listens at the local interface which is 127.0.0.1. But, you can open its remote access by doing some changes in the configuration file. To access the configuration file of PostgreSQL, you will use the following command:
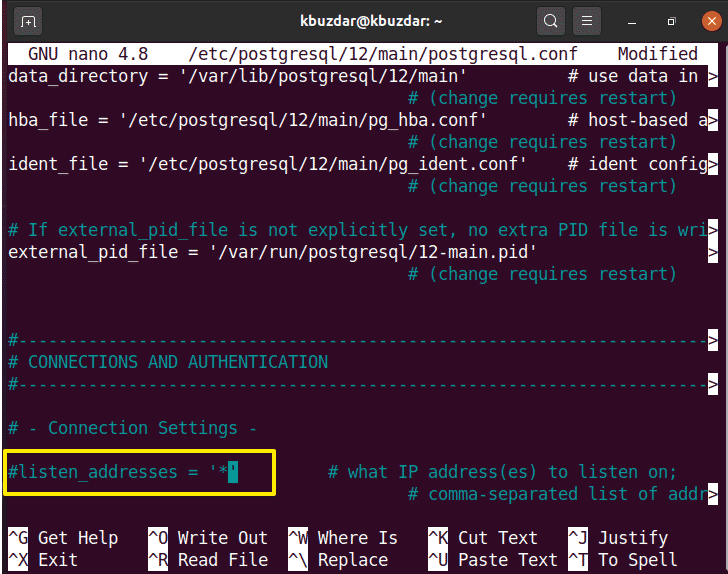
In the above-displayed file under the connection settings you will set #listen_addresses= ‘+’ and then save the file. This is an optional step for PostgreSQL installation.
Now you will restart the PostgreSQL services on your system as follows:
In this article, we implemented the installation of PostgreSQL on Ubuntu 20.04. Furthermore, you learned the different psql commands. In the future, you can explore more commands related to PostgreSQL using the command line.
]]>
How to Install PostgreSQL Client DBMS on Ubuntu
The PostgreSQL client allows you to run the PostgreSQL shell command to remotely connect to PostgreSQL server databases.
Step 1: Update APT
As you should always do when installing a new system, first update and upgrade your APT.

Step 2: Download and Install PostgreSQL Client
After updating your APT, download and install PostgreSQL Client with the following terminal command.

Step 3: Connect to PostgreSQL
You can connect to a remote PostgreSQL server using the psql command. You will have to provide the correct host or server IP address of the remote server. You will also have to provide the correct credentials to gain access to the server. Use the command below to connect to the server.

How to Install PostgreSQL Server on Ubuntu
You can host one or many PostgreSQL databases on your own local machine with the help of the PostgreSQL server package.
Step 1: Update APT
As you should always do when installing a new system, first update and upgrade your APT.

Step 2: Download and Install PostgreSQL Server
Now download and install the PostgreSQL server package via the command.
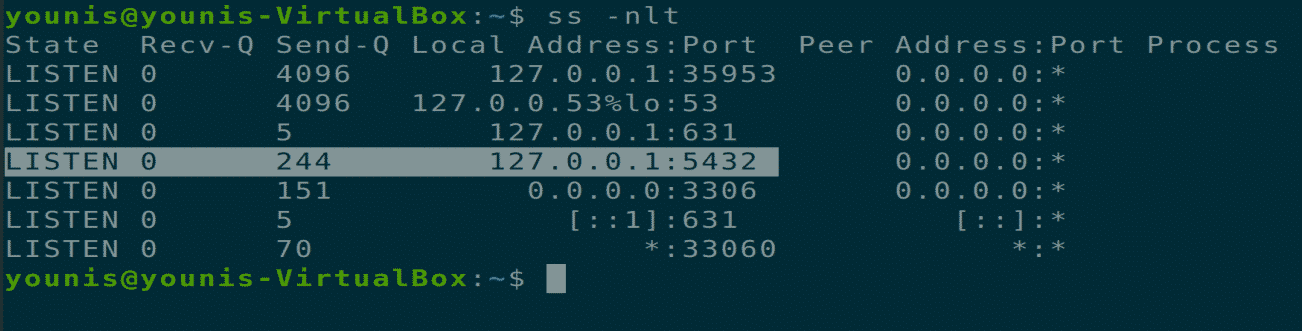
Step 3: Check Port Used by PostgreSQL
After the installation is completed, you can listen to the port used by the PostgreSQL through default port 5432. Check this by giving the following command.
Step 4: Change Startup Settings
You can also change startup settings of the PostgreSQL Server after system boot-up through the systemctl commands.


Step 5: Access PostgreSQL Server
When PostgreSQL Server installs, it is accessible from a local machine only and uses the loopback IP address of your machine. You may change this setting in the PostgreSQL configuration file to allow remote access. Enter the following command to open the PostgreSQL configuration file in gedit or any other text editor.
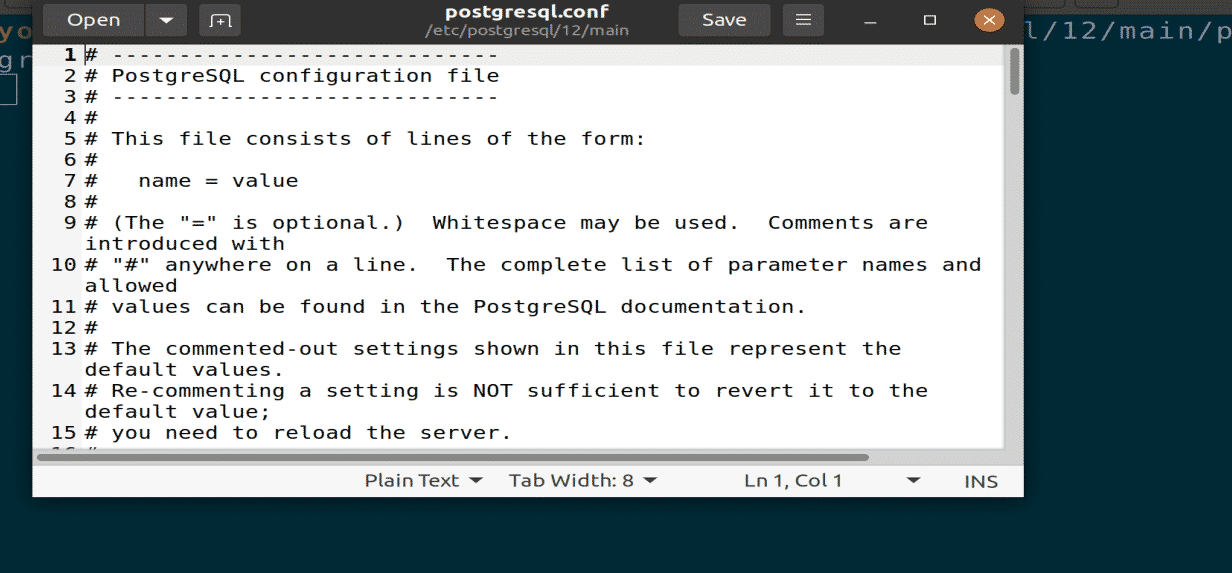
Figure: PostgreSQL configuration file opened in a gedit editor.
Change the following line under the “CONNECTIONS AND AUTHENTICATIONS” section. This command will make PostgreSQL listen to all incoming traffic through the port. Next, save the file and close it.
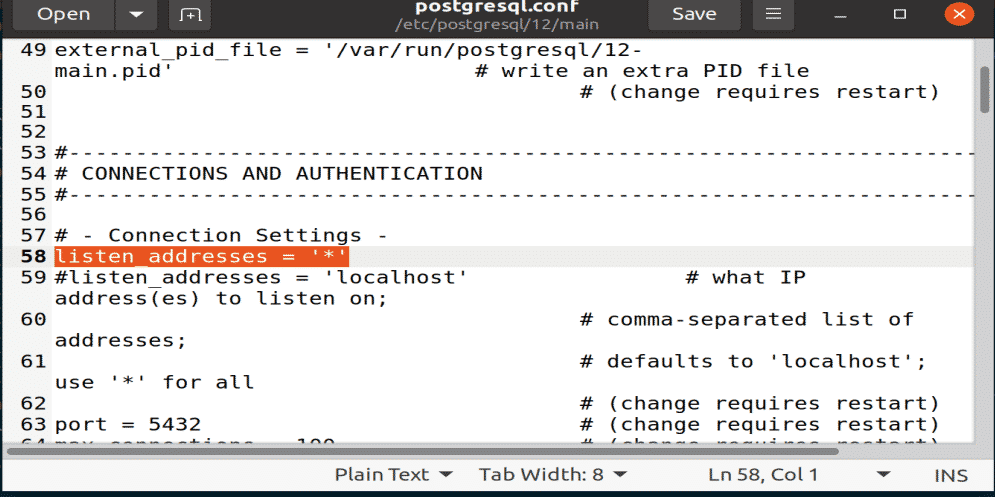
Figure: Listen code pasted under CONNECTION AND AUTHENTICATIONS area.
Step 6: Restart PostgreSQL
You will need to restart PostgreSQL service to take effect of all the changes to do that execute the following command in your terminal window.

Step 7: Check PostgreSQL Port Usage
You can check the PostgreSQL port usage and IP address by using the listening command.

Step 8: Allow Incoming Client to Connect
You should add the following line to another configuration file that will allow an incoming client to connect your databases and users. The MD5 option in this command is used to apply the authentication password to all the connecting users.
Line = host all all 0.0.0.0/0 md5
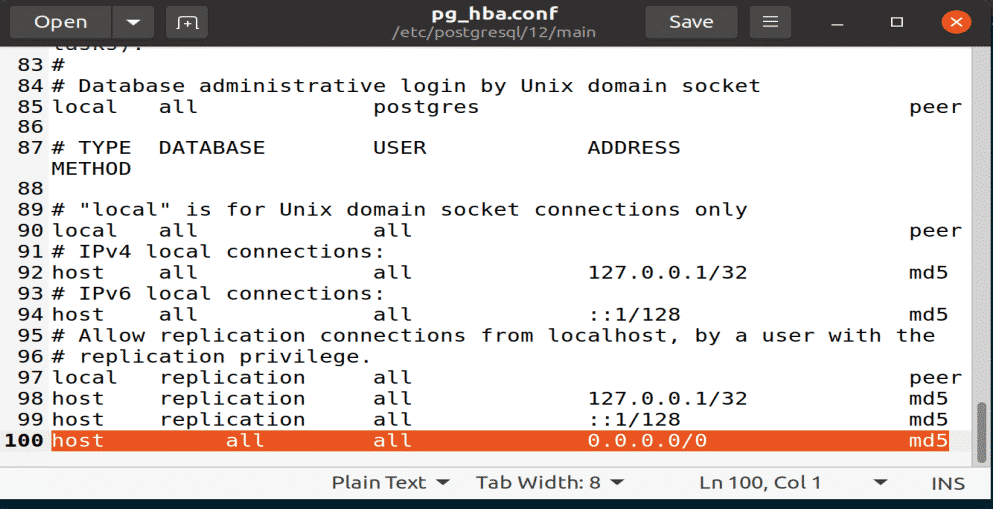
Figure: Adding line to pg_hba configuration file with gedit editor.
Step 9: Adjust Firewall Settings
You should make sure that the firewall does not stop incoming connections through the PostgreSQL port 5432. To do this, input the following command in the terminal window.

Conclusion
This article covered how to install the PostgreSQL Client package, how to install the PostgreSQL Server package, and how to set up a PostgreSQL database. After reading this article, you should also know how to grant access to other accounts for remote access to the server or to a database.
]]>Installing PostgreSQL Database:
PostgreSQL is available in the official package repository of CentOS 8. So, you can easily install it using DNF or YUM package manager.
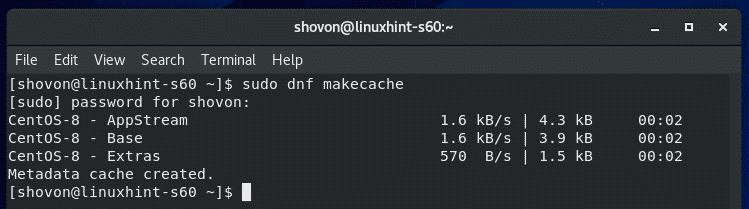
First, update the CentOS 8 package repository cache with the following command:

The CentOS 8 package repository cache should be updated.
Now, install PostgreSQL database server with the following command:

To confirm the installation, press Y and then press <Enter>.
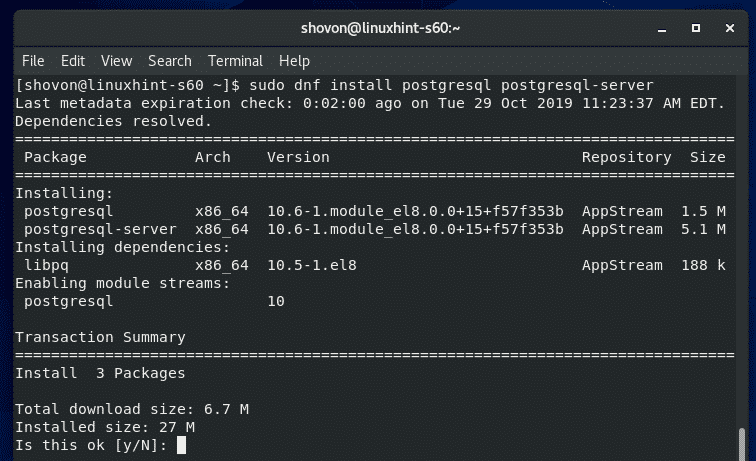
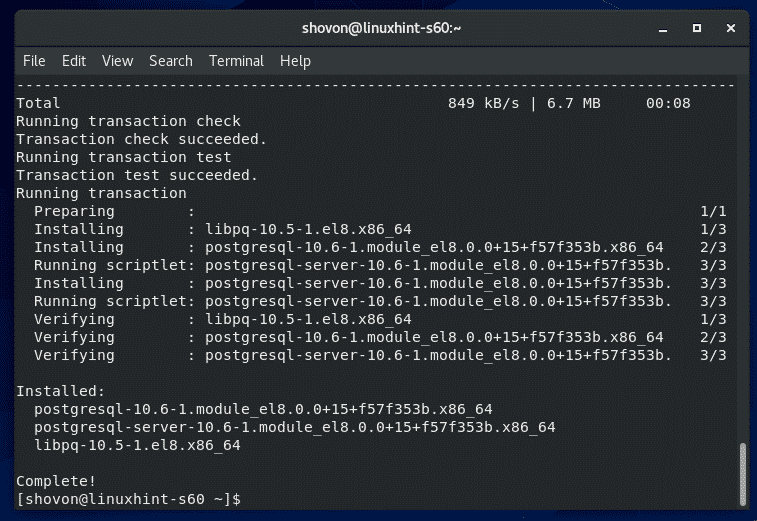
PostgreSQL database server should be installed.
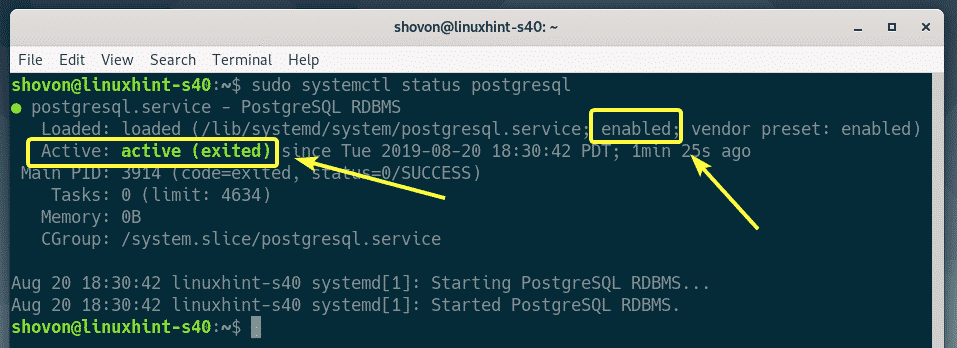
Once PostgreSQL database server is installed, run the following command to verify whether the PostgreSQL database server is working.

Initializing PostgreSQL Database Server:
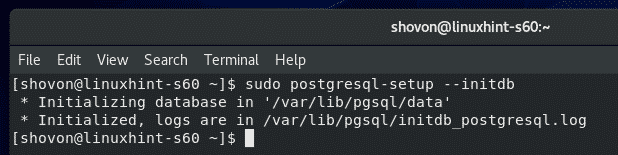
Once PostgreSQL database server is installed, you must initialize the PostgreSQL database directory.
You can initialize the PostgreSQL database directory with the following command:

PostgreSQL database directory should be initialized.
Managing PostgreSQL Database Service:
PostgreSQL database service will not be running by default as you can see in the screenshot below.
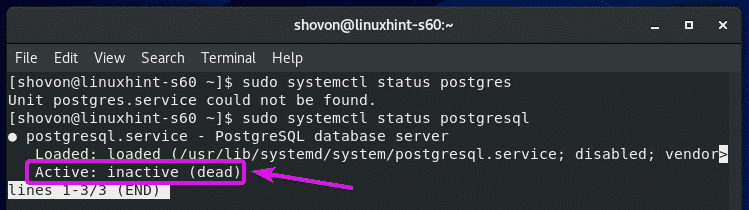
Once the PostgreSQL database directory is initialized, you have to start the PostgreSQL service manually as follows:

Once you start PostgreSQL database service, you can verify whether it’s running as follows:
As you can see, the PostgreSQL database service is running.
If you need to stop the PostgreSQL database service for some reason, run the following command:
If you need to restart the PostgreSQL database service for some reason, run the following command:
Starting PostgreSQL Server on System Startup:
If you don’t want to start PostgreSQL database server manually every time you boot your CentOS 8 machine, you must add it to the system startup of CentOS 8.
To add PostgreSQL database server to the system startup, run the following command:

PostgreSQL database server should be added to the system startup.

You can also remove PostgreSQL database server from the system startup as follows:
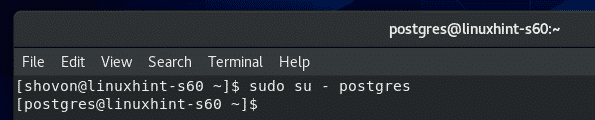
Login in as posgres User:
In order to run any PostgreSQL database service, you will have to login as the postgres user.
You can login as the postgres user as follows:
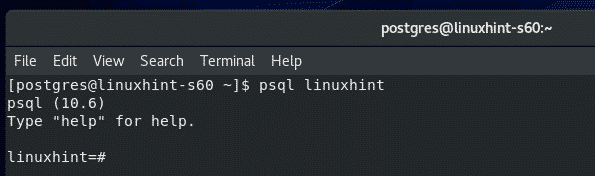
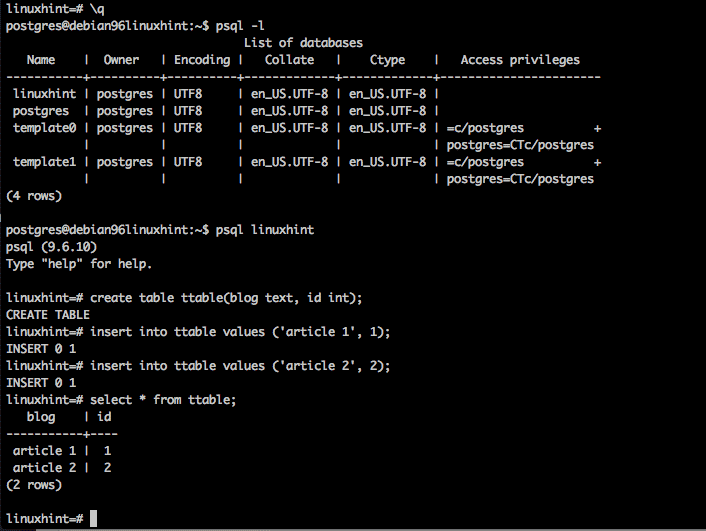
Creating a PostgreSQL Database:
You can create a PostgreSQL database (let’s call it linuxhint) with the following command:

Now, you can use the linuxhint database as follows:
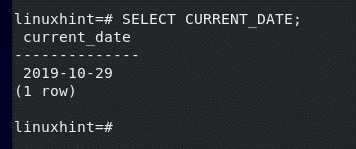
Let’s run a SQL query and test whether it works or not.
It works.
Once you’re done using the database, exit out of the database as follows:

Creating PostgreSQL Database:
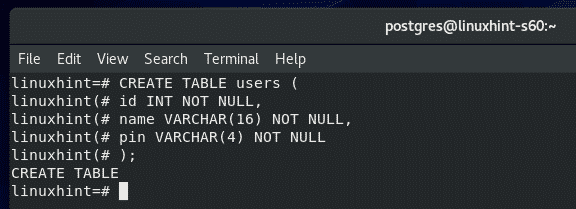
Now, let’s create a new table users in our linuxhint database.
Here is the SQL statement to create the table users. Copy and paste the SQL statements in the PostgreSQL shell to create a new table users.
id INT NOT NULL,
name VARCHAR(16) NOT NULL,
pin VARCHAR(4) NOT NULL
);
The users table should be created.
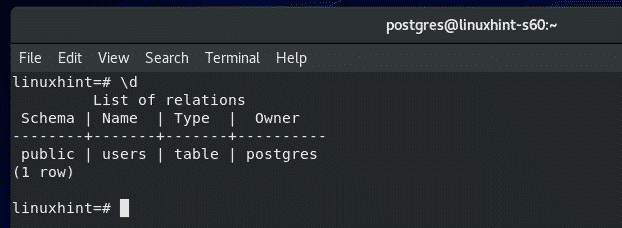
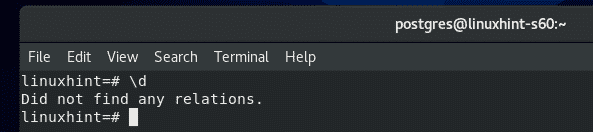
You can list all the available tables in your database as follows:
As you can see, the users table is in the list.
You can also see the schema of the users table as follows.

Inserting Data into Tables:
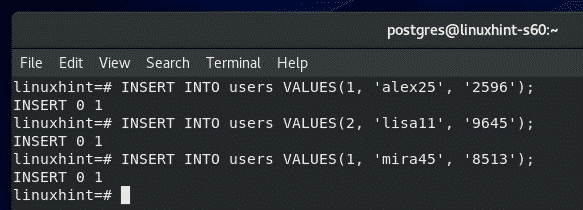
Now, let’s insert some new rows into the users table.
To insert new rows into the users table, you can run the following INSERT SQL statements.
INSERT INTO users VALUES(2, 'lisa11', '9645');
INSERT INTO users VALUES(1, 'mira45', '8513');
I’ve inserted 3 new rows into the users table.
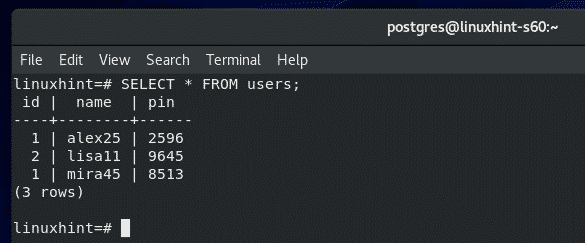
Reading Data from Tables:
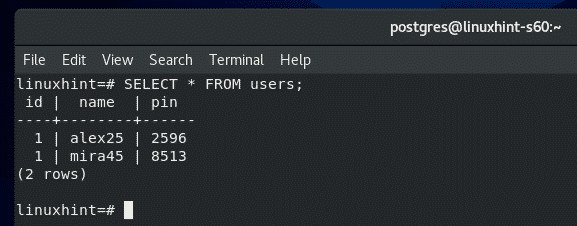
Now, to select all the rows from the users table and print them on the console, run the following SQL statement.
As you can see, the data I’ve inserted earlier is printed on the console in tabular format.
Removing Data from Tables:
To delete a row from the users table with the name ‘lisa11’ (let’s say), run the following SQL statement:

As you can see, that row is not in the users table anymore.
Updating Data from Tables:
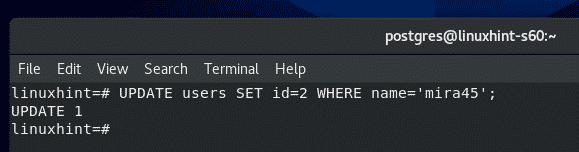
Let’s say, you want to update the id of ‘mira45’ of the users table from 1 to 2.
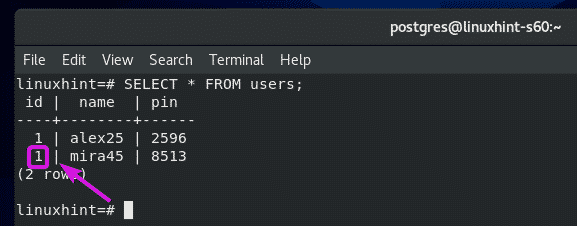
To do that, run the following SQL statement:
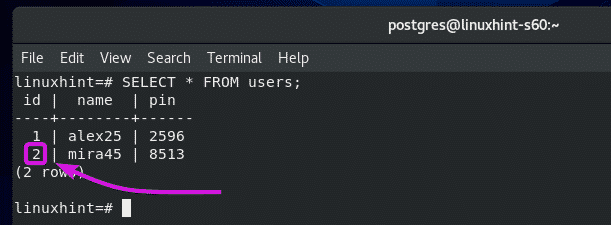
As you can see, the id of ‘mira45’ is updated from 1 to 2.
Removing Tables:
To remove the table users, run the following SQL statement:
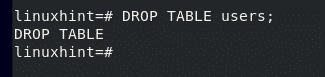
The table should be removed.
Deleting Databases:
To delete the database linuxhint, run the following command as postgres user.

The database linuxhint should be removed.
So, this is how you install PostgreSQL and do basic PostgreSQL CRUD operations on CentOS 8. Thanks for reading this article.
]]>Available for more than 20 years now, PostgreSQL has proven its remarkable reliability in use cases ranging from small to huge datasets. The list of satisfied commercial and non-commercial users is quite long, and among others it includes the United Nations Children’s Fund (UNICEF), the Creative Commons archive, Skype, and the BMW Group.
Its built-in transaction management model as well as the set of geometric data types helped to stand out the software from other developments such as MySQL/MariaDB, Redis , or SQLite . In this article we focus on the setup of PostgreSQL 11.5 in combination with PostGIS 2.5 .
PostGIS is the spatial extension of PostgreSQL which adds both geometric functions and geographic features to PostgreSQL. Simply speaking, these spatial datatypes act as shapes, and both abstract and encapsulate spatial structures such as boundary and dimension. Among others, newly available datatypes are Point, Surface, and Curve.
One of the most prominent users of PostGIS is the Institute Géographique National (IGN) of France which collects, integrates, manages and distributes reference geographical information for the entire country. Since July 2006, PostGIS is in extensive use. Up to now the IGN’s database holds more than 100 million spatial objects.
We will set up PostgreSQL/PostGIS on Debian GNU/Linux 10 “Buster” using the XFCE desktop environment .
Setting up PostgreSQL
Setting up the PostgreSQL DBMS on a Debian GNU/Linux requires only a moderate level of knowledge of system administration. The challenge here is the right order of steps that are required (see for a full list with images). As with every other Linux distribution, there are default settings and package names that can be a bit troublesome. We don’t moan, and just start, instead.
Installing PostgreSQL as a software
Step one is the installation of the PostgreSQL package. In a terminal you can do that as follows:
Using the Chef configuration management system, a basic recipe that leads to the same result contains just the following lines:
service ‘postgresql’ do action : [ :enable, :start ] end
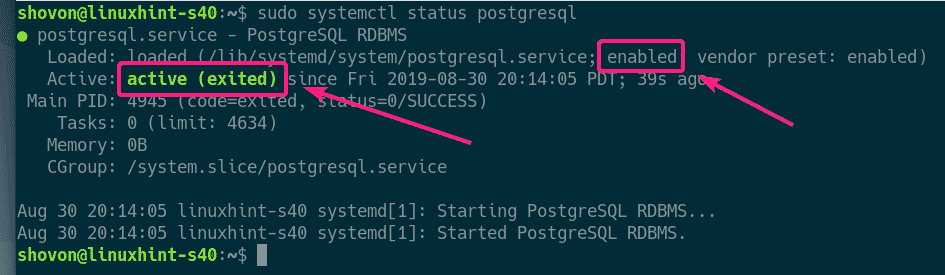
These lines lead to the installation of the postgresql package (plus package dependencies), and enabling the according service. In order to check the PostgreSQL service for being running, this command should give you a positive output, then:
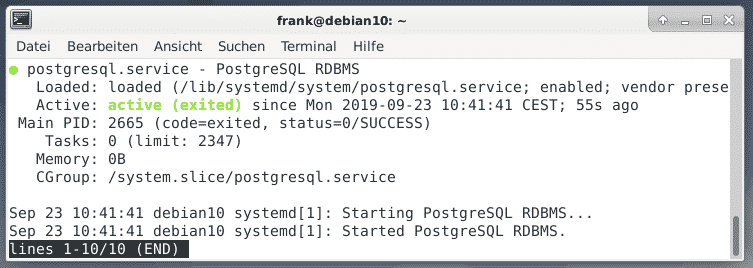
Completing the setup for the administrator’s account
The user postgres administrates the PostgreSQL databases. Step two is finalizing this account, and begins with adding a password to his credentials as follows:
New password:
Retype new password:
passwd: password updated successfully
#
Logging in as the user postgres allows you to grant other users access to the PostgreSQL database. Subsequently, we have to add a user in step three. Please be aware of the fact that both the Linux system and PostgreSQL keep their user databases separately. That’s why you have to make sure that a regular Linux user with the same name exists on your system, too, before enabling access to PostgreSQL for him.
Adding a user account
Step four is done as the user postgres. Change from root to postgres, and create a new account for the user linuxhint in the PostgreSQL database with the help of this command:
Shall the new role be a superuser? (y/n) n
Shall the new role be allowed to create databases? (y/n) n
Shall the new role ve allowed to create new roles? (y/n) n
postgres $
Next, set a password for the newly created user linuxhint. Login to the database shell using psql, and set the new password using the command \password. After that type in \q in order to quit the database shell, and to return to the shell in the terminal:
Step five is the creation of a separate database for the user linuxhint. In order to do so type in the command createdb as user postgres:
Now, the user linuxhint has its own database, and can work with it according to his needs.
Adding PostGIS
Step six consists of the installation of the PostGIS package. As done for PostgreSQL before, it can be done as follows using apt-get:
Alternatively, a simple recipe for Chef would be this one:
action :install
end
The PostGIS package has a dependency for the Debian package postgresql-11-postgis-2.5-scripts (automatically installed) that connects PostGIS to PostgreSQL, and eliminates a number of manual steps needed in other distributions. No matter which one of the two installation methods you choose – apt-get or Chef – , the Debian package management will make sure that all the depending packages are both installed, and configured correctly.
Step seven is the enabling of the PostGIS extension. As explained in the PostGIS documentation, do not install it in the database named postgres as this one is in use for the internal datastructures of PostgreSQL, and only enable it in each user database you actually need it in. Login as the user postgres, connect to the desired database, and create the two extensions postgis and postgis_topology as shown below. The command \c connects you to the desired database, and CREATE EXTENSION makes the desired extension available:
Now you are connected with the database “linuxhint” as user “postgres”.
Step seven is for validation that the activation of the extension was successful. The PostgreSQL command \dx lists the extensions that are installed, and both postgis and postgis_topology should be in the list, now.
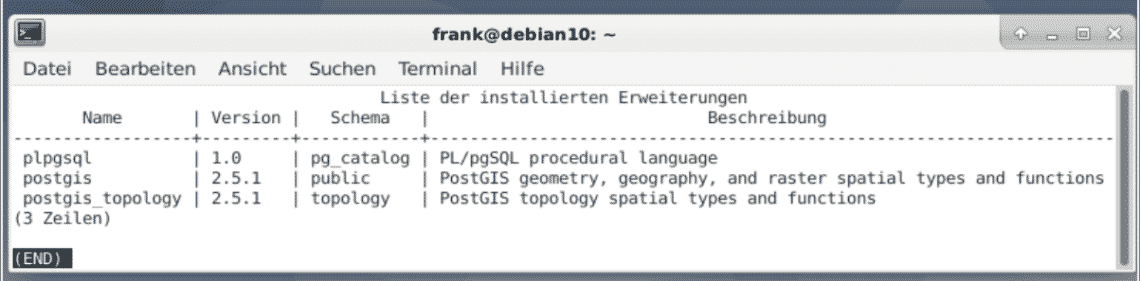
PostGIS provides other extensions, too. We recommend to install only what you need. See the PostGIS documentation for more information regarding the extensions.
Adding Data
Having setup PostGIS successfully it is time to add tables, and fill them with data. Quite a lot of geographic data is available online for free, for example from Geofabrik. The data is provided as shape files which is a common vector data format for GIS software.
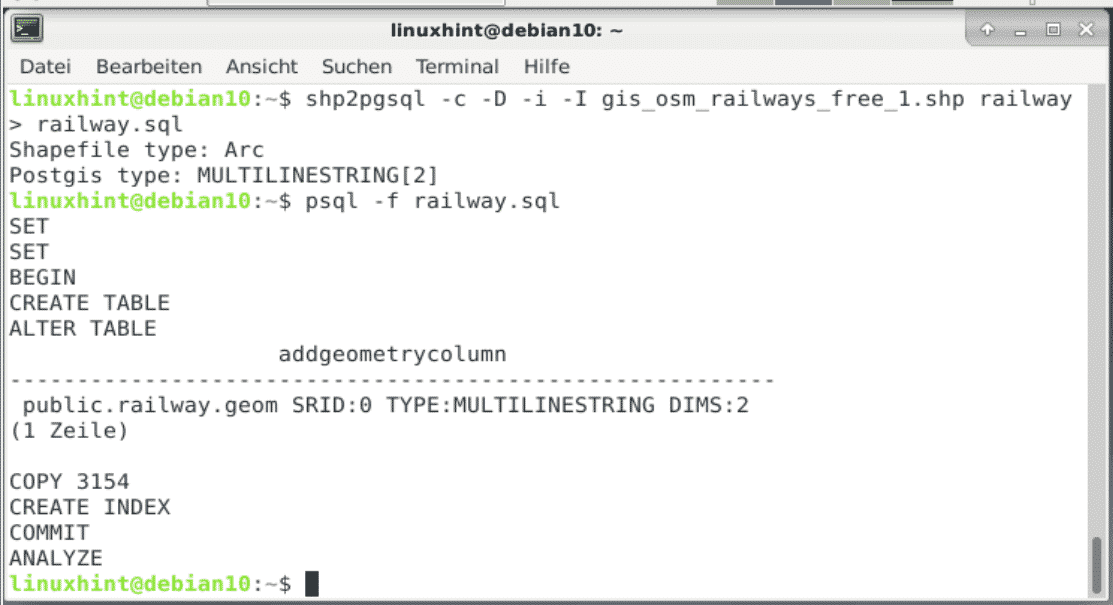
Having downloaded the shape file, load the content of the shape file into PostGIS with the help of the special commandline tool shp2pgsql. The example below demonstrates how to convert the shape file into a sequence of SQL commands, first, and upload the list of SQL commands to the database using psql, next:
Shapefile type: arc
Postgis type: MULTILINESTRING[2]
linuxhint $
linuxhint $ psql -f railway.sql
The figure below shows the output that is printed on screen as soon as you upload the data.
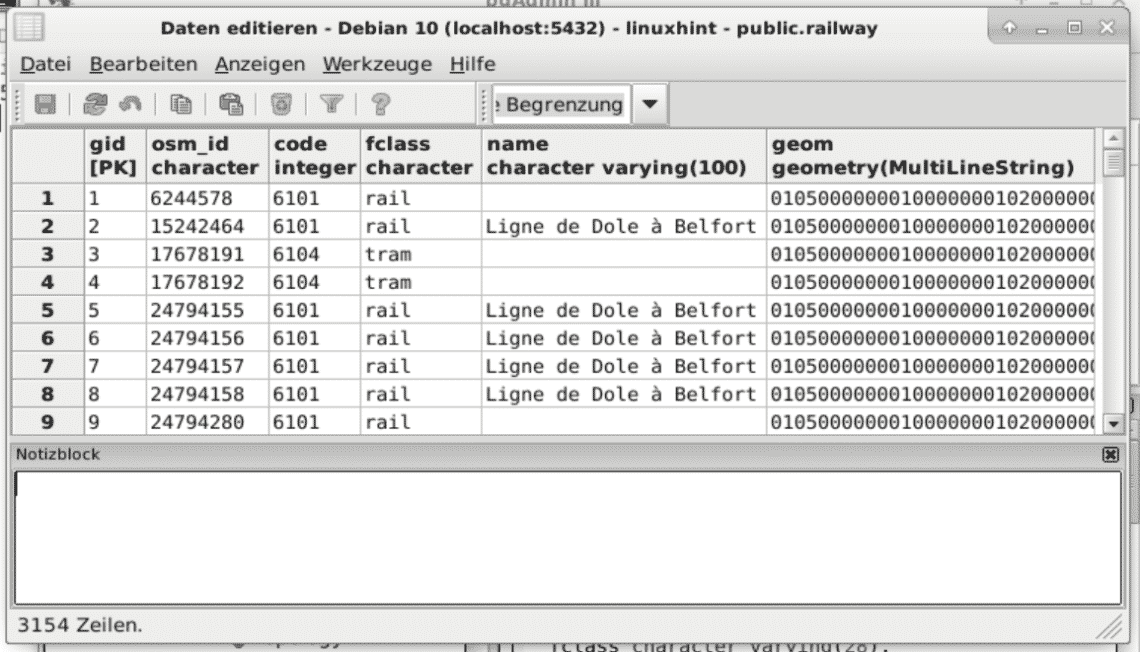
Now, PostgreSQL/PostGIS is at your service, and ready to recieve your SQL queries. For example, pgadmin allows you a look under the hood within minutes. The figure below shows this for the uploaded data. The rightmost column has a geometric type MultiLineString.
Conclusion
Setting up PostgreSQL/PostGIS is not rocket science. With the steps explained above you can do this in less than an hour, and have results quickly. Et voila!
Links and References
]]>In this article, I am going to show you how to install pgAdmin 4 on Debian 10 Buster. So, let’s get started.
Adding Official PostgreSQL Package Repository:
pgAdmin 4 is not available in the official package repository of Debian 10 Buster. But, you can easily add the official package repository of PostgreSQL on Debian 10 and install pgAdmin 4 from there.
First, update the APT package repository cache with the following command:
Now, install curl, ca-certificates and gnupg packages with the following command:
![]()
Press Y and then press <Enter> to confirm the installation.
curl, ca-certificates and gnupg should be installed.

Now, add the GPG key of the PostgreSQL official package repository to the APT package manager with the following command:
![]()
The GPG key should be added to the APT package manager.

Now, add the official PostgreSQL package repository on your Debian 10 machine with the following command:
| sudo tee /etc/apt/sources.list.d/postgresql.list

The official PostgreSQL package repository should be added.

Now, update the APT package repository cache with the following command:
![]()
The APT package repository cache should be updated. As you can see, the official package repository of PostgreSQL is in the list. So, the official package repository of PostgreSQL is active.
Installing PostgreSQL:
To use pgAdmin 4, you need to have at least one PostgreSQL database server. You can have it installed on a different computer than where you have pgAdmin 4 installed. You can also install PostgreSQL database and pgAdmin 4 on the same computer.
In this article, I am going to install PostgreSQL and pgAdmin 4 on the same Debian 10 computer.
To install the latest stable version of PostgreSQL (PostgreSQL 11 at the time of this writing), run the following command:
![]()
Now, press Y and then press <Enter> to confirm the installation.

PostgreSQL should be installed.

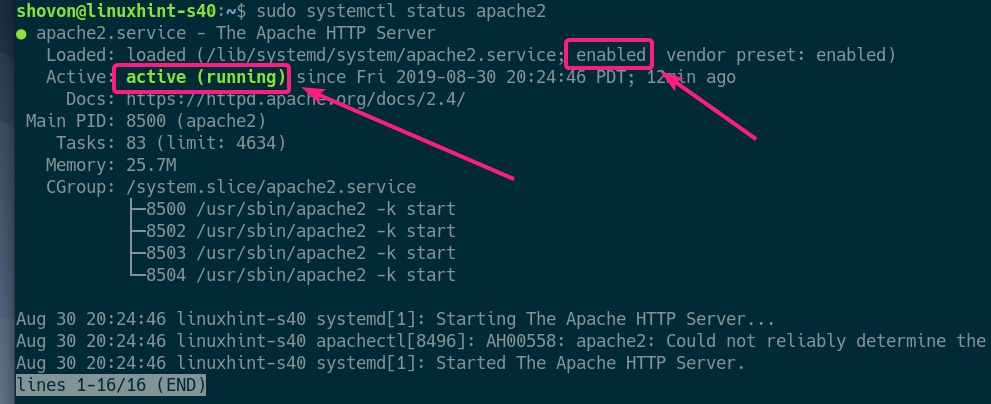
Now, check whether postgresql service is active with the following command:
As you can see, postgresql service is active. It’s also enabled to start automatically on system boot.
If postgresql service is not active in your case, run the following command to start it.
Setting a Password for the postgres PostgreSQL User:
In order to access PostgreSQL from pgAdmin 4, you must set up a password for your PostgreSQL database user that you want to use for login in to the PostgreSQL database server. I will set up a password for the default PostgreSQL user postgres in this article just to keep things simple.
First, login as the postgres user with the following command:
![]()
Now, start the PostgreSQL shell with the following command:
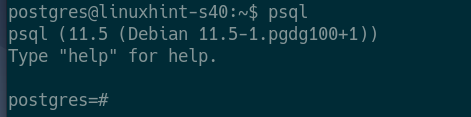
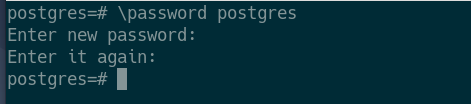
Now, set a password for the postgres database user as follows:
![]()
Now, type in a new password for the postgres user and press <Enter>.

Type in the same password again and press <Enter>.

Your desired password should be set for the postgres database user.
Now, exit out of the PostgreSQL shell as follows:

Now, log out of the postgres user’s shell as follows:

Installing pgAdmin 4:
Now, you can install pgAdmin 4 on your Debian 10 machine with the following command:
![]()
Press Y and then press <Enter> to confirm the installation.
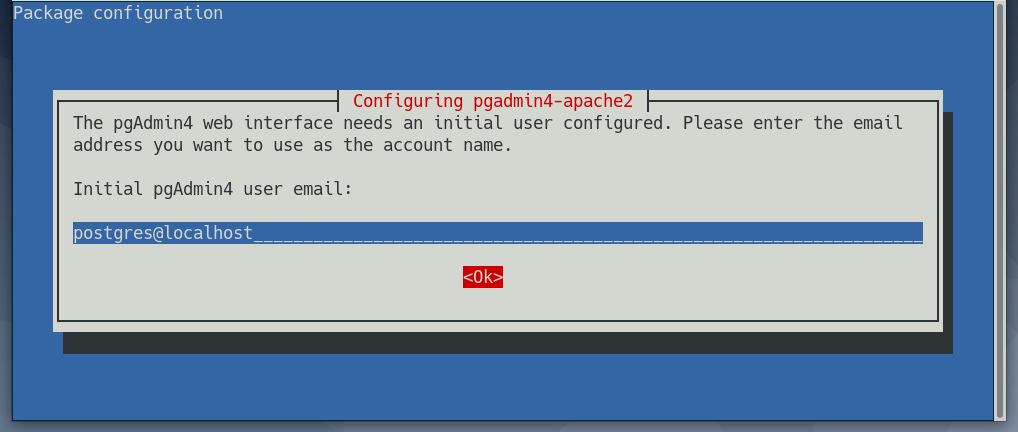
Now, type in an email address for pgAdmin 4 and press <Enter>. You will need this to login to the pgAdmin 4 web interface. If you don’t know what it is, then the default user email postgres@localhost is fine.
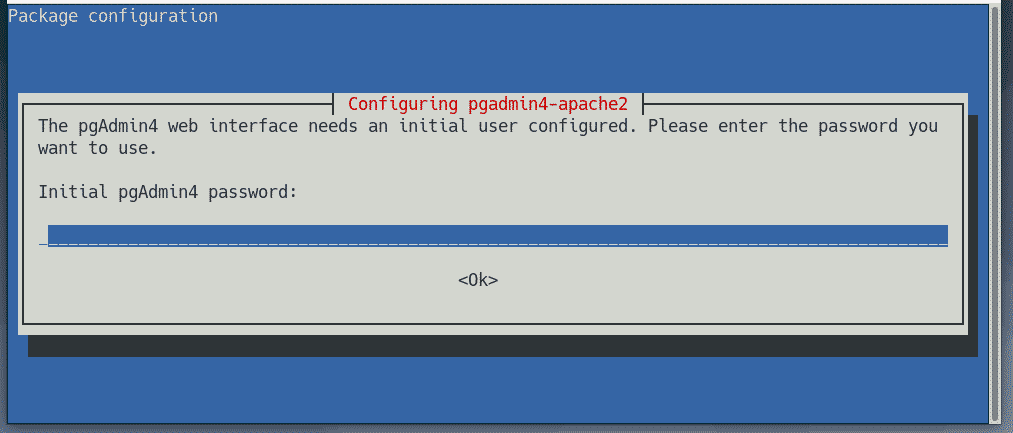
Now, type in a password for the user email of pgAdmin 4 and press <Enter>. Remember the password as you will need it to login to the pgAdmin 4 web interface.
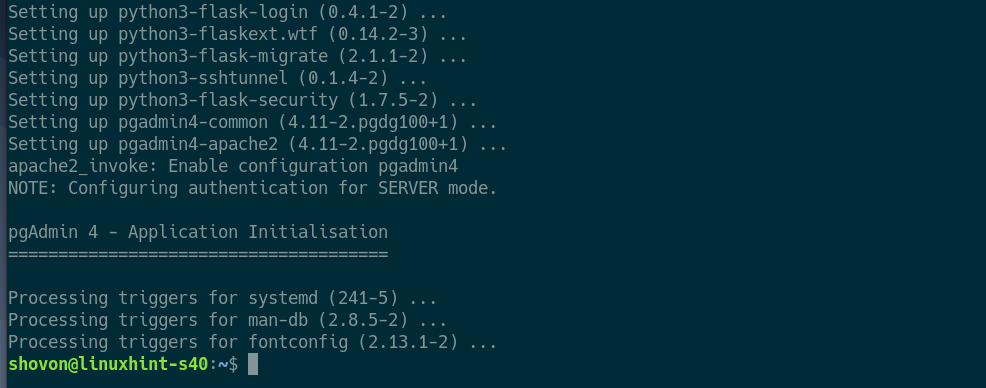
pgAdmin 4 should be installed at this point.
Now, check whether the apache2 service is running with the following command:
As you can see, the apache2 service is active/running and it’s also enabled to start on system boot automatically.
Accessing pgAdmin 4:
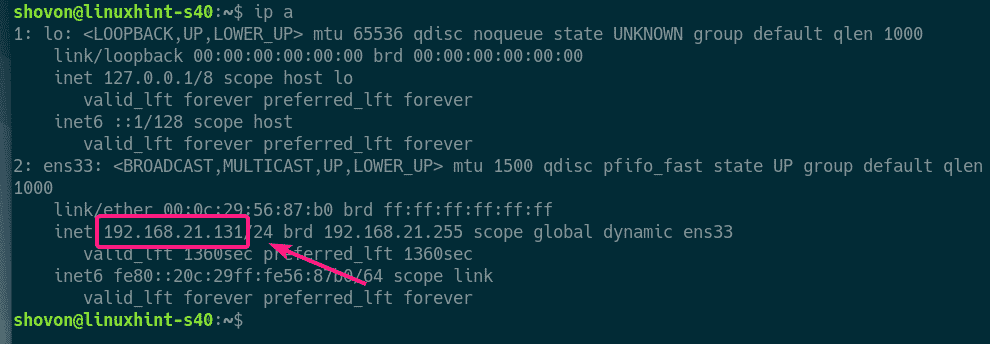
You can access pgAdmin 4 from any web browser. Just open a browser and visit http://localhost/pgadmin4 (for accessing locally) or http://<IP_ADDRESS>/pgadmin4 (for remote access)
NOTE: You can find the IP_ADDRESS of your Debian 10 machine where pgAdmin 4 is installed with the following command:
Once you visit the URL of the pgAdmin 4 web interface, you should see the following page. Now, type in the user email and password you’ve set up during the installation of pgAdmin 4 and click on Login.
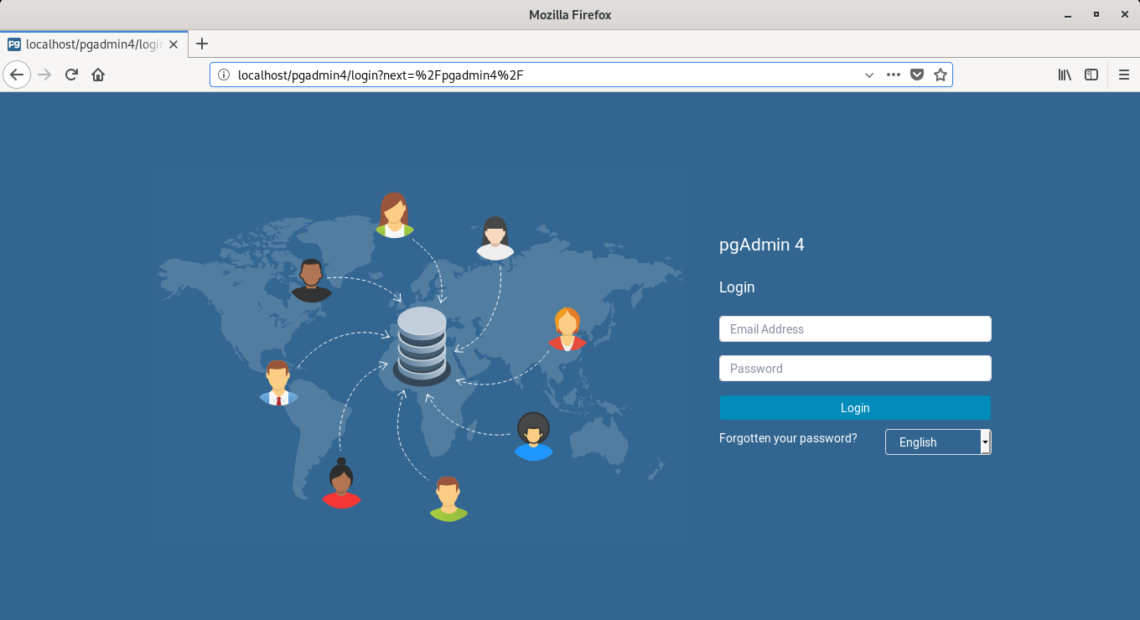
You should be logged in.
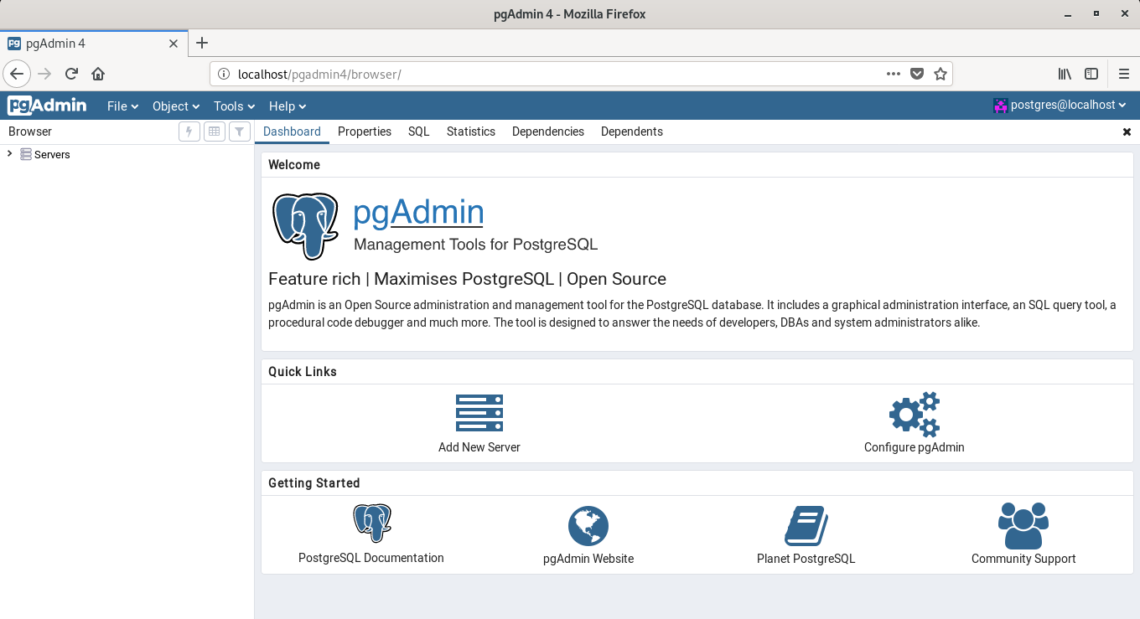
Adding PostgreSQL Servers to pgAdmin 4:
Now, you have to add at least one PostgreSQL database server in order to use pgAdmin 4.
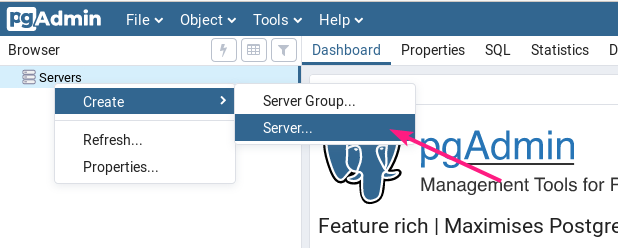
To add a new PostgreSQL database server, right click (RMB) on Servers and click on Create > Server… as marked in the screenshot below.
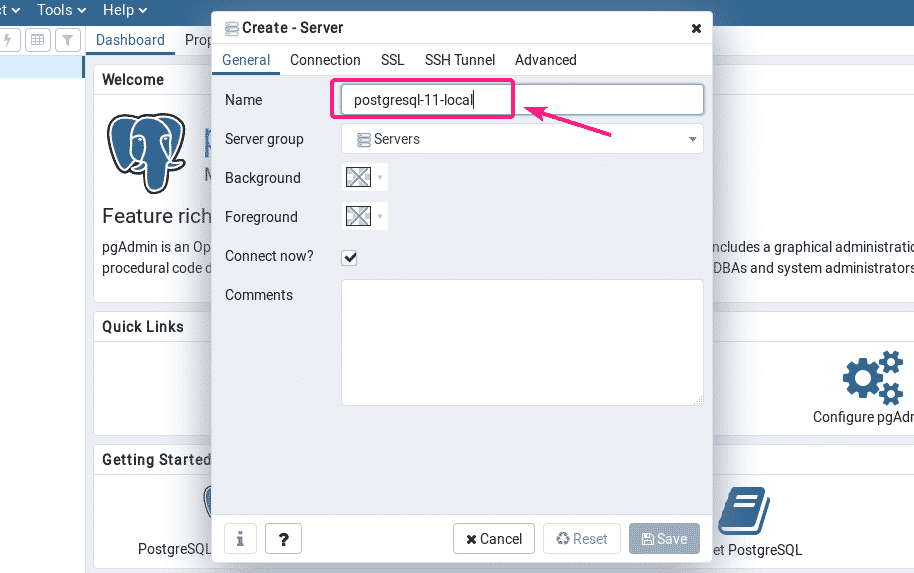
Now, in the General tab, type in a Name for your server.
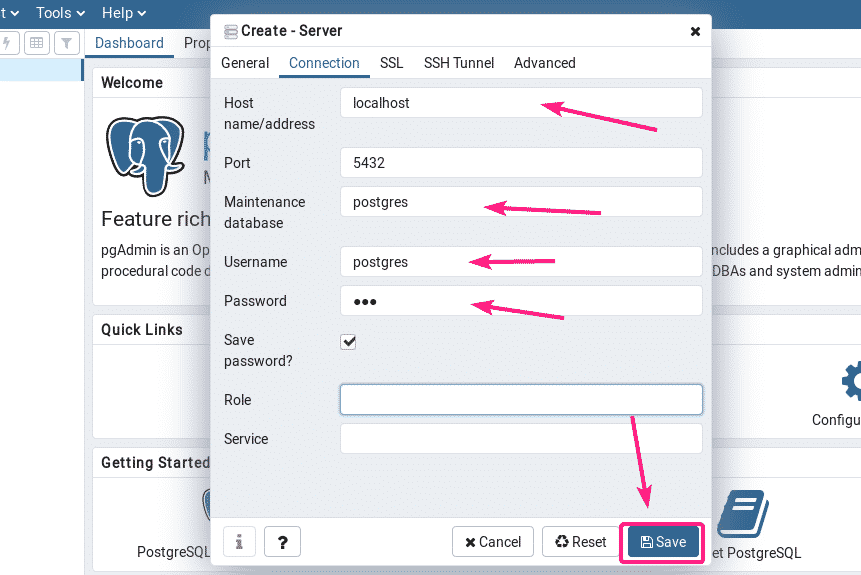
Now, go to the Connection tab and type in the host name or host IP, database name, username and password. If you’ve followed this article to setup a PostgreSQL database server as well, then the hostname should be localhost, and database name and username should be postgres, and the password should be what you’ve set up. Once you’re done, click on Save.
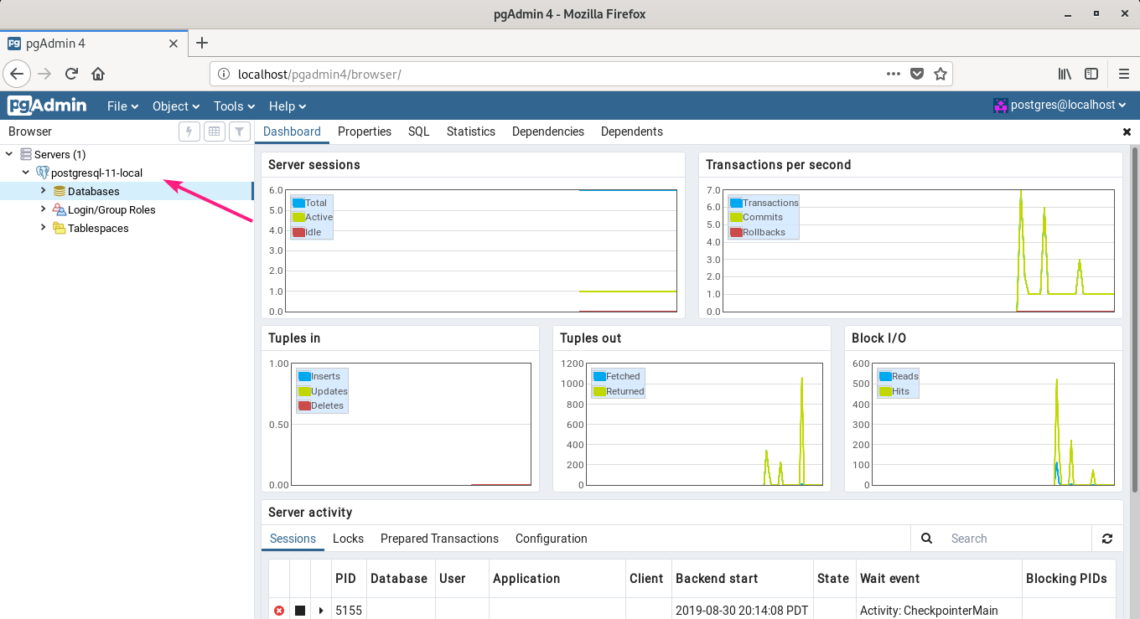
Your desired PostgreSQL database server should be added. Now, you can monitor the database server, create databases, create tables, insert data on tables and so on from the pgAdmin 4 web interface very easily.
So, that’s how you install pgAdmin 4 on Debian 10 Buster. Thanks for reading this article.
]]>Installing PostgreSQL:
The latest stable version of PostgreSQL is available in the official package repository of Debian 10 Buster. So, you can easily install PostgreSQL using the APT package manager.
First, update the APT package repository cache with the following command:

The APT package repository cache should be updated.
Now, install PostgreSQL with the following command:

Press Y and then press <Enter> to confirm the installation.

The APT package manager will download and install all the required packages.

At this point, PostgreSQL should be installed.

Now, print the version number of PostgreSQL with the following command:
As you can see, I am running PostgreSQL 11.5. It is the latest stable release of PostgreSQL at the time of this writing.

Managing PostgreSQL Service:
Once PostgreSQL is installed, check whether the postgresql service is running with the following command:

As you can see, the postgresql service is active. The service is also enable. So, it will start automatically on system boot.
If the postgresql service is not active in your case, you can start the postgresql server with the following command:
If the postgresql service is disabled, then it won’t start automatically on system boot. You can enable it with the following command:
Setting Up PostgreSQL Database User:
With the default configuration, you can use postgresql as only postgres user. So, you have to login as postgres user in order to execute any PostgreSQL command.
The postgres user don’t have any password set by default. So, you won’t be able to login as the postgres user.
To set a password for the postgres user, run the following command:

Now, type in a password and press <Enter>.

Re-type the same password and press <Enter> again.

A password should be set for the postgres user.

Now, to login as the postgres user, run the following command:

Type in the password that you’ve set for the postgres user and press <Enter>.

You should be logged in.

Creating a PostgreSQL Database:
Now, to create a new database linuxhint, run the following command:

Once the linuxhint database is created, login to the PostgreSQL shell with the following command:

You should be logged in to the PostgreSQL shell. Now, you can run necessary SQL statements and work with the linuxhint database.

As you can see, I ran a simple SQL statement and it worked correctly.

Once you’re done working with the database, you can exit out of the PostgreSQL shell as follows:

You should be back to the Linux shell.

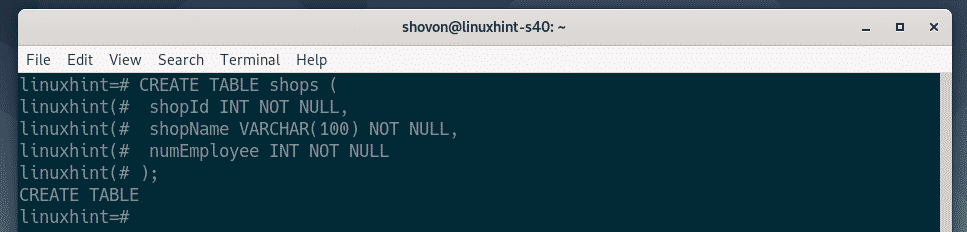
Creating a PostgreSQL Table:
Now, let’s create a new table shops in our linuxhint database.
Here is the SQL statement to create the table shops. Copy and paste the SQL statements in the PostgreSQL shell to create a new table shops.
The shops table should be created.
You can list all the available tables in your database as follows:
As you can see, the shops table is in the list.

You can also see the schema of the shops table as follows.

Inserting Data into Table:
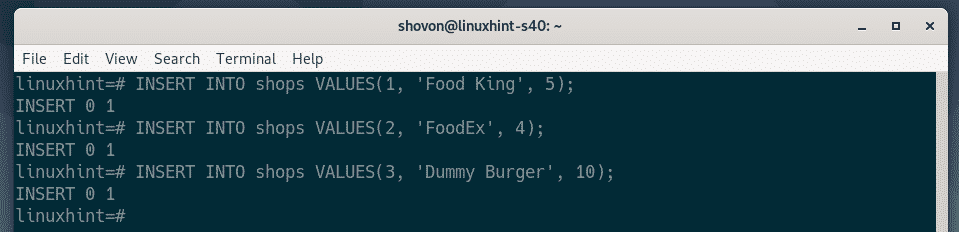
Now, let’s insert some new rows into the shops table.
To insert new rows into the shops table, you can run the following INSERT SQL statements.
The SQL statements ran successfully. I’ve inserted 3 dummy rows into the shops table. Great!
Selecting Data from Table:
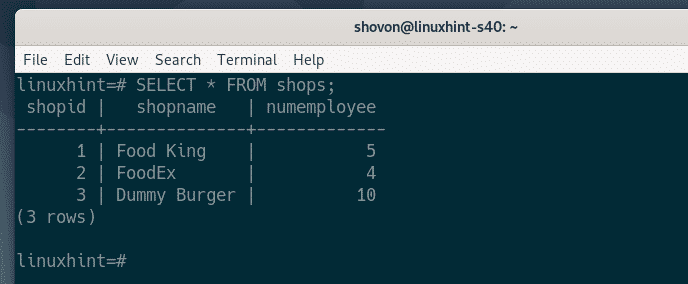
Now, to select all the rows from the shops table and print them on the console, run the following SQL statement.

As you can see, the 3 dummy rows I’ve inserted earlier is printed on the console in tabular format.
Deleting Data from Table:
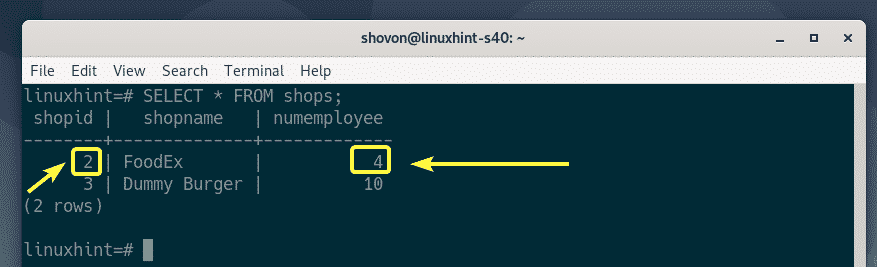
To delete a row from the shops table with the shopId 1 (let’s say), run the following SQL statement:

The row should be deleted from the shops table.

As you can see, the row is not in the shops table anymore.

Updating Table Data:
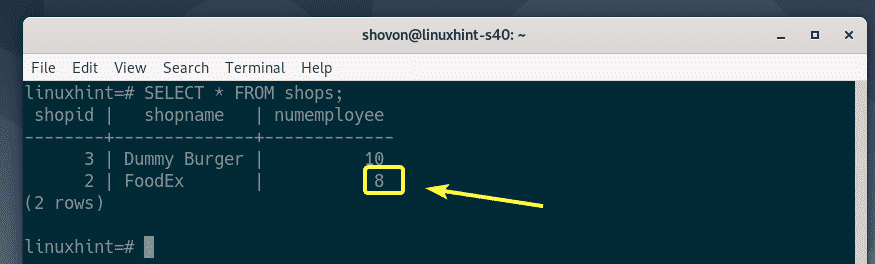
Let’s say, you want to update the numEmployee column from 4 to 8 (let’s say) for the shop with the shopId 2 of the shops table.
To do that, run the following SQL statement.

The row should be updated.

As you can see, the numEmployee for the shop with the shopId 2 is updated to 8.
Removing Table:
To remove the table shops, run the following SQL statement:

The table should be removed.

Deleting Database:
To delete the database linuxhint, run the following command as postgres user.

The database linuxhint should be removed.
So, this is how you install and use PostgreSQL on Debian 10. Thanks for reading this article.
]]>In this article I will demonstrate how to install PostgreSQL on Debian. We will use the latest stable versions of both Postgres and Debian at the time of this article, and I expect the process to not vary widely for several years making this tutorial still accurate. We will use the native repo of Debian and not any custom process to have a fully Debian experience. The current Debian version is 9.6 and the current PostgreSQL version is 9.6, released in 2016. Yes that is old, but we are going with the stable versions natively provided by Debian. Also its just a complete coincidence that both Debian and PostgreSQL have the same version number at this time, please don’t read anything into that other than pure coincidence. This will ensure the most stability which is recommended for mission critical usage. I will start with a fresh install of Debian on Digital Ocean in order to ensure the system is clean and the process is reproducible.
Prepare the System
Firstly, lets do a quick apt-get update and apt-get upgrade to ensure that the system has all packages already installed up to date.
$ apt-get upgrade
Install PostgreSQL
There are numerous PostgreSQL packages you can see by running apt-cache search. The package we want to install is called just postgresql. We will install it with apt-get install.
$ apt-get install postgresql
Run dkpg to verify the install was completed and PostgreSQL related packages are installed:

$ dpkg -l | grep postgre
On Debian platform, there is a convenience service to manage PostgreSQL. So we will not be running initdb or starting and stopping the database using native commands like pg_ctl. Check the help message for the PostgreSQL service by running the command:
Starting and Stopping PostgreSQL

$ service postgresql
Before we begin trying to start and stop the processes, lets verify the configuration files. On Debian the configuration files are installed via the postgresql-common package under the location /etc/postgresql.
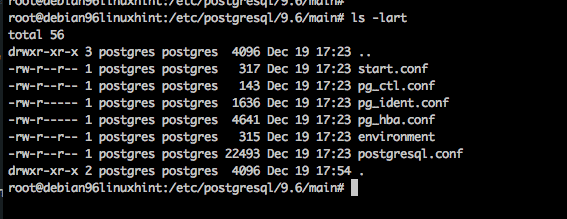
PostgreSQL Configuration Files
The postgresql.conf is the main database configuration file, where you can set custom settings for your installation. The pg_hba.conf is the access configuration file. These are started with sane and secure defaults for a Debian server. Notice the pg_hba.conf is configured for local access only, so you will need to update this file according to the documentation when you want to grant access to users or applications to connect to the database remotely.
Ok, lets practice stopping and starting the database with the provided service. With the service postgresql command you can provide the arguments stop, start, and status in order to control the server.
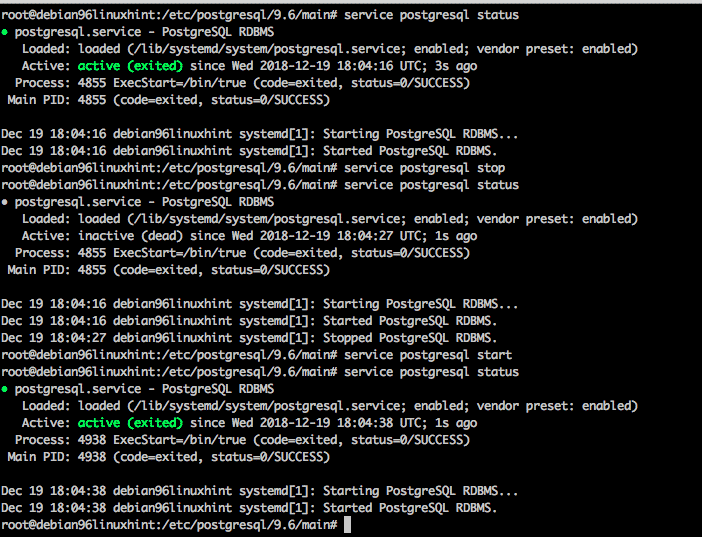
service postgresql start
service postgresql stop
service postgresql status
Connecting to the Database
By default PostgreSQL is installed in a fairly secure fashion. A linux user named postgres is created by default and this user has local access to connect to the database without any extra configuration steps. Even root can not login to the database by default. Let’s try to connect to the database as root user.
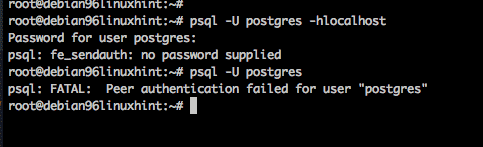
Root access denied
So rather, let us change linux user to the postgres user id, and then we can access the system.
$ psql -l
$ psql postgres
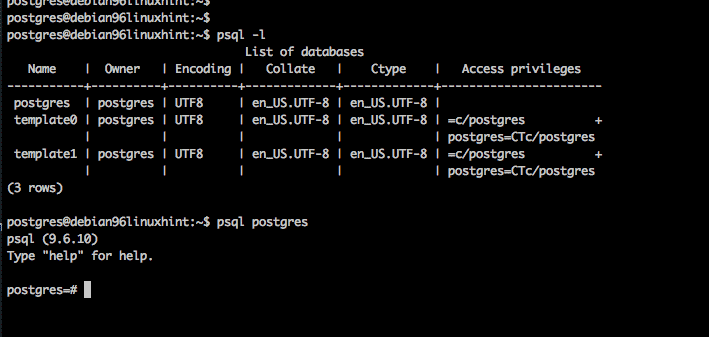
Login as linux user: postgres
To verify the system is working, let us create a database from the command line with the createdb utility. We will then update the pg_hba.conf, restart the database and connect to this database.
As user postgres, create the new database:
As user root, modify the pg_hba.conf to add the authentication for the new database.
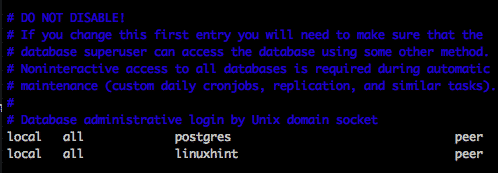
Updated pg_hba.conf as root
Then also as user root, reload the configuration files.
Finally change back to user postgres and test the new database. We will test by logging into linuxhint database, creating a table, adding 2 rows, and then querying the table. As shown below.
create test table
Conclusion
What you will finally want to do, is design your database schema and configure your pg_hba.conf in order to allow external access to your database and then you are off to the races. ]]>
While creating a table, you will have two options for your JSON column. Plain json data type and jsonb data type, both have their own advantages and disadvantages. We shall go through each of them, by creating a simple table with just 2 columns an ID and a JSON value. Following this we will query data from the table and get a feel for how to manage JSON formatted data inside Postgres.
JSON Data Type
1. Creating a Table with JSON Data Type
Let’s create a simple two column table named users:
id serial NOT NULL PRIMARY KEY,
info json NOT NULL
);
Here the column id acts as the primary key, and it will increase in an incremental fashion thanks to the pseudotype serial so we won’t have to worry about manually entering values for id as we go along.
The second column is of json type and is forced to be NOT NULL. Let’s enter a few rows of data to this table, consisting of JSON values.
‘{
"name": "Jane Doe",
"email": "[email protected]",
"personalDetails": {"age":33, "gender":"F"}
}’);
INSERT INTO users (info) VALUES (
‘{
"name": "Jane Doe",
"email": "[email protected]",
"personalDetails": {"age":33, "gender":"F"}
}’);
You can use your prefered JSON beautifier/minifier to convert the JSON payloads above into a single line. So you can paste it at a go into your psql prompt.
id | info
----+------------------------------------------------------
1 | {"name": "John Doe", "email": "[email protected]"...}
2 | {"name": "Jane Doe", "email": "[email protected]"...}
(2 rows)
The SELECT command at the end showed us that the rows were successfully inserted into the users table.
2. Querying JSON Data Type
Postgres allows you to dig into the JSON payload itself and retrieve a particular value out of it, if you reference it using the corresponding value. We can use the -> operator after the json column’s name, followed by the key inside the JSON object. Doing so
For example, in the table we created above:
----+----------------------------------------
id | ?column?
----+----------------------------------------
1 | "[email protected]"
2 | "[email protected]"
You may have noticed the double quotes in the column containing emails. This is because the -> operator returns a JSON object, as present in the value of key “email”. Of course, you can return just text, but you will have to use the ->> operator instead.
id | ?column?
----+----------------------------------------
1 | [email protected]
2 | [email protected]
The difference between returning a JSON object and a string becomes clear once we start working with JSON objects nested inside other JSON objects. For example, I chose the “personalDetails” key to intentionally hold another JSON object. We can dig into this object too, if we want:
?column?
----------
"M"
"F"
(2 rows)
This can let you go as deep into the JSON object as you would want to. Let’s drop this table and create a new one (with the same name) but with JSONB type.
JSONB Data Type
Except for the fact that during creation of the table we mention jsonb data type instead of json, all else looks the same.
id serial NOT NULL PRIMARY KEY,
info jsonb NOT NULL
);
Even the insertion of data and retrieval using the -> operator behaves the same way. What has changed is all under the hood and noticeable in the table’s performance. When converting JSON text into a jsonb, Postgres actually turns the various JSON value types into native Postgres type, so not all valid json objects can be saved as valid jsonb value.
Moreover, jsonb doesn’t preserve the whitespaces, order of json keys as supplied by the INSERT statement. Jsonb actually converts the payload into native postgres binary, hence the term jsonb.
Of course, insertion of jsonb datum has a performance overhead because of all these additional work that postgres needs to do. However, the advantage that you gain is in terms of faster processing of the already stored data, since your application would not have the need to parse a JSON payload everytime it retrieves one from the database.
JSON vs JSONB
The decision between json and jsonb sole depends on your use case. When in doubt use jsonb, since most applications tend to have more frequent read operations that write operations. On the other hand, if you are sure that your application is expected to do more synchronous write operations than read, then you may want to consider json as an alternative.
Conclusion
People working with JSON payloads and designing interfaces for Postgres storage will benefit immensely from this particular section of their official documentation. The developers were kind enough to furnish us with jsonb indexing and other cool features which can be leveraged to improve the performance and simplicity of your application. I implore you to investigate these as well.
Hopefully, you found this brief introduction of the matter helpful and inspiring.
]]>
You can easily interact with PostgreSQL database with Python programming language. All you have to do is install the Python module psycopg2 with PIP and you are good to go.
In this article, I will show you how to access PostgreSQL database with Python on Linux. I am going to use Debian 9 Stretch as my operating system and Python 3 programming language. The PostgreSQL database version I am going to use is PostgreSQL 9.6. So Let’s get started.
Pre-requisites:
You must have
- Any modern Linux distribution such as Ubuntu/Debian/CentOS etc installed.
- Python programming language installed.
- PIP or PIP3 installed depending on the version of your Python.
- PostgreSQL installed.
You can find many articles on linuxhint.com that may help you set up PostgreSQL and install Python+PIP on your favorite Linux distribution. Just search for it.
Creating a PostgreSQL Database and User:
In this section, I will show you how to create a PostgreSQL database and user on Linux. We will be connecting to this database from Python later in this article.
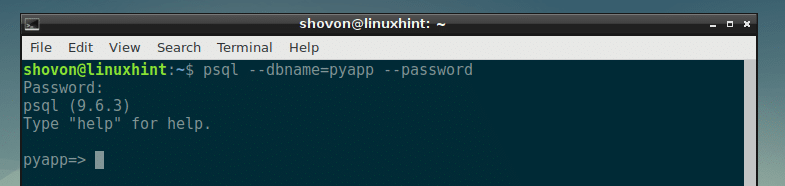
First find out your login username with the following command:
As you can see, my login username is shovon. Yours will be different. Make sure you take a note of it as you will need it later.

Now start the PostgreSQL interactive terminal with the following command:

The PostgreSQL interactive terminal should start.

Now create a PostgreSQL database pyapp with the following SQL command:
![]()
The pyapp database should be created.

Now you have to create a new PostgreSQL user. Also, make sure that the username is the same as your login username.
Make a new PostgreSQL user with the following SQL command:
NOTE: replace your_login_username and your_password with your own login username and password.

The PostgreSQL user should be created.

Now grant the newly created user all the privileges to the newly created database pyapp with the following SQL command:

All the privileges for the pyapp database are granted to your login user.

Now exit out of the PostgreSQL terminal with the following command:

Now let’s see whether we can login to our newly created database pyapp using our login username with the following command:

Now type in the password that you set earlier for your PostgreSQL user and press <Enter>.

You should be logged in.
Installing psycopg2 with PIP and PIP3:
Now it’s time to install psycopg2 Python module.
If you’re using Python 3, then run the following command to install psycopg2:

If you’re using Python 2, then run the following command to install psycopg2:
psycopg2-binary PIP module should be installed.

Creating the Project Directory:
Now create a project directory, pyapp with the following command:

And navigate to the directory with the following command:

This is where I will create all the Python script to access PostgreSQL database.
Connecting to the PostgreSQL Database:
First, create a python program connect.py in your project directory.
Now type in the following lines and save the file.
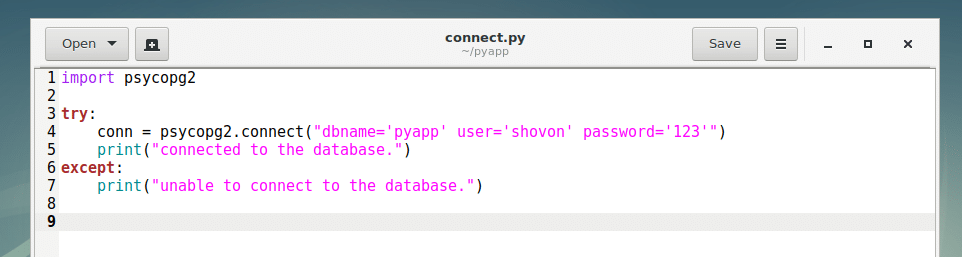
Now run the script connect.py with one of the following command:
For Python 3:
For Python 2:
As you can see, I am connected to the database.

Here on line 1, the psycopg2 module is imported. In line 4, psycopg2.connect() method is used to connect to the PostgreSQL database. A try-except block is used to catch errors if in case something goes wrong and connection to the database fails.
Executing SQL Commands:
In this section, I will create a simple table users using Python psycopg2
Type in the following code to a new Python script create_table.py and save it.
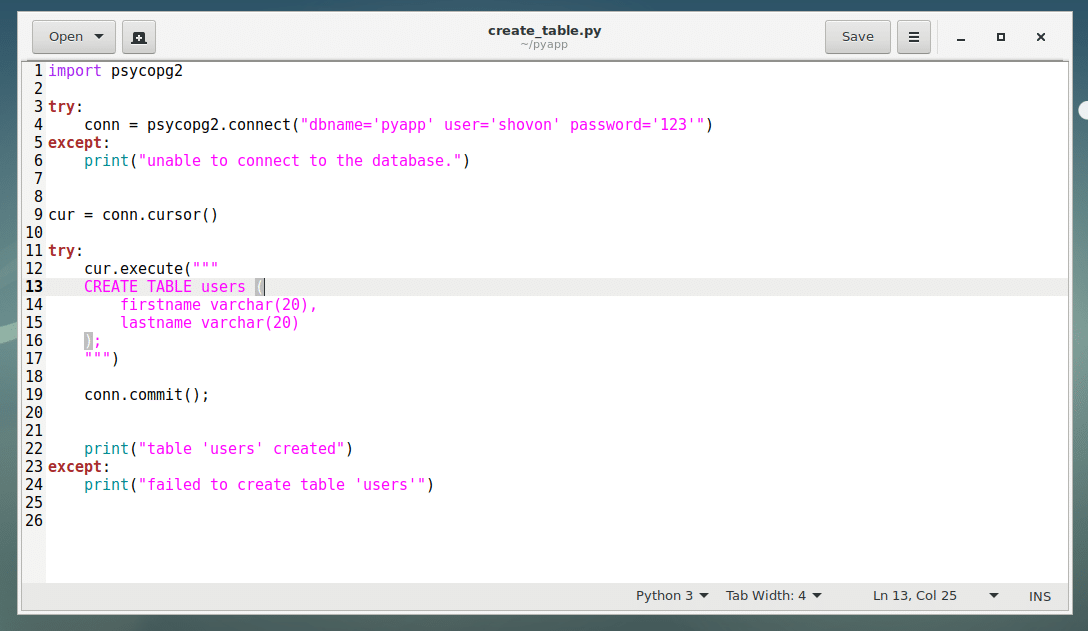
Now run the script:
As you can see, the table users is created.

With psycopg2, if you want to execute a SQL command, first you have to create a cursor.
On line 9, I created a cursor with conn.cursor() method and stored it to cur variable. Here conn is the variable where I stored the database connection from psycopg2.connect() method.
Then you execute SQL command with the cursor as cur.exec(“YOUR_SQL_GOES_HERE”), which I did on line 12-17 to create an users table.
If your SQL command makes changes to the database you’re connected to, then you have to call conn.commit() method to make the changes permanent as I did in line 19.
Inserting Data to PostgreSQL Database:
Now that you have users table ready, let’s insert some data into the table.
Create a new file insert.py into your project’s directory and type in the following codes and save the file.
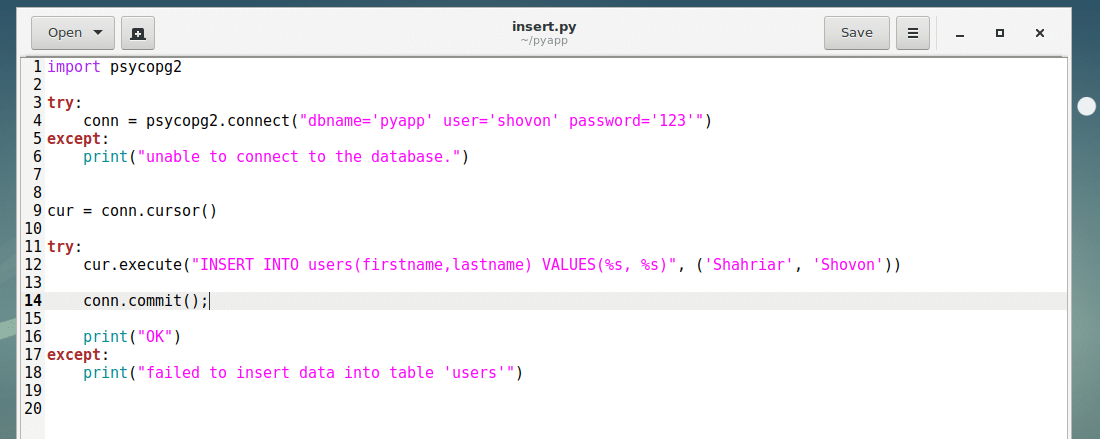
Now run the Python script insert.py as follows:
The data should be inserted.

As you can see in the PostgreSQL terminal.

In the insert.py script, line 12 cur.execute() method runs the SQL query to insert into the users table. The %s’s are replaced by the strings from the tuple, the second parameter of the cur.execute() method.
The first occurrence of %s is replaced by the first element of the tuple, the second %s is replaced by the second element of the tuple and so on. You can also mix data types if you want. For example, %d represents integer.
Fetching Data from PostgreSQL Database:
Now you can fetch the data that you inserted into the PostgreSQL database.
First create a new Python script fetch.py and type in the following lines of code. Then save the file.
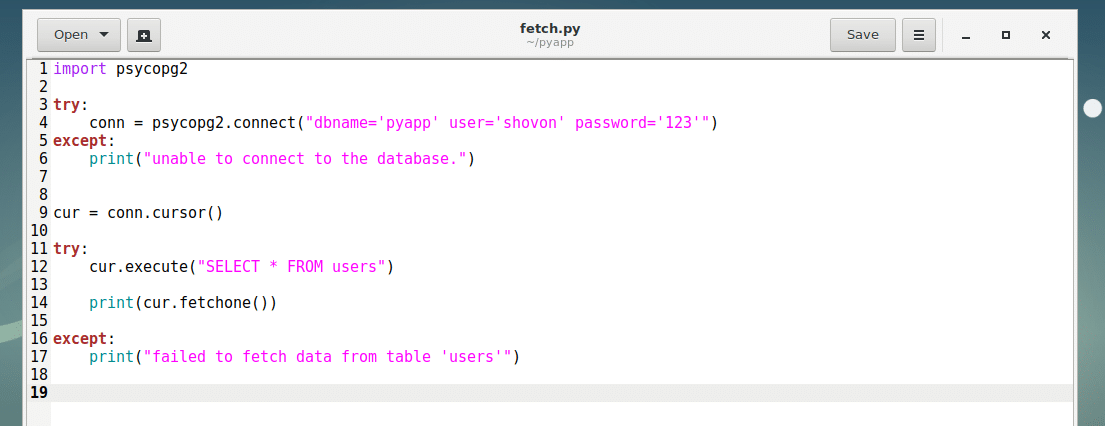
Now run the script fetch.py with the following command:
As you can see, the data I inserted is fetched. It’s returned as a tuple, which is kind of like an array.

In the fetch.py script, everything is similar as in other scripts. Here, cur.fetchone() method is used to return the first row of the table. If you have many rows, then you can keep calling cur.fetchone() to iterate through the list. When all the rows are returned, cur.fetchone() will return None.
Thanks for reading this article.
]]>In this article, I will show you how to setup PostgreSQL 11 replication. Let’s get started.
How Does Replication Works in PostgreSQL:
In a PostgreSQL replication setup, you have 2 types of servers. The Master server and the Slave server.
The database records of the Master server are duplicated to the Slave servers. You can read from the Slave servers using the IP addresses of the Slave servers. But you add new data only to the Master server. The servers are all synced up. So if any of the Master server fails, one of the Slave servers can take over and become a new Master. That’s how PostgreSQL can handle database request without any interruption even if some of the servers fail in a Master/Slave configuration.
Network Diagram:
This is the network diagram for the PostgreSQL Master/Slave replication setup. Here I have two servers, pg-master is the Master PostgreSQL server and pg-slave is the Slave PostgreSQL server. Of course, you can have more Slave server, but for the sake of simplicity I am going to have one Slave server.

My pg-master PostgreSQL Master server has the IP address 192.168.199.137 and the pg-slave PostgreSQL Slave server has the IP address 192.168.199.138. Remember these and make changes where necessary for your setup.
Installing PostgreSQL:
For the demonstration, I am using Ubuntu 18.04 LTS server. You can use any Linux distribution you want. Just the commands are a little bit different. That’s all.
You have to install PostgreSQL on all the servers that will be a part of the replication setup. In my case, the two servers pg-master, and pg-slave.
I will show you how to install PostgreSQL on pg-master machine. The steps are the same for the pg-slave machines as well.
On the pg-master server:
First you have to add the PostgreSQL package repository on your Ubuntu machine. To do that, run the following command:
sudo tee /etc/apt/sources.list.d/pgsql.list

The PostgreSQL package repository should be added.

Now run the following command to add the GPG key of the PostgreSQL package repository:

The GPG key should be added.

Now update the APT package repository cache with the following command:
![]()
The APT package repository cache should be updated.
Now install PostgreSQL database server with the following command:
For PostgreSQL 10 (Latest Stable):
For PostgreSQL 11 (Currently at Beta):

Now press y and then press <Enter> to continue.

PostgreSQL should be installed.

Set password for the postgres user with the following command:
![]()
Now enter the password. It should be set.\

Now remember to do the same to the pg-slave server before you continue.
Setting Up the Master PostgreSQL Server:
Now login as the postgres user:

Now create a new user replication:
PASSWORD 'YOUR_PASSWORD';"

Now open /etc/postgresql/11/main/pg_hba.conf with nano:
![]()
Add the following line to the marked location:

Now open the main PostgreSQL configuration file with nano:
![]()
Now find and change the following settings. If any line is commented out, uncomment it (removing #) as necessary.
wal_level = replica
max_wal_senders = 10
wal_keep_segments = 64
Now restart PostgreSQL server on your pg-master server:

Configuring the Slave Server:
On the pg-slave server login as postgres user:

Stop the PostgreSQL service on the pg-slave server:

Now open /etc/postgresql/11/main/pg_hba.conf with nano:

Add the following line as you did on the pg-master server:

Now open the main PostgreSQL configuration file with nano:
![]()
Now find and change the following settings. If any line is commented out, uncomment it (removing #) as necessary.
wal_level = replica
max_wal_senders = 10
wal_keep_segments = 64
hot_standby = on
Now go to your data_directory:

Remove everything from that directory:


Now copy the data from the pg-master server to the pg-slave server’s data_directory:
replication --wal-method=fetch

Type in the password for the postgres user of the pg-master server and press <Enter>.

Now create a recovery.conf file in the data_directory with nano:
![]()
Now add the following line to it:
primary_conninfo = 'host=192.168.199.137 port=5432 user=replication password=123'
trigger_file = '/tmp/MasterNow'

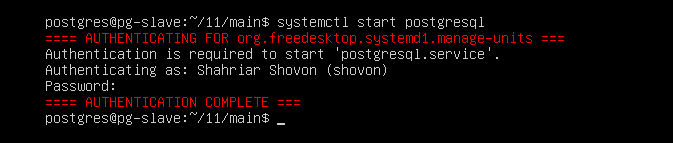
Start the PostgreSQL Slave server:
Testing Replication:
Now on the pg-master server, you can see that the Slave server is detected.

SQL command for creating users table:
name VARCHAR(30),
country VARCHAR(2)
);

SQL commands to insert dummy data into the users table:
INSERT INTO users VALUES('Shovon', 'BD');
INSERT INTO users VALUES('Kelly', 'US');
INSERT INTO users VALUES('Nina', 'IN');
INSERT INTO users VALUES('Kesha', 'CA');

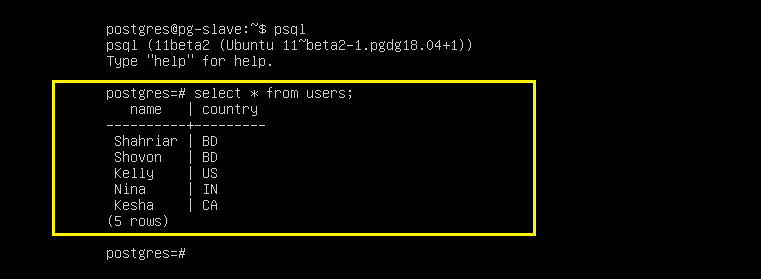
As you can see, the data is correctly added to the Master server pg-master:
# select * from users;
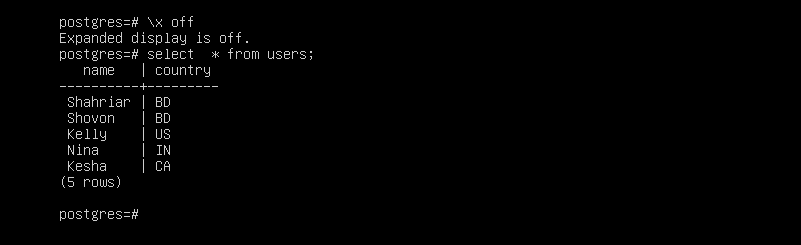
Now from the Slave server pg-slave, login to the PostgreSQL console:

Now try to select the data we just added:
As you can see the data is displayed in the Slave server. It means replication is working perfectly.
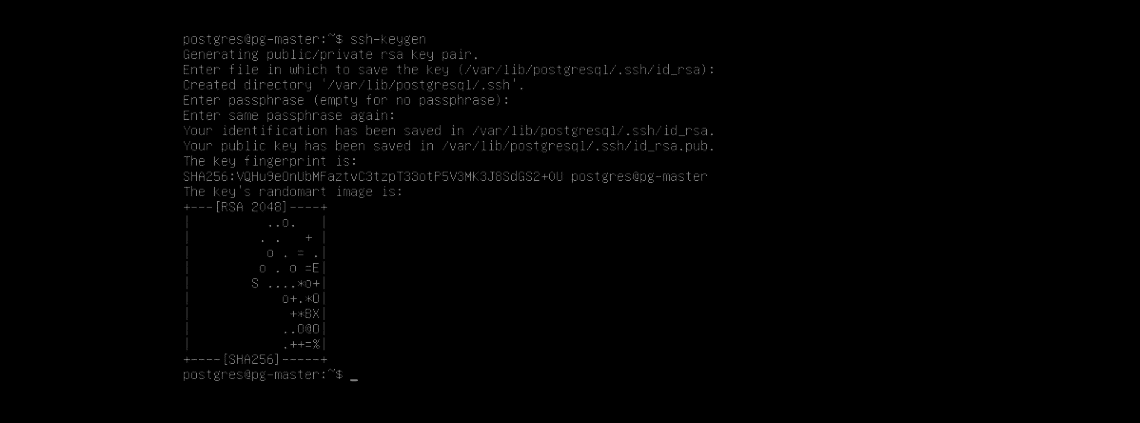
Generating SSH Keys:
You can login to the Master server from the Slave server and vice versa without password if you generate and copy SSH keys to opposite servers. This is useful for administration purposes.
I am only showing you how to do it on the Master server. The procedures are the same.
Generate SSH key on the Master and Slave servers while logged in as postgres user.

Keep pressing <Enter>. SSH key should be generated.
From the pg-master server, copy your SSH key to the pg-slave server:
From the pg-slave server, copy your SSH key to the pg-master server:
Type in yes and then press <Enter>.

Now type in the password for the server that you’re connecting to for the postgres user and press <Enter>.

That’s how you configure Master/Slave replication on PostgreSQL 11. Thanks for reading this article. ]]>
Before starting this tutorial, you need to confirm that pgAdmin4 is installed and working properly in your Ubuntu operating system. If pgAdmin4 is not installed in your system then you can follow the steps of the following tutorial to install pgAdmin4 first and start this tutorial.
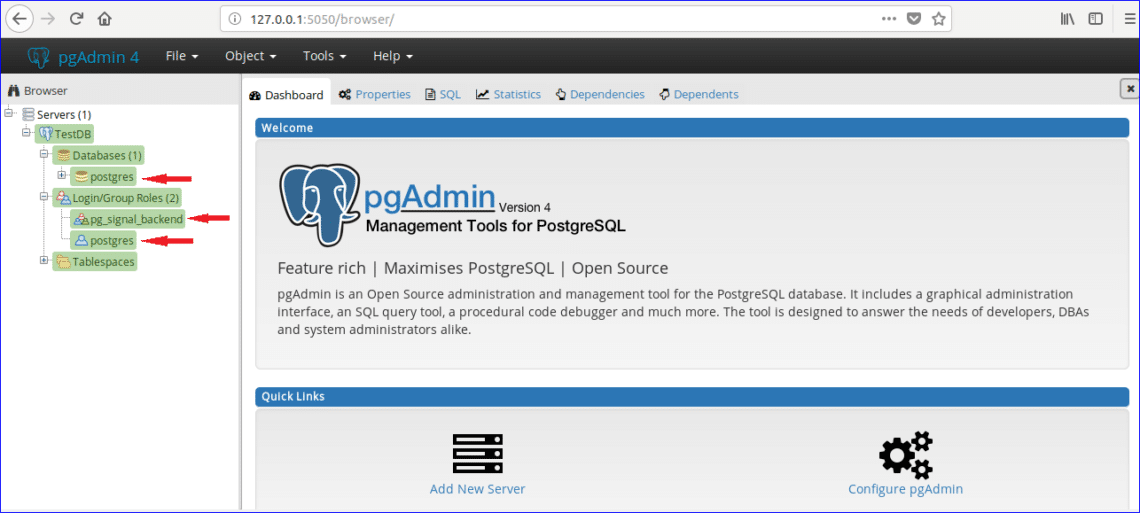
After the successful installation of pgAdmin4, open the following link from any browser to open pgAdmin4 client.
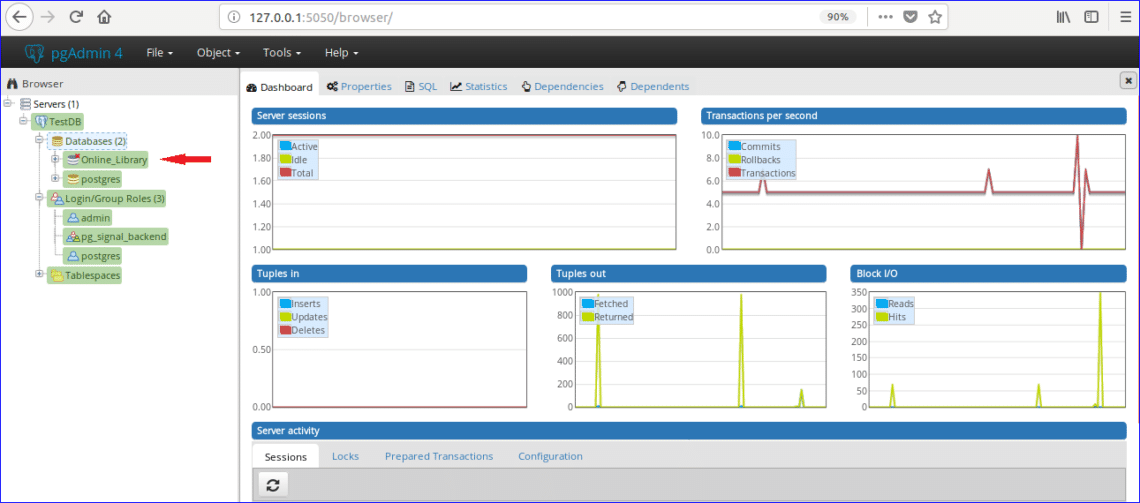
If you expand the Databases and Login/Group Roles sections from pgAdmin tree control then all previously created database list and roles will be shown. Here, one database named ‘postgres’ and two login/group roles, ‘pg_signal_backend’ and ‘postgres’ are created at the time of pgAdmin4 installation.
Create New User
Every database is associated with a particular user or group user. You can create database by associating with any existing user/group or any new user after creation. In this tutorial, a new user named ‘admin’ is created with all privileges. Follow the following steps to create a new user.
Step-1:
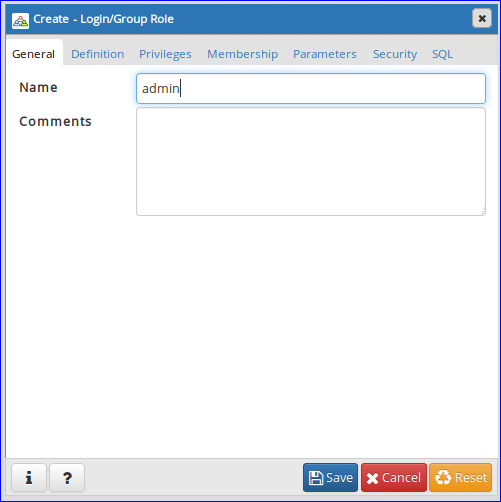
Right click on Login/Group Roles, select Create and click on Login/Group Roles… for creating new user.
Step-2:
The following Create dialog box will appear. Type ‘admin’ in Name field as user’s name and click on Definition tab.
Step-3:
Type login password for the user admin and click on Privileges tab. If you want to create user for limited time then set the Account expires data and time value.

Step-4:
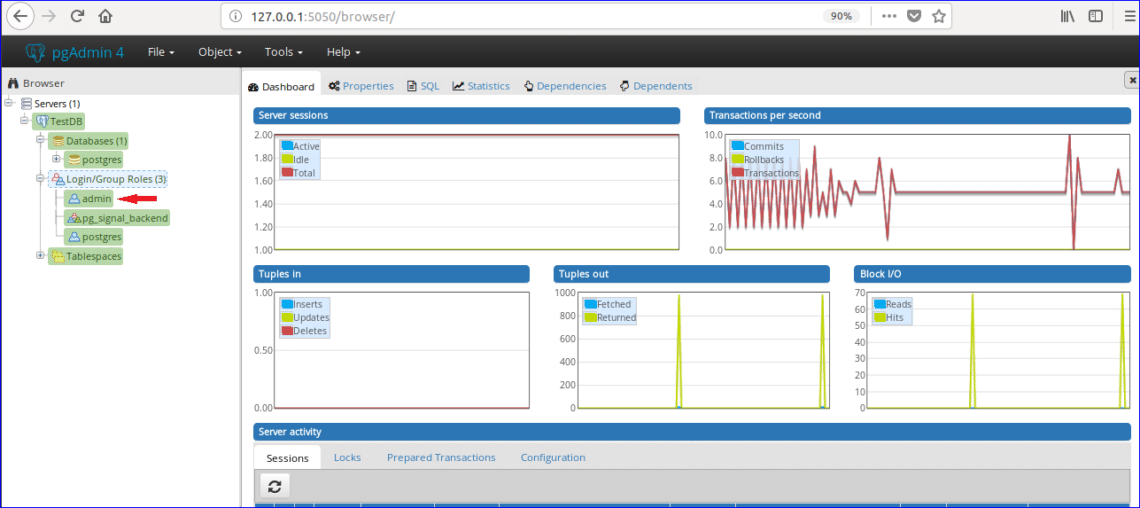
To set the all permissions to admin user make all options to ‘Yes’. Click ‘Save’ button to create the user.

‘admin’ user entry will be shown in Login/Group Roles section.
Create New Database
Suppose, you have to create a database named ‘Online_Library’. Do the following steps to create the database.
Step-1:
Right click on Databases, select Create and click Database… option for creating new database.

Step-2:
The following dialog box will appear for creating new database. Type ‘Online_Library’ in Database field and select ‘admin’ as database owner. Click ‘Save’ button to create the database.
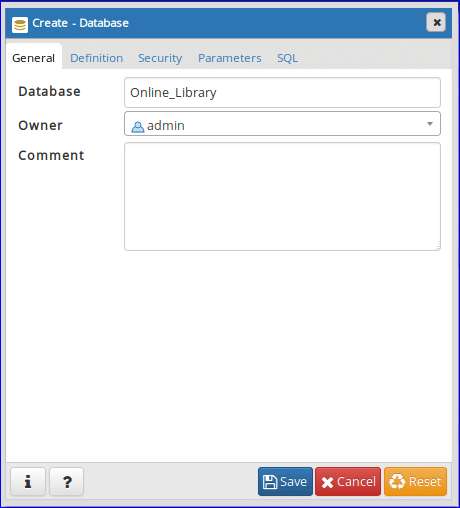
‘Online_Library’ database will be shown in Databases section.
Create Tables
Suppose, ‘Online_Library’ database contains two tables ‘book_type’ and ‘book_list’. The tables with sample data are given below.
Table: book_type
| ID | Category | Type |
| 1 | CSE | Programming |
| 2 | MBBS | Anatomy |
| 3 | BBA | Finance |
According to the table data, book_type table has three fields which are ID, Category and Type. Here, the value of ID field is numeric and will increment automatically, Category and Type fields are string. Primary key of this table is ID and all fields are mandatory.
Table: book_list
| ID | Book_Name | Author_Name | Edition | Type_ID |
| E001 | Java The Complete Reference | Herbert Schildt | 7th | 1 |
| M001 | Anatomy Trains | Thomas W. Myers | 3rd | 2 |
| E002 | Python Cookbook | Brian Jones & David Beazley | 3rd | 1 |
| B001 | Financial Accounting for BBA | Dr S N Maheshwari & CA Sharad K Maheshwari | 3 |
According to the table data, book_list table has 5 fields which are ID, Book_Name, Author_Name, Edition and Type_ID. Here, ID, Book_Name and Author_Name fields can’t be empty and Edition fields can be empty. ID field is primary key and Type_ID field is foreign key for this table. Now, follow the following steps to create these tables under ‘Online_Library’ database using pgAdmin4.
Step-1:
Click on ‘Schemas’ section of ‘Online_Library’ database. Expand ‘public’ section and find out ‘Tables’ section.
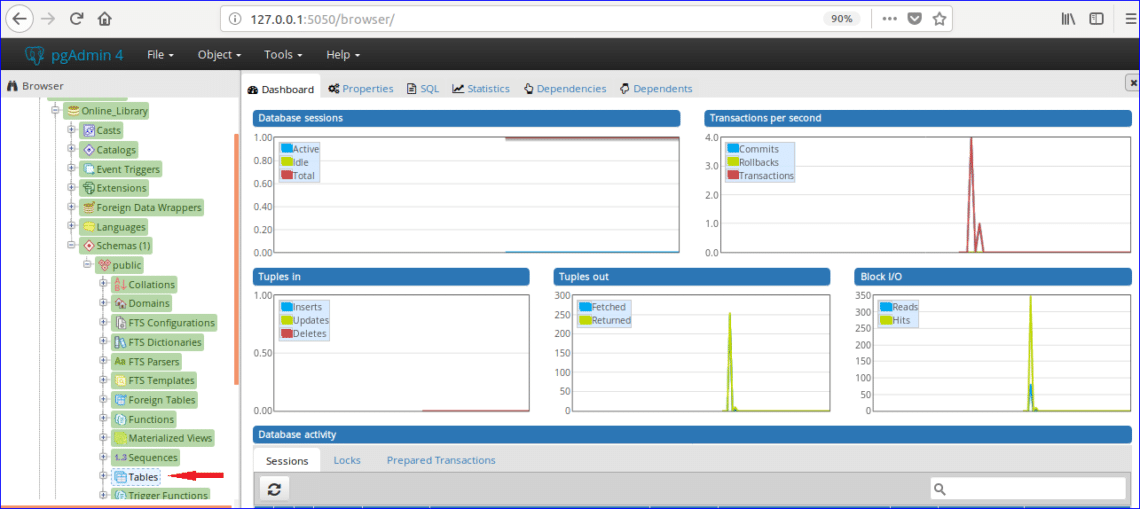
Step-2:
Right click on ‘Tables’, select ‘Create’ and click ‘Table…’ option.

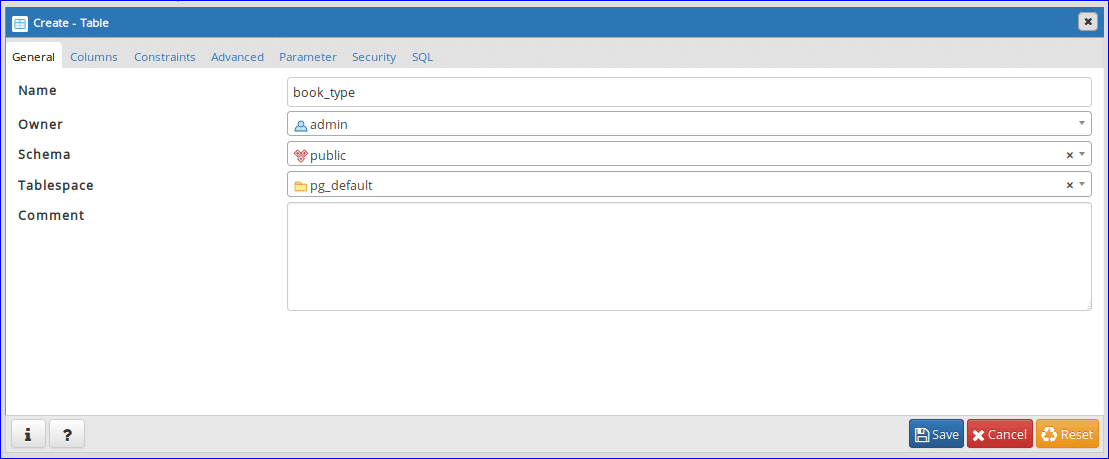
Step-3:
The following dialog box will appear to create a new table. Type ‘book_type’ in Name field, select Owner of the table (here, admin is selected as owner) and select Schema and Tablespace.
Step-4:
Select ‘Columns’ tab and click on ‘+’ button to create a new field for the table.

Step – 5:
Add three mandatory fields of ‘book_type’ table like the following dialog box. Set ‘bigserial’ as data type (for adding auto increment attribute) and set ‘Yes’ in ‘Not Null’ and ‘Primary key’ fields of ID column. The value of Category and Type column can vary. So select ‘character varying’ as data type for these fields. Click ‘Save’ button to create the table.

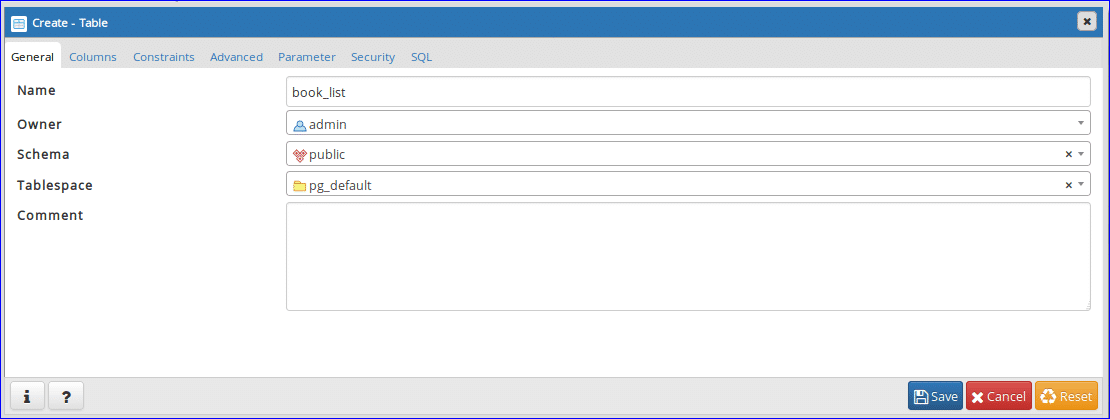
Step-6:
Open the following dialog box again for creating another table named ‘book_list’. Type ‘book_list’ in Name field and select other values of others fields like step-3.
Step-7:
Click on Column tab and add the fields according to table requirements. Here, ID column will contain data of fixed length (4 characters). For this, ‘character’ data type is selected for ID column. The value of Book_Name, Author_Name and Edition can vary. So, ‘character varying’ data type is selected for these columns. ‘Not Null’ option is set to ‘Yes’ for Edition column to accept Null value when no data will submit.

Step-8:
Click ‘Constraints’ tab to set primary and foreign keys. This tab contains other 5 tabs. First tab is ‘Primary Key’. This tab will display primary key information of the table. One primary key is set in the previous step which is displaying here. If you want to add or remove any primary key then you can do this task from this tab.
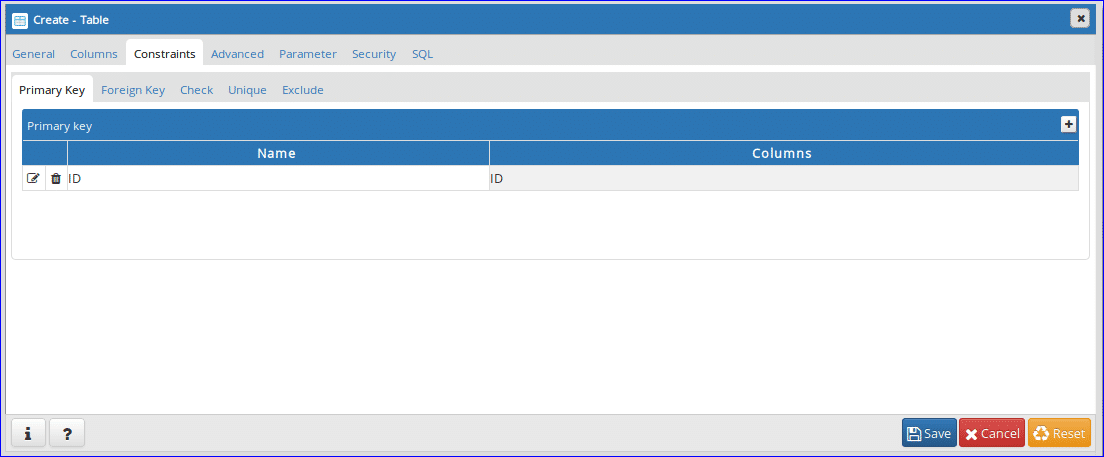
Step-9:
This table contains a foreign key based on the table information mentioned above. Click ‘Foreign Key’ tab to define foreign key. Click on ‘+’ button for adding foreign key.

Step-10:
Click on Edit () button open tab for creating foreign key.

Step-11:
Type the name of foreign key in Name field. Here, ‘Book_Type’ is set as foreign key name. Next, click Columns tab.
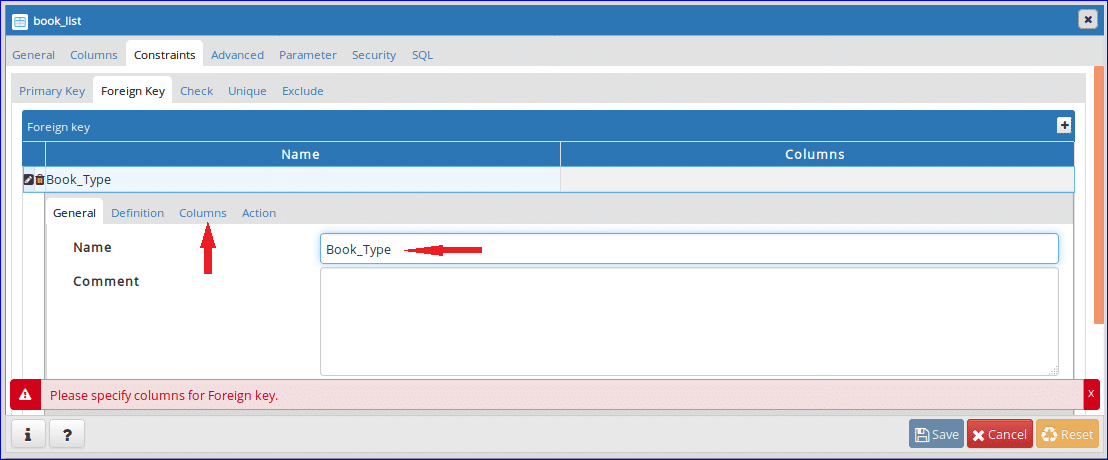
Step-12:
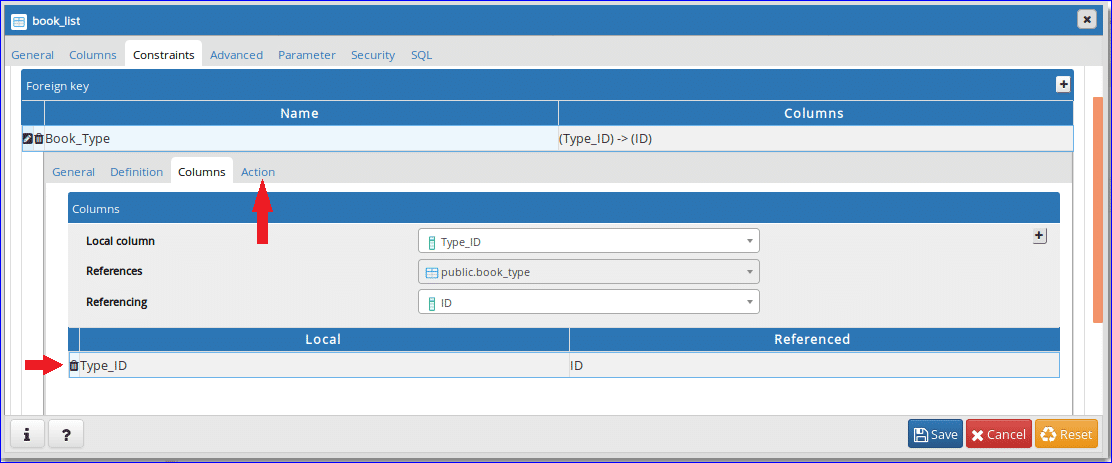
Select Local column, References and Referencing from dropdown list. For this table, Type_ID field is a foreign key and it is set as Local column. ‘book_type’ table is selected as Reference table and ID field of ‘book_type’ is selected as Referencing column. After setting, click on the ‘+’ button to add foreign key.

Step-13:
Added foreign key information will be shown in the bottom. Click on ‘Action’ to add particular action on update and delete data of reference table.
Step-14:
Select ‘CASCADE’ option for both update and delete operation. When the ID value of book_type table will update or delete then the related record(s) of book_list table will be effected. Click ‘Save’ button to complete the table creation task.

After completing the above steps, Tables section will contain the following two table names. If you want to change the structure of the table then right click on the particular table name and click properties to open the dialog box for modifying the table structure.

After creating database and tables, you can execute different types of SQL commands like select, insert, update and delete in a particular table. You can also perform other database operations like creating function, view, trigger etc. in pgAdmin4. Hope, you will be able to do basic database operations in pgAdmin4 after reading this tutorial. ]]>
Example-1: Creating table with array field
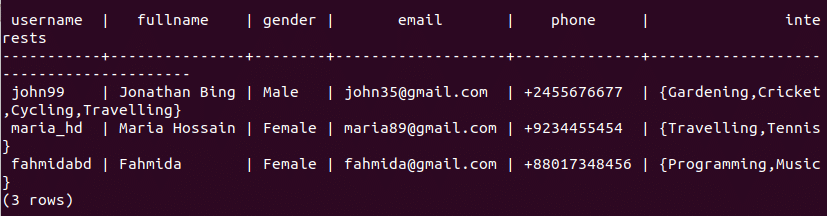
Create a table using array field. In this example, a table named users is created with fields, Username, Fullname, Gender, Email, Phone and Interests. Interests field is defined as TEXT [] array which can accept multiple values in this field.
Username VARCHAR(15) PRIMARY KEY,
Fullname VARCHAR (100),
Gender VARCHAR (6),
Email VARCHAR (20),
Phone VARCHAR (20),
Interests TEXT[]);

Example-2: Insert data in array field of the table
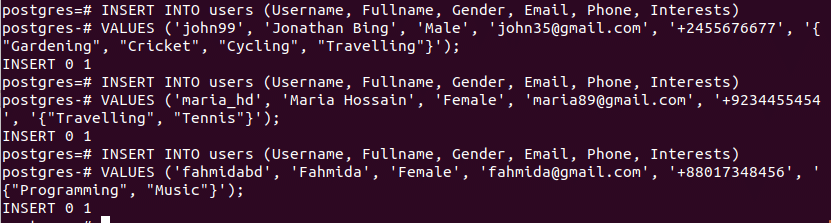
You can insert one or more values in the array field. In array fields, the multiple values are separated by commas and use second bracket to set the values. Run the following three insert statements to insert three rows in users table.
VALUES ('john99', 'Jonathan Bing', 'Male', '[email protected]', '+2455676677',
'{"Gardening", "Cricket", "Cycling", "Travelling"}');
INSERT INTO users (Username, Fullname, Gender, Email, Phone, Interests)
VALUES ('maria_hd', 'Maria Hossain', 'Female', '[email protected]', '+9234455454',
'{"Travelling", "Tennis"}');
INSERT INTO users (Username, Fullname, Gender, Email, Phone, Interests)
VALUES ('fahmidabd', 'Fahmida', 'Female', '[email protected]', '+88017348456',
'{"Programming", "Music"}');
Run the following select statement to show all records of users table.
Example-3: Select data using array field of the table
a) Retrieve particular array value
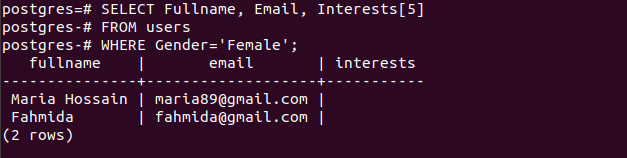
If you want to retrieve particular value from the array then you have to specify the index value with the array field. The following select query is used to retrieve Fullname, Phone and Interest value of the second index from the users table of all male users.
FROM users
WHERE Gender='Male';

If the index value is unavailable in the array field then it will returns NULL as output. In the following statement, fifth index not exists in any Interests field.
FROM users
WHERE Gender='Female';
b) Retrieve records based on specific array value
You can use any function to search particular array values in all records of array field. The following select statement will retrieve Fullname, Email and Phone of all users whose Interests field contains ‘Travelling” value.
FROM users
WHERE 'Travelling' = any(Interests);

c) Retrieve records using unnest function
unnest() function is used to retrieve each array value in separate row. The following select statement will retrieve records separately for each value of Interests field.
FROM users;
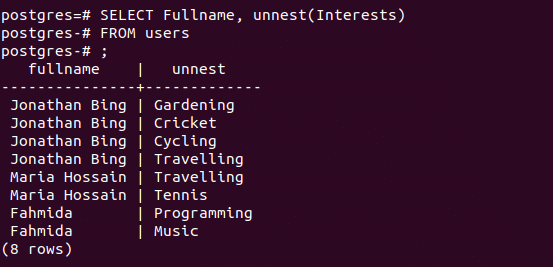
Example-4: Update data using array field of the table
a) Update particular array index
The following update query will update the second index value of Interests in which records contains the username “john99”.
SET Interests [1] = 'Football'
WHERE Username= 'john99';

Run the following select query to show effect of the update query.
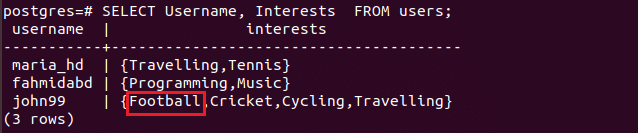
b) Update all values of a particular array field
You can update the full content of the array field by two ways. First way is to use normal conventional way which is shown in the above example and second way is to use array expression. Both ways are shown below for updating the record. You can run any of the following queries to update the array field. The following update statement will replace the previous values with new two values which row contains the username, ‘maria_db’.
SET Interests = '{"Gardening", "Hockey"}'
WHERE Username= 'maria_hd';
Or,
SET Interests = array ['Gardening','Hockey']
WHERE Username= 'maria_hd';
Run the following select query to show effect of the update query.

Example-5: Delete data based on array field of the table
You can run delete query by matching particular array values. In the following example, the users who has “programming” as the value in the first index of Interests field will be deleted from the table.
WHERE Interests[1] = 'Programming';
Run the following select query to show effect of the delete query.
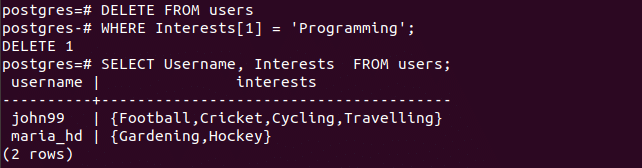
All the above examples of this tutorial show the use of one-dimensional array in PostgreSQL. The use of multi-dimensional array is bit complicated than one-dimensional array. As a beginner, you can practice this tutorial to gain the basic knowledge of using PostgreSQL array.
]]>PostgreSQL: Using where EXISTS clause
When any SQL query is used inside another SQL query then it is called a subquery. The complicated query can be written easily by dividing a large query into multiple subqueries. EXISTS clause is used with a subquery in a SQL statement. The output of EXISTS depends on the numbers of records returned by the subquery but does not depends on the values of the records. The result of EXISTS will be true if the associated subquery returns at least one row. How you can use EXISTS and NOT EXISTS clause in select, insert, update and delete statements are shown in this tutorial using different examples.
EXISTS Clause Syntax:
Create three tables named company, items and customers and insert some data. Run the following select query to show the contents of these tables.
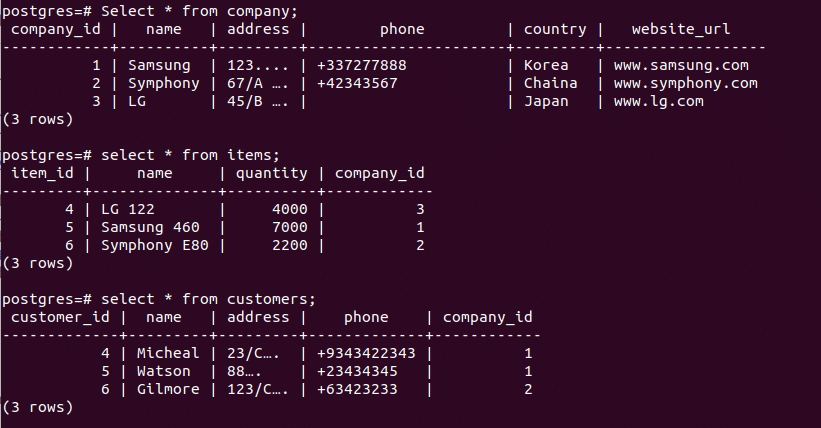
Example-1: Using EXISTS clause in SELECT query
(a) EXISTS
The following query will retrieve records from items table based on company table. The subquery searches all records from company table where company_id of company table is equal to company_id of items table and the value of phone field is not empty. There is one record in company table that does not have phone number and this record will be omitted from the output.
Output:
The record of LG has no phone entry in company table. So it is not appeared in the output.

(b)NOT EXISTS
NOT EXISTS clause is opposite of EXISTS clause. The following query will retrieve those records from items table when the subquery returns false.
Output:
There is no record in company table where website_url is NULL. So the output of subquery is false for all records and all records of the items table are retrieved.
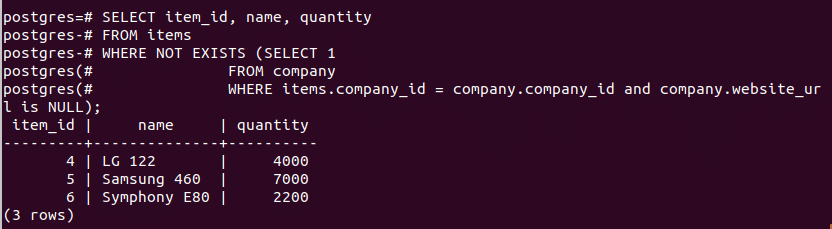
Example-2: Using EXISTS clause in INSERT query
According to the following insert query, the data will be inserted in items table when company_id of both company and customers tables are equal.
Output:
There are three entries for company_id in customers table with values are 1 and 2. So the subquery will return true for three times and three records will be inserted.
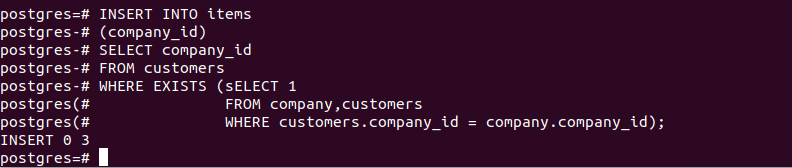
Run the select query to check the content of items table.
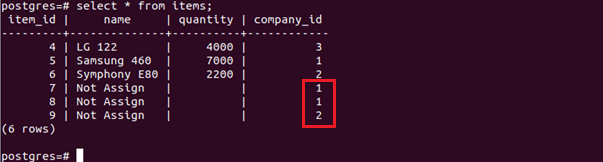
Example-3: Using EXISTS clause in UPDATE query
The following query will update the records of items table where company_id is 1 and the subquery returns true.
Output:
Here, the subquery will return true for three times and company_id is 1 for three records. Three records will be updated after executing the update query.

Run the select query to check the content of items table.
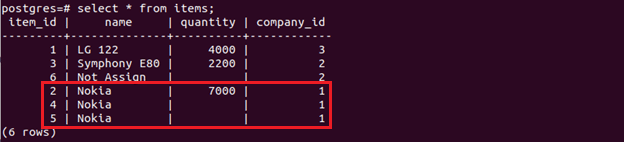
Example-4: Using EXISTS clause in DELETE query
The following query will delete those records of items table where company_id is 1 and the subquery returns true.
Output:
There are three records with value 1 of company_id and one record has name value ‘Not Assign’. So, the condition will true for three times and delete three records from items table.

Run the select query to check the content of items table.

Hope, you have get a clear idea of using EXISTS clause in SQL query after reading this tutorial.
]]>PostgreSQL: Using NULL and Not NULL clauses
Unknown values of the database table are treated differently by SQL. When one or more fields of a table needs to be set blank then the NULL keyword is used at the time of table creation and NULL value can be used for selecting or inserting or updating data of the table. NULL value does not indicate zero or empty value. It is mainly used for that field where the value is missing or unknown or no value is applicable. But if any field of a table needs to set mandatory then you have to use NOT NULL keyword during the time of table creation. How you can use NULL and NOT NULL clauses in PostgreSQL to run select, insert, update and delete SQL statements are shown in this tutorial.
Create table using NULL and NOT NULL
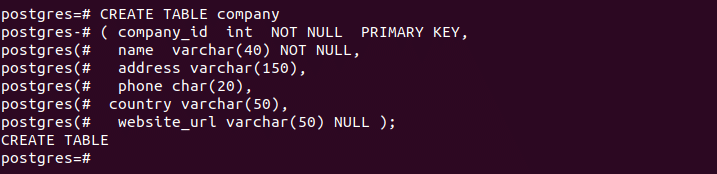
( item_id SERIAL,
name varchar(40) DEFAULT('Not Assign'),
quantity INT NULL,
company_id INT,
PRIMARY KEY (item_id),
FOREIGN KEY (company_id) REFERENCES company(company_id) );
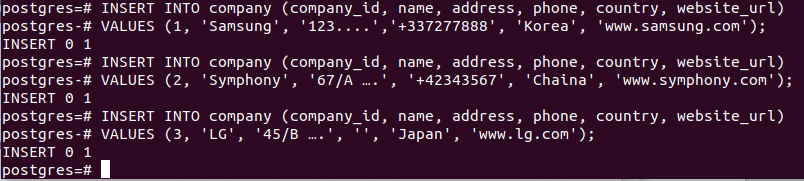
Insert Some Data in tables:
Insert into Company table:
VALUES (1, 'Samsung', '123....','+337277888', 'Korea', 'www.samsung.com');
INSERT INTO company (company_id, name, address, phone, country, website_url)
VALUES (2, 'Symphony', '67/A ….', '+42343567', 'Chaina', 'www.symphony.com');
INSERT INTO company (company_id, name, address, phone, country)
VALUES (3, 'LG', '45/B ….', '', 'Japan');
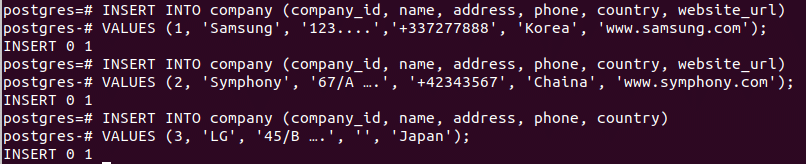
Insert into items table:
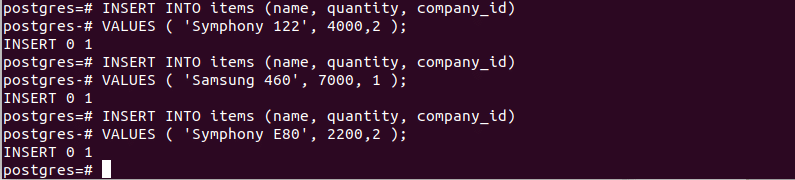
Example-1: Using NULL and NOT NULL in SELECT Query
a) NULL
The following query will retrieve all name and address data from company table where website_url value is null. There is only one record where the website_url value is NULL.
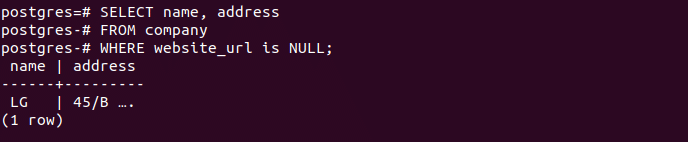
b) NOT NULL
The output of NOT NULL is opposite of NULL. The following select query will return all records from company table where website_url field contains any data.
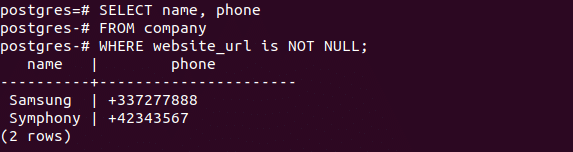
Example-2: Using NULL or NOT NULL in INSERT Query
The following query will insert company_id value from company table to items table which has no website_url value. There is one record in company where website_url is NULL. So, one record will be inserted after executing the query.
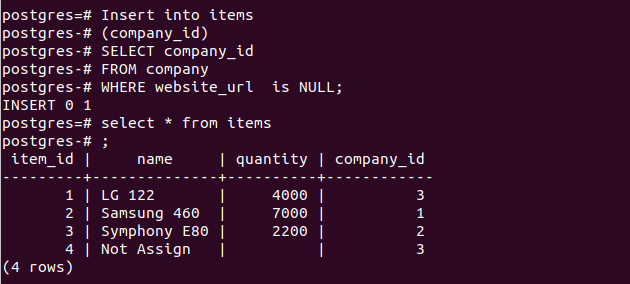
Example-3: Using NULL in UPDATE Query
name field value of items table will be updated which record contains NULL in quantity field. According to the data, one record will be updated after executing the query.
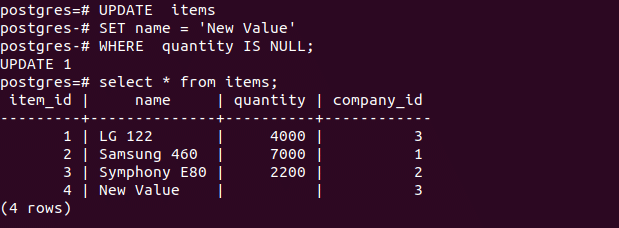
Example-4: Using NULL or NOT NULL in UPDATE Query
The following query will delete records from items table where quantity value is NULL. There is only one record in items table where quantity value is NULL. So, one record will be deleted after executing the query.
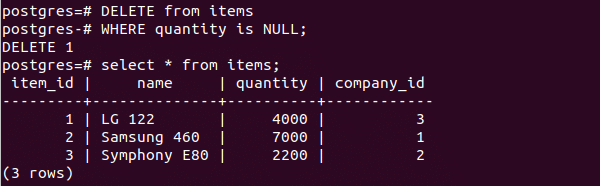
You can apply NULL and NOT NULL clauses with WHERE clause for executing any query based on the table if the table contains any NULL value. But NULL value and empty string are not identical. If you create any field of the table without NULL option and keep empty data in that field then NULL clause will not work for that field. You can apply NULL clause for any table based on the table structure.
]]>By default, searches on PostgreSQL database are exact. What that means is, when users search for ‘x y z’, the PostgreSQL database looks for ‘x y z’ in exact order in the fields of a certain table. If there’s a slight mismatch, for example let’s say you have ‘x y_z’, the database will fail to show any result.
Let’s look at a real life scenario, then you will be clear on what Full Text Search is and what is the need for it.
Let’s say you have an IT store and the user searched for ‘desktop and laptop’. No problem there. But do you actually have any product that is a desktop and a laptop? Do you even have a product whose title says ‘XXX Desktop and Laptop’ exactly as the user searched for? Most probably no! The search would fail to show any relevant results. The user probably wanted to list all the computers in your store that he or she can use as a desktop and a laptop, most likely a convertible tablet. Since the search failed to show any result to the user, the user may think you’re out of stock or you don’t have it in your IT store. But you do have many convertible tablets that can be used as a desktop and a laptop in your store’s database. If the users can’t find it, you won’t get any sales. You do want to your website to list all the convertible computers you have in stock when users do a search query like that. This is where Full Text Search comes into play. Where an ordinary search fails, Full Text Search rescues.
In this article, I will show you how to perform Full Text Search with PostgreSQL. Let’s get started.
Setting Up PostgreSQL for Full Text Search
Before you can practice Full Text Search on PostgreSQL along with me, you have to set up PostgreSQL with some dummy data. In this section, I will show you how to add these on PostgreSQL.
First, create a new database with the following command:
NOTE: Here it_store is the database name.

Now login to the PostgreSQL shell of the it_store database you created with the following command:

You should be logged in to the PostgreSQL’s it_store database as you can see in the screenshot below.
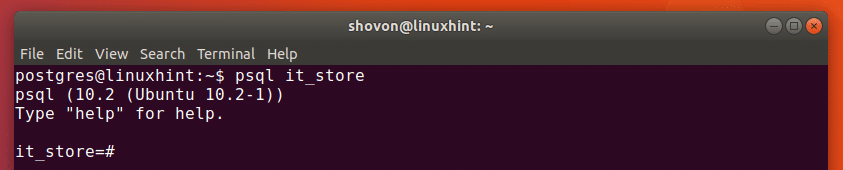
I am not going to go overboard here. I am going to create a simple products table for our IT Store database. The basics fields I need are a Product ID, Product Title, Product Description.
The SQL code for the products table is given below:

Now copy and paste the SQL command to create the products table into the PostgreSQL shell as shown in the screenshot below.
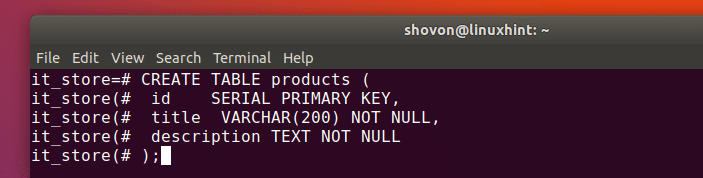
Once you’re done, products table should be created.
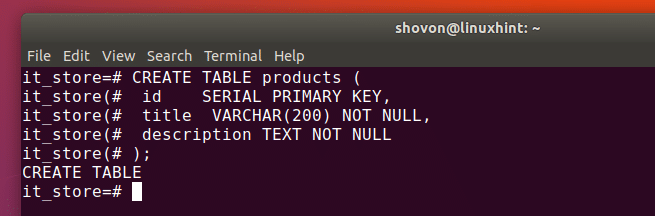
Now I am going to insert some products into the products table. The SQL commands are given below.

The products are inserted into the products table.
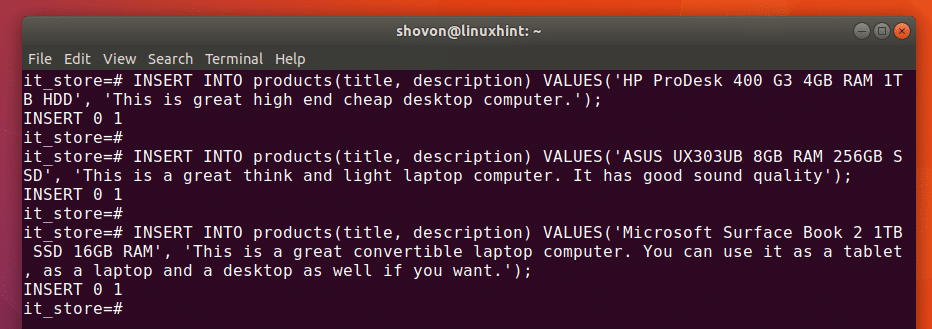
You can run the following SQL command to verify that:

As you can see, the products are in the products table.
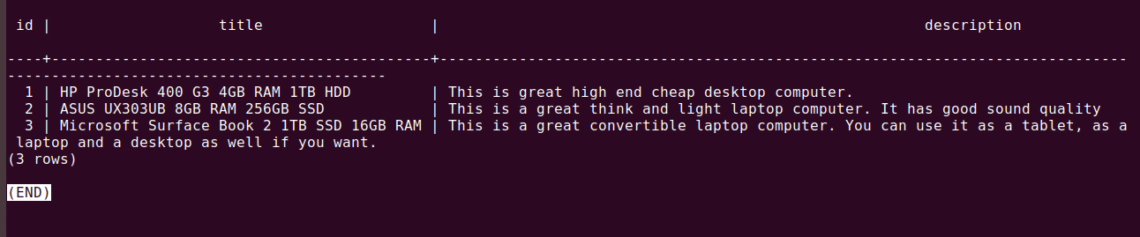
Full Text Searching with PostgreSQL
In the earlier section, I showed you how to add dummy data to your PostgreSQL database. In this section, I will show you how to perform Full Text Search on those data with PostgreSQL.
In PostgreSQL, you use two functions to perform Full Text Search. They are to_tsvector() and to_tsquery(). Let’s see how they work and to use them first.
A Quick Tour of to_tsvector() and to_tsquery() Functions
to_tsvector() function breaks up the input string and creates tokens out of it, which is then used to perform Full Text Search using the to_tsquery() function.
Now to understand what to_tsvector() function does to an input string, open up PostgreSQL shell and run the following command:

As you can see the output of the to_tsvector() function in the marked section of the screenshot below, the to_tsvector() function broke up the words and assigned some numbers in them.
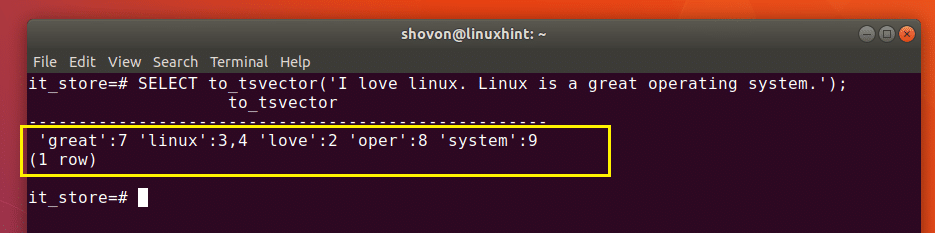
You can use to_tsquery() function as follows:
WHERE to_tsvector(fieldName) @@ to_tsquery(conditions)
Conditions of to_tsquery() Function
The to_tsquery() accepts conditions that it uses to compare with the output of to_tsvector() function.
For example, if you’re looking for ‘laptop and desktop’, you should put ‘laptop & desktop’ to to_tsquery() function.
For ‘laptop or desktop’, the condition should be ‘laptop | desktop’.
Now I will go into our IT Store database to show you some real world examples.
Let’s search for a convertible device that can be used as desktop and laptop as I talked about earlier.
Run the following SQL command to do that:
![]()
As you can see, the correct computer was found.
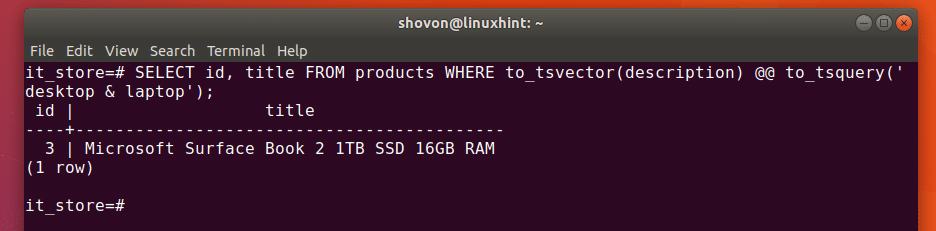
You can flip the terms as well. For example, you can search for ‘laptop & desktop’.

The correct result is still displayed.

Let’s say the user wants to list all the desktop or laptop computers in your IT store. The query is ‘desktop or laptop’ and the condition of to_tsquery() function should be ‘desktop | laptop’ or ‘laptop | desktop’.
The SQL command is:

As you can see, all the computers of the IT Store are listed.
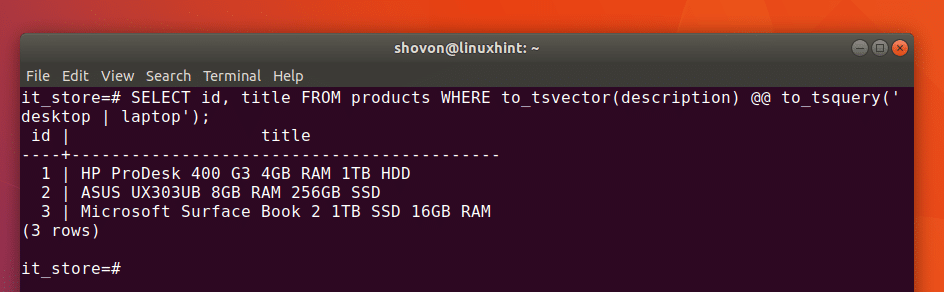
Let’s take a look at another example. The user is looking for all the laptops in your store but not the convertible ones. The user query may be ‘not convertible laptops’. The condition of to_tsquery() function may be ‘!convertible & laptops’
The SQL command is:
![]()
As you can see, the correct laptop is found.
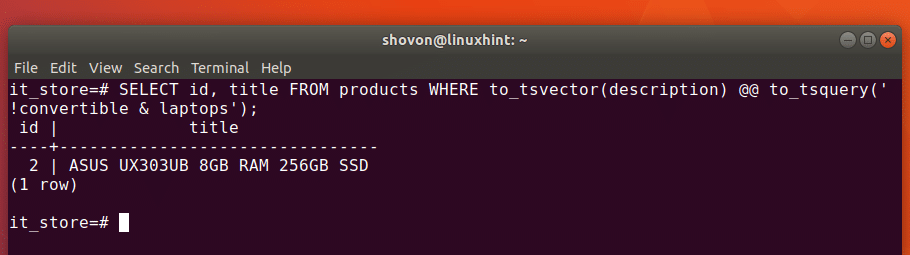
Have you noticed one thing? I put laptops in the to_tsquery() function, but there is not laptops keyword in the product description. So how did PostgreSQL find it? Well that’s the magic of Full Text Search. The keywords need not to be exact. PostgreSQL can even handle some plural words, tenses and many more.
By default, the Full Text Search works only on English language. But PostgreSQL provides support for some other languages as well. Check the PostgreSQL documentation for more information about it.
That’s how you perform Full Text Search on PostgreSQL. Thanks for reading this article.
]]>Install and Get Started with PostgreSQL 10 on Arch Linux
PostgreSQL is a powerful object-relational database management system. PostgreSQL strongly complies to ANSI SQL standard 2008. It is an open source and cross platform database. It is an enterprise class database. The latest version of PostgreSQL as of this writing is 10.
In this article, I will show you how to install and use PostgreSQL 10 on Arch Linux. Let’s get started.
Installing PostgreSQL 10
First update the package database of pacman package manager with the following command:

The package database of pacman package manager should be updated.
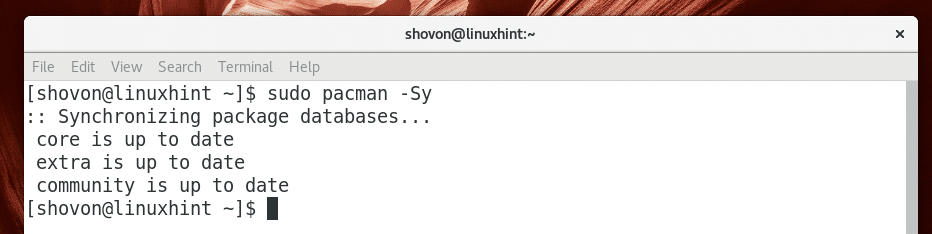
PostgreSQL 10 is available in the official package repository of Arch Linux. So you can install PostgreSQL 10 very easily.
You can run the following command to install PostgreSQL 10 on Arch Linux:

Now press ‘y’ and then press <Enter> to continue.
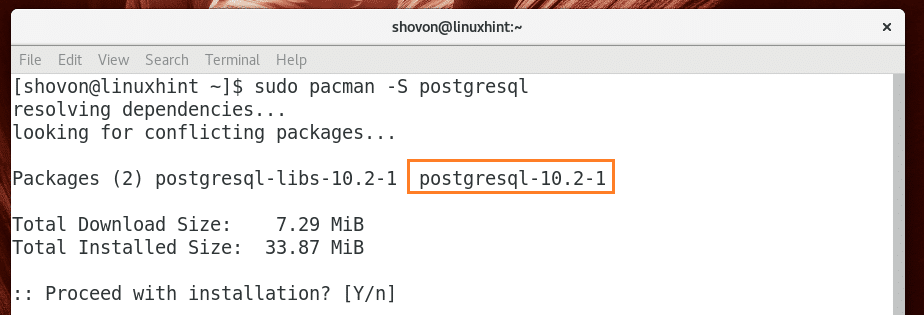
PostgreSQL 10 should be installed.
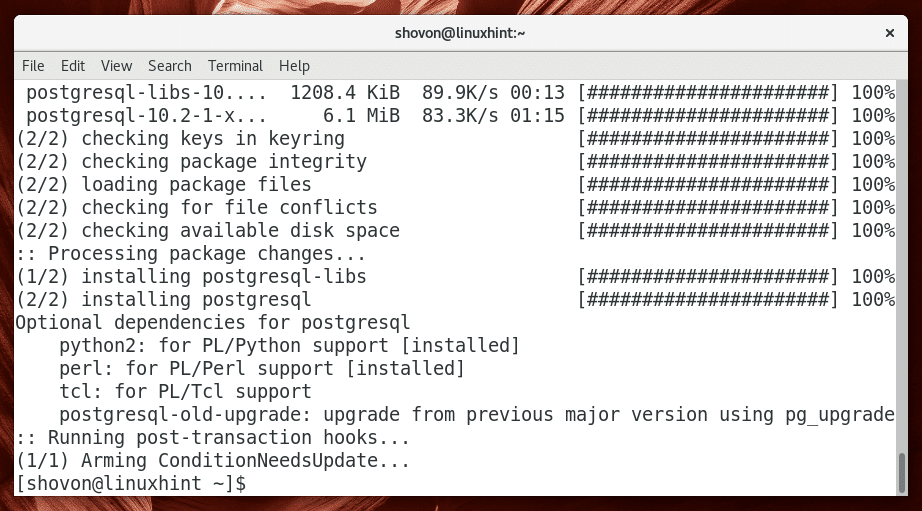
Now you can run the following command to check the version of PostgreSQL you’ve installed.

As you can see from the screenshot below, the version of PostgreSQL installed is 10.2.

Now you can run the following command to check whether PostgreSQL is running or not.
As you can see from the screenshot below, PostgreSQL is not running.
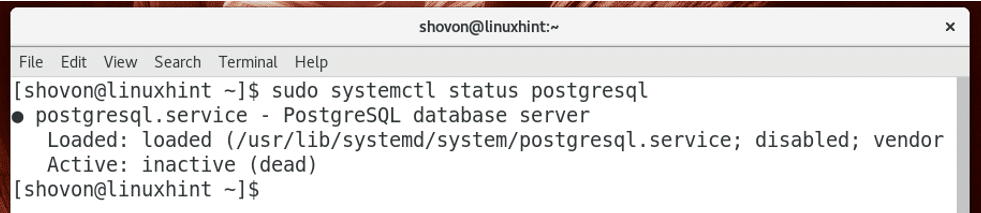
You may think all you have to do now is to start PostgreSQL. But you’re wrong. You can’t start PostgreSQL now as the data directory of PostgreSQL is not initialized yet.
Before you can initialize the data directory of PostgreSQL, you must login as the postgres user with the following command:

You’re logged in as postgres user as you can see from the marked section of the screenshot below.

NOTE: You should always login as postgres user to use or do any type of administration of PostgreSQL. Otherwise you may get permission errors and things might not work as expected.
Now you can initialize the data directory of PostgreSQL with the following command:

NOTE: The default data directory of PostgreSQL on Arch Linux is /var/lib/postgres/data
As you can see from the screenshot below, the data directory is being initialized.
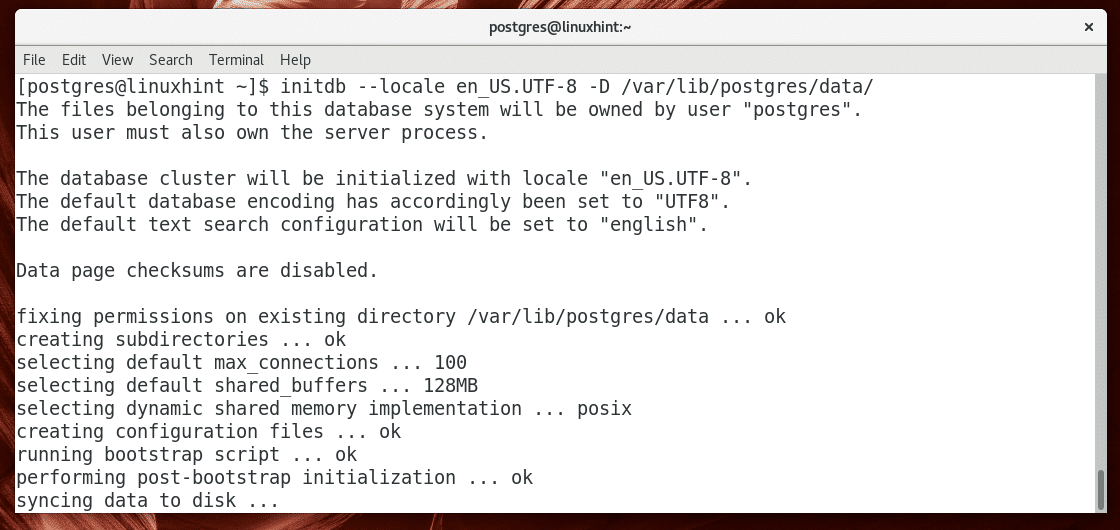
The data directory is generated at this stage.
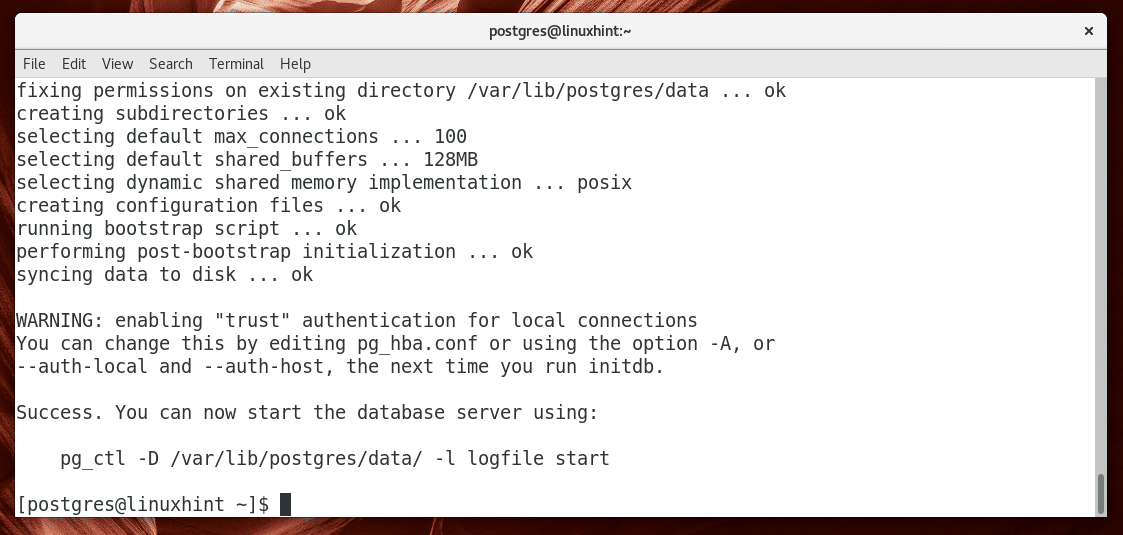
Now logout of postgres user with the following command:

You should be logged out of postgres user account.

Now that the data directory of PostgreSQL is generated, you can start PostgreSQL with the following command:

You can run the following command to check whether PostgreSQL is running again with the following command:

As you can see from the screenshot below, the PostgreSQL database server is running.
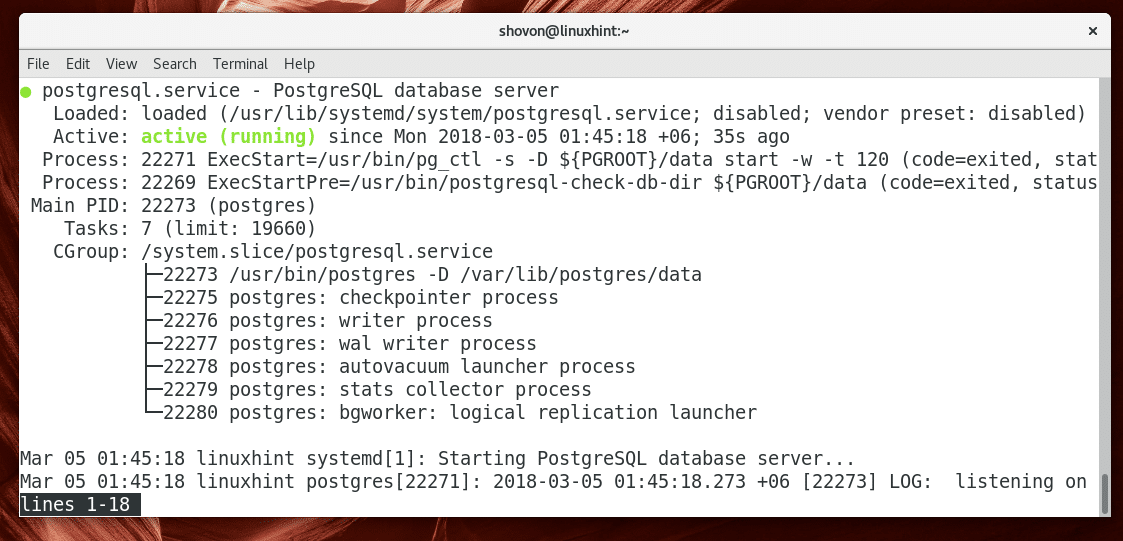
Now you should add PostgreSQL to the system startup so that it will start automatically on system boot.
Run the following command to add PostgreSQL to system startup:

PostgreSQL should be added to the system startup as you can see from the screenshot below.

Using PostgreSQL 10
In this section I will show you the basics of PostgreSQL 10.
Before you do anything, log in as postgres user with the following command:

You’re logged in as postgres user.

Creating a Database:
You can use the createdb command to create a database in PostgreSQL.
Let’s say you want to create a database linuxhint. You can run the following command to create linuxhint database:

The linuxhint database should be created.
Using a Database
You can use psql command to login to an existing database that you created with createdb command.
You can run the following command to login to linuxhint database.

As you can see from the screenshot below, you’re logged in to the linuxhint database.
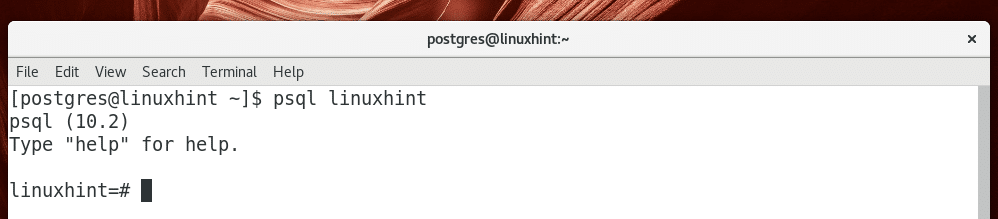
Executing SQL Command
Once you’re logged in to a database using psql command, you can execute PostgreSQL compatible SQL commands.
For example, you can run the following SQL statement to check the current date.

As you can see from the screenshot below, the current date is printed.
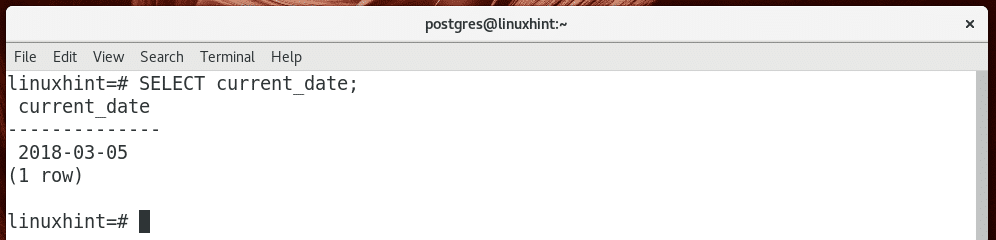
Creating a Table on PostgreSQL:
You can run the following SQL statements to create a table users on PostgreSQL:
firstname VARCHAR(20),
lastname VARCHAR(20)
);
As you can see a table users is created.
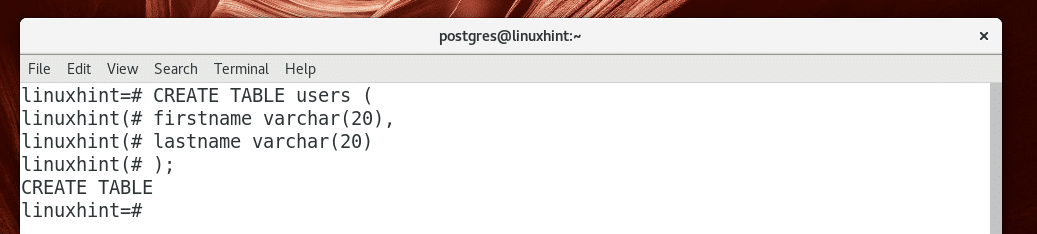
Inserting into the Table
You can insert into the newly created users table using the following SQL statement:

As you can see 1 row is inserted into the users table.

Selecting Data from Table
You can run the following SQL statement to select all the data from the users table.

As you can see the data I inserted was retrieved.
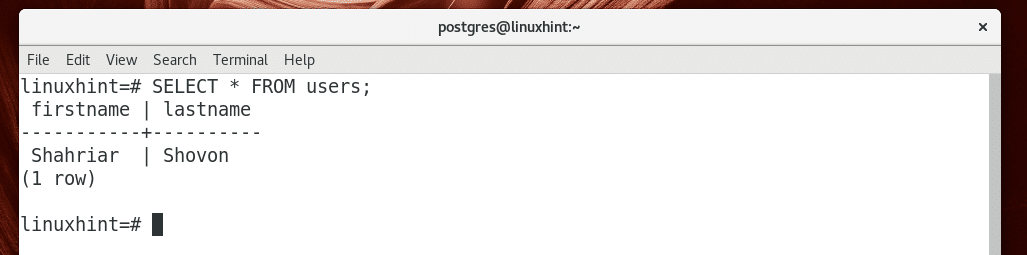
That’s how you install and get started with PostgreSQL 10 on Arch Linux. Thanks for reading this article.
]]>In this article, we compare one of the most popular database management systems (DBMS) in the world, MySQL, with DB-Engines’ DBMS of the year 2017, PostgreSQL, to see which can offer more to users in 2018.
Introduction
MySQL started as a personal project created by David Axmark and Michael Widenius as a free, speedy, and more flexible replacement for the lightweight database management system called mSQL. Today, MySQL is owned by Oracle, which is why Widenius decided to fork it and launch MariaDB to serve as a free and community-developed drop-in replacement.
The origin of PostgreSQL can be traced to the year 1982 and the Ingres project at the University of California, Berkeley. PostgreSQL is known for its emphasis on extensibility and compliance with standards. It follows a regular release schedule, aiming to make at least one minor release every quarter.
Features
Both PostgreSQL and MySQL are mature relational database management systems with support for a wide range of features, foreign key references, including database replication, triggers, updatable views, full-text search, and many others.
Since version 9.1, PostgreSQL supports triggers on views. “MySQL triggers activate only for changes made to tables by SQL statements. This includes changes to base tables that underlie updatable views,” as stated in the official documentation.
The current stable version of MySQL, 5.7, does not support CTE (Common Table Expressions), which are a way how to create a view or temporary table for a single query. A major benefit of CTE is that this feature can improve the readability of SQL code. Support for CTE is available in MySQL 8.0.1, whose first public milestone was announced in September 2016. PostgreSQL supports CTE.
Another important feature that was has been available to MySQL users only for a short while, since the release of MySQL 8.0.2, is the support for Window Functions, which perform some calculation on a set of rows similar to grouped aggregate functions.
Also worth mentioning is MySQL’s lack of support for Materialized Views, a feature readily supported by PostgreSQL. As described by Oracle, a Materialized View is “a table segment whose contents are periodically refreshed based on a query, either against a local or remote table.”
Performance
As demonstrated by Alexander Korotkov and Sveta Smirnova, both PostgreSQL and MySQL are perfectly capable of handling millions of queries per second. This is thanks to a series of recent optimizations these two popular database management systems recently made for big servers.
However, it should be noted that MySQL natively does not support any kind of multi-threading. There are ways how to increase MySQL performance with parallel query execution, but they require a bit of work or third-party plugins. On the other hand, PostgreSQL can devise query plans which can leverage multiple CPUs in order to answer queries faster.
ACID Compliance
One of the most often cited advantages of PostgreSQL over MySQL is its full ACID compliance. ACID stands for atomicity, consistency, isolation, and durability, and it is a set of properties of database transactions that ensure transaction validity even in the event of a sudden power outage or a critical error.
MySQL is ACID compliant only when using the InnoDB and NDB Cluster storage engines. The old default storage engine of MySQL, MyISAM, is not ACID compliant.
JSON Support
Since MySQL 5.7.8 and PostgreSQL 9.2.24, MySQL and PostgreSQL support a native JSON data type that enables efficient access to data in JSON (JavaScript Object Notation) documents. In PostgreSQL 9.4.15, the JSONB data type was introduced as a binary version of JSON.
SQL Compliance
Because MySQL has always been focused primarily on speed, its compliance with the SQL standard lags significantly behind PostgreSQL. “We are not afraid to add extensions to SQL or support for non-SQL features if this greatly increases the usability of MySQL Server for a large segment of our user base,” claim MySQL developers.
According to the official documentation, “PostgreSQL supports most of the major features of SQL:2011. Out of 179 mandatory features required for full Core conformance, PostgreSQL conforms to at least 160. In addition, there is a long list of supported optional features.”
For a detailed comparison of SQL compliance of MySQL, PostgreSQL, and other major database management systems, we recommend you visit this Wikipedia page.
Support
Because MySQL is a far more popular database management system than PostgreSQL, it is typically easier to find help online. There are also more third-party tools and plug-ins available for MySQL than there are for PostgreSQL. That said, PostgreSQL also has a strong and very active community of users who are happy to help one another solve all sorts of PostgreSQL-related issues.
Commercial support for MySQL is available 24/7 to all commercial customers, who have the flexibility of choosing from three different editions—MySQL Standard Edition, MySQL Enterprise Edition, and MySQL Cluster Carrier Grade Edition—to meet specific business and technical requirements. Commercial support for PostgreSQL users is available from many different companies in all regions of the world.
Licensing
According to Oracle, MySQL database server and MySQL Client Libraries are provided under a dual license model designed to meet the development and distribution needs of both commercial distributors (such as OEMs, ISVs, and VARs) and open source projects.
“Oracle’s Free and Open Source Software (‘FOSS’) License Exception (formerly known as the FLOSS License Exception) allows developers of FOSS applications to include Oracle’s MySQL Client Libraries (also referred to as ‘MySQL Drivers’ or ‘MySQL Connectors’) with their FOSS applications.” In other words, MySQL can be used for free and for any purpose as long as it is not redistributed within a closed source product.
“OEMs (Original Equipment Manufacturers), ISVs (Independent Software Vendors), VARs (Value Added Resellers) and other distributors that combine and distribute commercially licensed software with MySQL software and do not wish to distribute the source code for the commercially licensed software under version 2 of the GNU General Public License (the ‘GPL’) must enter into a commercial license agreement with Oracle.”
PostgreSQL is open source and released under the terms of the PostgreSQL License, which is similar to the BSD and MIT licenses. It grants PostgreSQL users the permission to use, copy, modify, and distribute PostgreSQL and its documentation for any purpose, without fee, and without a written agreement.
Conclusion
Because the developers of both MySQL and PostgreSQL have such different priorities, each of the two database management systems has its own distinct strengths and weaknesses. Keep in mind that unless you’re working on a very atypical project, the differences in performance and features likely will not matter to you nearly as much as the differences in licensing and community support.
]]>See below video tutorial on PGAdmin4 Installaiton on Ubuntu:
PgAdmin 4 Installation Steps
1. Update the system
Before starting the installation process, you have to update the system by executing the following command.

2. Install required packages
Three packages require to install before downloading pgAdmin which are python, pip and virtualenv. Run the following command to install these packages.
virtualenv python-pip libpq-dev python-dev

When the following prompt appears then press ‘y’ to complete the installation process of the required packages.
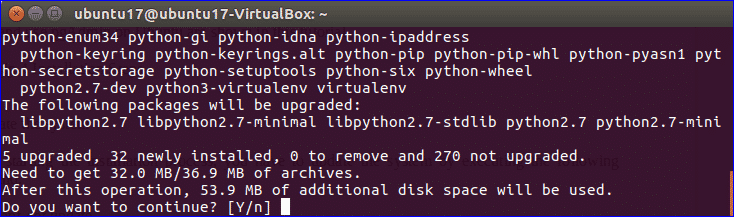
3. Create virtual environment
Run the following commands to create a new folder named pgAdmin4 in the current location, go to the newly created folder and create the virtual environment.
$ cd pgAdmin4
$ virtualenv pgAdmin4
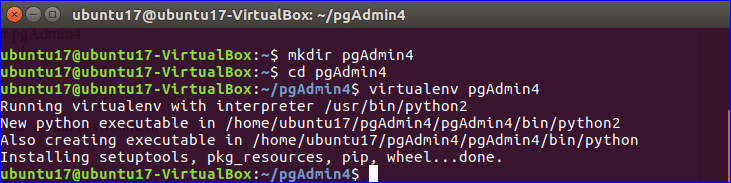
4. Activate virtual environment
Go to pgAdmin4 folder under pgAdmin4 and run the following commands to activate the virtual environment.
$ source bin/activate

5. Download pgAdmin 4
Run the following command to download the latest version of pgAdmin 4.
2.1-py2.py3-none-any.whl
After completing the download of pgAdmin, the console will be look like the following image.
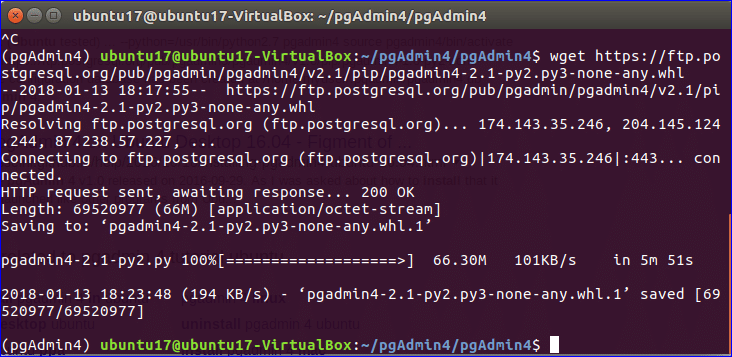
6. Install pgAdmin 4
Run the following command to complete the installation process of pgAdmin 4.
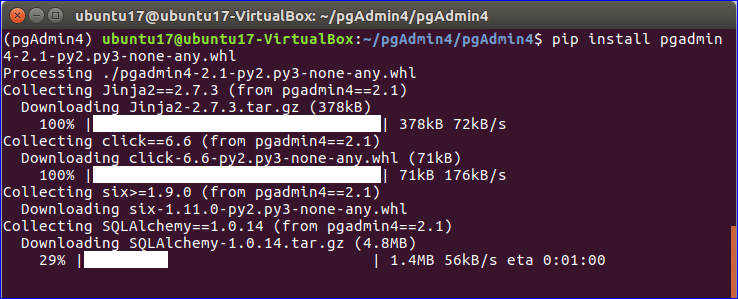
After installation, the following screen will appear.
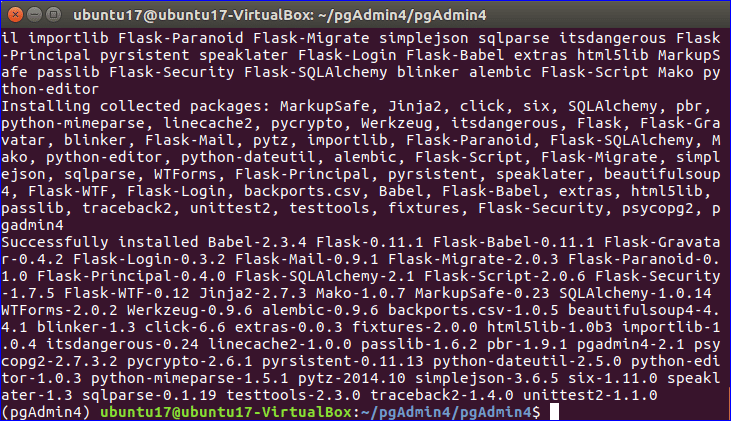
7. Configure and run pgAdmin 4
After completing the installation steps, you have to create a configuration file to run this software. Create a new file named config_local.py in lib/python2.7/site-packages/pgadmin4/ folder using nano editor.
Add the following content in config_local.py.
DATA_DIR = os.path.realpath(os.path.expanduser(u'~/.pgadmin/'))
LOG_FILE = os.path.join(DATA_DIR, 'pgadmin4.log')
SQLITE_PATH = os.path.join(DATA_DIR, 'pgadmin4.db')
SESSION_DB_PATH = os.path.join(DATA_DIR, 'sessions')
STORAGE_DIR = os.path.join(DATA_DIR, 'storage')
SERVER_MODE = False

Now, use the following command to run pgAdmin.
***Note: If any flask-htmlmin module error appears then run the following commands to install the module and then run the server.
$ python lib/python2.7/site-packages/pgadmin4/pgAdmin4.py
The following message will appear if pgAdmin can run successfully.

Now, access http://localhost:5050 from any browser. If all the steps are completed properly then the browser will display the following page.
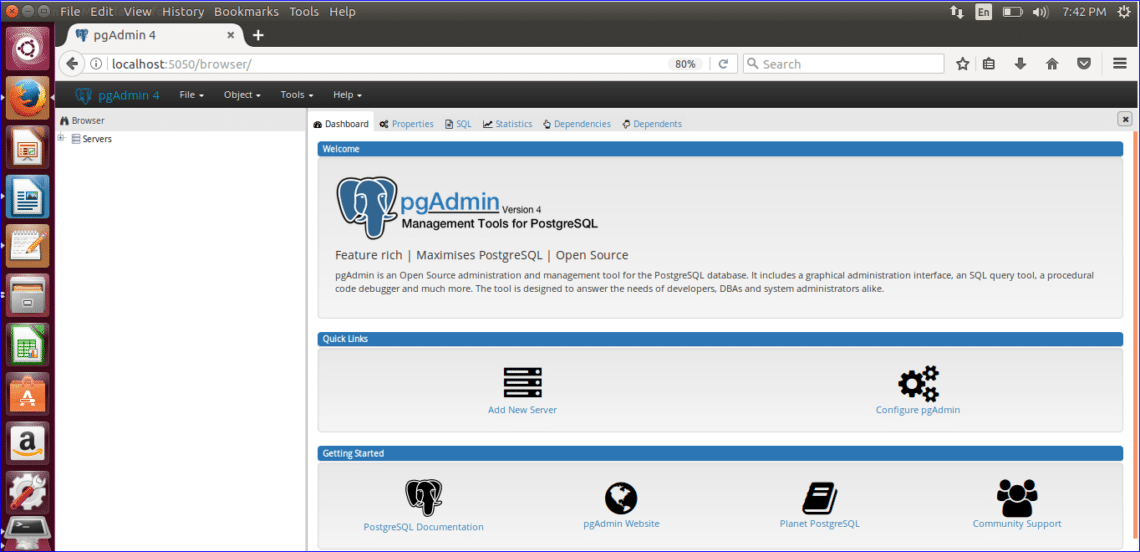
Using pgAdmin 4
Before using pgAdmin, you need to confirm that the latest version of PostgreSQL is installed on your operating system. Run the following command to install postgres package for PostgreSQL and contrib package for taking additional functionalities related to PostgreSQL.

Type ‘y’ when the following message appear in the terminal to complete the installation process.
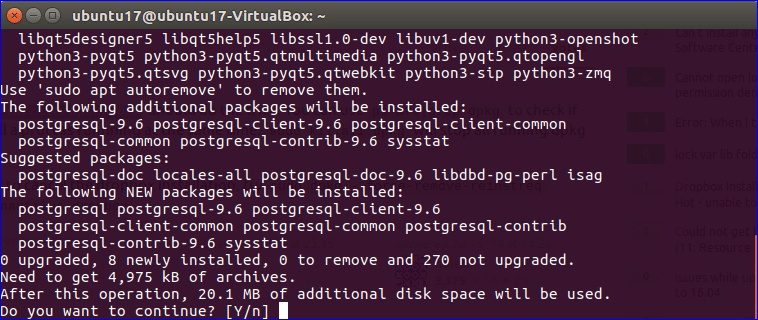
Next, you have to create the username and password for PostgreSQL database. Type the following command in the terminal to add login credentials for the user, postgres.

Setup the password for the username, ‘postgres’. It will ask to type the password two times for confirmation.

If you want to quit from the interactive session of postgres then type ‘\q’.
PostgreSQL is now ready to use. Go to the pgAdmin browser and click on the ‘Add New Server’ option.

There are four tabs in ‘Creat-Server’ dialog box. In General tab, type the name for the new server. Here, ‘TestDB’ is set as server name. Setting background and foreground colors are optional. Make Connect now option checked.

Click on the Connection tab and type Host name/address. Here, localhost is used as host name. By default port is 5432 and keep it unchanged now. postgres is set as maintenance database by default. Default username of this database is also set as postgres which is created earlier. Type the password for postgres user that you have created before. Make Save password option on. The other two tabs of this dialog box, SSL and Advanced are used for advanced setting which are omitted in this tutorial. Click on the Save button to create the TestDB server.
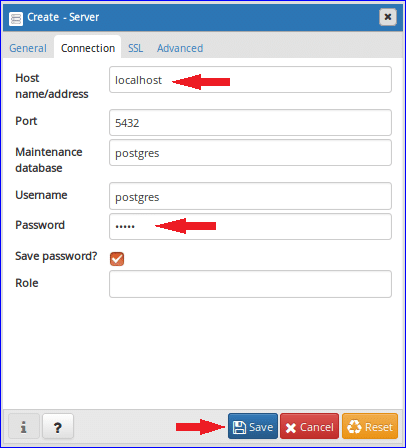
When you expand TestDB server, the following screen will appear. Three sections will appear in the left side of the browser. These are Databases, Login/Group Roles and Tablespaces.
There is only one database exists named postgres in Databases part. If you want then you can create new database from this section and after creation the database will be added in this section.
Two login information are shown in Login/Group Roles section. These are pg_signal_backend which is created at the time of installation and postgres which is created later after installation. You can also create new user and role from this section.
Third section is Tablespaces which are used to define the location of the data files containing database objects such as tables, indexes etc. By default, two tablespaces named pg_default and pg_global are created here. If you want you can also create your own tablespace from this section.
The right plan of the browser shows the overall server status and activities which are the up and downtime of the server, the numbers of database transaction per second, tuples in, tuples out, Block I/O and server activity information. There are four parts in server activity section to get more detail information related to server current activities. These are user session,lock information, prepared statements and configuration.
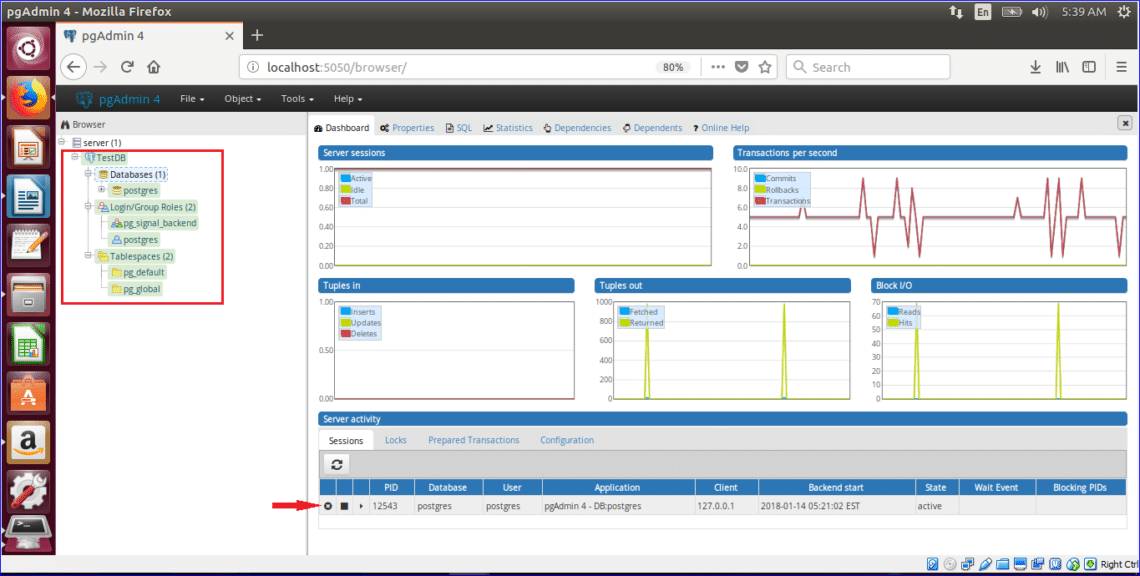
So, you can do various types of PostgreSQL database operations and monitor the current database avtivities easily by using pgAdmin tool. To advance to the next level see the tutorial below which will go into more details of the usage of PGAdmin4:
]]>
In this article I will show you how to install and setup PostgreSQL the easy way on Ubuntu Linux. In order to use “The Easy Way”, it implies that will use the version of PostgreSQL that comes with the Ubuntu distribution and not get picky about specifying a different version. So lets get started.
Run apt-get to install postgresql package for Ubuntu as such:
After the command completes PostgreSQL software will be installed and configured to an initial running and usable state. To verify what has been done try the following commands:

pwd
# psql -l
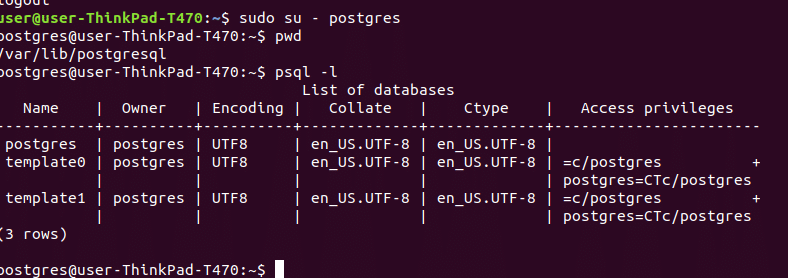
Now check the output form the ps command that was done earlier and notice where is the location of the config_file. In my example the following arg was added on the command line:
Let’s open the postgresql.conf configuration file to see what we can learn. The following interesting entries were specified which will help us understand how PostgreSQL was installed on this system:
# (change requires restart)
hba_file = '/etc/postgresql/9.6/main/pg_hba.conf' # host-based authentication file
# (change requires restart)
port = 5432 # (change requires restart)
From the above we can see some critical directories. The data_directory is where the data we insert into the database is actually stored, we should not need to play around with that at all. The hba_file is where we will update our access permissions for new connections to the database. hba file is certainly something we will want to modify when we setup more robust security. By default password’s are used, but LDAP or Kerberoros are probably desired in a more secure setting. And the port is set to 5432, which is the standard port. If we wanted to be more secure we could modify to use a different port, but I don’t think it really helps too much anyway against sophisticated attackers.
Before making any other configurations lets do some simple queries and see the output to get a feeling for what is setup.
postgres=# SELECT * FROM pg_user;
postgres=# SELECT * FROM pg_database;
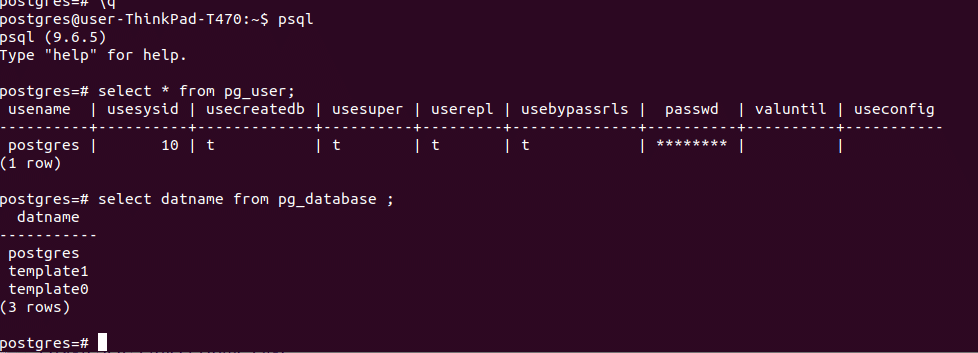
Next let us create a new user that can login to the database that is not the postgres superuser. Use the following command:
‘E’ means store password for this user encrypted, ‘P’ means prompt now for a new password for this new user, and ‘d’ means allow the new user to create databases in the system. Now you can exit out from the linux user ‘postgres’ and from the command prompt of a regular user let us connect to the database:
To make this easier to use we can set a few environment variables as shown below:
export PGHOST=127.0.0.1

And finally before getting started, let us create a new database that we can use for our data with the createdb command:
The command above will create a new database in the system called ‘mywebstore’ which can be used for storing your user data. And with that we have installed and setup PostgreSQL on Ubuntu “The Easy Way”.
References
PostgreSQL Wikipedia Page
PostgreSQL Project Home Page
PostgreSQL Official Documentation
PostgreSQL License
]]>
Starting the Installation
First, navigate to the official PostgreSQL website at the following URL: https://www.postgresql.org.
After you open the link, a window will appear onscreen. Click the Download button shown on this screen.
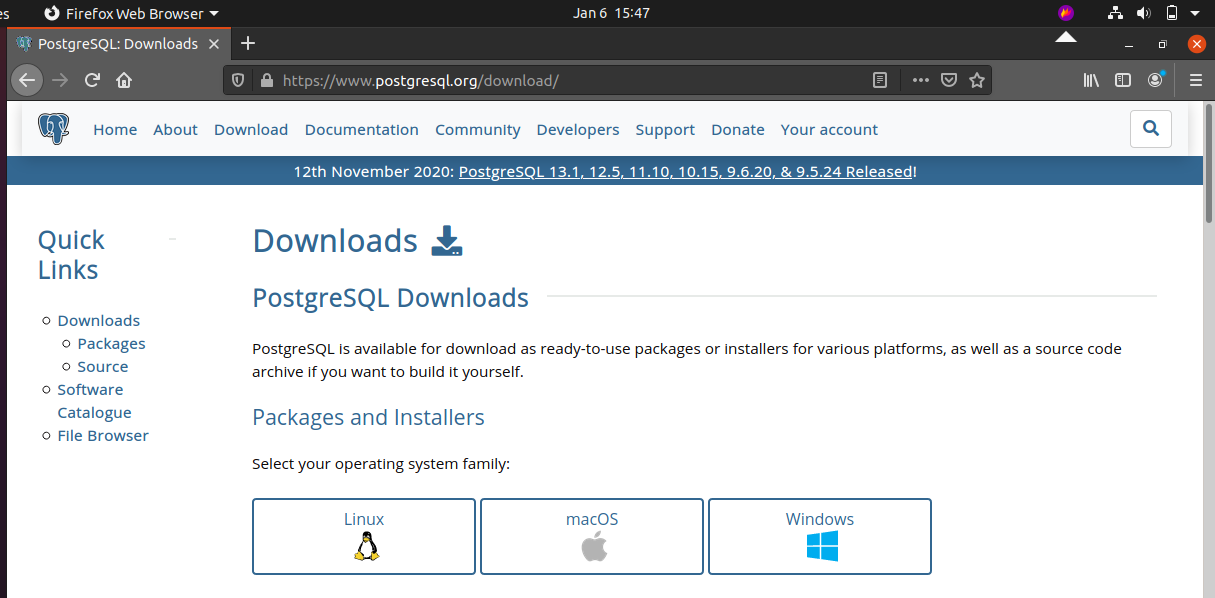
After you click the Download button, another window will open. Scroll down, and click Ubuntu under the Binary Packages heading.
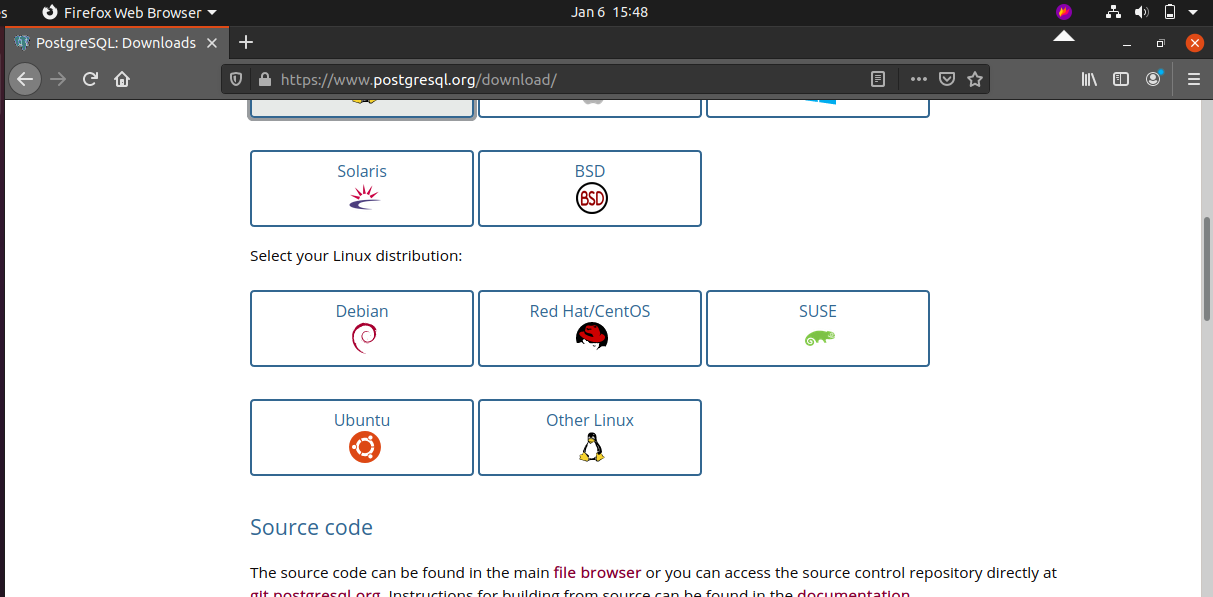
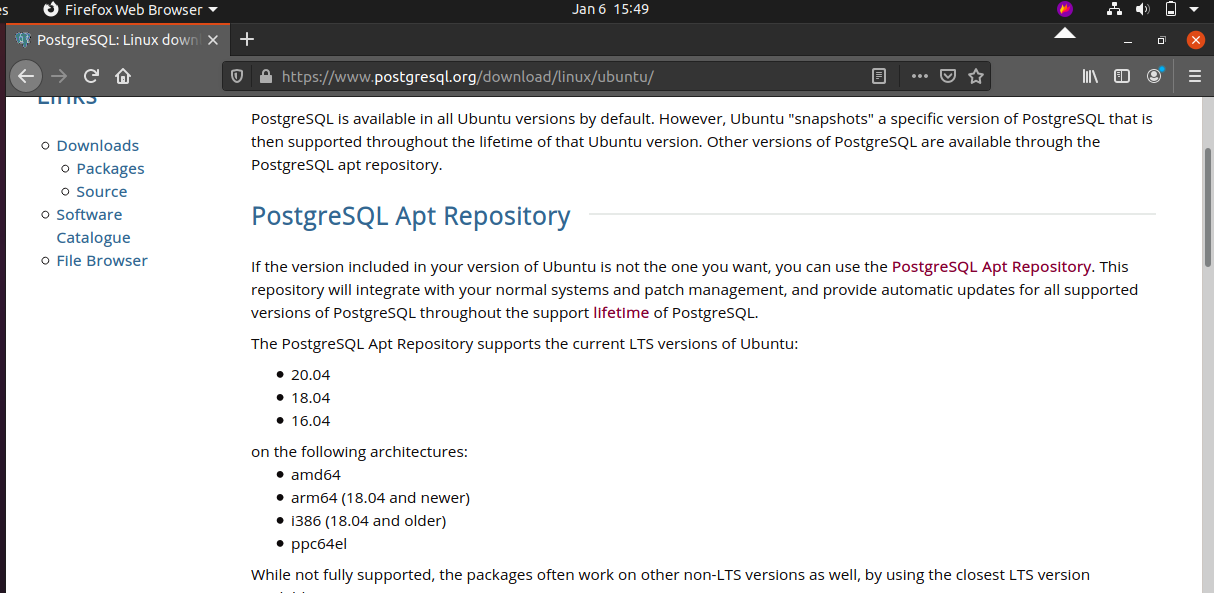

Next, you need to refresh the Ubuntu OS package repository cache. Issue the following command to update the cache:

Finalizing the Installation
At this time, you have completed all the hard work and are almost ready to install PostgreSQL 10. You just need one more command to install this software. Issue the following command to install PostgreSQL 10 on your system.
After you enter and run this command, a new window will open that will hold some of the key details about the installation and the items to be installed. Press Y then Enter to continue the installation.
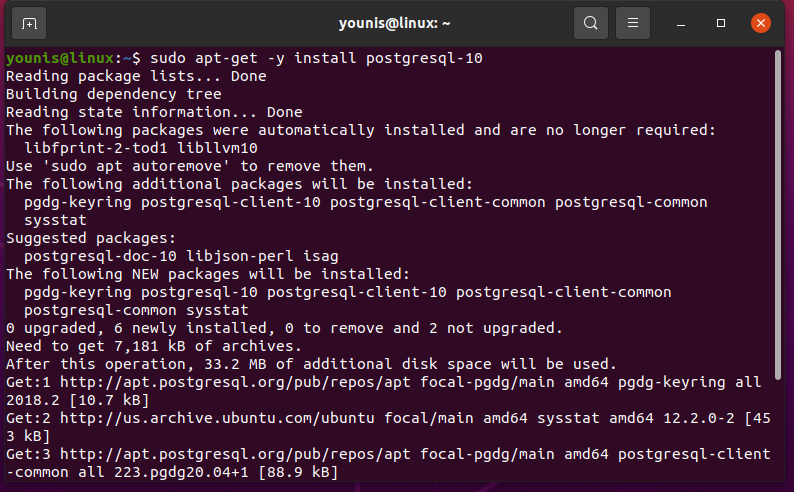
Wait for a few seconds, and the installation will complete. It does not take much time to install the software; the installation should be complete after a little while.
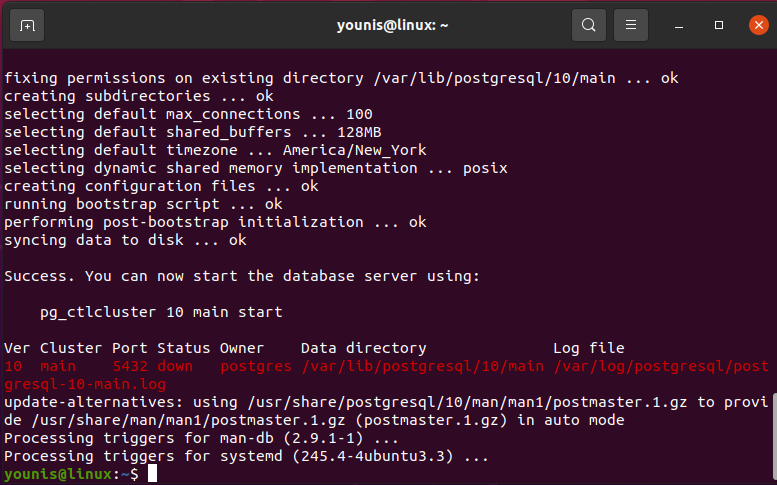
Once the software has been installed successfully, run some tests to verify that it has been installed correctly. Enter the following command to check whether the software is running correctly:
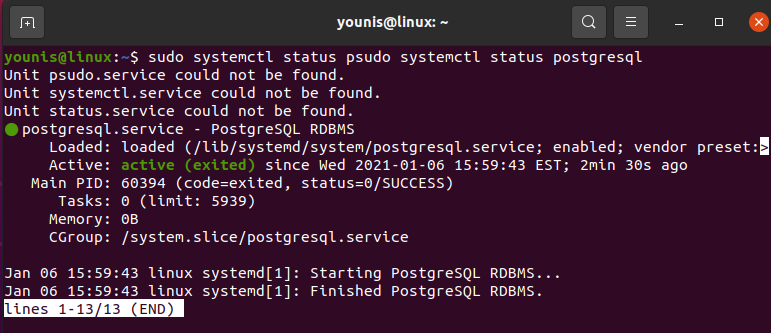
As you can see from the output, PostgreSQL is running.
Creating and Setting a Profile
Now that you have completed the installation, you will only be able to log in to PostgreSQL as a ‘Postgres’ user. To access the software without using a Postgres user, you will have to create other users and databases from this login.
So, log in as a Postgres user and set up a password for the Postgres user by entering the following command:

After this, you can log into the system as a Postgres user by issuing the following command:
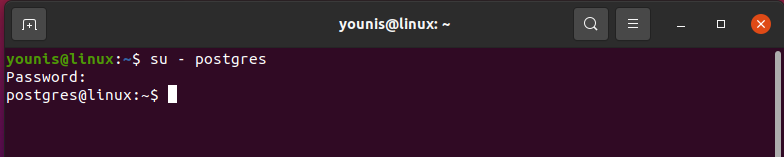
After logging into the interface, as a user, you should have access to the command-line interface of PostgreSQL. To obtain the command-line interface, run the following command:
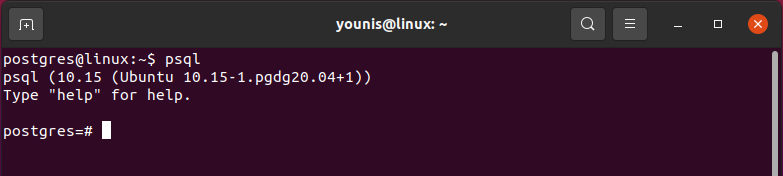
Now, you have access to the command-line interface, and you can write commands and text in PostgreSQL. You can also view the prompt that appears to run other PostgreSQL commands.
Conclusion
In conclusion, this article provided a complete and detailed overview of the procedure required to install PostgreSQL 10 in Ubuntu 20.04 Focal Fossa.
]]>