This article covers the usage of the ss command with some straightforward examples. All the commands shown in this article were executed on the Ubuntu 20.04 distribution to check the statistics of socket and network connections.
Example 1: List Network Connection Using ss Command
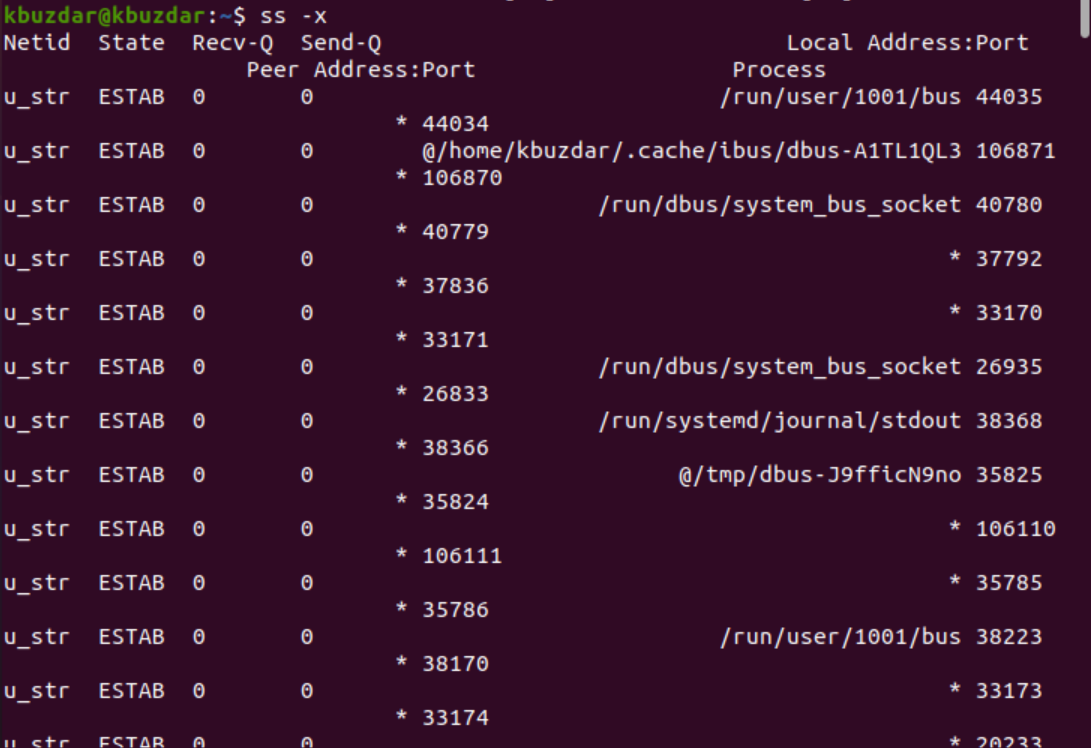
You can easily list all network connections present in a system, including TCP, UDP, and UNIX socket connections, using the following ss command. The output is displayed in “less” format so that you can scroll through the output window:

Example 2: List TCP, UDP, & Unix Socket Connections
You can also filter out the TCP, UDP, and UNIX socket connections using the following options:
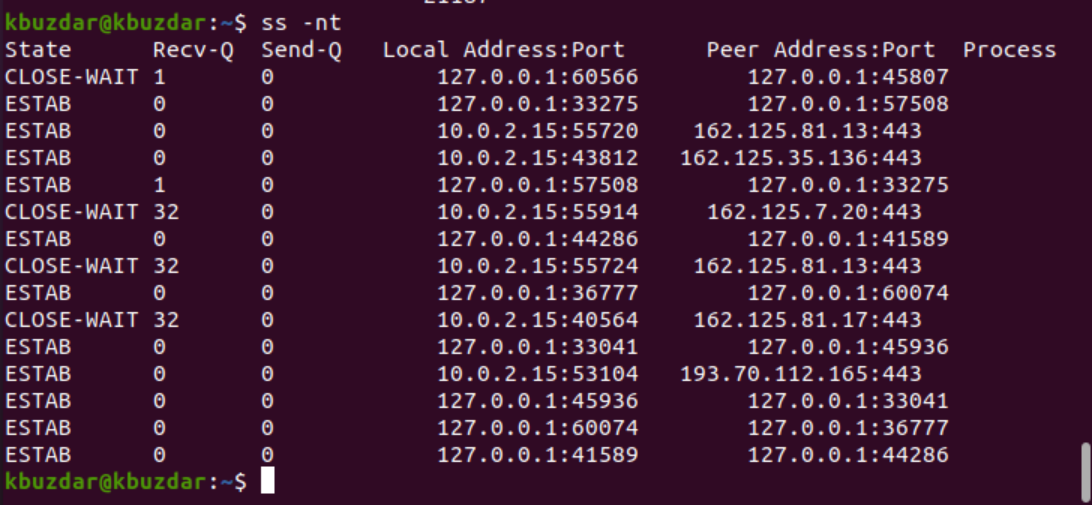
Using only the “t” option displays connections that are ‘Connected’ or ‘Established.’ This option alone does not show you the TCP socket connections that are ‘Listening.’
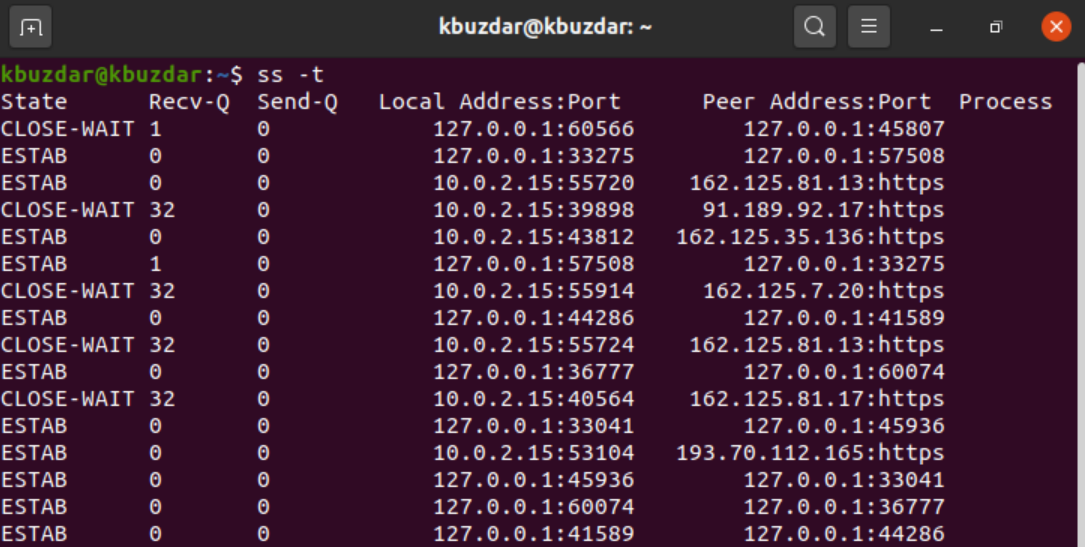
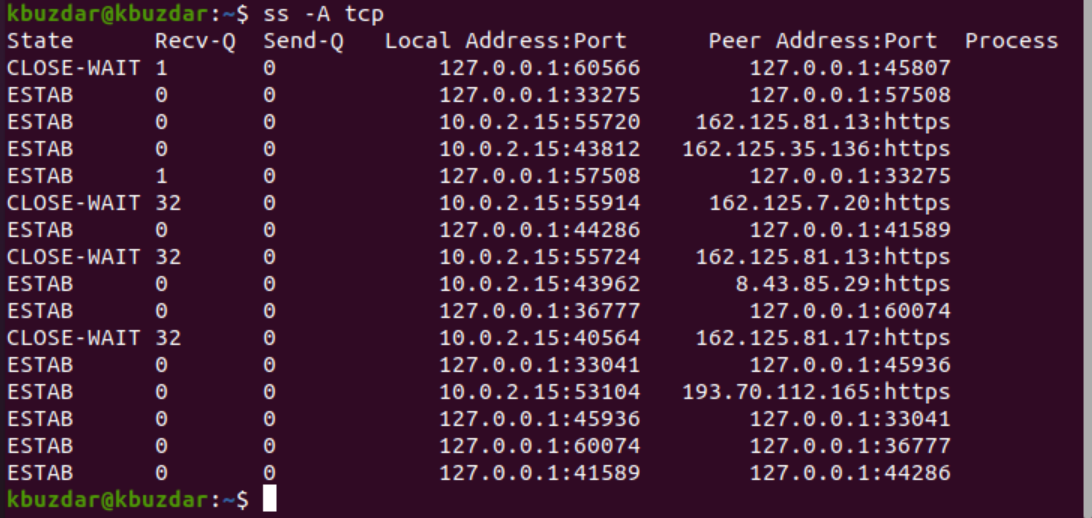
For TCP, use the ‘-t’ option, along with the ‘-A’ tag.
For UDP connections, use the following command:
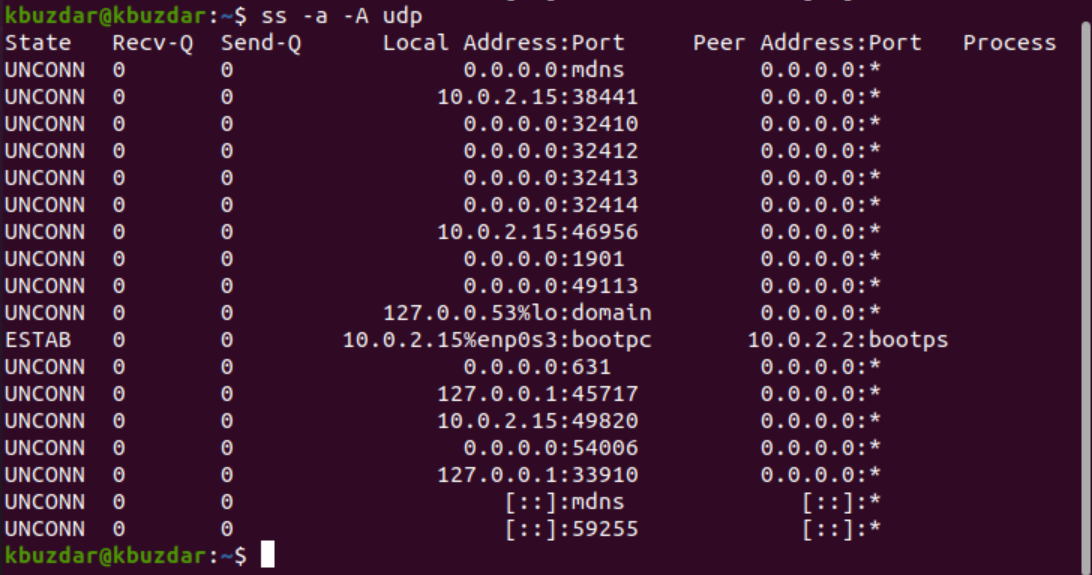
The ‘a’ option displays both ‘Connected’ and ‘Listening’ sockets. UDP is a connectionless protocol, so using ‘ss -u’ alone will not display anything. However, the ‘a’ can be used to show all UDP connections.
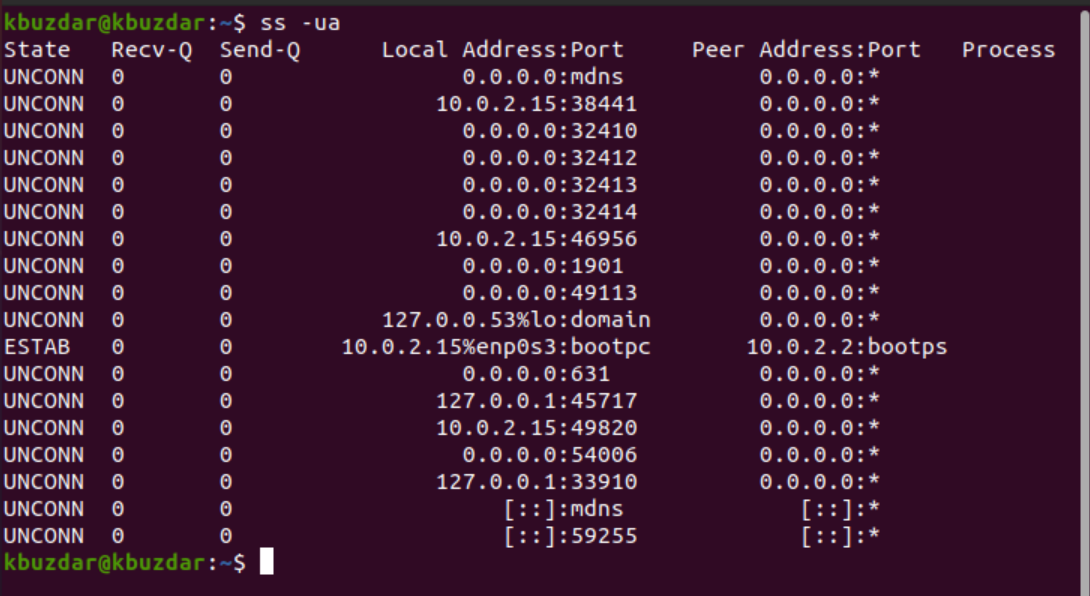
For Unix socket connections, use the following command:
Example 3: Display Faster Output
The “n” option used with ‘t’ prevents socket statistics from resolving IP addresses to hostnames and displays the faster output, as follows:
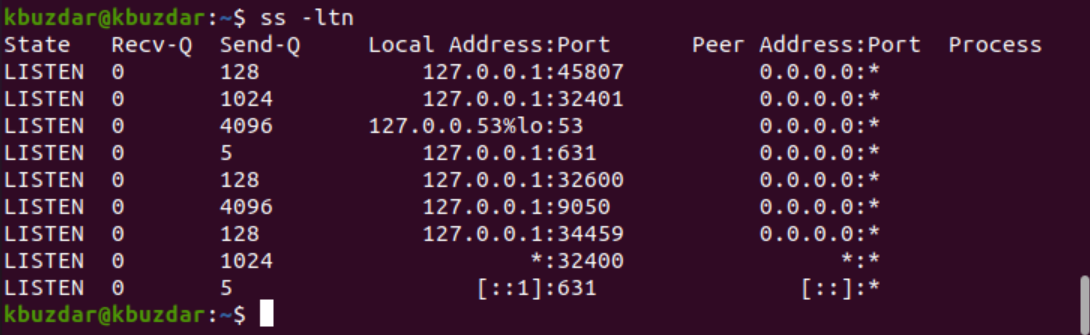
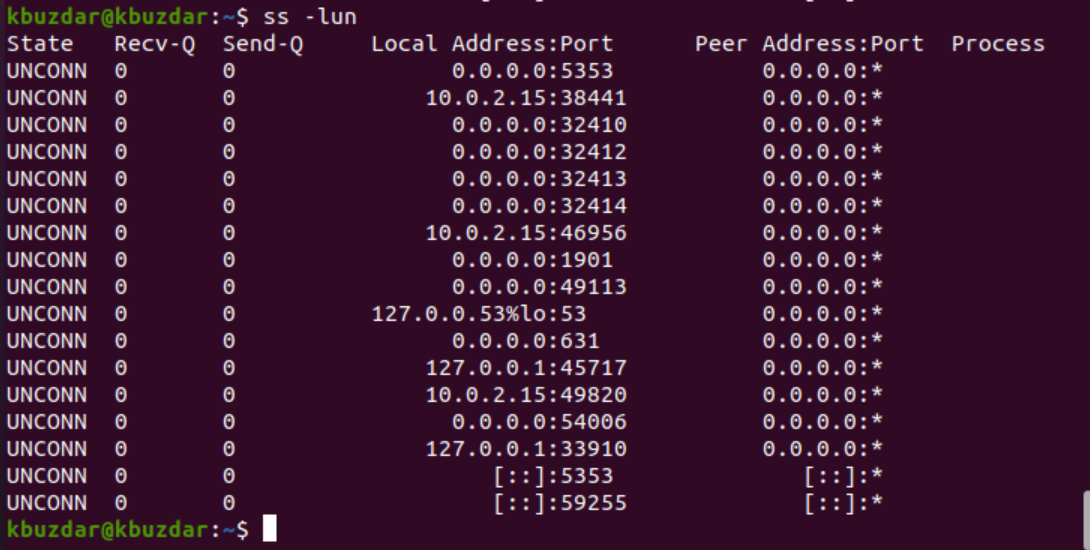
Example 4: Display Listening Sockets Only
You can also display only the TCP socket connections that are listening. The “n” option ignores resolving the hostnames of the IP address to display the output more quickly.
For all UDP listening connections, replace the ‘t’ option with the ‘u’ option, as follows:
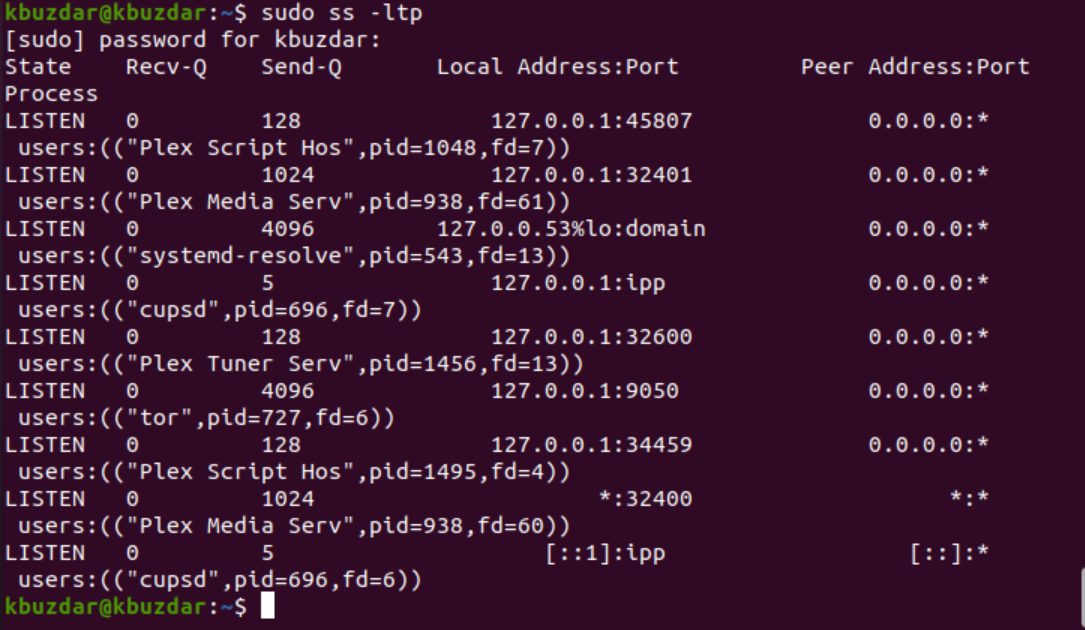
Example 5: Display Process Name with pid
You can display the process name, along with the pid of each process, using the following ss command with the ‘-ltp’ option:
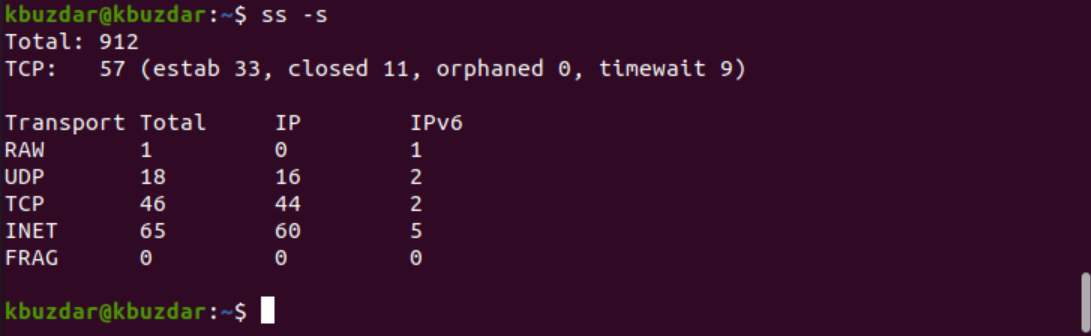
Example 6: Display Statistics
The use of the ‘s’ option with the ss command displays the complete statistics, as follows:
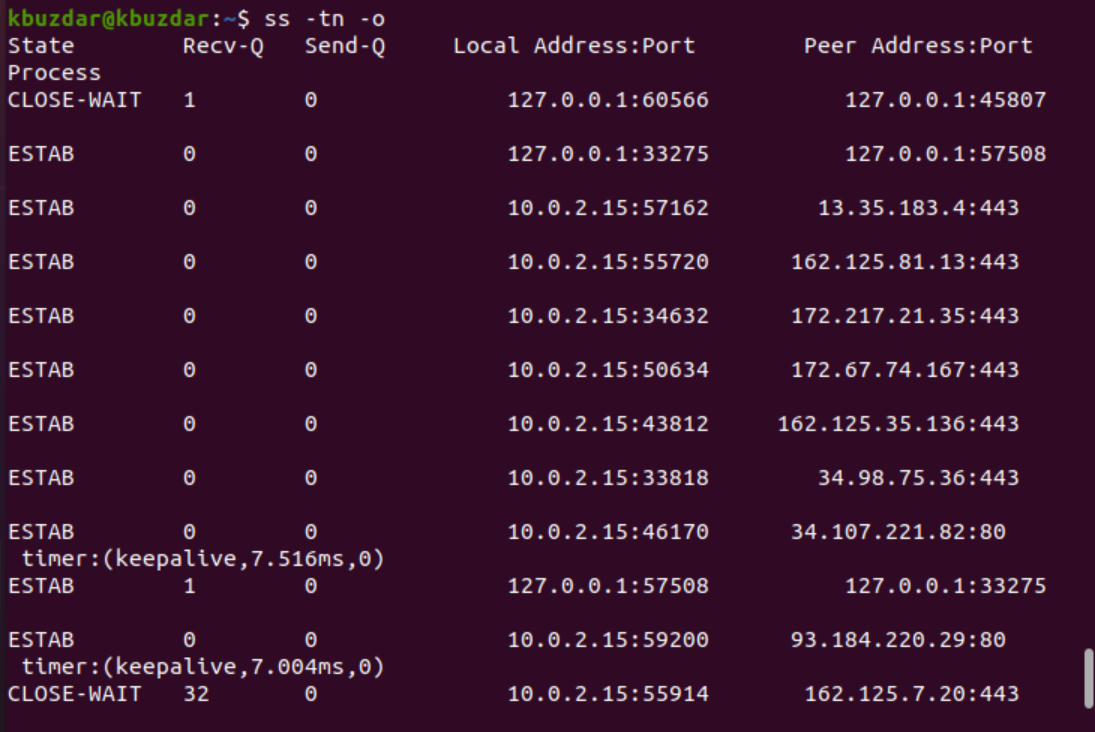
Example 7: Display Timer Details of Connection
By using the ‘-o’ option with the ss command, you can display the time information of each connection. The time details inform the user how long this connection has been maintained:
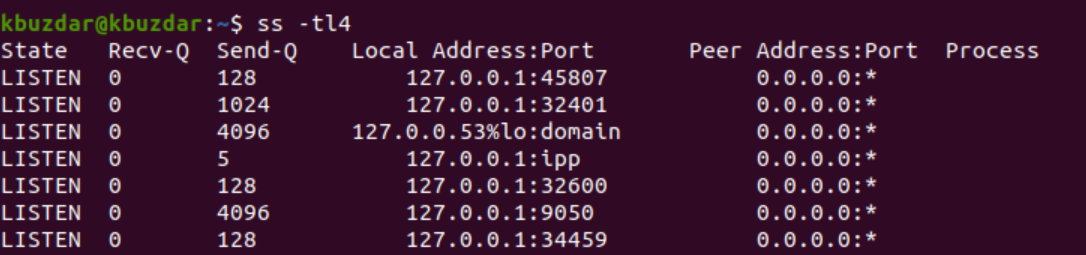
Example 8: Print IPV6 or IPV4 Socket Connection
To print the IPv4 socket connections only, use the ‘-4’ option with ‘-f inet,’ as follows:
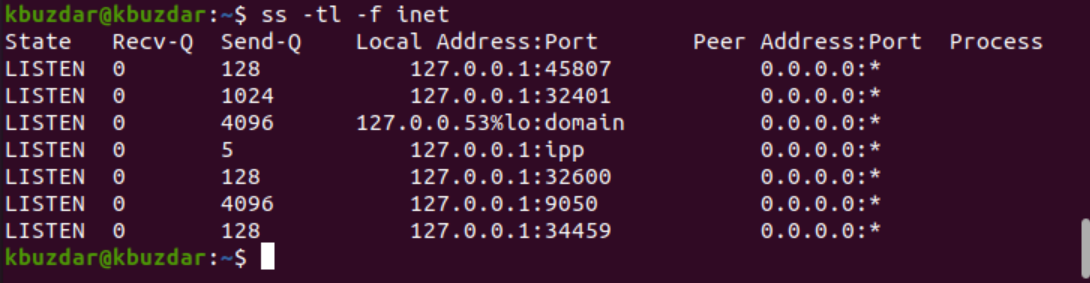
For IPV6, use the ‘-6’ option or ‘-f inet.’

Example 9: Filter TCP Connections by State
You can also filter connections by connection state with the ss command. Connections can exist in various states, such as established, syn-recv, syn-sent, fin-wait-1, fin-wait-2, time-wait, close-wait, closed, all, last-ack, closing, connected, bucket, synchronized, and bucket.
So, according to the user requirements, you can use and filter any connection state by running the following command:
$ ss -t4 state established
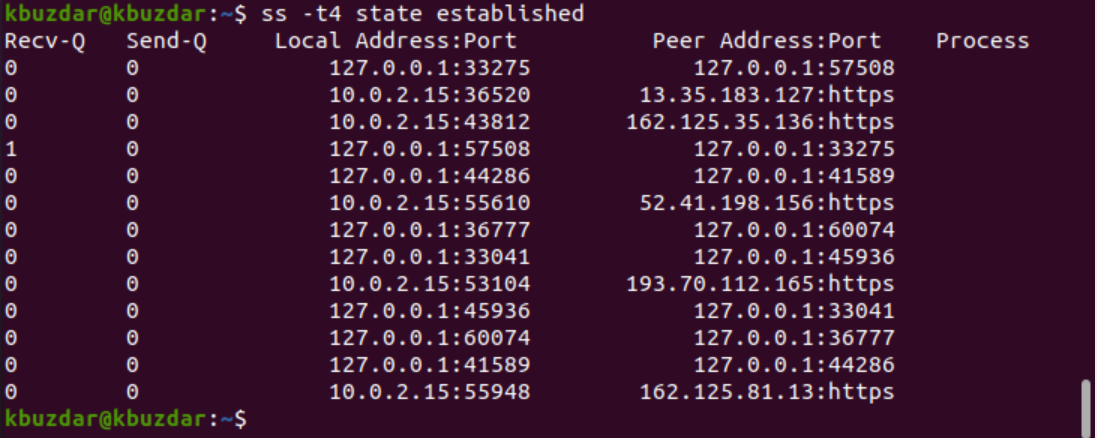
In the above example, we filtered all ‘established’ socket connections of TCP.

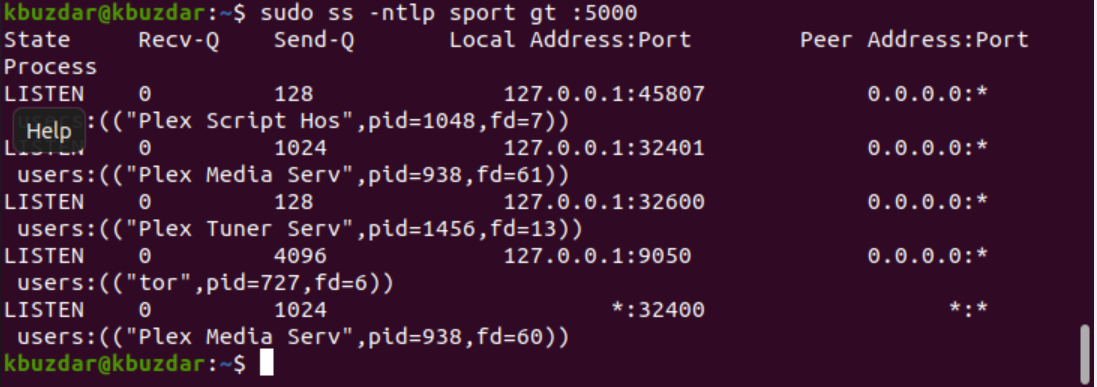
Example 10: Filter Address by Port Number
You can also filter the connection by the port number or by a specified IP address, as follows:

Conclusion
This article explored the various uses of the ss command. The ss command is the best alternative for the netstat command, as you have seen in this tutorial. Using the above examples, you can easily monitor system sockets and network connections.
]]>Installing netstat on Debian 9 Stretch:
netstat command is a part of the net-tools utility package on Debian 9 Stretch. It may not be installed by default on your Debian 9 Stretch operating system. The net-tools package is available in the official package repository of Debian 9 Stretch. So installing it is very easy.
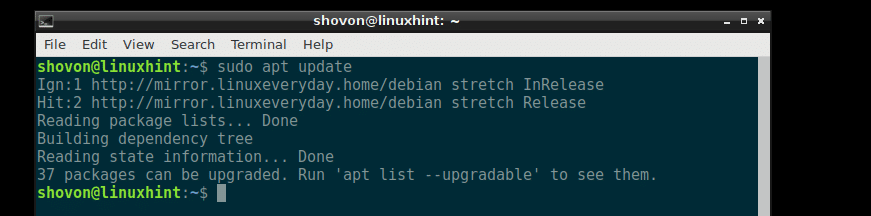
First update the apt package repository cache of your Debian 9 Stretch machine with the following command:

The apt package repository cache should be updated.
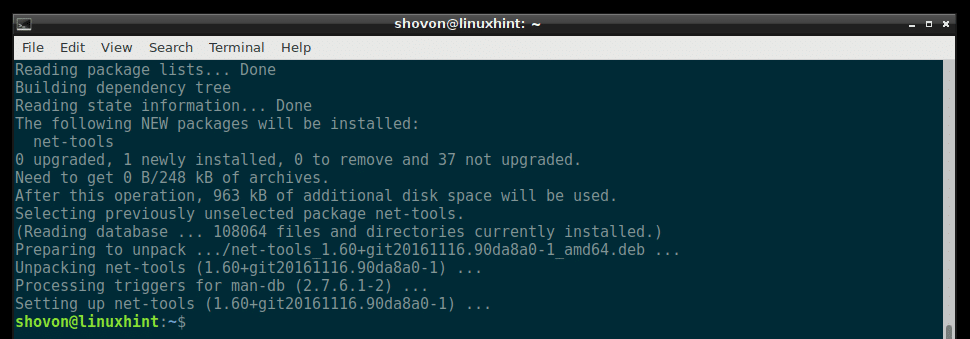
Now run the following command to install the net-tools utility on Debian 9 Stretch:

net-tools should be installed.
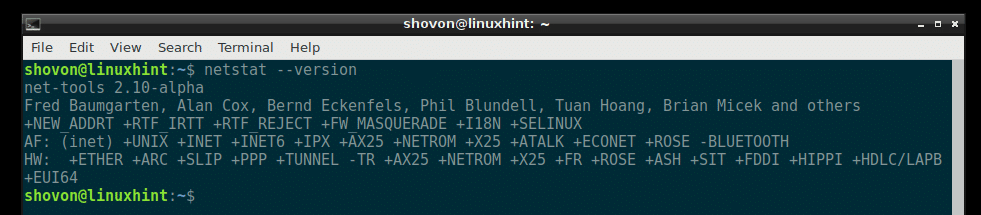
Now check whether netstat is working with the following command:
It works!
Listing All Ports and Sockets Using netstat:
You can list all the opened ports and connected sockets on your Debian 9 machine with the following command:

or

As you can see, all the opened ports and sockets are listed. It’s a very long list.
Listing All the Listening Ports and Sockets with netstat:
You can use netstat to see a list of all the ports and sockets that are listening with the following command:

Or

As you can see, all the ports and sockets on your Debian 9 machine is listed. It’s a long list.
Listing All the Listening TCP Ports with netstat:
You can list all the TCP (Transmission Control Protocol) ports that are listening using netstat with the following command:

Or

As you can see, all the TCP ports that are listening is listed.

In the output of netstat, all the common ports are replaced by the service name by default. For example, the port 80 by default is the port for the HTTP (HyperText Transfer Protocol), which we all are familiar with. So in the output of netstat, it is shown as http instead of port 80 as you can see in the marked section of the screenshot below.

If you need the port number, not the service name, then you can run the following netstat command:

Or

As you can see from the marked section of the screenshot below, the service names are replaced by the port number.

Listing All the Listening UDP Ports with netstat:
If you want to list all the UDP (User Datagram Protocol) ports that are listening on your Debian 9 machine, you can do so with the following netstat command:

Or

All the listening UDP ports should be listed. Just like the TCP port example, the common port numbers are replaced by the service names by default here as well, as you can see from the marked section of the screenshot below.
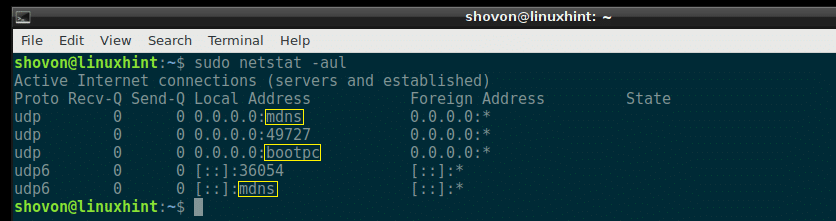
But the ports that are not common are not replaced by the service names as you can see from the marked section of the screenshot below.

If you want all the ports to be displayed, not the service name as before, then run the following netstat command:

Or

As you can see from the marked section of the screenshot below, the service names are replaced by the UDP port number.

Find out What Service Name Represent What Port:
Debian 9 Stretch has a service file which can be found at /etc/services
You can open the service file /etc/services with the following command:

The contents of the /etc/services file:
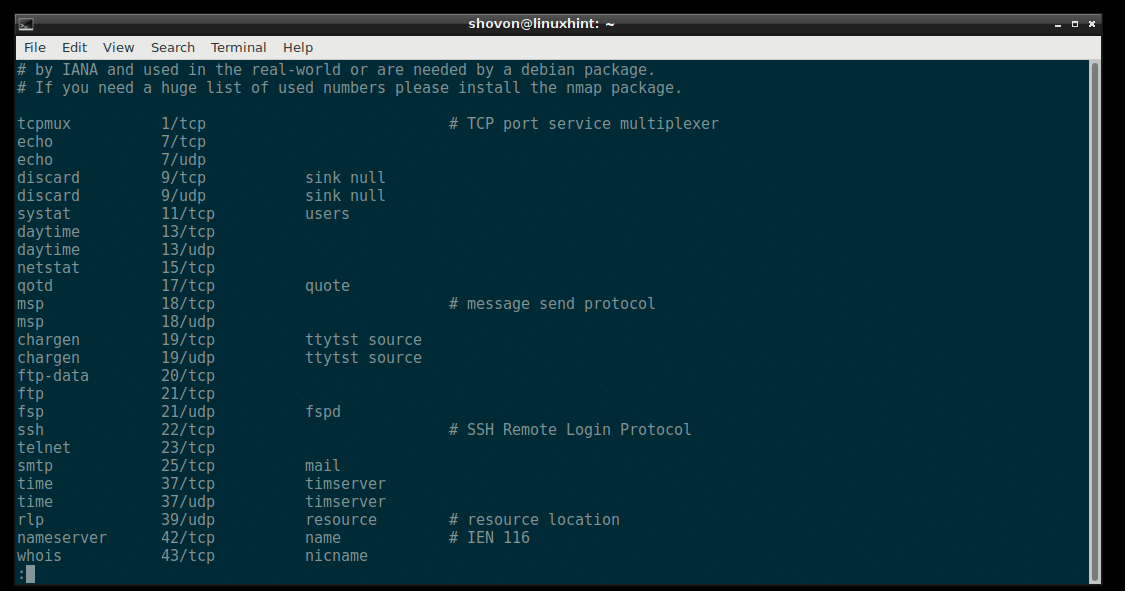
The /etc/services file contains a long list of service name, and the port number and protocol of that specific service that a client or server may use. Programs on Linux system such as netstat uses this file to resolve the port numbers to service names and vice versa.
The service name, port number and protocol of the SSH service in /etc/services file:

How to Get Help with netstat:
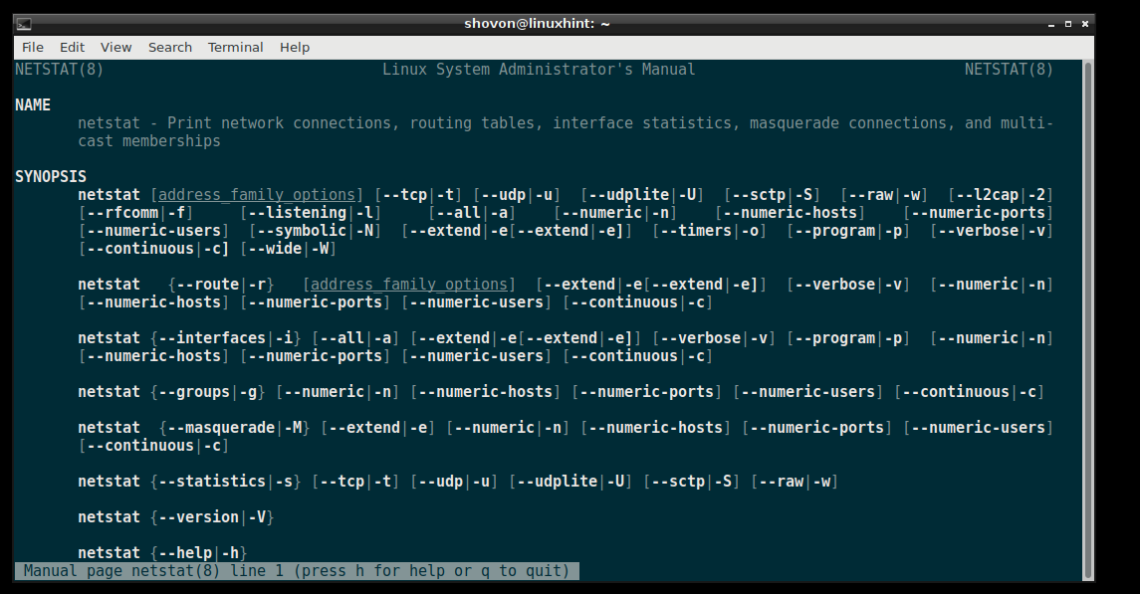
On Debian 9 Stretch, if you need any help with the netstat command, you can just go to the manpage of netstat and you should be able to get a clear documentation of what netstat command line options are available and what they do.
To go to the manpage of netstat, run the following command:

The netstat manpage:
That’s how you show listening ports on Debian 9 Stretch with netstat. Thanks for reading this article.
]]>
List out all connections
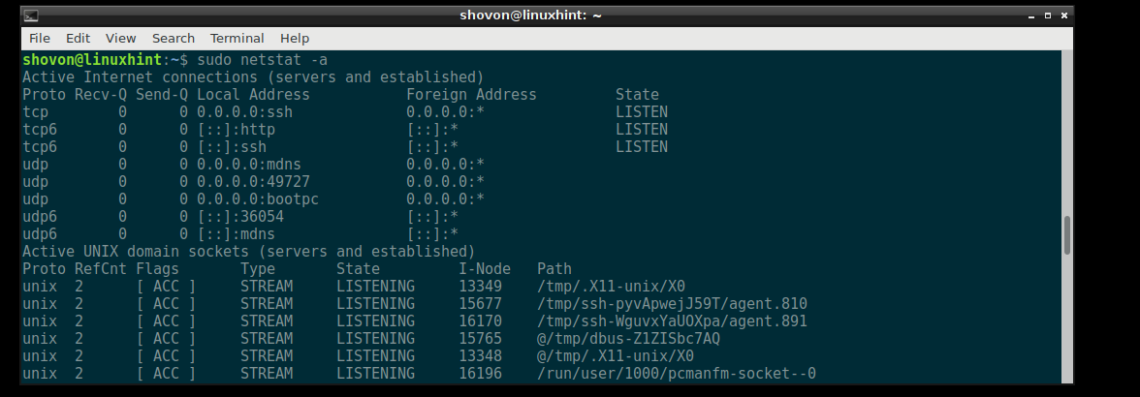
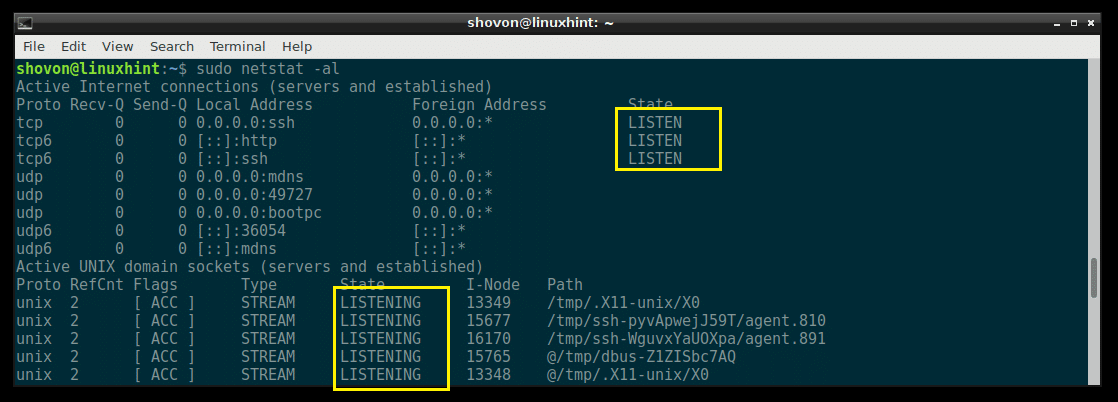
The first and most simple command is to list out all the current connections. Simply run the netstat command with the a option.
# netstat -a
check the following snippet for the netstat output. Output contain multiple pages, so some data are omitted.
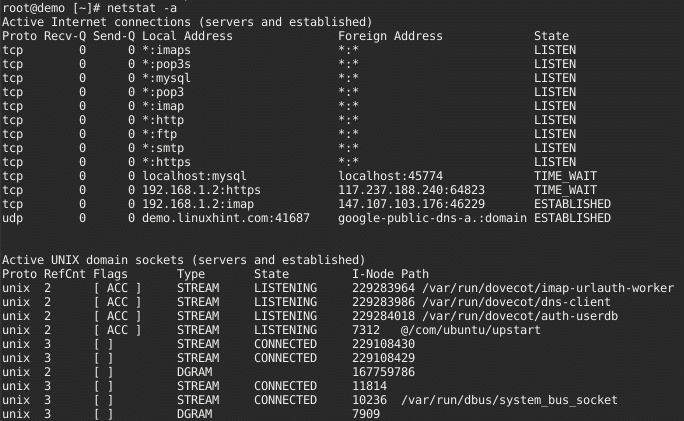
Explanation of each column
Proto – tell us if the socket listed is TCP or UDP. TCP connections are used for browsing the web and downloading files. UDP connections are used by certain fast-paced computer games and sometimes by live streams.
Recv-Q & Send-Q – tell us how much data is in the queue for that socket, waiting to be read (Recv-Q) or sent (Send-Q). In short: if this is 0, everything’s ok, if there are non-zero values anywhere, there may be trouble.
Local Address & Foreign Address – tell to which hosts and ports the listed sockets are connected. The local end is always on the computer on which you’re running netstat and the foreign end is about the other computer
State – tells in which state the listed sockets are. The TCP protocol defines states, including “LISTEN” (wait for some external computer to contact us) and “ESTABLISHED” (ready for communication). The stranger among these is the “CLOSE WAIT” state. This means that the foreign or remote machine has already closed the connection, but that the local program somehow hasn’t followed suit.
The above command shows all connections from different protocols like tcp, udp and unix sockets. However this is not quite useful. Administrators often want to pick out specific connections based on protocols or port numbers for example.
Don’t resolve host, port and user name in netstat output
When you don’t want the name of the host, port or user to be displayed, use netstat -n option. This will display in numbers, instead of resolving the host name, port name, user name. This also speeds up the output, as netstat is not performing any look-up.
# netstat -an
List only TCP or UDP connections
To list out only tcp connections use the t options.
# netstat -t
Similarly to list out only udp connections use the u option.
Listing all LISTENING Connections
# netstat -l
Listing all TCP Listening Ports
# netstat -lt
Listing all UDP Listening Ports
# netstat -lu
Displaying Service name with PID
# netstat -tp
Displaying Kernel IP routing
# netstat -r

Showing Network Interface Transactions
# netstat -i
Displaying RAW Network Statistics
# netstat –statistics –raw

You can only use netstat truly effectively if you know much about your network and your Linux system.
]]>