
Linux, as a derivation of Unix, naturally has much in common with the BSDs. Like BSD, Linux distributions are free and open-source as well. Despite the fundamental similarities, Linux has largely overshadowed BSDs in popularity, with over 74% of modern smartphones being Linux based.
So that begs the question: If BSD and Linux are just iterations of research Unix, what exactly makes them different?
Well, the differences between the two lies in the fundamentals, and the differences are very many. But to read them all in a single post would be quite tedious for the readers. Hence, this post will focus solely on the fundamentals and leave the intricate details out for the sake of brevity and to not intimidate away the new readers.
But what is Linux, really?
The first thing that many people get wrong is that Linux is a kernel, not an operating system. So that makes it only a part of the OS, not the OS itself.
Let’s discuss Kernels for a second. Kernels serve as the pivot in any operating system, as it retains all the underlying code upon which that operating system stands. It enables and expedites the interaction between the hardware and software components of a system, manages its input/output requests to and from the software applications, and is responsible for handling the hardware devices as well.
In short, a kernel is the most integral feature of any operating system that it is based upon, and is thus retracted to a highly protective part in the system’s memory where any and all access request from applications are denied, barred a few that are integral to system’s operation.
Now that we understand what a kernel is, we can move on and see what Linux, as a kernel, does in the operating system.
Linux Kernel within an Operating System
Among the most popular Linux based operating systems are Debian, Ubuntu, Fedora, and Deepin. So, whenever you hear somebody say they use Linux, know that it’s actually one of these distributions. These distributions are “Linux-based” because they are built upon the Linux kernel. The tweaking to the kernel along with the new applications loaded into it make each distribution different from another.
What is BSD, and how is it different from Linux?
As mentioned earlier, the different distributions of BSD are all operating systems. And that makes BSD, like Linux, a kernel.
But to make things complicated, BSD is also a standalone operating system, which Linux isn’t. Let us explain how exactly.
For BSD distributions, several programs are added to the BSD kernel. This combination is then released as a standalone, complete package that needs to be installed, and the thing’s ready to go. So, the core difference between the BSD distributions such as FreeBSD, OpenBSD, etc., is because of the programs added to the kernel operating system. To download additional software packages, BSD users use the ports system, which keeps these packages in source form. The source code is compiled by the system each time the software is launched. While this can prove to be cumbersome, especially when running longer, more intricate codes, BSD systems can skip the compilation step upon each launch entirely if the program is installed in a binary state, thus alleviating the process to a great extent.
Linux is different from BSD in the regard that each of its distributions uses completely different programs, and the distributions don’t have a centralized repository for software packages, as each distribution has its own repository.
Differences in Licensing
One of the fundamental differences between BSD and Linux is that of the Licensing system under which their distributions are released.
When you download software from the Ports repository in BSD or install a distribution as a whole, the software or distribution is allocated to you under the BSD license, which is a custom license system employed by the BSD developers. While BSD is completely open-source and free as of now, the BSD licensing system allows the developers to declare BSD closed-source at a moment’s notice. As a FreeBSD user, you’re not legally entitled to further releases from BSD devs. However, the BSD developers have made it public that they have every intention of keeping it open-source in the future.
Linux distributions are released under the GNU General Public License (GPL). Under this licensing system, Linux developers are legally compelled to release each and every instance of changes made to the Linux kernel. The licensing system, in essence, makes sure that Linux remains open-source, no matter what changes are made to the kernel itself.
Why is Linux more Popular? (Spoilers: Software Availability)
If you’ve been wondering this whole time why you haven’t heard about BSDs as much as you hear about Linux distributions, here’s why: when it comes to software compatibility, Linux knocks it right out of the park. For every software out there is a Linux compatible release. This is not the case for FreeBSD, which remains largely neglected for that reason.
The Linux kernel makes writing and distributing software programs simpler as compared to other kernels, so developers are naturally inclined to work towards Linux releases. The distribution, especially, is made even easier by the pre-installed binary package system that it facilitates. Linux allows software packages to be downloaded and installed via package managers such as apt, yum, Pacman, etc.
As compared to software distribution in Linux, BSD users have it much hard. The software packages are first downloaded as source codes in BSD via the ports system. These source codes are then compiled every time they’re launched, a process that is both time-consuming and frustrating in the modern age where software is installed at the click of a button. This is equally frustrating for the developers, as they have to put in a whole lot of effort to make compiling as quickly as possible.
Although the introduction of pre-compiled binary packages has largely mitigated the process of getting software in FreeBSD, software availability still remains an enormous problem for BSDs.
Choosing between Linux and BSD
Aside from the more mainstream Windows and IOS, Linux distributions are leaps and bounds ahead of any other operating systems out there. It is free, open-source, and has everything to offer that FreeBSD has, without the caveats.
BSD and Linux are a lot more common than they are different, with licensing and software distribution being the only core differences. Still, despite the similarities, using one is a trade-off of another.
On one hand, FreeBSD maintains a library of tools and dependencies across all distributions, making it easier for the developers to iterate on the contents and come up with applications of their own. This is where FreeBSD has a considerable advantage over Linux, as the GNU suite included with Linux doesn’t allow this.
But on the other hand, the lack of software compatibility and availability severely hinders the experience with FreeBSD. This problem can be solved by using the Linux compatibility package, which allows Linux software to run on BSD distributions, but this is one extra step that still hinders the experience, nonetheless.
As far as the licensing goes, the Linux GPL license is much more restrictive than BSD licensing. Developers or users cannot make variations to the Linux kernel or sourcecode without making it public. BSD users have no such obligations; hence developers should at least try BSD out. To be able to keep the source code private is a considerable advantage that Linux fails to provide.
The licensing for Linux distributions is biased in the favor of users, as it confirms that any development made to improve applications for the system will be made available to the users. The BSD licensing, on the other hand, is more akin to the standard licensing, allowing the users to install BSDs for free but not holding the developers to make their content public.
Our Recommendation
We’d recommend a Linux distribution if you’re going to use it for general purposes. Its software compatibility is reason enough for us to recommend it. However, if you’re a manufacturer, BSD is the right option for you. It has a centralized repository for software and is well-reputed for its reliability. And as far as BSD licensing goes, you won’t have to worry about making your work open-source.
If you’ve opted for Linux Kernel, we’d recommend using Ubuntu. It is regularly updated every six months, a consistency that, in my opinion, strikes a great balance between keeping up with security problems and not frustrating the users.
And if you choose to go with the BSD kernel, we’d recommend FreeBSD, which is by and large the most commonly used distribution of BSD out there.
]]>This is a quick tutorial on installing MariaDB 10.3 Database Server on a FreeBSD 12 system. By following the instructions here, you’ll be able to set up the database on your own FreeBSD server.
1- Update the FreeBSD Ports collection
Before you install MariaDB, you should update the FreeBSD port tree by issuing the command below:

To make sure that the portsnap command is properly executed, extract the snapshot into /usr/ports with the command below:
You only need to run the command above just once, when you’re running the portsnap command for the first time. Your output should display a crucial message near the end; ignore it.
To see if you’ve been keeping up with the updates, issue the following command:

2- Install MariaDB 10.3 Database Server
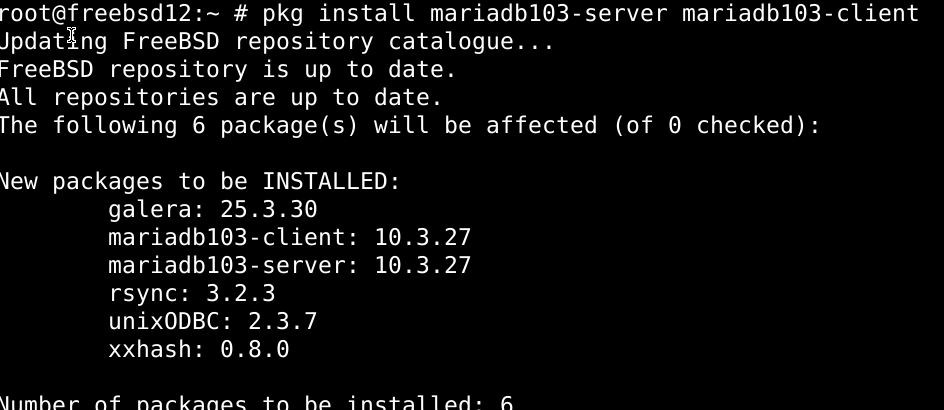
Now you’re ready to install MariaDB using the FreeBSD tree ports; it can be installed from its binary package with the FreeBSD package manager.
To see if the latest version of MariaDB can be installed with the FreeBSD package cache, type in the following:
The output clearly indicates that the latest version is FreeBSD 10.x.xx. Issue the command below:
3- Launch the mysql-server service
With MariaDB successfully installed on your FreeBSD server, all there’s left is to enable it before finally using it.
Activate the mysql-server service with the following command:
This should enable the service to launch upon a reboot. To start the mysql-server service on your FreeBSD, type in:

4- Perform server hardening for MariaDB
Issue the command below:
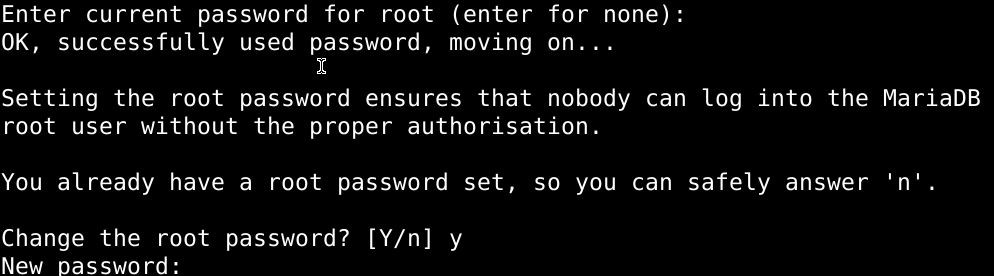
You’ll be asked to enter and then re-enter the new password along with a host of other questions that you should all answer yes to. Just make sure that you’ve set the database root password, disabled remote root logins, deleted any anonymous users, and removed the test database from open access.
Perform a test as the root user:
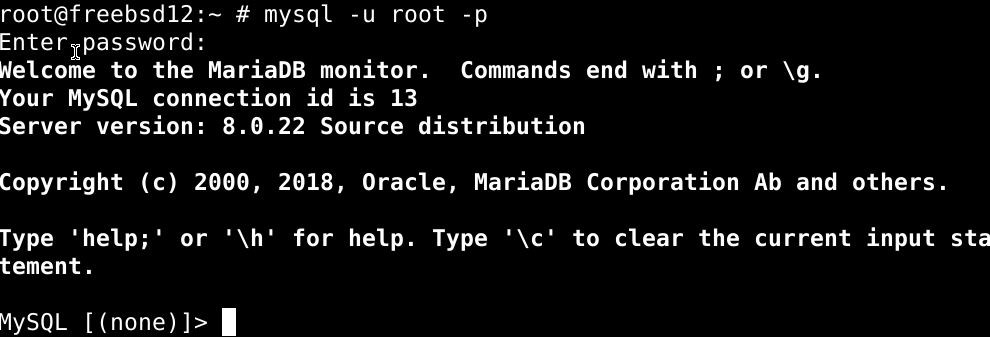
Then type out the password.
5- Chain MariaDB service with localhost
Use the sockstat command to see the activities related to our newly installed MariaDB service:
The output indicates that the service has been integrated with all the network interfaces. Now, it could be that you don’t have the service connected to the network database. If that’s the case, use the command below:
The changes will be made consistent upon a system reboot. To restart the system, type:
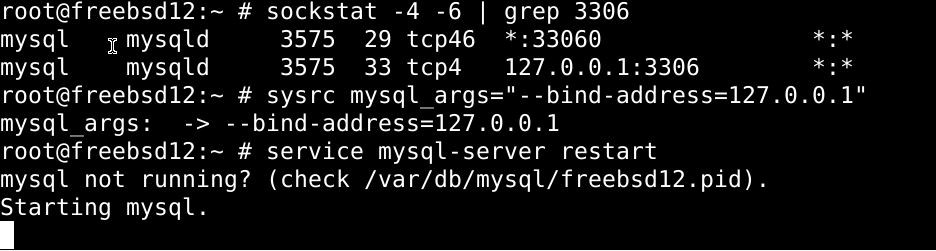
Once the system has restarted, confirm the changes with the command below:

Wrapping it up
Hopefully, you’ve got MariaDB up and running on your FreeBSD system. The features included with the latest MariaDB install are:
- You get InnoDB(with an instant add column as well) as the default storage engine for MariaDB.
- Parallel and Multi-source replication.
- You can use FOR loops with MariaDB.
- Transparent columns.
- The latest versions come with Galera Cluster.
- You can add Sequences.
- Column compressions are now independent of the storage-engine.
This is going to be a quick tutorial on how to set up nano on a FreeBSD system. Plus, there’s going to be a section in this lesson that’ll help you get started with this text editor.
Installing nano text editor in FreeBSD
To install any software in a FreeBSD system, the pkg method and the ports collection method are your most viable options. The FreeBSD package manager(pkg) installs with packages, and the ports collection method is used to perform a custom installation of the software. In both cases, you have complete control over the compilation method for the package/port.
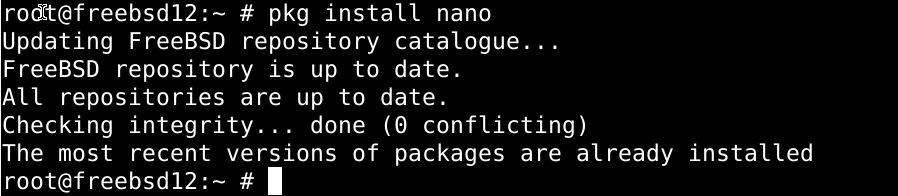
Install Nano with FreeBSD package manager
Run the command below to install nano with the pkg:
Install Nano with ports method in FreeBSD
You can use the ports collection method to install Nano as well.
Switch the installation directories to the port nano –
Then type in the command below to install the package:
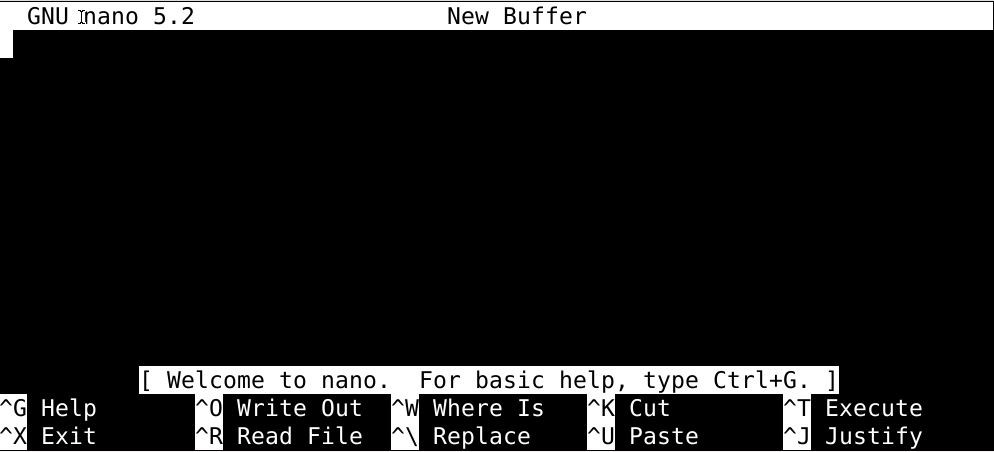
Getting started with Nano text editor
As far as the interface goes, Nano is probably the easiest to work with out of all the text editors for FreeBSD. Its command-line interface is quite intuitive and flexible, and once you start working with it, it’ll show.
So without further ado, let’s get started with our new text editor.
Creating a new file in Nano
The command that creates new files in Nano goes something like this:
Or you can type nano into the field and hit enter to fire up the text editor and get to writing the document.
When you’re done writing the document/file, you can press ctrl+o to save the file. You will be asked to name the file before it is saved.
Copy-pasting text in Nano
Press the ctrl and number 6 keys together to set the mark and select the text portions to copy using the arrow keys. The key combination to copy the highlighted text is alt+6, and to paste the same, take the cursor to that location and press ctrl+u.
You can also cut out the portions of texts this way. Once marked with the arrow keys, press ctrl+k to cut the portion of the text. Then paste it with the ctrl+u keys at a location of your choice.
Lookup words in Nano
Press the ctrl and w keys together to prompt a search field. Type out the words you want to find, hit enter, and Nano’s version of the find tool will look it up and take the cursor to the first search result.
Saving your work in Nano
You can save your file’s contents by pressing the ctrl+s keys together, and your file will be saved under the designated name if you’ve already named the file. Else the editor will ask for a file name before you save it.
To save the contents of a previously saved file but to a different copy, press the ctrl and o keys together, enter a new name and, your work will be saved to a new file.
Quit Nano
Just press the ctrl and s keys together when you’re done, and your file will be saved, then press the ctrl and x keys together to leave the editor.
In summary
In this tutorial, we’ve introduced Nano, a simple yet powerful text editor that goes well with Unix like operating systems. Hopefully, you’ve managed to set up and get started with Nano.
]]>FreeBSD is one of the many open-source distributions of the Berkeley Software Distribution (BSD) Kernel. Since BSD is an iteration of Research Unix, FreeBSD is said to be a Unix-like operating system. It can be used on pretty much any processor adaptive to Intel’s x86 architecture. Other builds that can run it includes amd64, PC-98, Alpha/AXP, and IA-64. It is known for being more reliable and faster than Linux, hence used as an alternative to Linux. It is favored by manufacturing companies, and such other entities, because of its licensing system, which allows them to modify the kernel without having to make the changes open-source.
This tutorial is about installing FreeBSD 12 on VirtualBox. The instructions here are universal to almost all other hypervisors.
Pre-requisites
First, get the FreeBSD 12 image before you proceed to install; use the link below:
Then create a bootable FreeBSD 12 USB with the command below:
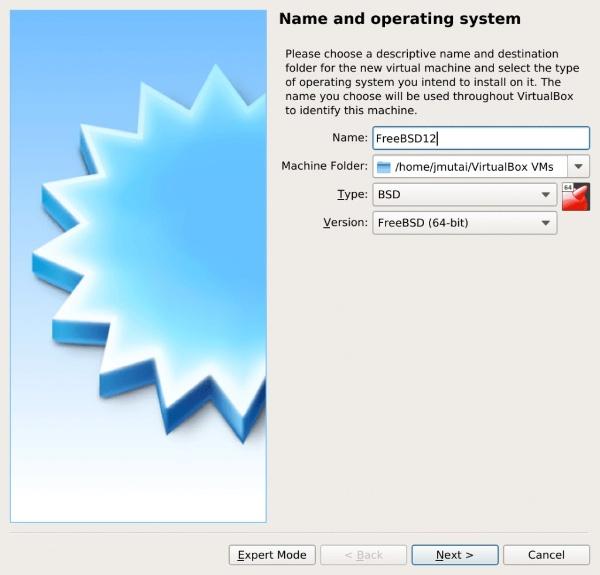
Now, Fire-up VirtualBox and click the New button to start creating a Virtual machine.
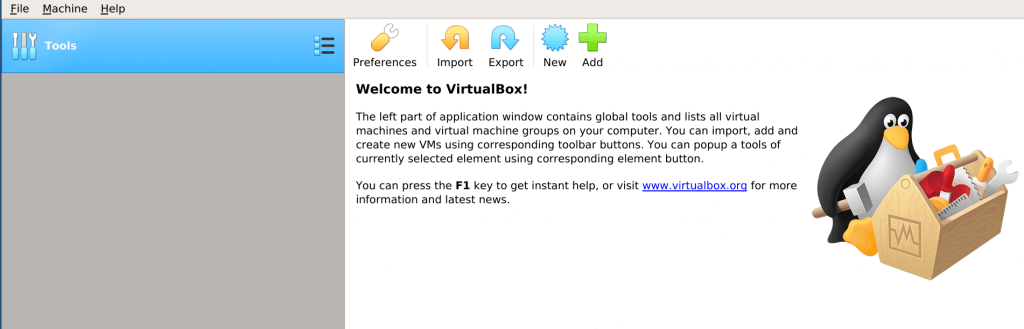
Name your Virtual Machine, then select the operating system type:
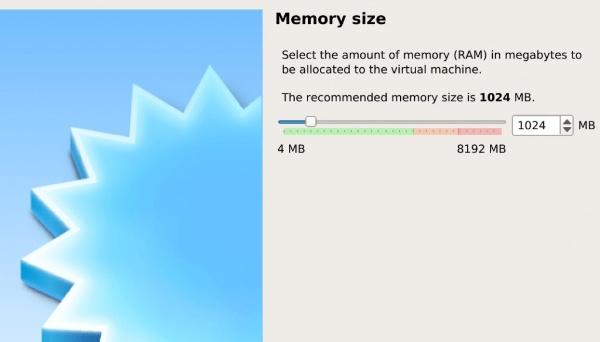
Then allocate the appropriate disk space for installation:
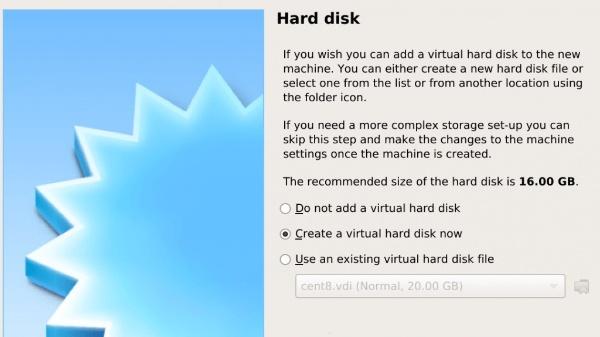
After that, proceed to select a hard disk:
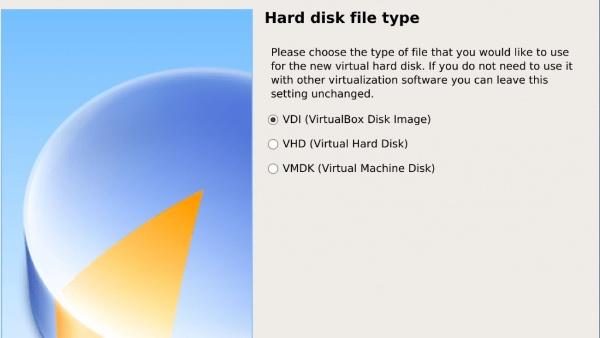
Select a file type for this hard disk:
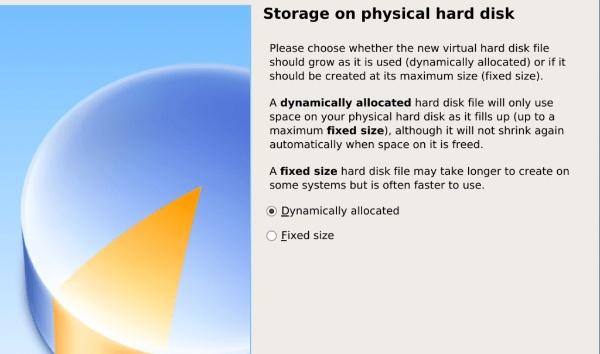
The next step is to choose between dynamic and fixed-sized installation. The Dynamic allocation allows the hard disk file to accumulate in size, whereas fixing the HDD file size creates the file at maximum size.
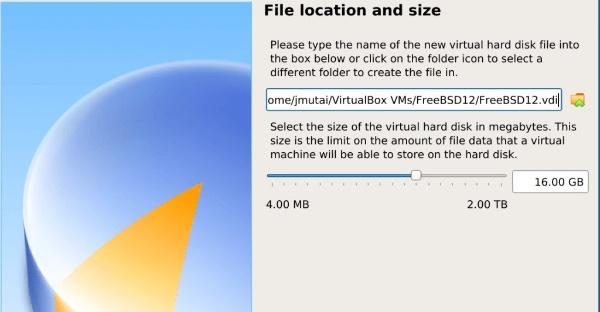
Then name your virtual HDD file and select a size for it:
The template for your virtual machine is up and ready to go.
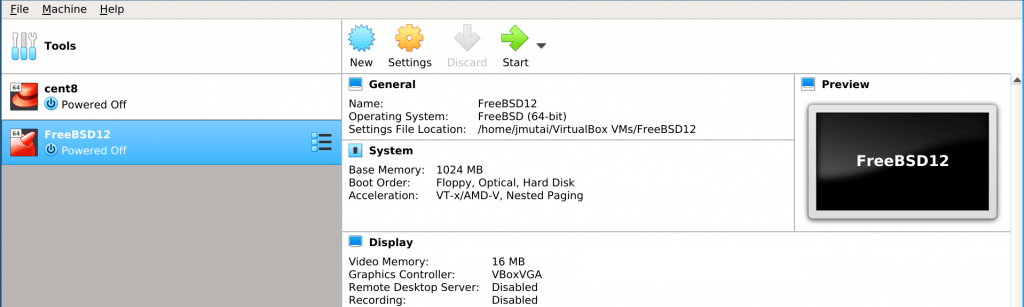
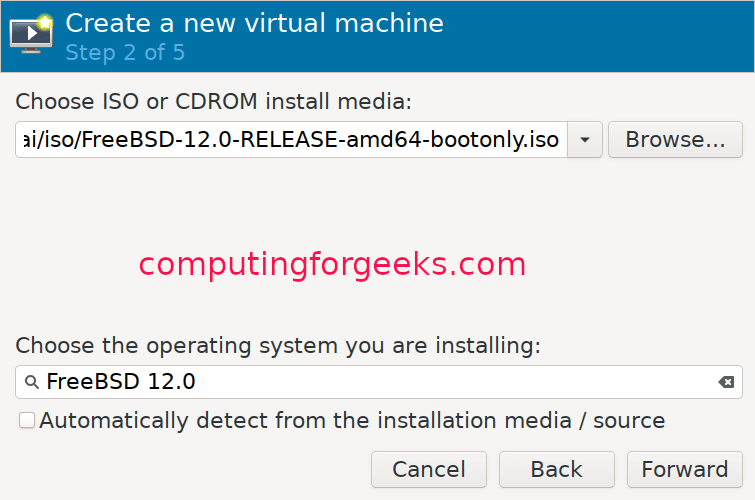
Click the green button labeled start and select an ISO image path:

Installing FreeBSD
Create a new virtual machine, as follows:

Select the operating system type:
Allocate some memory to your virtual machine and configure CPU settings:
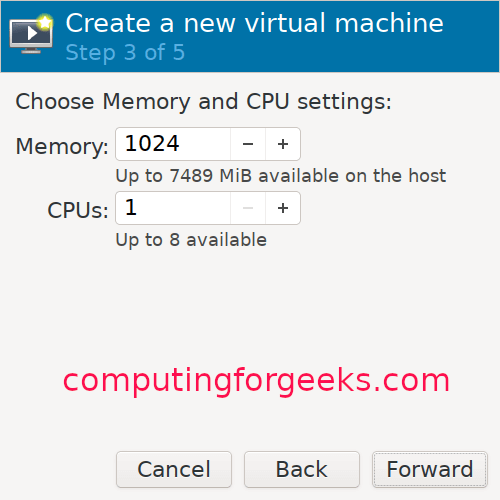
Allocate a disk size for your VM:
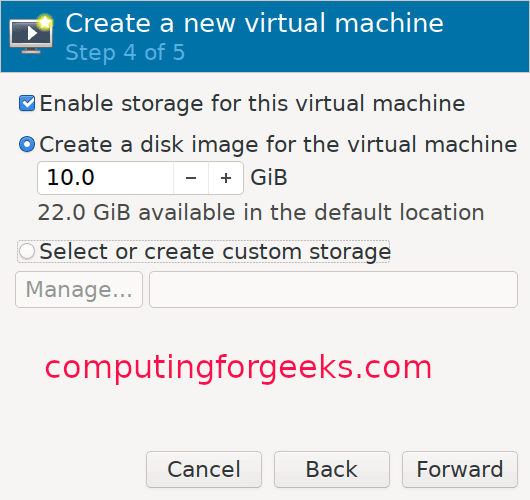
Give your VM a name:
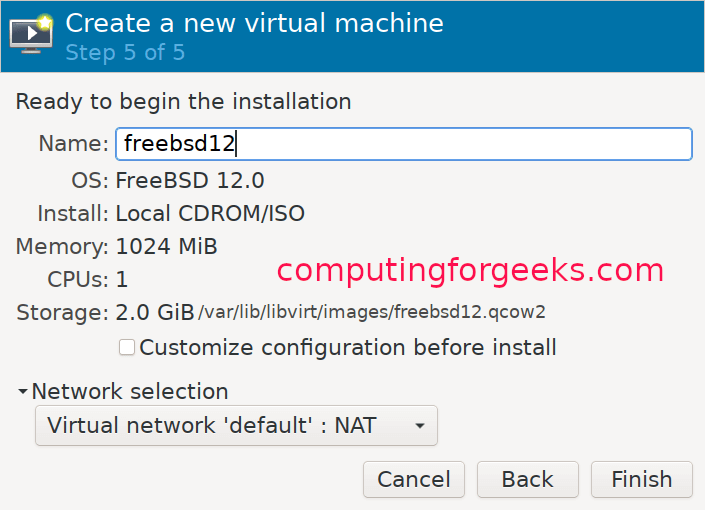
FreeBSD KVM installation guide
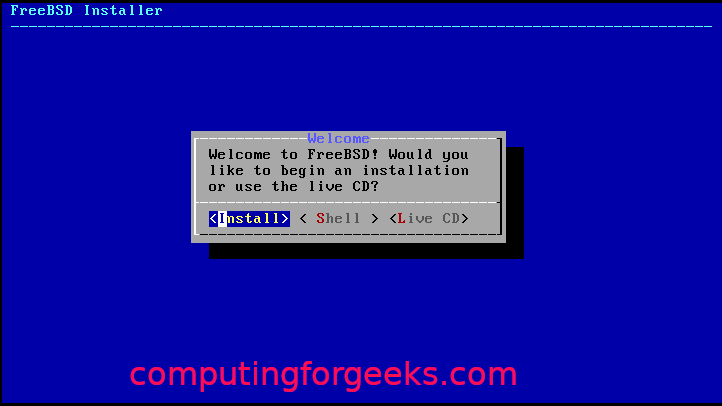
Once the VM creation is finished, the installer will start automatically. Press enter to continue.

Click the install button to continue.

Choose one of the keymaps.
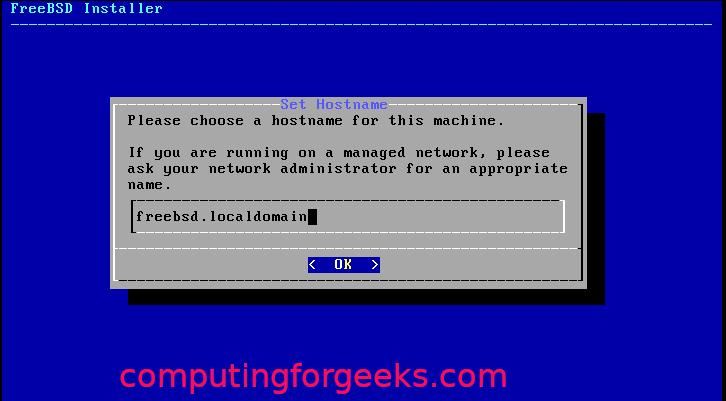
Give your VM a hostname:
Select the FreeBSD components you want to install:

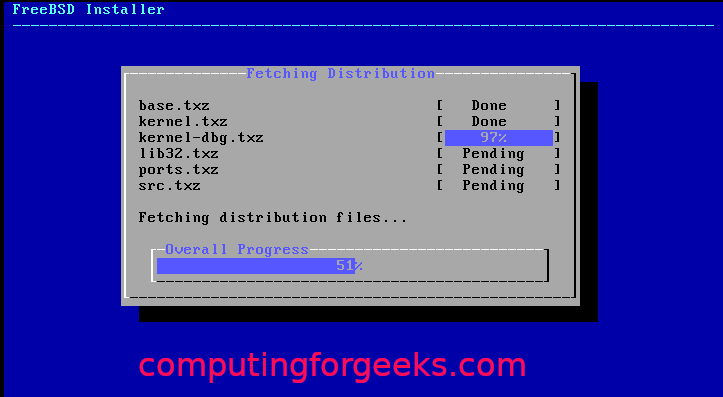
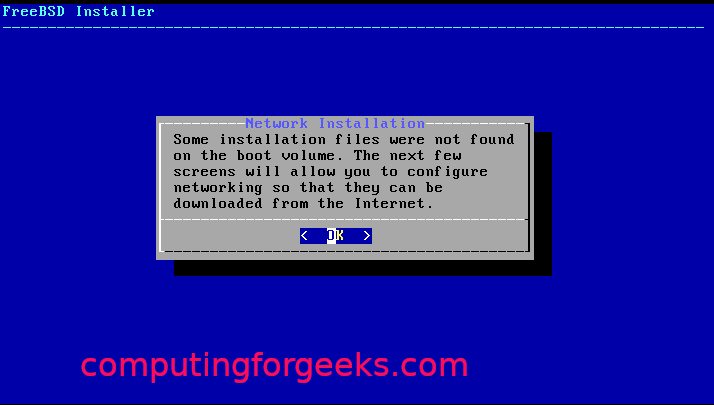
If the software packages aren’t retrievable from the disk, it’ll download it off of the web.

Choose the network interface to configure:

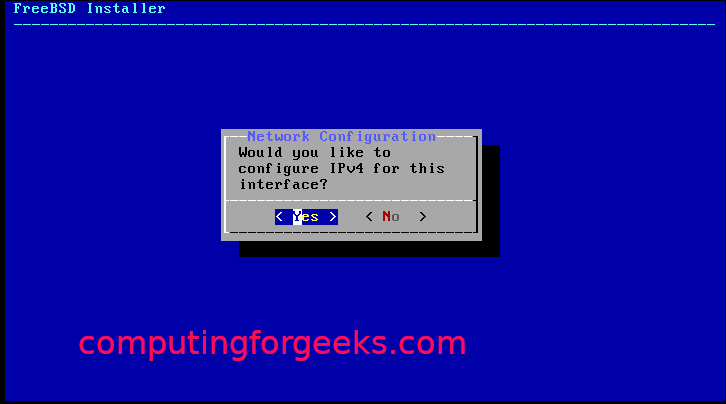
Just agree if you’re using IPv4.

Choose DHCP if you’re using static IP addressing:

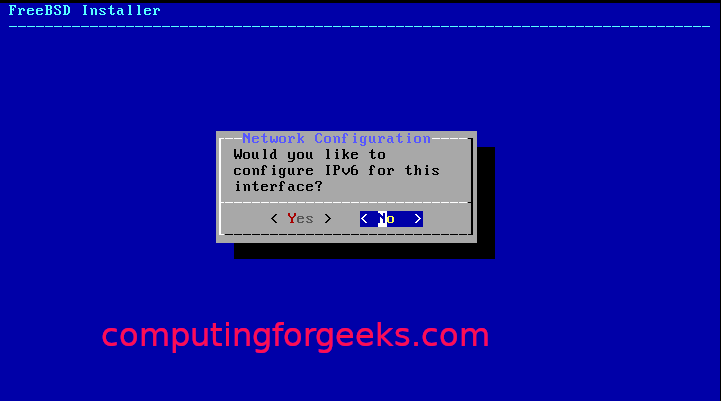
Click on Yes if you’re using IPv6:

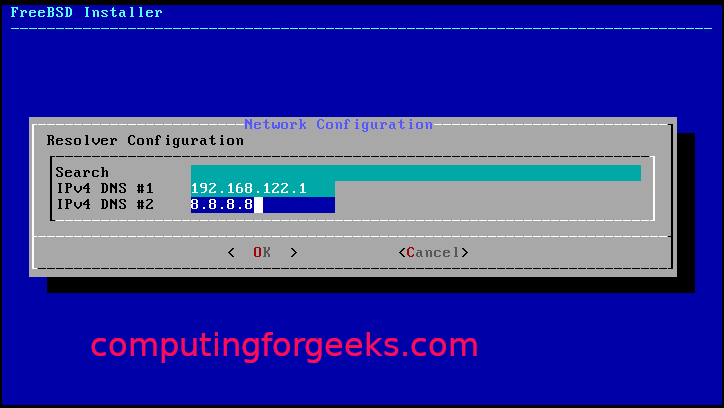
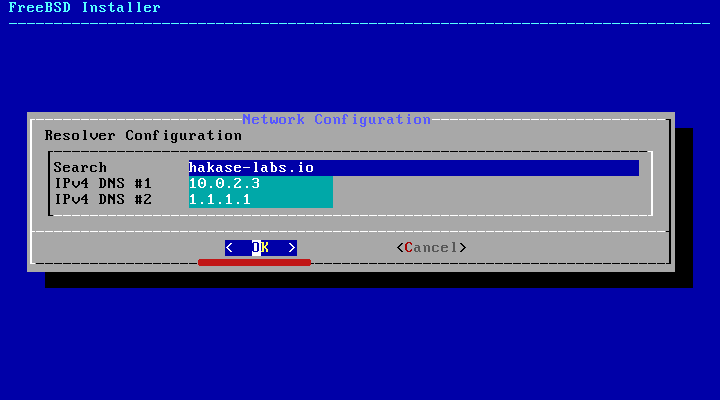
Then for the revolver configuration:
Out of the installation mirrors, select those that are nearest to you:

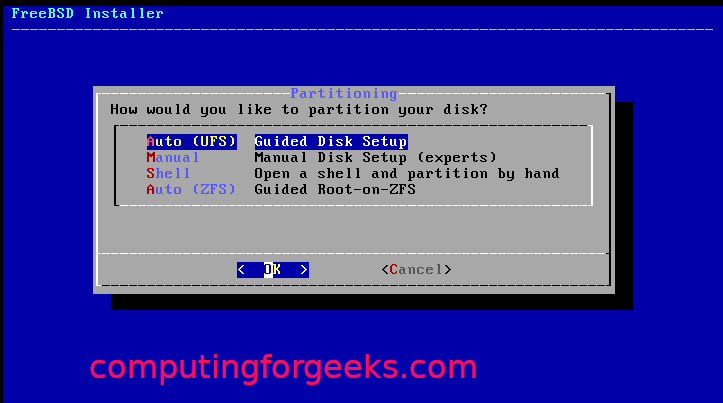
Select one of the partitioning methods(auto/manual/shell):
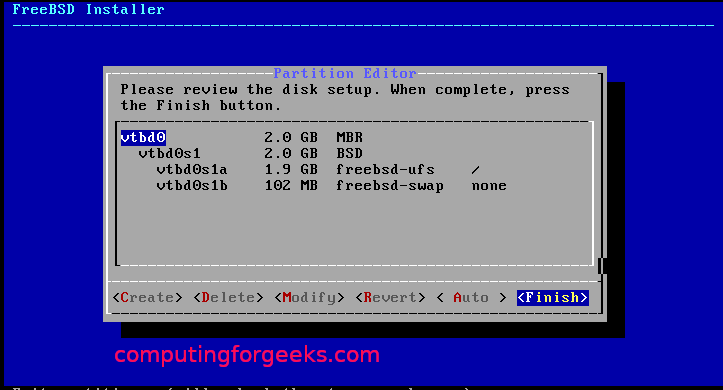
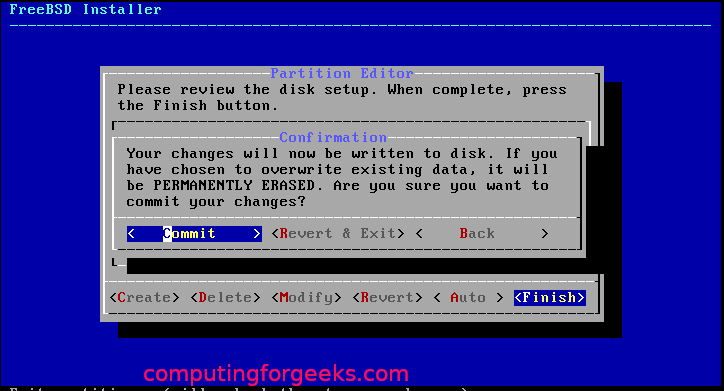
With the partitioning done with, it should start with the installation.
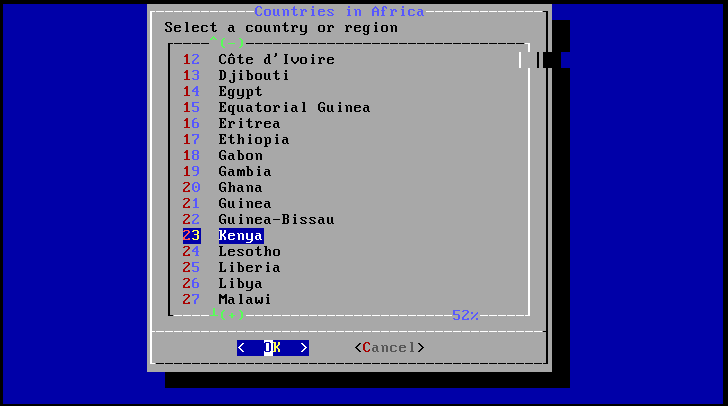
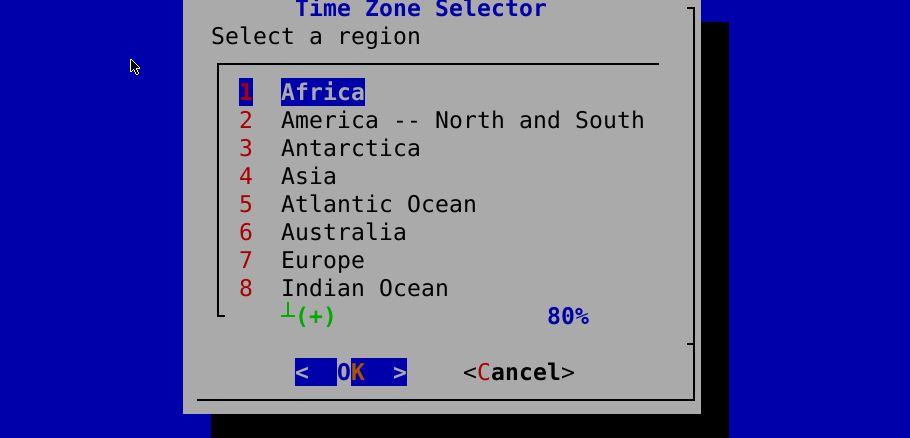
Select a time zone and region:

Select the processes you want to run at startup:

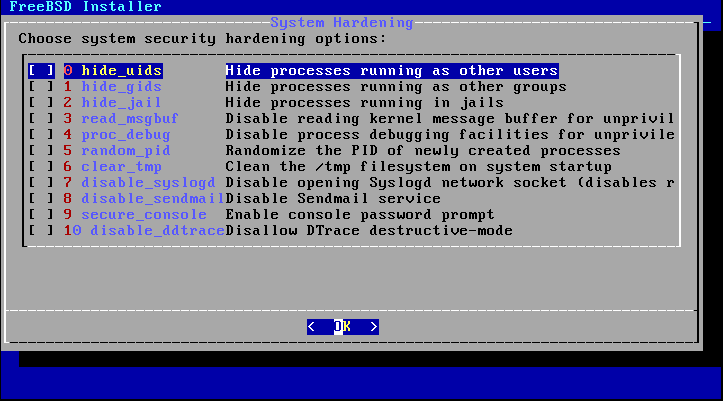
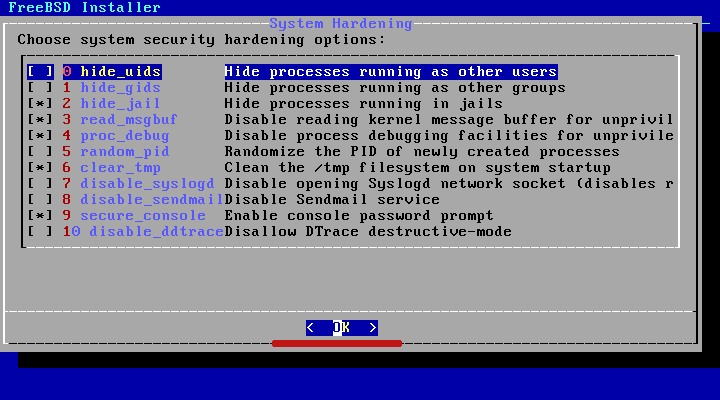
Choose the system hardening options:
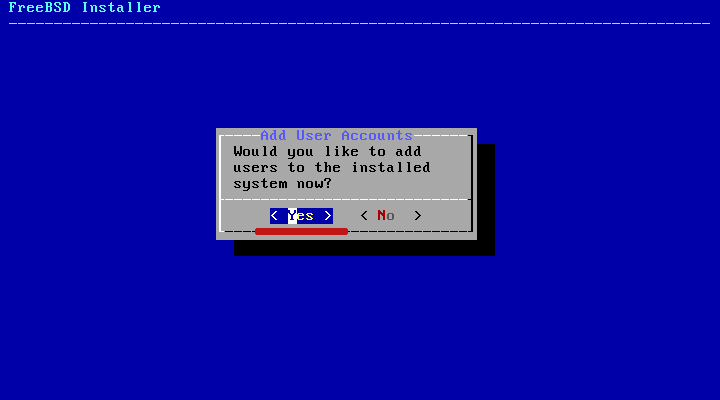
Set the root password and create users:
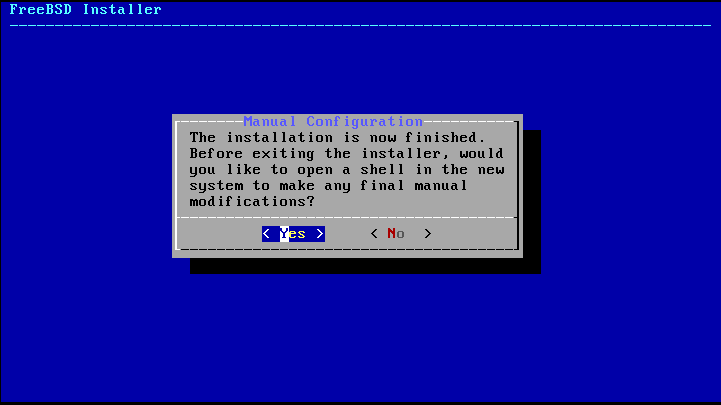
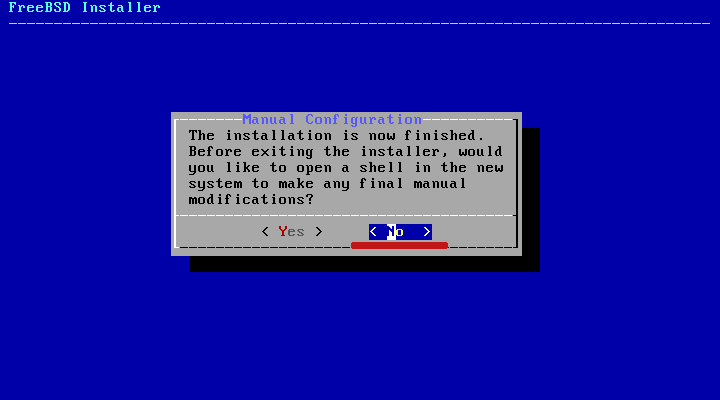
Select Exit and click on OK.
With that, you’ve successfully installed FreeBSD on KVM. Now, you just have to reboot the system.

Wrapping up
This tutorial has demonstrated to users how to set up FreeBSD on VirtualBox and configure it. If the instructions here worked out for you, check out more FreeBSD tutorials on our website.
]]>Fortunately, with FreeBSD, updating the system isn’t that much of a hassle when compared to other operating systems, which mess up. You can run the FreeBSD update with a simple command:
This tutorial will help you with exactly that: follow the instructions below to upgrade your system working on FreeBSD v10.2v operating system.
Before you begin:
Make sure you’re logged in with the root command or using an account enabled to issue the sudo command. In this tutorial, the default FreeBSD user account, the FreeBSD droplet, will run the update.
Step 1: Identify any potential issues and install the latest patches
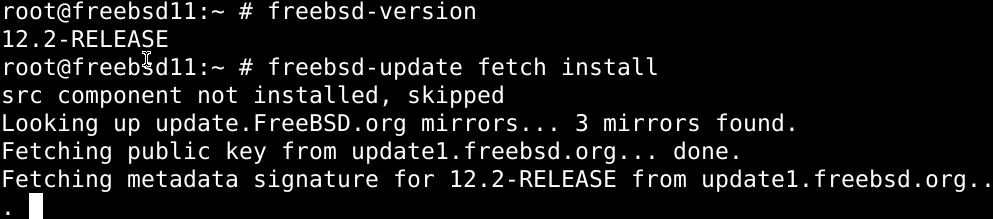
Before we upgrade the FreeBSD OS, we must acquire the patches and supporting packages for the latest FreeBSD version. Log in with the following command:

Now, we’d need some info on the latest FreeBSD version before we can make further changes. To find these details, issue the freebsd-update command with the –r option to highlight exactly which version we’re updating the server to. I have already upgraded my FreeBSD version

The output should report with adequate information. Now pinpoint which changes may cause any issues later.
Hit the y key to confirm and press enter. Upon confirmation, the system will automatically start updating the server. There are some things. However, that need we’ll need to configure ourselves after the update.
Step 2: Fix the post-upgrade issues
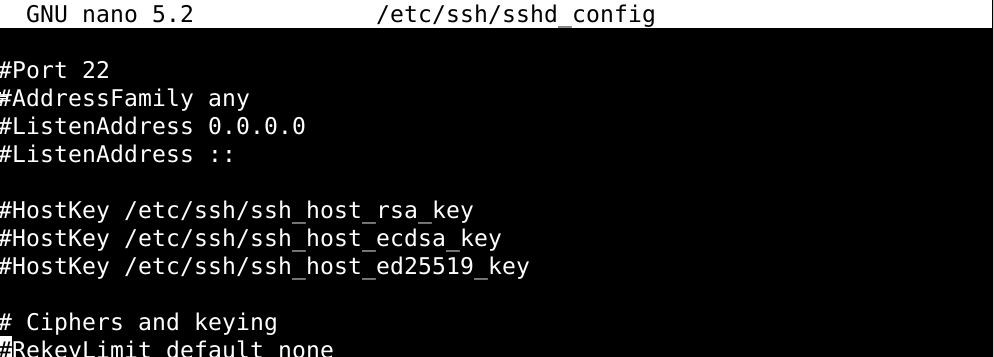
Once you’ve installed the latest packages, you’ll most likely see two error messages. Don’t worry; all you need to do is to make changes to two different configuration files in the /etc/ssh/sshd_config and /etc/rc.subr directories, respectively.
Press enter, and you’ll be automatically redirected to the /etc/rc.subr configuration file, and it’ll be launched in the nano text editor.
Delete any lines that appear related to the “latest” FreeBSD version, which isn’t actually associated with the version that we’ve just installed. See, the configuration file still recognizes FreeBSD 12.1 as the latest, while we’ve installed v12.2.
Save and exit the file when you’re done editing it, and a notification will pop up, confirming that the configuration file has been successfully integrated with the upgrade.
The second line is the error message, which will go away as soon as you fix the /etc/ssh/sshd_config configuration file. Hit the enter button to open this configuration file and start editing the file the same way you did the first one. You only have to remove the lines related to the 12.1 installs of FreeBSD, then save and exit the file.
You’ll then be shown the changes you’ve just made, and then you’ll be asked for permission to apply the changes. Just type y each time you’re asked the question.
Upon confirming your modifications, you’ll be displayed several pages long catalog of the binary files to which the system has made its modifications. This list should be identical to the screenshot below:
If you want to see the contents here, keep pressing the spacebar to make your way through each page or just hit the q key to skip the review process.
With all that taken care of, we can finally move on and upgrade to FreeBSD 12.2.
Step 3: Upgrade FreeBSD 12.1 to FreeBSD 12.2
Type in the command below to begin the installation:
The screenshot below illustrates what you’ll see once you issue this command:

You’ll need to reboot the system once the upgrade finishes. Type this command and hit enter to restart your system:
The SSH session will terminate, and the system will take a few minutes to reboot.
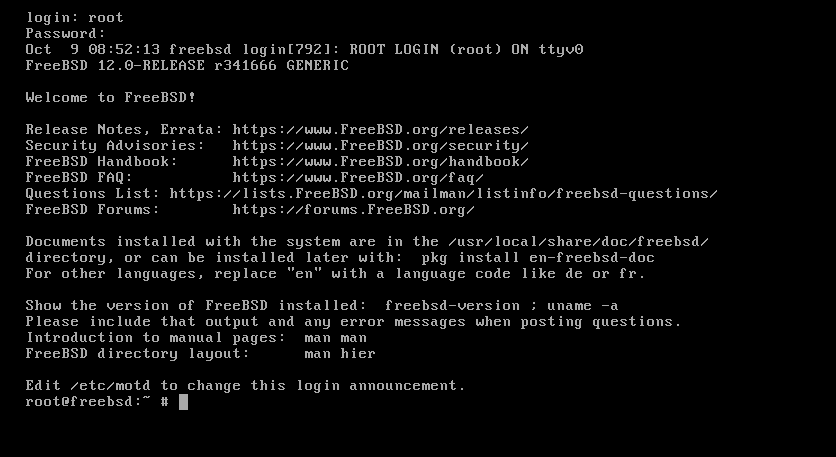
When the system boots back up again, log in to the same user account to continue.
To verify the install, check the current version installed on your system. Use the command below to log in to your server:

Then issue the following command:
If things have been going smoothly so far, you should see the output similar to the screenshot below:

One last thing before we wrap up: there’re probably some smaller updates released since the upgrade was made available to download.
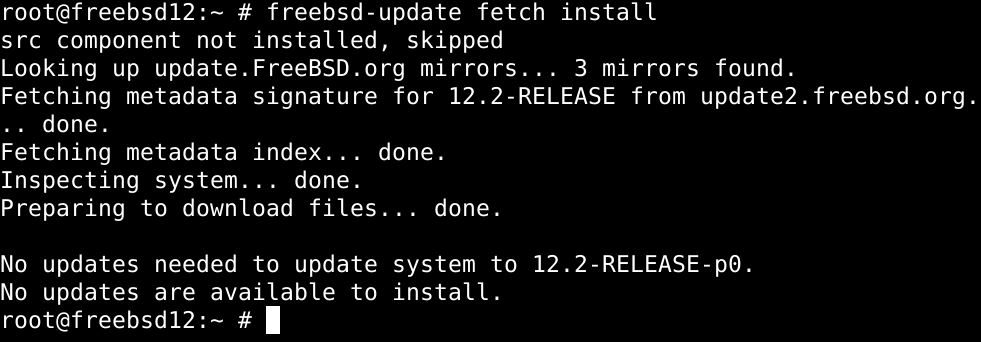
You can fetch these updates by running the freebsd_update install command:

If you’re still being displayed the errors, don’t worry. Install the packages to update these files.
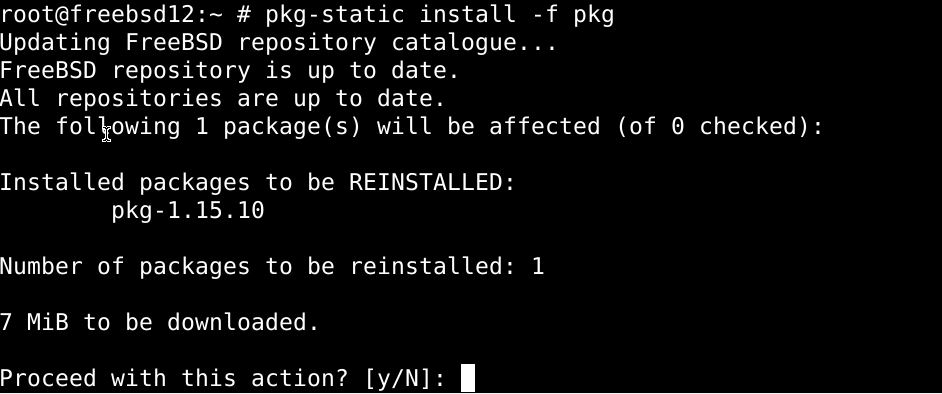
A safety measure is to upgrade all the third-party packages when FreeBSD is upgraded. Enter the command below:
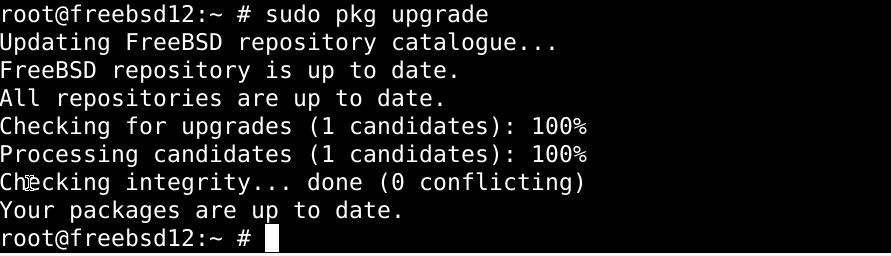
The results of the above issue should resemble the following:
Press y and hit enter to proceed to receive the following output:
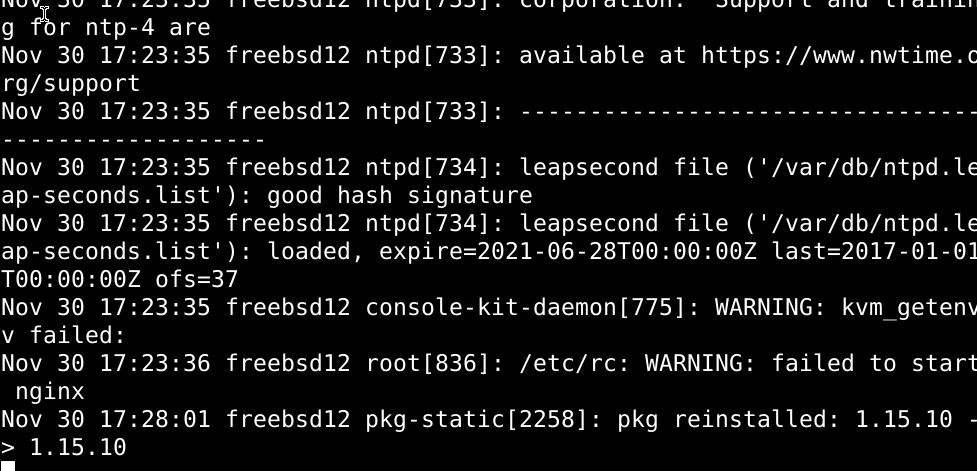
Again, press y and hit enter to upgrade the packages.
Use the rehash command to make sure your user account has full permission to use the installed packages.

With that, we’ve got the latest version of FreeBSD installed and ready to go.
In case your install is refusing to work,
The instructions in this article should properly work on your system too. Still, for the readers who couldn’t upgrade FreeBSD by following this tutorial, this section will help you roll back all the installs you’ve just made. Just use the command below:
The command above should undo all the work you’ve done to upgrade FreeBSD.
In summary
Hopefully, you’ve upgraded your FreeBSD 12.1 server to the latest v12.2 by following the commands in this tutorial. Upgrading FreeBSD isn’t nearly as much of a frustrating experience as upgrading some of the more mainstream operating systems *cough* windows *cough*.
]]>To install the FAMP stack on FreeBSD 12.2, we’ll use pkg, the package manager for FreeBSD.
Step 1: Prime your FreeBSD system for FAMP installation
Before we start with the installation, it’s better to make sure that our system is up to date.
To see what version you’re using, enter:
If the version is out of date, enter the command below to update it:

Next, install the supporting dependencies:

Then add a new user with the command below:

You’ll be prompted to enter the user credentials and account information.
# Full name: Younis Said
# Uid (Leave empty for default): <Enter>
# Login group [younis]: <Enter>
# Login group is younis. Invite younis into other groups? []: wheel
# Login class [default]: <Enter>
# Shell (sh csh tcsh nologin) [sh]: bash
# Home directory [/home/younis]: <Enter>
# Home directory permissions (Leave empty for default): <Enter>
# Use password-based authentication? [yes]: <Enter>
# Use an empty password? (yes/no) [no]: <Enter>
# Use a random password? (yes/no) [no]: <Enter>
# Enter password: your_secure_password
# Enter password again: your_secure_password
# Lock out the account after creation? [no]: <Enter>
# OK? (yes/no): yes
# Add another user? (yes/no): no
# Goodbye!
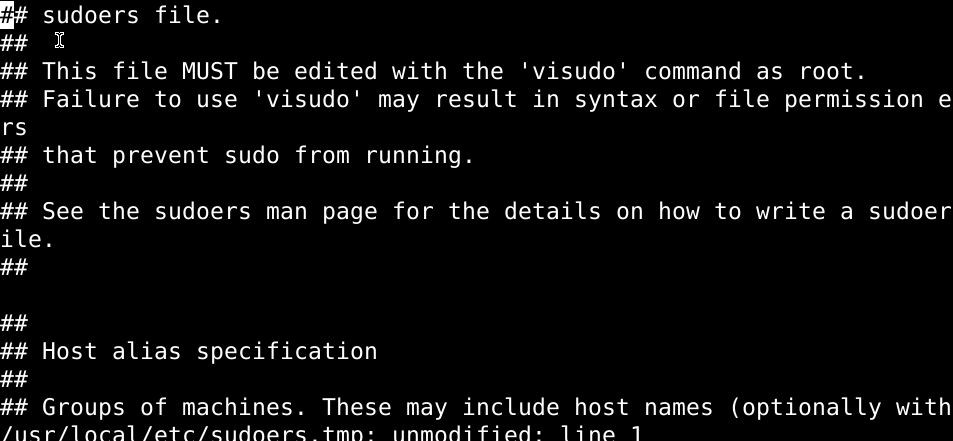
Lastly, issue the visudo command as under to delegate command privileges of the admin to all users of the wheel group:
# Uncomment by removing hash (#) sign
# %wheel ALL=(ALL) ALL
Use su command followed by the new username to change the account to the one you just created:

Also, update the time zone:

Step 2: Install Apache HTTPS server 2.4
Out of all the web servers in use today, the Apache HTTPS server is by far the most popular and is used worldwide to host both static and dynamic webpages and applications.
Pkg, the default FreeBSD package manager, allows the convenient installation of the Apache HTTPS server from the FreeBSD repository. Type in the command below to install Apache with pkg:

See what version is installed with the command below:

Before you boot Apache, you must enable it:

Then enter the command below to launch Apache:

Verify the launch with the following command:

The output should clearly state if it’s running.
You can also verify that everything is working properly by putting your public IP address in your web browser’s search field. If the installation went smoothly and everything is working properly, you should be redirected to a webpage confirming your install.
Step 3: Install MySQL 8.0 with pkg
With the Apache HTTPS server active and running, we can move on to the third step: installing MySQL. MySQL is a database server, and it maintains and regulates access to databases to which information relating to the website is stored.
Like we did with Apache, we’ll download MySQL off of the FreeBSD repository with pkg.
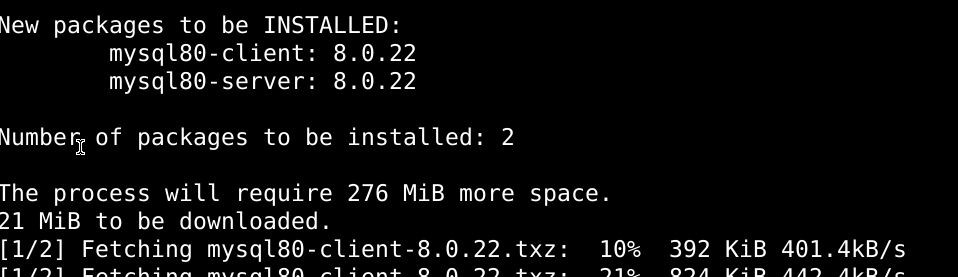
With the above command executed, the latest version should be installed on your system. Look up the latest version on the web, then check it against the version installed on your drive with the following command:

Before you launch MySQL, you must enable it:

Enter the command below to fire up the database:

Verify the launch by issuing the command below:

To reinforce the security measures on your database, you should enter the security script to remove some inconsistencies with MySQL and tighten the access to your system:
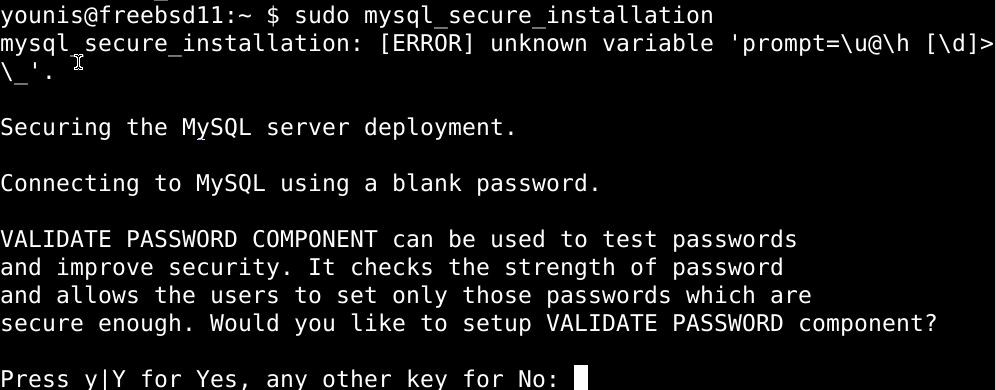
Then set a password and answer the questions that come after. You can select the default on all questions by pressing :key_enter:
Step 4: Install PHP 7.4
The final component of the FAMP stack is PHP, the leading programming language in the web development scene at the moment. Without PHP, the dynamic websites you’re looking to run on your server won’t be fully operational.
Like we’ve used the pkg command before, we can also install PHP from the FreeBSD repositories.
To install the crucial php74, php74-mysqli, and mod_php74 packages, enter the command below:

See the version installed:

If the version installed is up to date, proceed to replicate the sample PHP configuration file by running the command as under:

To run PHP, type:
$ sudo service php-fpm start
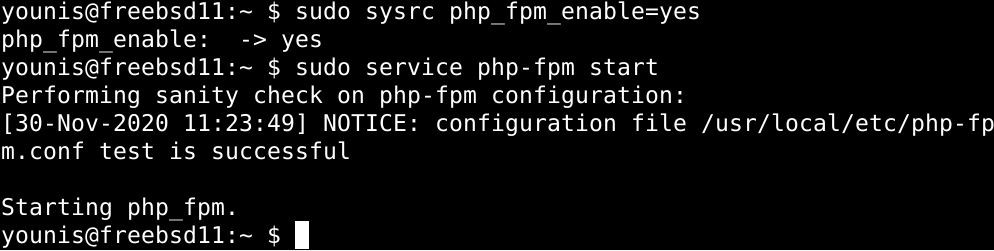
To check if PHP has started, type:

To add more to the PHP package that you just installed, try out some supporting modules. Look up packages written with PHP modules:

Then use the command below to search for any PHP modules available:

You should see a handful of PHP modules. You can install any of these you want to try out with the pkg command.
Step 5: Configure Apache to load PHP modules
The FAMP stack can only work when Apache is configured to work with PHP.
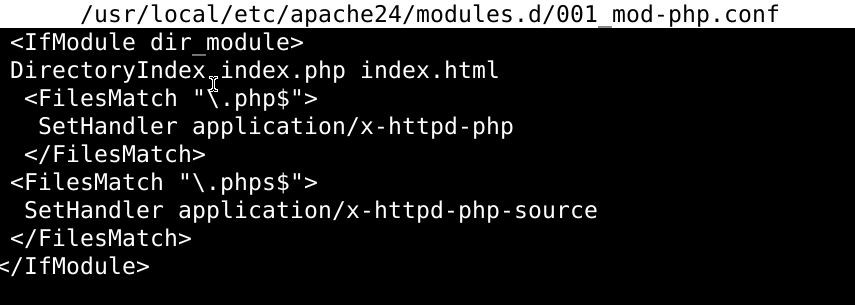
Run the command below enter the configuration file:
Then add the following entries to the file:
# DirectoryIndex index.php index.html
# <FilesMatch "\.php$">
# SetHandler application/x-httpd-php
# </FilesMatch>
# <FilesMatch "\.phps$">
# SetHandler application/x-httpd-php-source
# </FilesMatch>
# </IfModule>
To apply changes, save and exit the file.
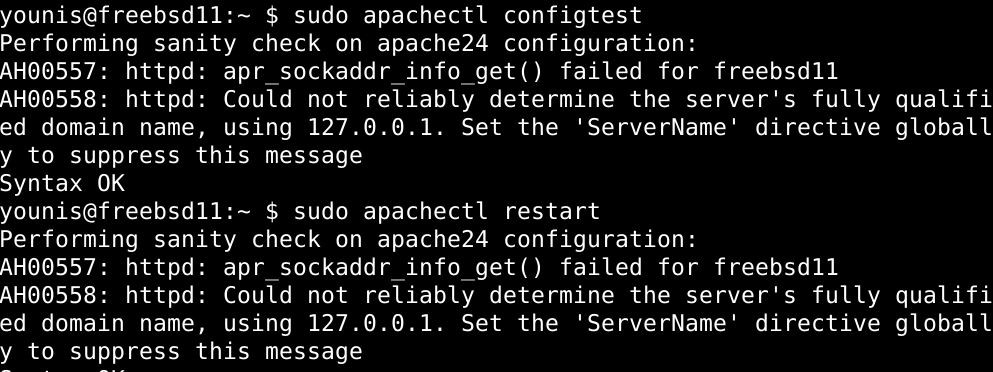
Test out the Apache Configuration with the command below:
To have the configurated changes apply, restart Apache with the following command:
Step 5: Testing PHP Processing
Before you proceed to work with the FAMP stack, it’s good practice to test out if there’s any problem with PHP. Configuring PHP can alleviate this situation for us.
You can easily perform the configuration with a simple PHP script. Use the command below:
Copy the line below and paste it into the configuration file:
Head over to http://your_server_IP/info.php, and you’ll be redirected to this page:

Make the server details private by deleting the info.php file.

In Summary
This tutorial illustrated how to install the FAMP stack on a FreeBSD 12.2 system. You can now host dynamic web content on your system and have it work as a fully functional webserver. Be it a dynamic website or a large-scale web application, your server’s potential has no bounds. Make sure to check out more FreeBSD tutorials on our website before you start, though. We have a lot of content here on our website, and you’re bound to find some that’ll help you get started.
]]>In this article, we’ll explain how to set up let’s Encrypt on FreeBSD and list some of the fundamentals to help you start with it.
How to install Certbot
The latest release for Certbot can be acquired by downloading and extracting the python packages. Use the pkg command as under if you're using Python 2.7:

And if you’re using python 3.7, type in:
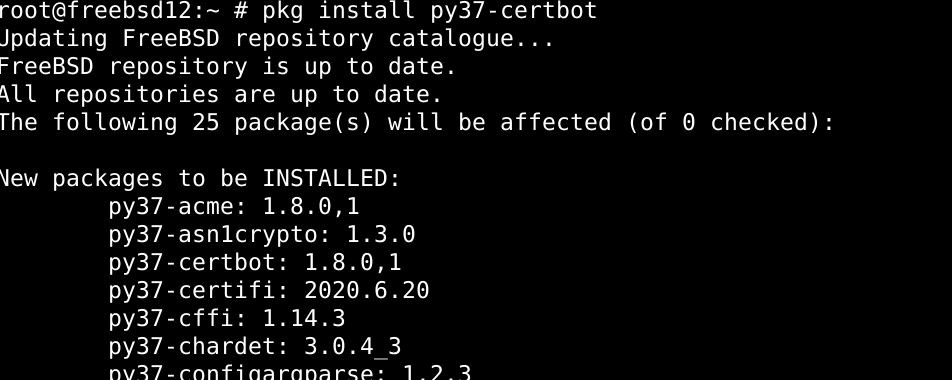
The command above should install Certbot on your FreeBSD system.
Getting started with Certbot
Register Certbot
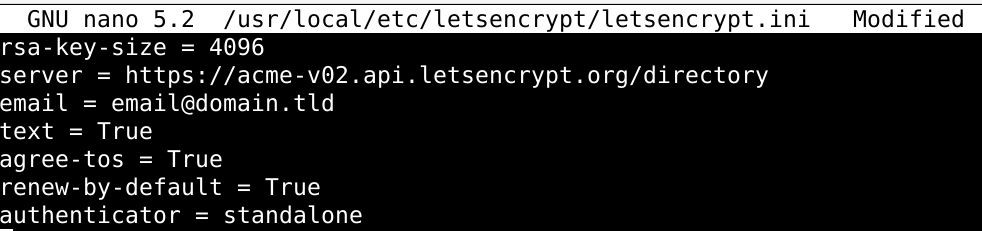
Before we begin creating certificates, we’ll need a /usr/local/etc/letsencrypt/letsencrypt.ini file for our user account. Type out the contents below in your file:
# server = https://acme-v02.api.letsencrypt.org/directory
# email = [email protected]
# text = True
# agree-tos = True
# renew-by-default = True
# authenticator = standalone
Then issue the command below in the shell to register Certbot:
![]()
Create a Certificate With Certbot
Creating a certificate with Certbot is as simple as it gets: use the standalone server for TLS/SSL authentication.
However, using the standalone server means putting your web server on hold for a few seconds. If you cannot afford to shut down the hosting service, you can create certificates with webroot.
To create a certificate with webroot, type out the following command in the shell:

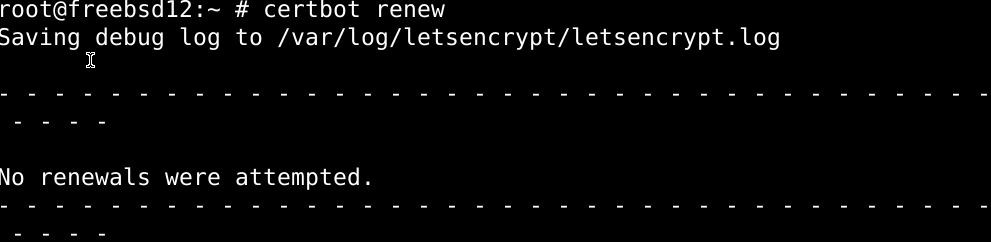
Renew certifications with Certbot
The certifications can be updated automatically with Certbot. Type in the command below to update your certificates with Certbot.
Erasing certificates
Deleting certificates with certbot is very easy, as long as you know the exact name of the certificate you want to be deleted. To list all the authenticated certificate
The screenshot below shows the likely output you’ll get out of this command:
The command syntax for deleting a certificate with certbot is:
The referenced certificate should be deleted with the command above.
Wrapping up
Ok, folks, this tutorial was about setting up Let’s Encrypt on a FreeBSD system and using the Certbot supervisor to automatically create, authenticate and remove TLS/SSL certificates.
Certbot can be vital for users who frequently have to update certificates themselves, manually, which can be a tedious process.
]]>This article will demonstrate how to set up FreeBSD 12.0, the latest version, on Zettabyte File System, or ZFS. The method we’ll employ is going to use BSDinstall and consequently allocate all of the disks to host the FreeBSD system.
FreeBSD
FreeBSD is one of the many free and open-source Unix-like distributions of the Berkeley software distribution (BSD) kernel. It originated from the research Unix, along with its contemporary distributions, among which are the OpenBSD, NetBSD, and DragonFly BSD. It has come a long way since its release in 1993 and has earned a reputation for being more reliable than Linux.
FreeBSD has some considerable advantages over Linux distributions(Ubuntu, Fedora, etc.), such as lower latency, which provides a faster experience. Manufacturers often use it as an alternative to Linux to get around the Licensing issue, which obligates them to open-source their works.
Z file system (ZFS)
Also known as the Zettabyte file system, ZFS is an innovative volume manager/file system utility released by Sun Microsystem back in 2001. It comes with high scalability, optimal data compression, integrity checking, a system with proper check and balance to prevent data corruption, and file repair features to salvage corrupted data. It is supported on NFSv4 ACLs, RAID-Z, and the FreeBSD system started ZFS support with a new release in 2008.
Install FreeBSD on ZFS
Here’s how to install FreeBSD operating system on ZFS.
Prerequisites
To demonstrate how to install FreeBSD 12.x, we will use a virtual machine. The specs for this VM is as follows:
RAM: 2GB,
No. of CPUs: 2
Hard-disk space: 25GBs.
These are the minimum specs, and you should definitely allot more resources to your ZFS.
Also, if you don’t have the FreeBSD image ready, you can download it from the link below:
https://download.freebsd.org/ftp/releases/
Step 1: Select base component for installation
Boot your system with the FreeBSD setup CD/media in it and press enter to further the install.

Then select Install out of the options you’re displayed.

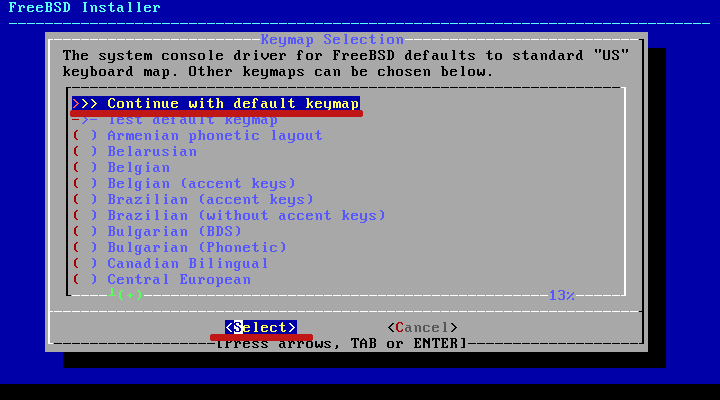
Then select one of the keyboard maps, one that you’re using. In this tutorial, we’ll need the ‘US’ keyboard map, and if you’re using it too, click the first option and hit select.
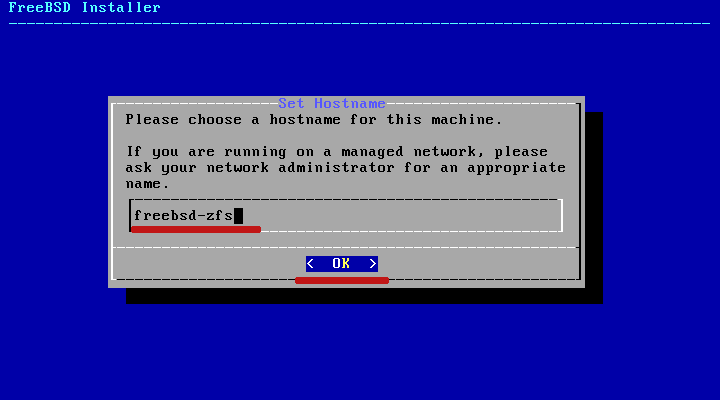
Then type in the hostname for your system, and click OK.
Then pick out the system components to meet your requirements. To add to the components, pick them out by pressing the spacebar and clicking OK.

Step 2: Configure for ZFS on your system
This is where you’ll be making partitions on your disk drive. Just select the ‘Auto (ZFS),’ a partitioning method that automates this, and click on OK.
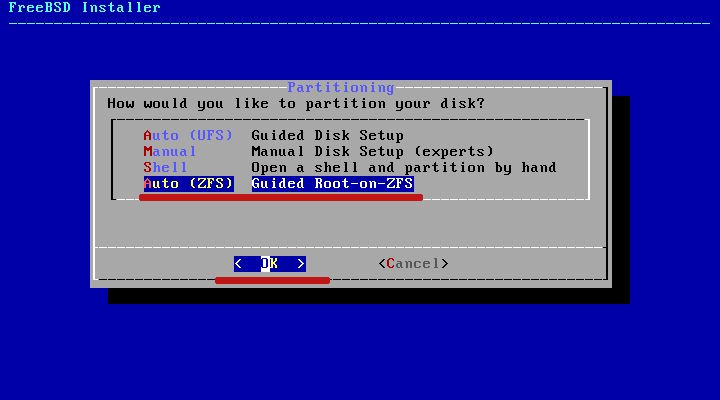
You should go with the manual/shell option if you wish to partition disks by yourself.
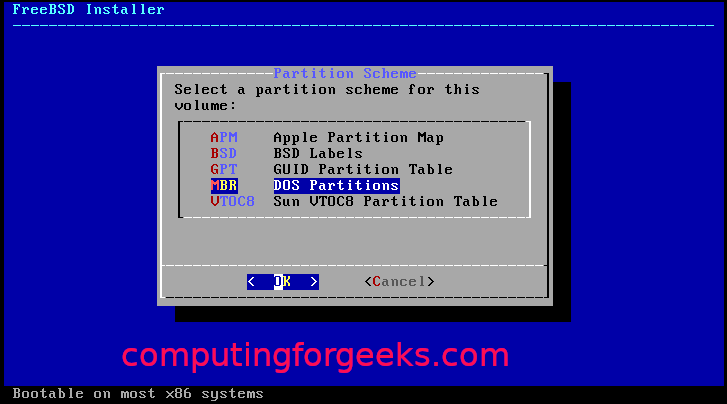
The BSDinstall, by default, creates a ZFS partition. It is given the zpoll name zroot along with the GPT partition scheme and 2GB swap space.
Just leave it as is and click select.

This process is further sped up by the raidX options, for which you’d have to be using Raid.
Select the first ‘no redundancy’ option and click OK.

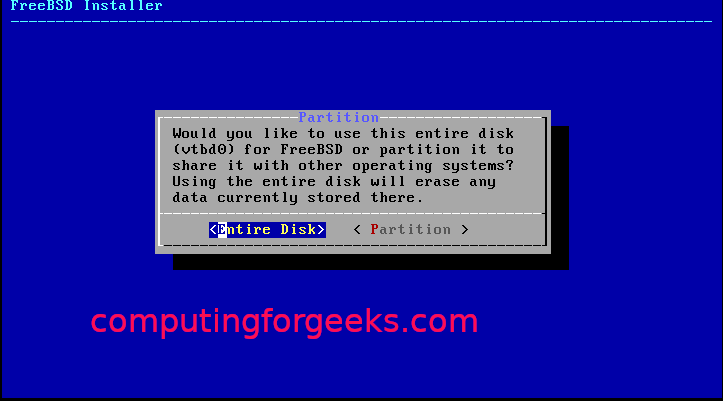
Then click on your drive and click the OK button
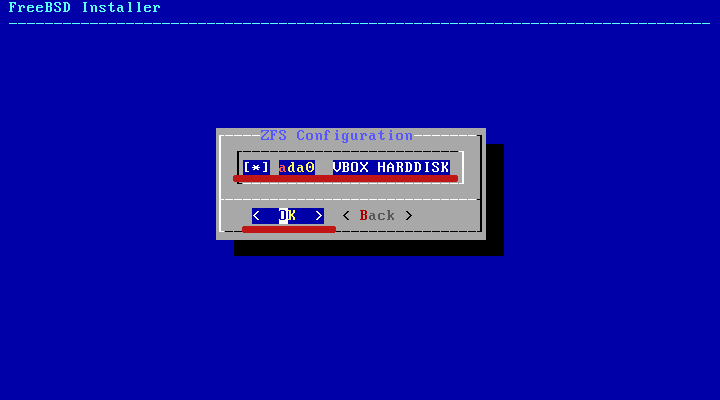
When asked if you want to ‘destroy’ the contents of the disk, just select Yes.

Then wait for the installation of base components to finish.

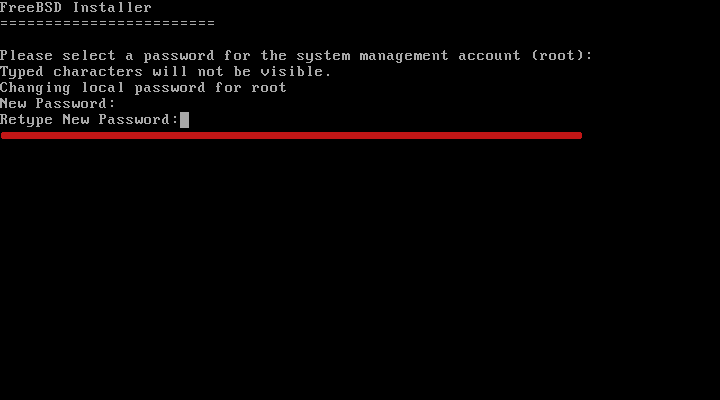
Step 3: Change the root password
Upon the installation of base components, you’ll need to set the root password. Make sure to select a strong, multicharacter password.
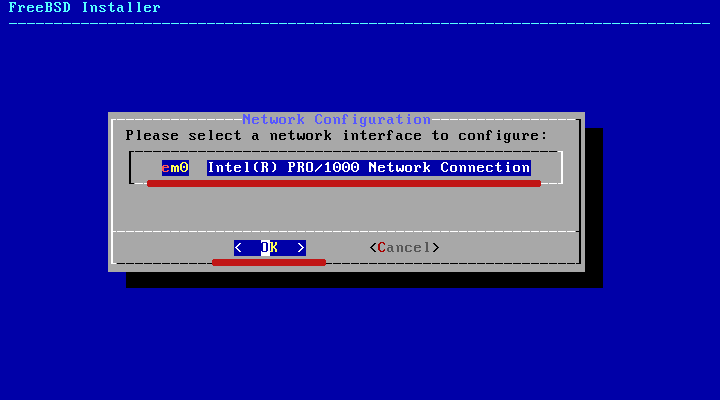
Step 4: Configure Networking options
Select your network interface as follows, then click OK.
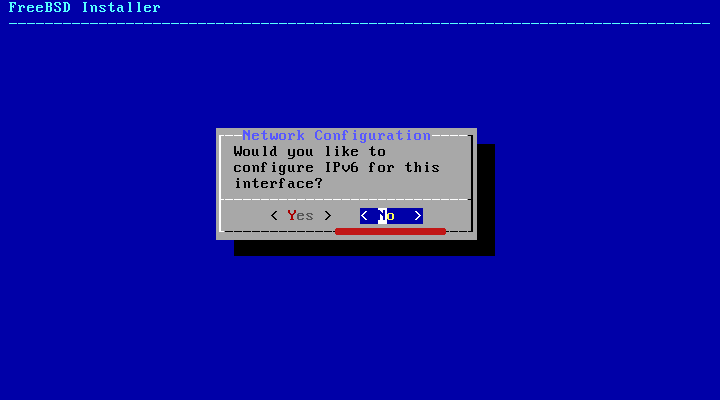
Then select the ipv4 address and click on yes.

Just click yes if you’re using DHCP, and FreeBSD will retrieve the ip address from the gateway.

And if you’re using Ipv6, choose NO.
Next, configure resolver by giving in the details choose OK to continue.
Step 5: Selecting timezone
To configure timezone, select the region you’re in and click on OK.

Then fill in the details:

Lastly, select the services you’d want to start at boot.

Step 6: Strengthen system security:
This is commonly referred to as “security hardening.” To harden the system of your security, pick the relevant options, and click on OK.
Step 7: Create a new user
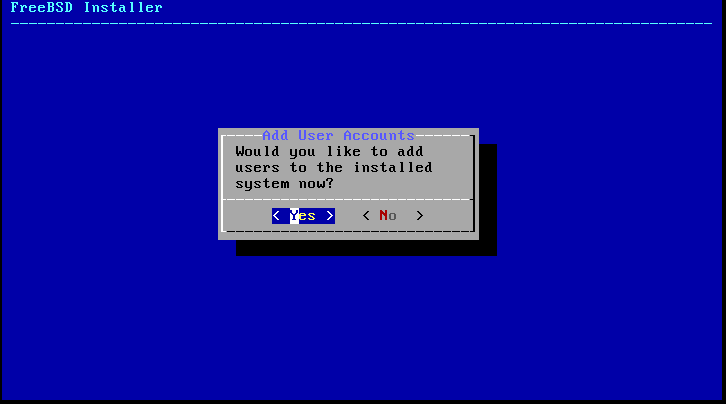
The system will prompt you to create a new user. Click on YES to continue.
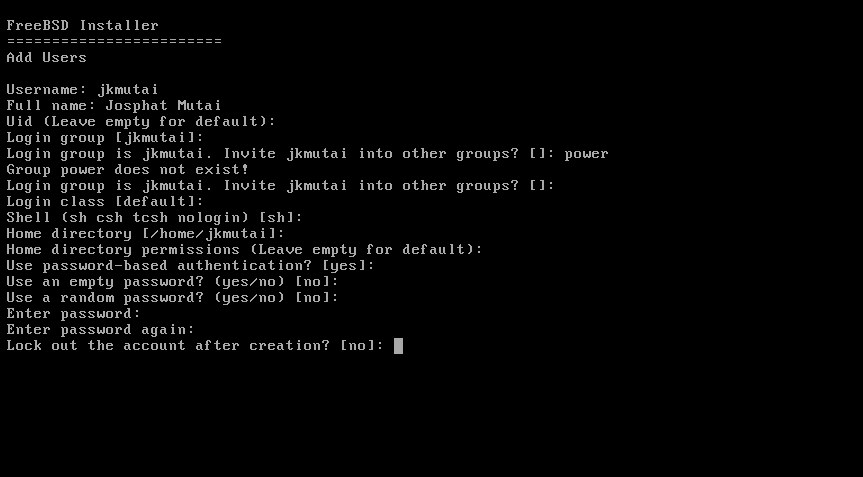
Give the user credentials to log in with later.

Click on Exit, then click OK.

With a new user account created, FreeBSD has been successfully installed on your ZFS.
Just click on No if it asks you to configure manually.
Then restart your system by clicking on reboot as in the screenshot below:

Upon reboot, use your user credentials to log in with. Then verify the install with the command below.
$ df -h
You should receive the following output:
Wrapping up
That’s it for this tutorial. We’ve shown you how to install the latest FreeBSD version on ZFS.
As an advanced, next-generation filing system, ZFS has a lot to offer. Some of the features that newer versions have are:
- Pooled storage – an amalgamation of filing system and volume manager
- Snapshots – a feature that tracks changes in files.
- Copy-on-write – makes sure your work is saved upon creation.
- Data integrity verification and automatic repair
- Enormous storage space, and
- RAID-Z
Nginx is a stylization for engine x. It is a free and open-source HTTP server written and developed by the Russian software engineer Igor system. Nginx is also frequently used as a reverse/mail proxy server and a load balancer. Although lightweight in its web server class, it is highly robust and produces impressive results nonetheless. As a result, it has been steadily on the rise and has gained a significant reputation as a reliable web server. It’s scalability and resource-optimization features have earned its place as one of the most popular webservers, with one estimate reporting over 38 percent of the top 1 million websites on the internet being hosted on Nginx servers around the world.
Nginx- HTTPS Features
As mentioned earlier, Nginx can be used as an HTTP server, proxy server, load balancer, and mail server as well. Here, we’ll list some of the uses of Nginx as an HTTPS webserver/Proxy.
- Outstanding Static/index/auto-indexing files management features
- Comes with load balancing operational with features to monitor connections health.
- Module-based architecture with supports from both the main and third parties.
- Capable of handling well over 10,000 connections at once, and that too on a low memory footprint within the range of 2.5 MB per 10k low-bandwidth connections.
- Transport layer security/Secure Socket Layer connections with OpenSSL supported Onile Certificate Status Protocol stapling features
- Launch virtual servers with your name and system’s IP address.
- Handy features to redirect and rephrase URLs
- Newer versions capable of supporting gRPC remote procedural call.
- Employs cache to launch reverse proxies
- Compatible with Internet Protocol Version 6
- Supports WebSockets and performs load balancing and reverse proxy for Websocket programs.
- Fortified client-server connection, with features for updating and configuration during operation.
Installing NGINX on FreeBSD
This tutorial is going to be about setting up and getting started with the Nginx web server under the FreeBSD Unix-operating system.
Installation Overview
The whole procedure can be summarized as follows:
- Use the pkg command or ports system to install Nginx on FreeBSD.
- Enable the Nginx support on FreeBSD.
- Edit the file located at /usr/local/etc/nginx/nginx.conf to configure Nginx
- Verify the install
Follow the instructions below to set up Nginx on your FreeBSD server.
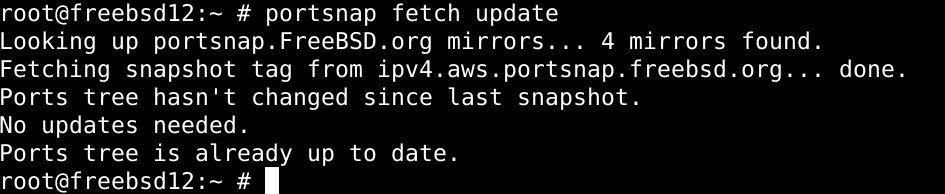
Step 1: Update the ports tree in FreeBSD
Issue the following command to update the ports tree in FreeBSD:
Step 2: Install Nginx on FreeBSD
There are two ways you can install Nginx on your server:
1) using via ports system
Then install Nginx webserver port with the commands below:
$ makeinstall clean
While you install Nginx, select the options relevant to your use of the webserver. Here, we chose REWRITE_MODULE, SSL_MODULE, etc., to present as an example.
2) using the pkg command
Alternatively, you can choose to install Nginx by adding the nginx binary package with the package manager, using the pkg command:

This should install Nginx on your FreeBSD webserver.
Step 3: Enable the Nginx Service on FreeBSD
Type in the command below to enable the Nginx web server
Alternatively, you can also type in:

That’s about it with the installation.
Getting started with Nginx on FreeBSD
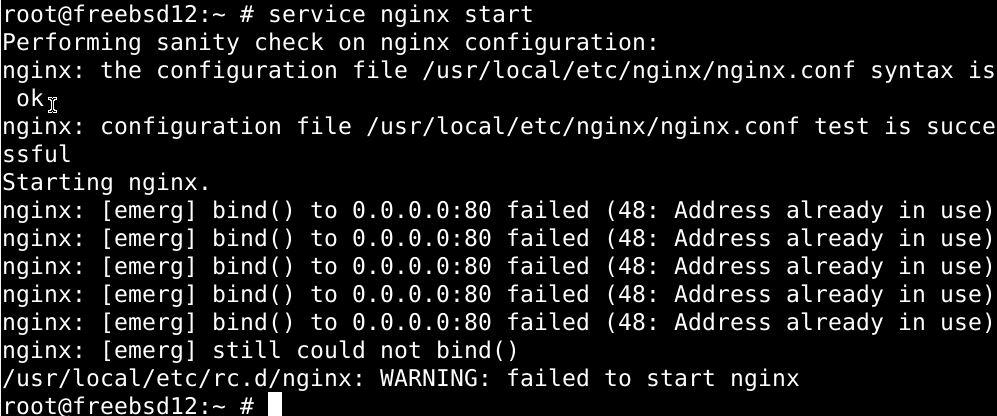
Launch an Nginx server
Launch Nginx by typing the following into the command shell and pressing enter:
Alternatively, you can issue the command below:
Close an Nginx Server
To exit an Nginx server, issue the command below:
You can also type in the more concise command as well:

This command should quit the Nginx server
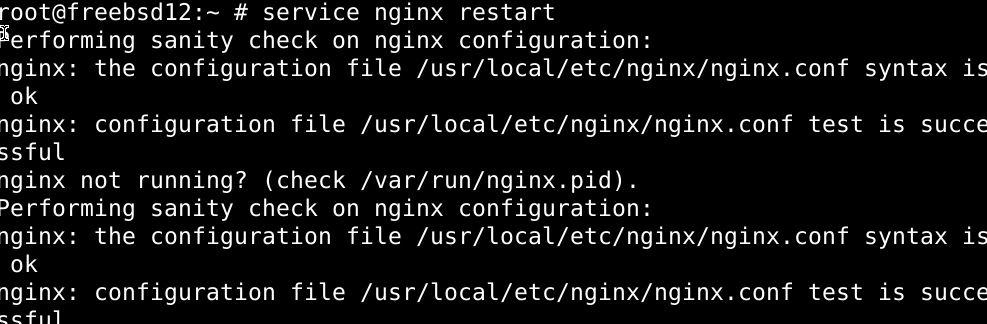
Rebooting Nginx server
Issue the command below to restart the Nginx server.
Alternatively,
The Nginx server should restart upon the execution of the command above.
Reloading Nginx webservers post configuration
To restart an Nginx server after editing the configuration file, use the command below:
You can also use:
Important files in Nginx
- The Default configuration file for Nginx in FreeBSD is located at: /usr/local/etc/nginx/nginx.conf
- The ports on which Nginx listens to by default are 80 & 443
- The file that contains all the error details is /var/log/nginx-error.log
- The file that records the details related to access requests is /var/log/nginx-access.log
- The root document in Nginx is located at the /usr/local/www/nginx/ directory.
Testing the Nginx setup on FreeBSD
Copy and paste the following link into the URL field in your web browser:
http://server-ip-here/
Creating a website with Nginx
Start by setting up a directory by issuing the mkdir command:
Then create a new user for your domain with the command below:
Lock the username with the following command:

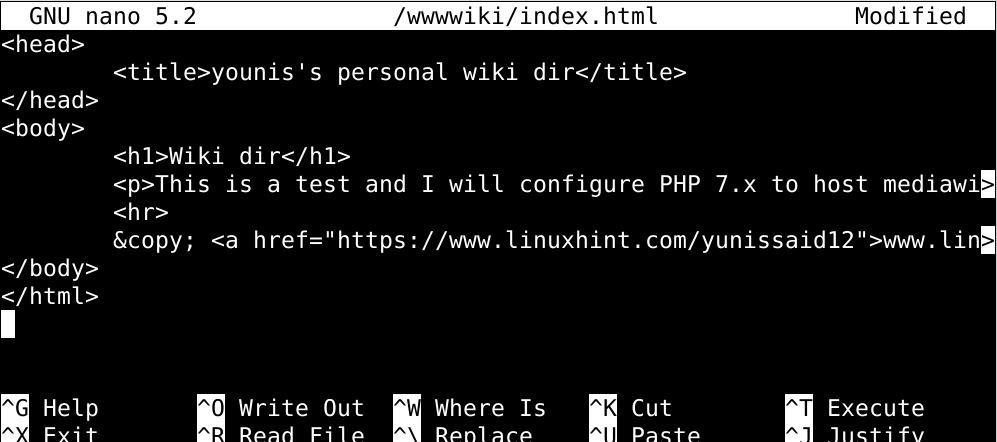
Then chalk up a file to test things out:
Then copy-paste the following into the file:
Then allot the group ownership with the commands below:
$ chmod -R 0555 /wwwwiki/
$ ls -ld /wwwwiki/

Configure Nginx for wiki virtual domain or IP address
Start by creating a configuration file with the commands below:
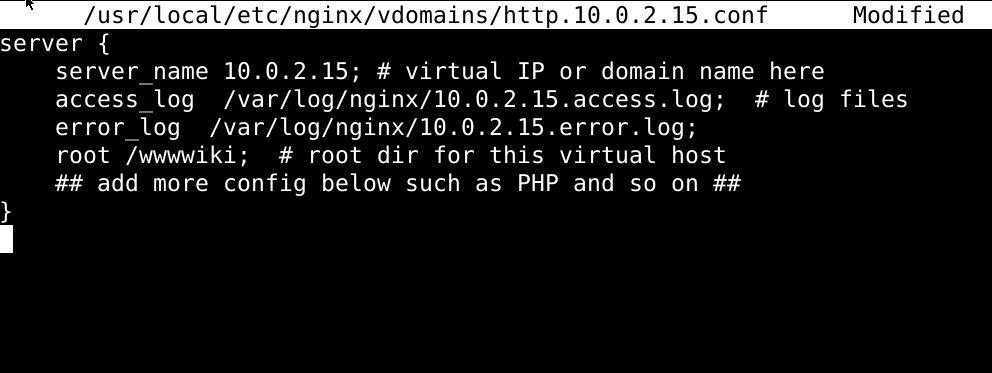
$ sudo nano /usr/local/etc/nginx/vdomains/http.10.0.2.15.conf
Then copy-paste thefollowing text to this file and make appropriate changes to the text below:
# server_name 10.0.2.15; # virtual IP or domain name here
# access_log /var/log/nginx/10.0.2.15.access.log; # log files
# error_log /var/log/nginx/10.0.2.15.error.log;
# root /wwwwiki; # root dir for this virtual host
# ## add more config below such as PHP and so on ##
#}
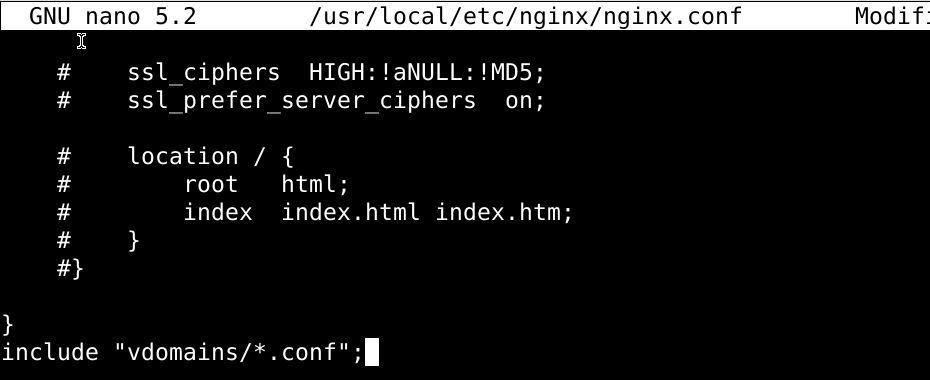
Don’t forget to save the file before you exit it. Then use the command below to update our configuration file:
Then append the following towards the end:
Again, save and exit this file. Then verify nginx using the following command:
$ service nginx reload

Lastly, test the configuration by issuing your IP address:
http://10.0.2.15/
In summary
That’s about it for today’s tutorial. We explained how to install Nginx on a FreeBSD server using the ports system and the pkg command, and how to enable the Nginx service on FreeBSD. We also saw how to set up a website with Nginx and introduced Nginx to the new users. The instructions here should work out for you just fine.
]]>Step 1: Install some supporting packages.
Issue the command below to install Nano:

The head over to the rep configuration file located at:
Then update the pkg repo with the command below:
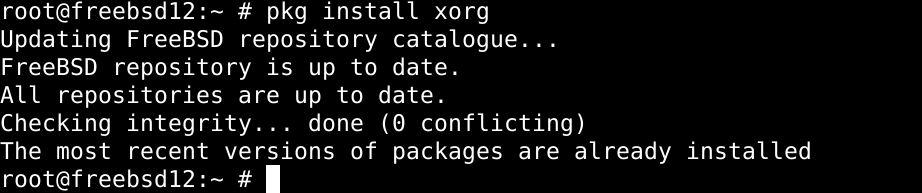
Lastly, use the pkg package manager to install Xorg:
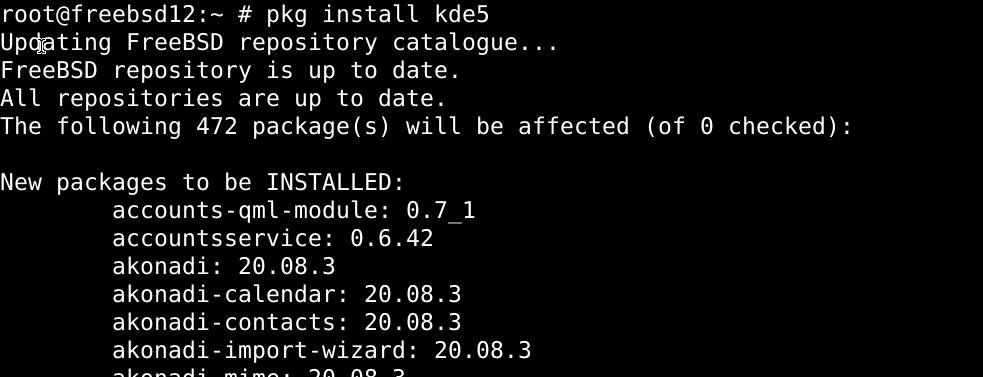
Step 2: Install and configure KDE.
Then use the package manager to install KDE:
Then go to the fstab file, and append the line below the file, then save and exit the file:
proc /proc procfs rw 0 0

Go to the rc.conf file edit as follows:
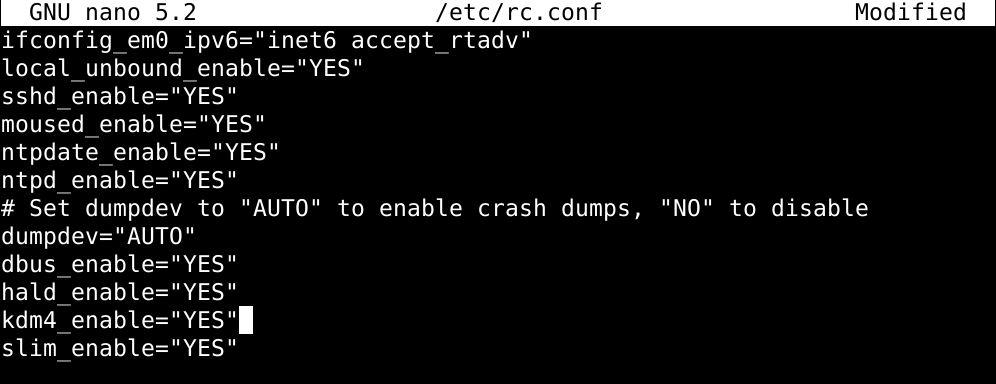
Save and exit to keep changes.
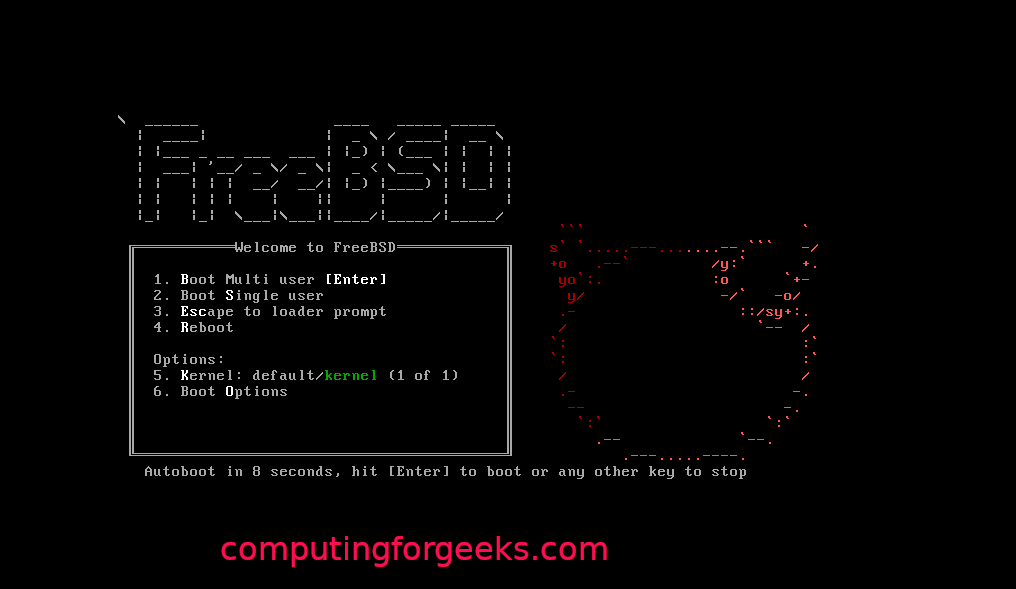
Reboot the system using the command below:
Step 3: Getting started with KDE.
Upon system reboot, and when the installation finishes, log in with your credentials.
- To see details on system configuration, head over to system settings.
- See what applications are running, select the applications tab.
- Select the computer tab to see details on disk partitioning, etc.
- The recently used tab shows all the applications opened recently.
- To turn off your computer, select the leave icon and click on shut down.
Wrapping up
That’s it for this tutorial. Hopefully, the instructions worked out for you, and you’ve KDE up to and running on your computer by now.
]]>This post will illustrate in a step by step detail the procedure for setting up and configuring the latest FreeBSD 12.0 on KVM. The tutorial assumes that you’re using one of the Linux distributions on your local machine.
Prerequisites
Create a new virtual machine as follows:

Select the operating system type:

Allocate some memory to your virtual machine and configure CPU settings:


Allocate a disk size for your VM:

Give your VM a name:

FreeBSD KVM Installation Guide
Once the VM creation is finished, the installer will start automatically. Press enter to continue, as shown below:
Click the install button to continue:
Choose one of the keymaps, then give your VM a hostname:

Select the FreeBSD components you want to install:

If the software packages aren’t retrievable from the disk, it’ll download it off of the web.
Choose the network interface to configure:

Just agree and click ‘ok’ if you’re using IPv4:
Choose DHCP if you’re using static IP addressing:

Click on ‘Yes’ if you’re using IPv6:
Then for revolver configuration:

Out of the installation mirrors, select those that are nearest to you:
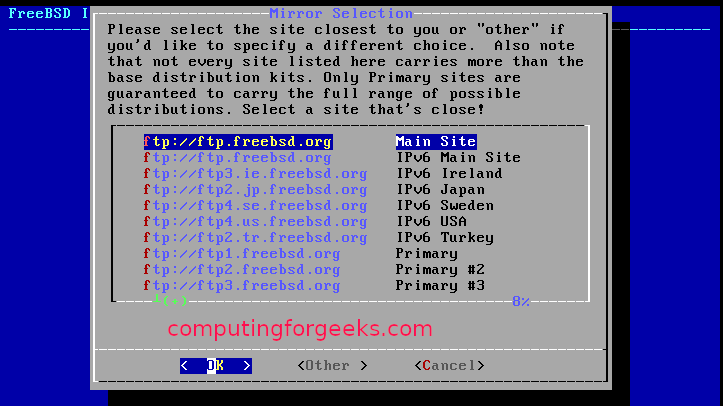
Select one of the partitioning methods (auto/manual/shell):


With the partitioning done with, it should start with the installation, as shown below:


Select a time zone and region:


Select the processes you want to run at startup:

Choose the system hardening options:

Set the root password and create users:


Select ‘Exit’ and click on ‘OK’.
With that, you’ve successfully installed FreeBSD on KVM. Now, you just have to reboot the system.


Wrapping up
This tutorial has demonstrated to Linux users how to set up and configure FreeBSD on KVM.
]]>As of yet, docker isn’t supported for the FreeBSD operating system, so there’s no way you can use docker on FreeBSD, natively at least. Several attempts have been made to build the docker source up for FreeBSD, but none that I could find yielded any substantial results. This is likely because FreeBSD lacks some of Linux’s features, such as namespace and cgroups that aren’t yet a part of FreeBSD kernel.
So that leaves us with one option only: using a virtual machine. So we’ll use virtualbox in this tutorial to fire up a Linux VM in FreeBSD and use docker within it.
Step 1: Install docker client and virtual machine in FreeBSD
To install both docker client and virtual machine along with virtual box all in one command, type the following into the shell and hit enter:
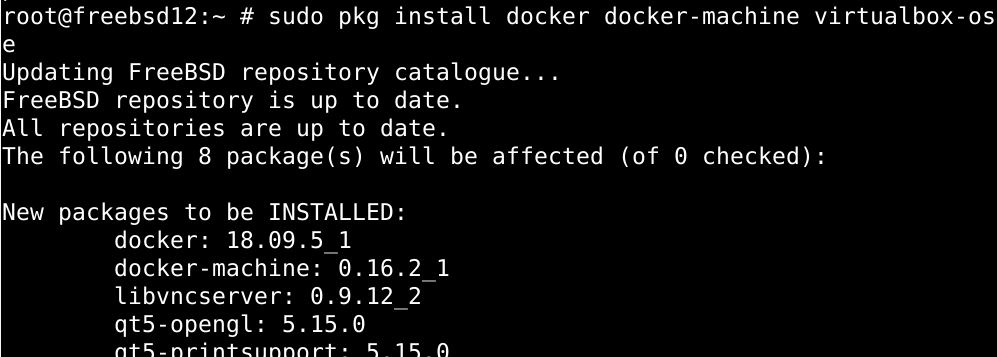
The reason why we’re setting up docker-machine with the virtual box is that it facilitates management for Docker hosts. With a docker-machine, you can create servers and install docker on each of them, and also configure each individually.
Step 2: Load the vboxdrv kernel module
With virtualbox installed on your system, load the vboxdrv kernel module. To do this and add your user account to the vboxusers group, you’ll need to run the following command:

Once the command executes, you’ll be able to use vbox. You can use virtual machines after restarting your system.
Step 3: Creating VirtualBox hosts
Use the command below to create a Virtualbox host:

To see every host current on your system.

With a new virtual box host in place, we should set the VM parameters to communicate with the docker client. Use the command below:
![]()
Then copy-paste this command to the .bashrc/.zshrc file, and you’re all set to use docker on FreeBSD.
Why go through all this trouble?
Surely there has to be an easier way to run docker, one that doesn’t need the use of virtual machines?
Well, no. As of yet, this is the only way to get docker up and running on a FreeBSD system, because as mentioned earlier, FreeBSD doesn’t have the support for some of the elements that are crucial to docker’s operation.
Then why not use an alternative to docker? I’ve heard rkt is a much better alternative to docker, and it runs on FreeBSD!
Sure, there are many FreeBSD alternatives to docker that are better, if not just as good. The thing is: most people are familiar with docker, and it’s rather daunting to shift platforms completely for some users. Another reason is the lack of instructional material for rkt, so those new to the containerization software would opt for docker instead of its FreeBSD alternatives.
Conclusion
That’s it for this tutorial. Hopefully, you’re now able to use docker on FreeBSD with the box.
]]>Look up the current time and date in FreeBSD
To see what the current time and date in your FreeBSD system is, use the command below:
You should see the following output:

How to set date and time in FreeBSD
To change the date/time in your FreeBSD system, log into your root account, and use the syntax below:
where, of course, y is the two digits of years, m stands for the month(1-12), d stands for the day of the month(1-31), H stands for the hour of the day(0-23) and M stands for minutes(0-59).
Let’s say you want to change the date to November 19, 2020, at 09:33; you’d issue the command below:

How to change time in FreeBSD
To change the time in your FreeBSD system without changing the date, you can use the command syntax as under:
Let’s set the time to 21:33:

Changing timezones in FreeBSD
The command for switching to the local timezone in FreeBSD is tzsetup, scans the database for any timezone related information. The contents of this database are contained in the /usr/share/zoneinfo/zone.tab file, which is accessed when you run tzsetup.
Type out the command below to change the timezone on your FreeBSD system:
This should launch the terminal menu from which you can pick the timezone.
Select the timezone area matching your location, then select your country and type ok. You’ll be prompted to confirm the changes.
Once you hit enter to confirm changes, the system will update the timezone immediately. To verify this, you can use the date command again:

From the output above, it’s clear that the timezone switch from UTC to PKT(Pakistan Standard Time) has been successful.
Wrapping up
Changing timezones or time and date independently in FreeBSD is very easy. All you need to do is to use the appended date command to change the date and the tzsetup command to set the time.
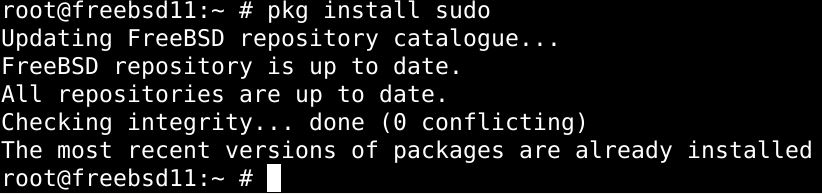
]]>Follow the instructions in this guide to set up and use the sudo command on FreeBSD 9.x/10.x/11.x/12.x system.
Tutorial Overview- Install sudo on FreeBSD
Here’s an overview on how to go about installing sudo on a FreeBSD system:
- First, you’d open the terminal and log into the remote server
- Then use the following ssh commands to update your package database:

Then we’d install sudo with the following command:

Lastly, you’ll see how to make configurations to sudo access to match the FreeBSD architecture and your operational requirements.
Part 1: Installing sudo on FreeBSD
The following are detailed explanations on step 3 to install sudo on FreeBSD. We’ll present two different methods you may choose from to your liking.
With FreeBSD port system`
We can use the FreeBSD port system to install sudo. Run the command below to install the port:
Using pkg command
Get the latest FreeBSD updated version of sudo (like FreeBSD 12.x+) by typing in:
Part 2: Configuring Sudo on FreeBSD
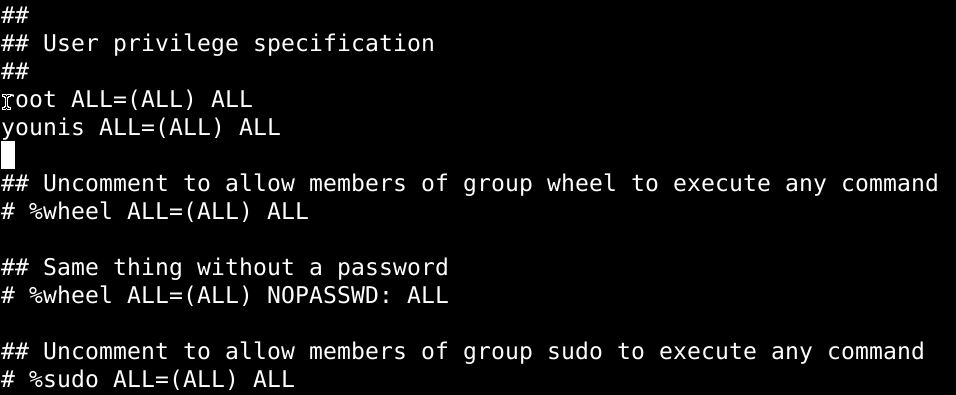
To configure sudo, we’ll need to edit the default configuration file. Head over to /usr/local/etc/sudoers to access the file. This file should not be tempered without the visudo command, as not using the visudo command can lead to denial of access as well as critical syntax errors under which sudo refuses to perform.
So make sure to use the command below before you edit anything within the file:
$ visudo
To grant admin privileges to a user, you’d use the command syntax below:
Similarly, you can delegate the commands to a group of users with:
Remember to save the changes before you exit the file.
Part 3: Using Sudo on FreeBSD
Let’s have an overview of some of the basic things you can do with sudo:
Creating a root user
The command below lets you run the shell as a target user.

Type the following to run the login shell
Finally, the id command lets you authenticate user credentials:

Execute commands as root
Type in the command below, replacing the indicators with relevant variables:
$ sudo /path/to/command arg1
To demonstrate, we’ll reboot the ftpd service:

Check user’s privileges
The following command lists the commands you’re allowed to execute as a root user:

Wrapping up
This tutorial demonstrated the installation of Sudo on FreeBSD 9.x/10.x/11.x/12.x system. We listed the two ways to install Sudo: with the FreeBSD system port and by adding the binary package file to FreeBSD.
You’ve also learned how to edit the default config file to configure Sudo on FreeBSD. It is located /usr/local/etc/sudoers. You also saw how to create a new root user and how to run commands with sudo privileges.
Getting used to working with sudo is easy, although it takes some time. Hopefully, this tutorial was enough to have you get started with sudo.
]]>How to get disk drive information in FreeBSD
To acquire the information related to disk drives and cd ROMs, etc., the most straightforward path we can take is to head over to /var/run/dmesg.boot file and accessing the file. This is where the required information is kept in a snapshot, taken right after the system mounts the disk drives.
Listing disk drives with egrep
To find out the exact number of hdds/ssds are working under the server, use the grep command as under:
Alternatively, you may put:
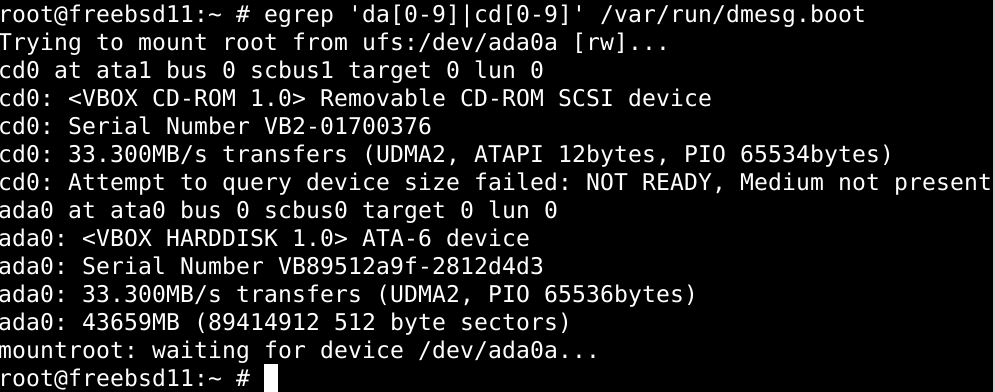
The output you’ll get should list all of the disk drives, including cd/DVD ROMs being read by your system.
Using geom utility to list disk-drive information:
You can use the geom command line to show disk drive information as well:

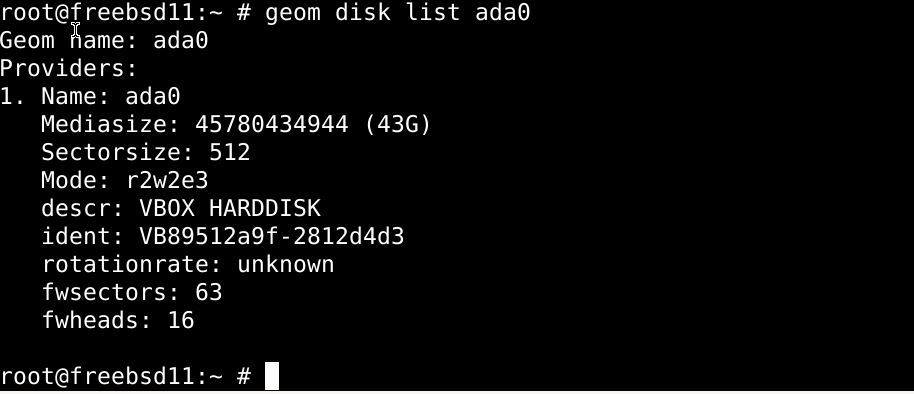
This listing can be made more specific when combined with the grep command.

Using atacontrol command to list disk drives
Using the atacontrol command-line utility, we can list the disk drives working within our system. The atacontrol command is used to gain permission to work with the FreeBSD ata subsystems and should be used with caution. If executed improperly, it can cause the CPU to crash, leading to some unrecoverable data loss.
Disk drive information with camcontrol command
You can also use the camcontrol command to access the CAM subsystem and see the working drives on your system. This is made possible by the CAM subsystem, a modular system that drivers for ATA and SCSI devices use to implement. The CAM system also accommodates host adapter drivers for the SCSI and ATA host controllers.
To present a list of disk-drives on your system, type in:

To see details on each partition:

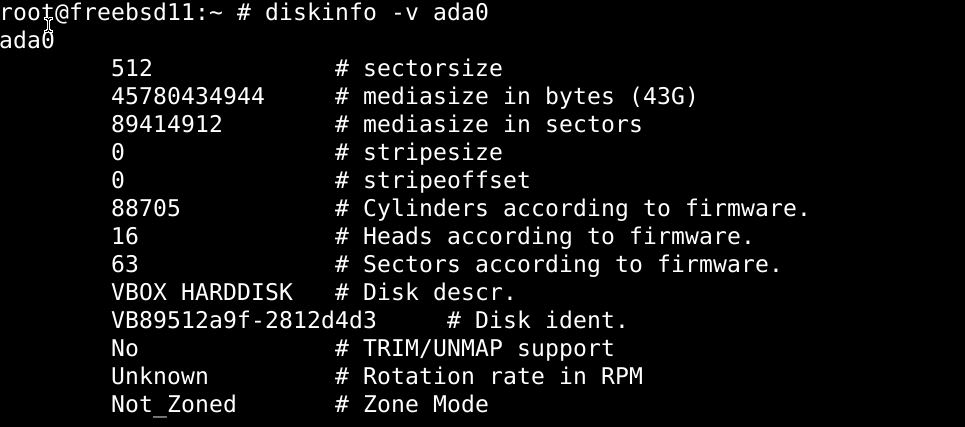
Find out the disk sizes with the diskinfo command
Use the diskinfo command to acquire information on the disk sizes
$ diskinfo -v ada1
$ diskinfo -v ada0
Installing and using the lsblk command
Enter the line below to install the lsblk command for use later:

Then run the lsblk command:
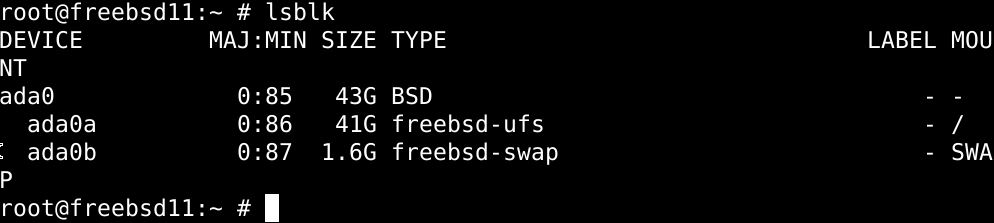
To list all of the detectable disks on your FreeBSD

To display info on a specific disk, use a similar syntax to the command below, which is requesting info for ada0 disks:
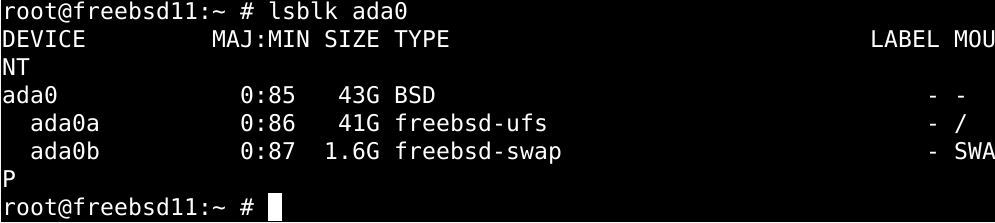
Wrapping up
This tutorial presents different ways to obtain information on disk-drives in a FreeBSD system. We’ve presented commands and methods that are very different from each other, as they have wildly different intended applications.
]]>Sockstat is an all-around command-line utility that comes included with FreeBSD. It sees immense use in examining network connections and open sockets. In FreeBSD, it lists the names and status of the background and foreground processes that have caused a network port to unlock. You can even customize it to arrange the communication socket lists on connection status, IP versions, what ports are being listened to by specific programs, etc., and simplify the results based on socket ownership and descriptors for the communication sockets. With Sockstat, you can also see all the intricate details on each of the Unix domain sockets/IPC. An apt move would is to integrate sockstat with the grep filter to triple its functionality and get the most out of it.
Let’s look at some of the neat stuff we can pull off with Sockstat on FreeBSD.
List the working Ports on FreeBSD with Sockstat
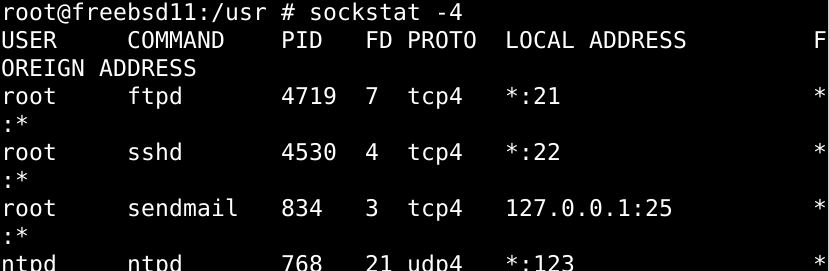
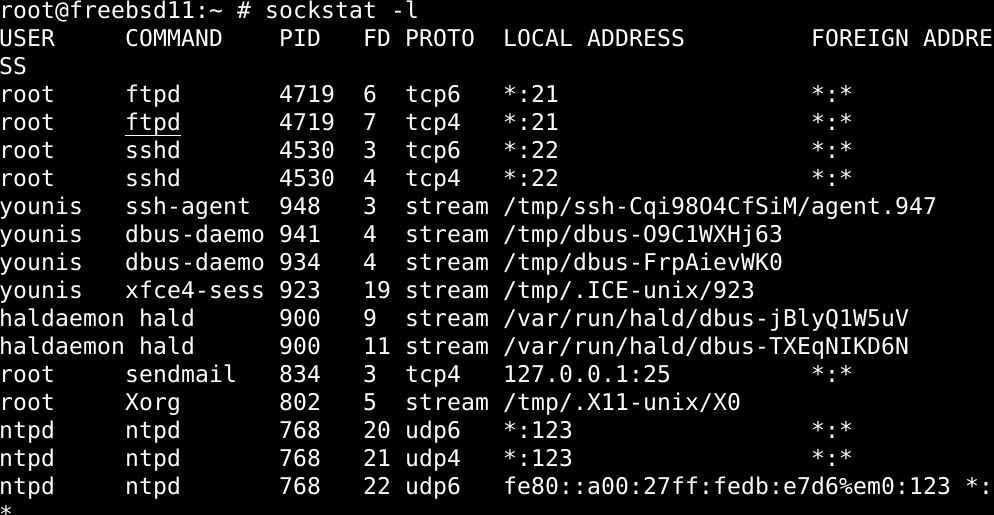
The Sockstat command lists all of the sockets that are currently opened in a FreeBSD system. Type in the sockstat command unappended with any of the flags or options to see the list of open sockets:
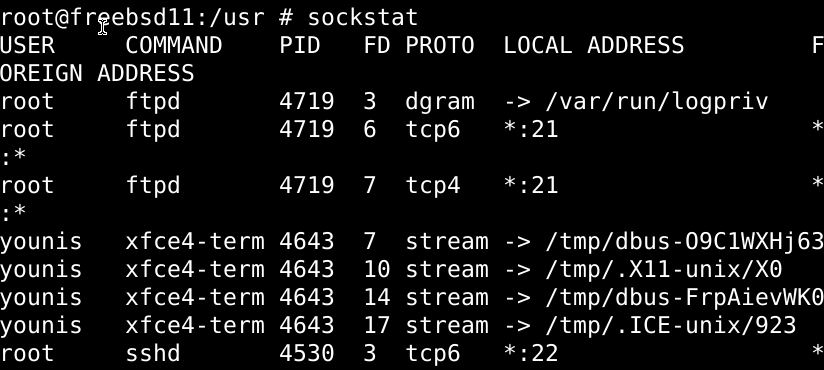
Let’s take a moment and go over what each of the column labels in the output means. The first column from the left is labeled USERS, and it lists all the user accounts(roots, mysql) to which each socket belongs to. The second column header is COMMAND, and this column header lists all the commands that had set each socket to open. The PID column and FD columns list the process IDs and file descriptors, respectively, of the sockets. The column headed PROTO displays all the socket types transport protocols linked to each opened port. The last two columns are the Local Address and Foreign Address. The first of these two lists the local IP address for each open socket. Whereas the latter indicates what IP addresses are linked to each of these sockets.
List specific versions of Opened Ports in FreeBSD
To list opened sockets with a specific protocol version only, for example, the Ipv4 version, add a -4 flag to the end of the sockstat command:
You can also have it present a list of other versions similarily, for example
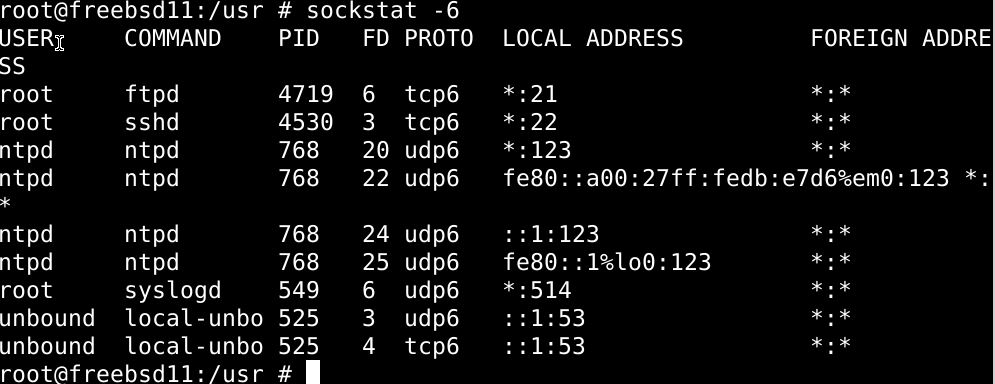
Should display all the sockets with IPv6.
List the open sockets based on TCP/UDP in FreeBSD
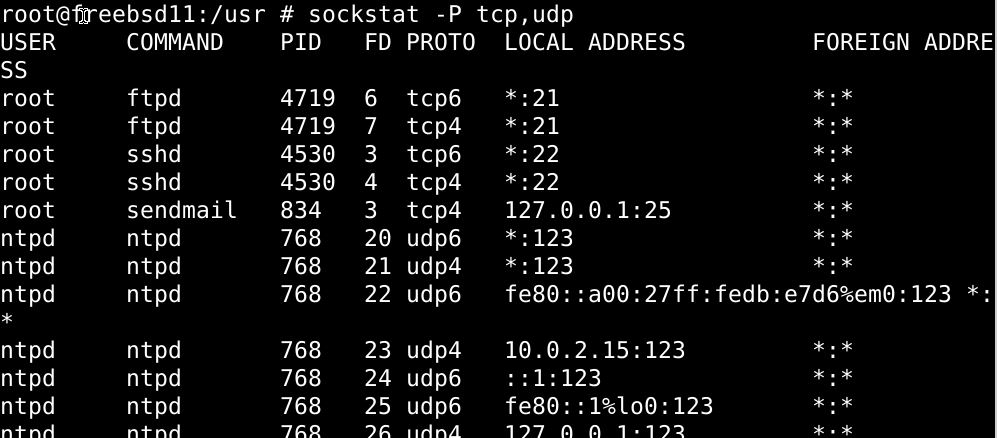
Add the –P flag to the sockstat command to have the list of open sockets presented based on TCP or UDP. You’ll also need to add the protocol’s argument name to the command, which you can look up by heading over to /etc/protocols file and checking the file there. To have only TCP based sockets, type in the following command:
Similarly, you can shortlist based on UDP:
These two can be linked together very simply:
As of yet, sockstat doesn’t extend its support to the ICMP protocol.
Display sockets with specific Port Numbers
To see all the opened sockets, both TCP and UDP, while having the list arranged based on port numbers(both local and otherwise), type in the sockstat command with appropriate flags:
$ sockstat -P udp -p 53
$ sockstat -P tcp -p 443,53,80,21
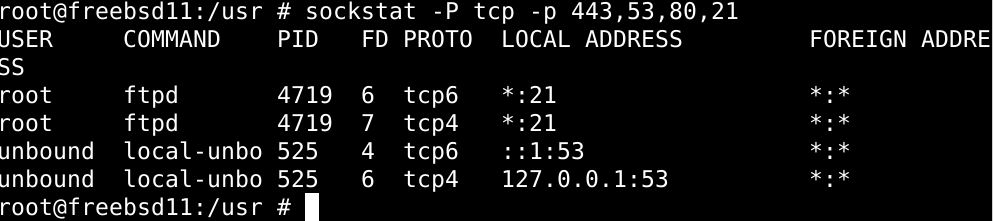
In the above commands, the first one shows the TCP HTTPS Port, the second one the UDP DNS Ports, while the third one shows both.
See the open ports being listened to on FreeBSD
With the -l flag added to the sockstat command, you will be presented open socket that is currently listening through the protocol suite and all the opened UNIX domain sockets as well as any named pipes.
List the ports actively listening on the network
Add the -l and -s flags to the sockstat command to have the open TCP ports arranged by their listening status.
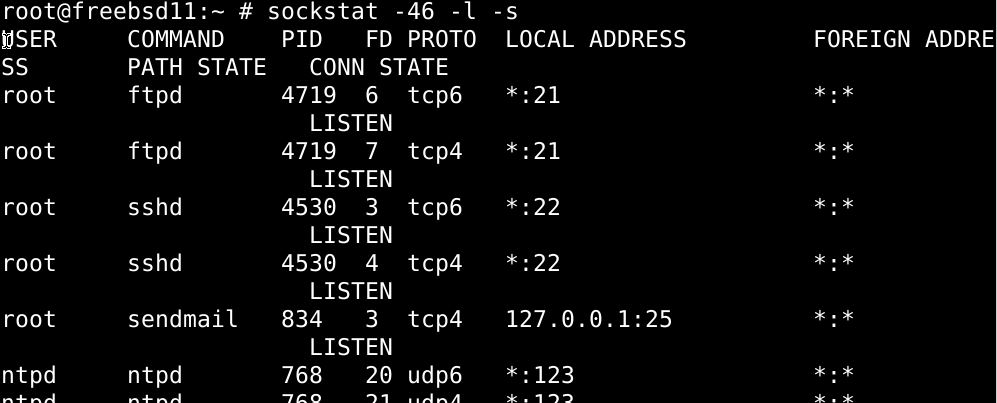
UDP cannot be displayed being a non-network protocol, thus retaining no data on listening status.
Arrange open ports by the app/command using them
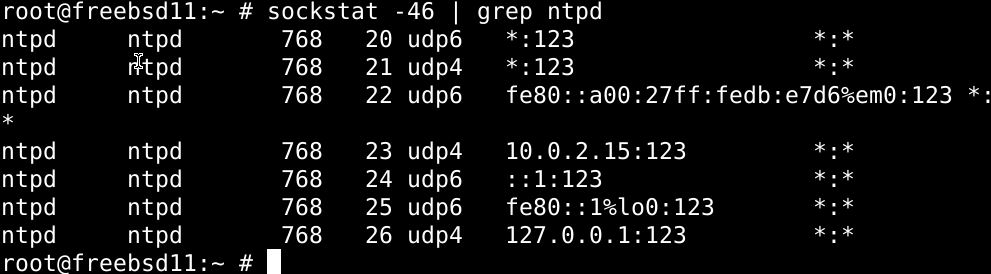
Here’s comes the part where pairing Sockstat command with grep utility comes in handy; with grep utility, you can have the open ports listed by the applications currently in the process of using them.
The command you’d use to list the open ports linked particularly with the ntpd server is:
You can make the listing more specific by having it only display the connected sockets by adding the -c flag to the above command:

Display all Unix Sockets
Have all the Unix domain sockets listed by adding u- a flag to the sockstat command:
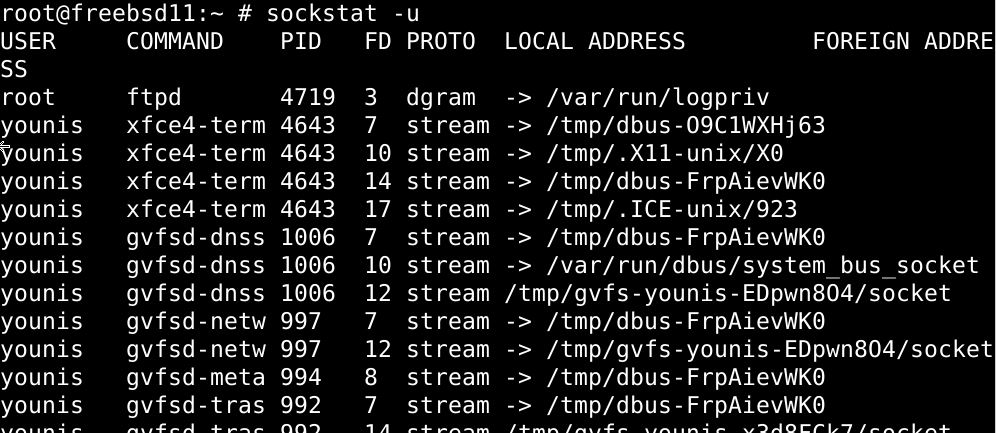
This should also display the named pipes along with the Unix Sockets.
Arrange open ports by HTTPS Connected Protocols
To have the list displayed by the HTTPS protocol for each socket, use the command below:

List HTTP Remote Sockets
You can also list all of the remote sockets currently using the HTTP protocol. Run either one of the following commands in the terminal:
$ sockstat -46 -c -p 80,443 | grep -v ADDRESS|awk '{print $7}' |
uniq -c | sort -nr

Find the number of times an IP address sent requests
To find out how many connection requests have been received from each IP address, you can run the following command:

By determining if there’s an unusually high number of connection requests sent by an IP address, you can identify that there’s some malicious intent and can positively enter the yellow alert and take the appropriate safety protocols.
Send a DNS query from TCP socket
You can send a DNS query using the TCP socket on the console, provided that the network is free of any DNS traffic. Run the command below:
Wrapping up
So, you’ve learned a whole lot about using the sockstat command and its variations with flags and switches. You also saw how it is used in different ways to present the network diagnostics in different preferences and use this information to perform multifaceted troubleshooting in FreeBSD. That’s a whole lot in itself, but now that you’re familiar with this stuff, you should consider incorporating the sockstat command line with some powerful command-line tools, such as netstat and Isof.
]]>List every user on your FreeBSD system
Fire up the command terminal and enter the commands below to obtain the list of user accounts.
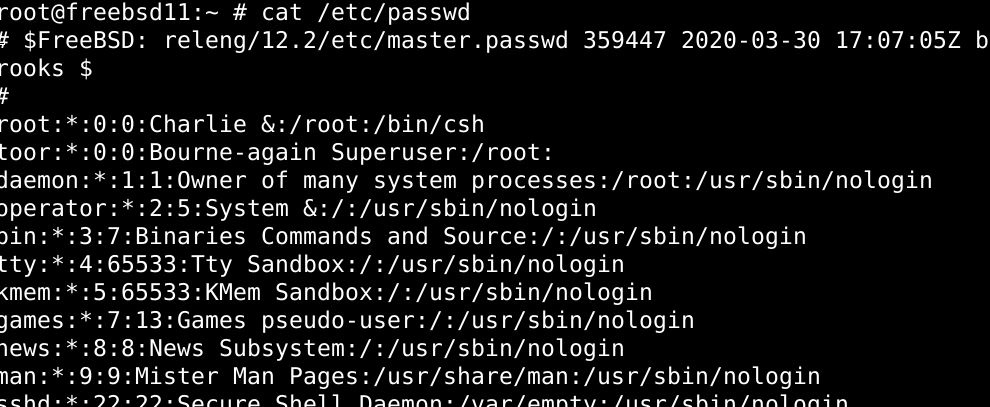
$ less /etc/passwd
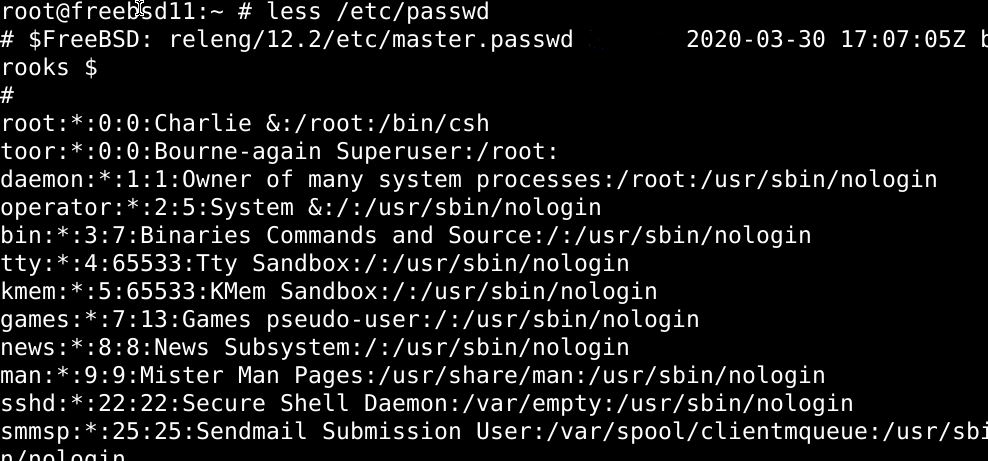
With the passwd file accessed, we can discern the required info from the output. The last line in the file(see below) is crucial:
Let’s go over each of the elements in the file and see what it means.
The first element, vnstat is the user name for the account.
The next element is *:284:284, in which the symbol * signifies that the password is encrypted and is kept in a file of its own. Following the * is the number 284repeated twice, the first of which is the user, and the second is for the Group ID.
The third portion is the vnStat Network Monitor, which represents the account information.
/nonexistent signifies the home directory for each user account.
Lastly, the /usr/sbin/nologin section represents the login shell for the user.
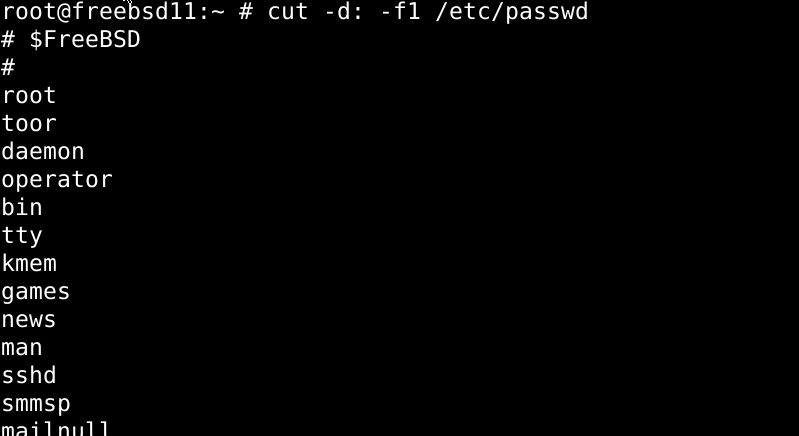
Listing usernames with cut command
To acquire a simple list consisting of only the usernames, try the cut command:
Using awk command to list users
Alternatively, you can use the awk command to obtain results similar to that of the cut command:
Displaying the username list with getent command
You can also use the getent command to access the passwd file.
$ getent passwd | more

To look up particular users with the getent command, add the username after the command.

Searching particular usernames with grep command
To look for a particular user, try the grep command:
$ grep '^younis' /etc/passwd

Check user activity and login attempts on FreeBSD
You can also do this on OpenBSD, NetBSD, and other Unix OS. Type:

Or you can also use the command below
You should be displayed the account status for each user.
See active users and user groups on the server
To see what user accounts are active on your server, use the more/less/grep commands as under:
$ less /etc/group
$ grep younis /etc/group

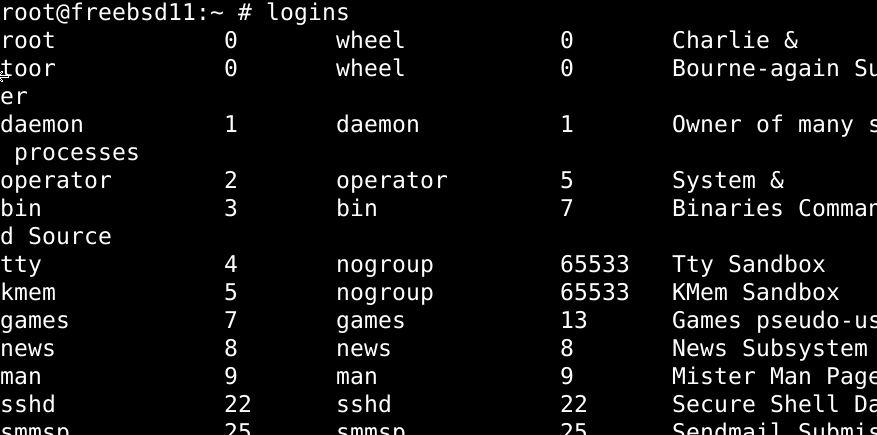
Obtain general info on accounts with logins
Type logins to see details on user accounts.
Add the -a flag to see expiration dates on the user accounts:

You can also look up details on a particular account with the –l flag:

Similarly, to specify multiple accounts:
To look up the home directory for all users, use the –x option with logins command:
For a particular user, type in:

Lookup low-security user accounts:
Use the -p option with the logins commands to see user accounts without passwords shown below:
Summary
There are many reasons you might want to look up user accounts on your FreeBSD system. Perhaps you want to detect if anything fishy is going on, or maybe you’re just looking to survey the userbase on your system. We’ve listed several ways you can look up the usernames and account info in this tutorial. Most of the commands we listed extracted the information from the /etc/passwd file to present the output. Although this tutorial is intended for users of the FreeBSD operating system, users of other Unix operating systems such as macOS, NetBSD, OpenBSD, etc., can also follow the instructions here to achieve the same results.
]]>Any number of user accounts can be made a part of a group in FreeBSD. Every group has a unique name and GID that identifies it. There is a UserID or UID for every process, and it is used along with the GroupID or GID to assess what is it allowed to change.
Adding a user to a FreeBSD group with the pw command
To add users to a group, we will be using the pw command-line utility. The intended purpose of this command is to provide the root user with a straightforward and intuitive interface to create and customize user groups.
So you’d need root access to follow the instructions in this guide. Use the sudo command as illustrated below:

Replacing a user’s group membership
The instructions in this section will remove the previously held memberships of the group. To see what groups a certain user ‘younis’ is a part of, use the id command:

Let’s add this user to a group named teamtwo. Enter the pw command as under:

To add this user younis to two groups with just one line of command, use the combination below

Where wwwusers is the second group, we want to add user younis to. The –G switch used in the command above specifies the first group as primary and the following groups as secondary.
Adding FreeBSD users to a new group without replacing pre-existing memberships
The command syntax presented below can add users to a new group without removing their existing group memberships.
$ pw group mod {groupNameHere} -m {userNameHere1,userNameHere2,...}
Let’s demonstrate with an example. Check the user groups with the id command:

Then to add this user to the teamtwo group, use the command syntax as we’ve used below:

You can make sure that the previous group memberships are retained by running the id command on that user.

Adding a new user to a group in FreeBSD
This section will focus on creating a new user and adding it to a pre-existing group. You can use the pw command again to both create the user and add it to a group.


With the commands above, we’ve created a new user named younis2, added him to the secondary testing group, and set a password for the user account.
To run a verification on the user account, use the id command again:

Check the members in a FreeBSD group
The pw command can also be used to display the names of all the users in a certain group. To check the members in our testing group, we’d issue the command below:

Alternatively, we can use the grep command on /etc/groupfile.

To list the groups a certain user is a part of, run the following group command:
You can use the id command to see the same result:
$ id -G -n younis2

Conclusion
This tutorial was all about adding users to groups in FreeBSD. We learned how to replace memberships for user accounts and how to add users to new groups without replacing their memberships. You’ve also learned how to create and add new users to pre-existing groups on the go.
]]>This post demonstrates how to upgrade FreeBSD version 11.x to v12.
Upgrade FreeBSD v11 to v12
Step 1: Prerequisites
To see what version you’re currently using, issue the command below:
$ uname -mrs
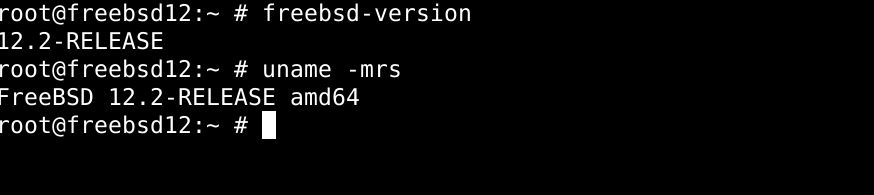
The output reveals we’re using version 12.2 as the latest, but the following commands let you upgrade the kernel anyway. Next, type in the command below, and press enter:
Then, use the pkg command to update any or all packages.

Step 2: Upgrade FreeBSD using the Binary Method
Use the freebsd-update command below to update using the binary method:

The command above examines the configuration file. It’ll ask permission to make changes, so press y when it does.
With the downloads and configurations are taken care of, we’ll now change the disk properties. Enter the command below:

Then restart the system:
Upon a successful reboot, make sure the system is back online and use the command below to get rid of the old files and continue with the upgrade:

With the base system updated, update all the binary packages with the command below:

Then check the following directory:

Step 3: Verifying the Update
First, verify if every service is active:
$ sockstat -l
$ sockstat -4
$ sockstat -6
$ netstat -a -n | grep LISTEN
$ top

Make sure the log file isn’t encountering any errors while using the various command line utilities:
$ egrep -i 'err|warn|cri' /var/log/messages
Check the current version:
$ freebsd-version

Wrapping up
This post illustrated how to upgrade FreeBSD v11 to 12 with the binary package method. Although FreeBSD 11.2 has not ended its support, it is better to upgrade to version 12. With every upgrade, the FreeBSD kernel is made more resource-efficient and faster.
]]>This tutorial will illustrate how to install and configure wifimgr on FreeBSD. Although this tutorial is meant for FreeBSD users, the installation procedure is similar to setting up wifimgr on any other BSD releases.
How wifimgr works?
The operations of wifimgr are entirely dependent on the wpa_supplicant.conf(5) file, which handles all of the processes in the background with the wpa_supplicant(8) software. Wifimgr simply displays the networks in configuration files’ records, along with any networks detected by the scanner to the user. This application allows user to switch Wi-Fi networks at their convenience, prioritize network connections, etc.
Installing wifimgr
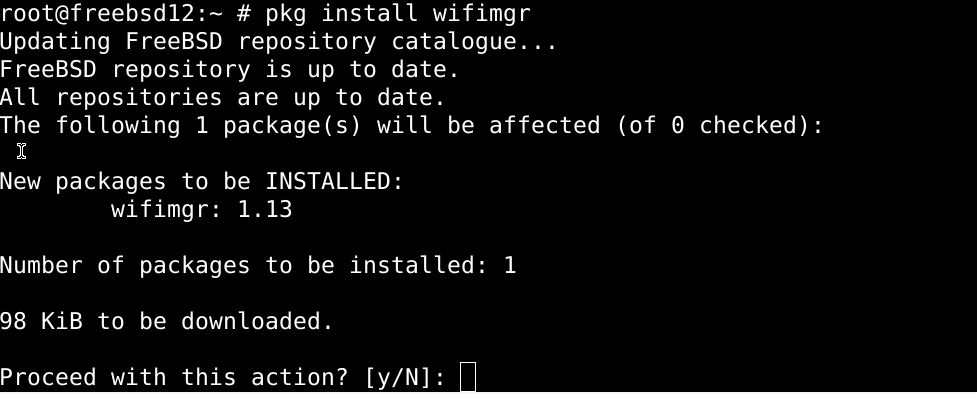
We will use the ports system and install wifimgr as a binary package (you can do so by compiling the source as well). Type in the command below to install wifimg:
The command to uninstall is similar:
To install using the port, issue the commands below:
$ portsnap extract net-mgmt/wifimgr
$ cd net-mgmt/wifimgr
$ make


Similarly, use the following command to uninstall:
$ make deinstall

We’d recommend you compile wifimgr with the ports system, as the pkg sometimes installs the slightly outdated version of the software.
Configure wifimgr
wifimgr is configured by editing the /etc/rc.conf file. There has to be at least one network configured into the file. Use the configuration for FreeBSD version 8 and up as follows:
# ifconfig_wlan0="WPA DHCP"
Remember to use your username instead of ath0 in the command above.
Wrapping up
This tutorial showed you how to set up and configure wifimgr on FreeBSD to manage Wi-Fi networks. You can either use the ports system or download wifimgr as a binary package, as illustrated in this post.
]]>This tutorial will illustrate how to install and configure Wine on FreeBSD 12.0.
Installing Wine on FreeBSD
We will use the FreeBSD ports repository to get the latest packages for Wine, both for stable and development versions. If you’re using the 32-bit version of FreeBSD, just put the commands below to install Wine stable:
For Wine development (32 bit):
For Wine experimental (32 bit):
However, if you’re using the 64-bit version of FreeBSD, download the i386 packages for Wine that allows 32-bit packages to run on 64-bit operating systems.
For Wine stable (64 bit):

For Wine Development (64 bit):
For wine experimental (64 bit):
Building Wine with chroot
First, add all the relevant i386 files into the chroot folder.
To build Wine on FreeBSD, we’ll use chroot as follows:
$ make buildworld TARGET=i386
$ make installworld TARGET=i386 DESTDIR=/compat/i386
$ make distribution TARGET=i386 DESTDIR=/compat/i386
$ mkdir /compat/i386/usr/ports
Then, append the mount points for the relevant directories:
$ mount -t nullfs /usr/ports /compat/i386/usr/ports
Then, issue the commands below to start idconfig:
$ setenv MACHINE i386
$ setenv UNAME_m i386
$ setenv UNAME_p i386
$ service ldconfig start
Then, head over to any directory and extract the package:
$ make package
Binary Image Activation
You can make configurations to the FreeBSD kernel so that every time a Windows binary file is opened, it is launched in Wine. This allows you to keep windows binaries like any other binaries on FreeBSD.
With root access, issue the command below:
--magic "\x4d\x5a\x90\x00\x03\x00\x00\x00\x04\x00\x00\x00\xff\xff\x00\x00\xb8\x00\x00\x00" \
--mask "\xff\xff\xff\xff\xff\xff\xff\xff\xff\xff\xff\xff\xff\xff\xff\xff\xff\xff\xff\xff" \
--size 20 --set-enabled
It is important to remember that Wine cannot detect the presence of infected windows applications, so make sure you’re getting the windows applications from official sources.
In conclusion
With Wine, you can run pretty much any Windows application, including video games. You’ll likely encounter some bugs and compatibility issues in your experience with Wine, especially when you work with heavier applications.
]]>
Crontab can be granted to each user account. The user accounts which can use the crontab command are listed in the allow file if it is available. Else, either the deny file governs what users are restricted from using this command, or the command would only be available to all or no users (barring the superuser), depending upon certain configuration variables. \
Crontab options/switches
Using a crontab without any option displays the crontab of the user.
Using with –u option:
The –u option, when added to the crontab with a username, edits the crontab of that user.
Using with –l option:
Adding the –l option to the crontab command yields crontab on the standard output.
Using with –r option:
Using the –r option with the crontab command erases your crontab. Before actually deleting the crontab, you’ll be asked for confirmation.
Using with –f option:
Executing the crontab command with the –f option deletes your crontab without asking for confirmation first, so use with caution.
Using with –e option:
Use the –e option with crontab to make changes to the current crontab, and installs the modified crontab once you exit the editor.
Crontab files
The files relevant to crontab utility are as under:
- The file located at /var/cron/allow shows what users are allowed to use crontab.
- The file located at /var/cron/deny displays what users have their crontab privileges restricted.
- Lastly, the file at /var/cron/tabs lists the crontab tables.
Syntax:
The syntax for using the Crontab command is as under:
$ crontab [-u user] { -l | -r [-f] |-e }
Conclusion
With crontab, users can schedule and automate the commands to be executed. The cron utility works in the background and runs any commands that are listed in a crontab.
If you want to start a new crontab file instead of using a template, you can use the crontab command with the –e option.
]]>Listing hostnames in FreeBSD with hostname command
Launch the terminal and type in the command below to list the hostnames on your FreeBSD system:

Or you can use the grep utility and specify the location in the command:
Changing hostname in FreeBSD
As stated earlier, you’ll need to add a switch to get the hostname command to change hostnames. To make these changes consistent upon restart, you’ll be editing the configuration file located in /etc/rc.conf.
To configure the /etc/rc.conf file, use the nano editor and issue the following command:
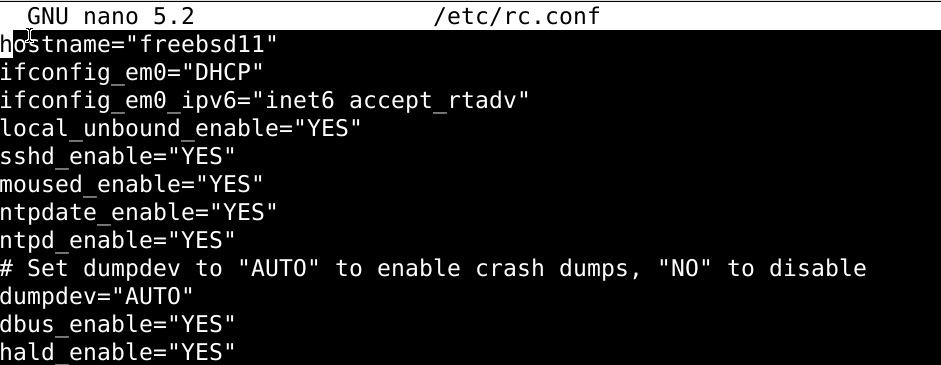
Replace the name with a new one and launch the hostname variable.
Then make changes to the /etc/hosts file, again using the nano text editor:

Edit the file to remove the name from throughout the file and replace it with the new one.
Finally, to apply changes temporarily without a reboot, type in:
You should reboot anyway to see if the changes have been retained.
Changing hostnames in FreeBSD without a reboot
Issue the following command:
Then make changes to the /etc/rc.conf using the command below:
For better illustration, consider the following:

Make sure to save the file before you exit it.
Lastly, you’ll need to modify the /etc/hosts file replaces the old hostname with the new one:s
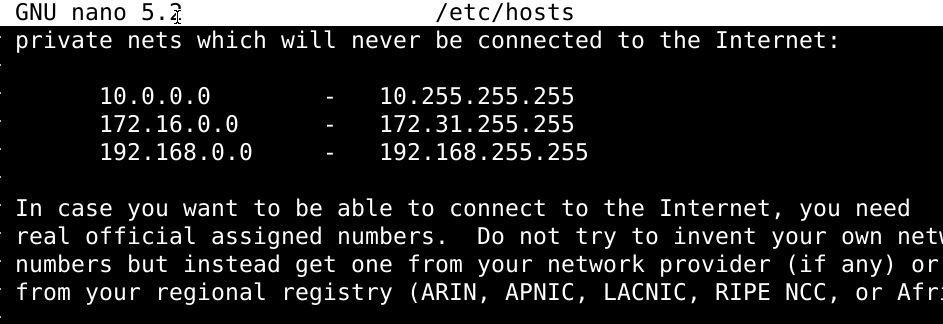
Change the hostname from 127.0.0.1 old-host-name to 127.0.0.1 new-server-name-here:
Add the details regarding the domain with the name. use the hostname command with the –f option:
Use the –s option to remove the domain information:
To acquire details regarding the hostname, add the –d option to the hostname command:
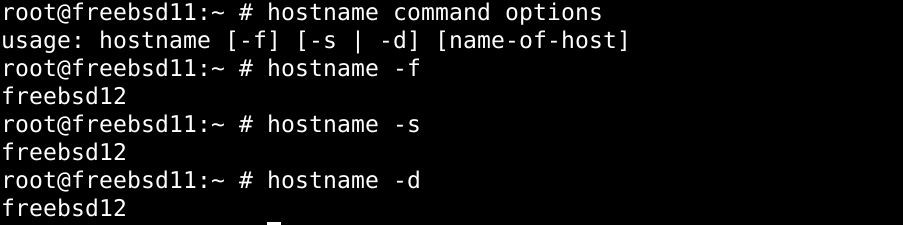
To read more on the topic, visit the pages below:
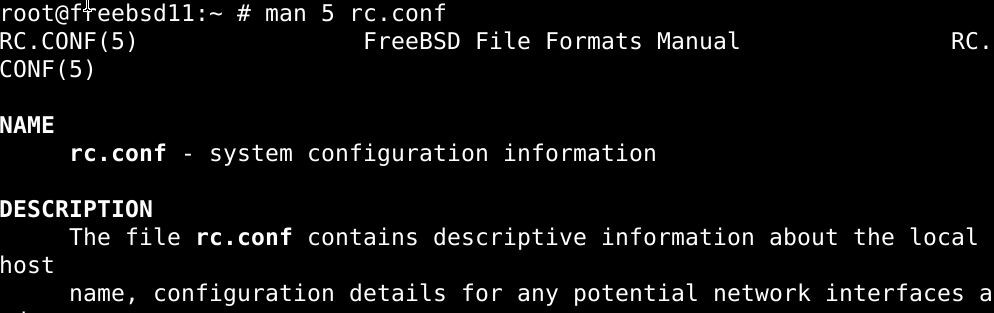
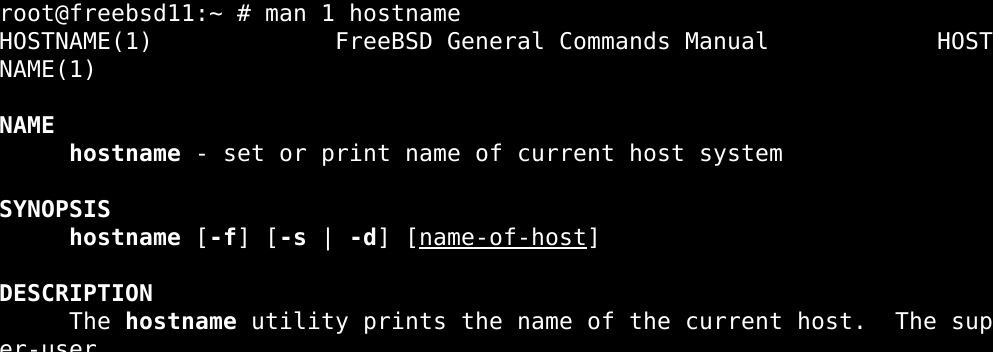
Wrapping up
That’s the end of the lesson. Hopefully, the instructions here worked out for you, and you’ve successfully changed the hostname on your FreeBSD system.
]]>This is going to be a quick lesson on how to update all FreeBSD kernel and packages. FreeBSD comes with two updateable elements, namely the Core OS and the third-party software. The Kernel or the Core OS is updated via FreeBSD-update command, whereas to update third-party software, we’d either need to use the package manager or using the ports system. Both the kernel and the packages are updated quite frequently, so it is advised not to miss out on any one of them to create security risks and reinforce vulnerabilities.
Updating the Core OS in FreeBSD
Run a quick search for updates. Use the command below:
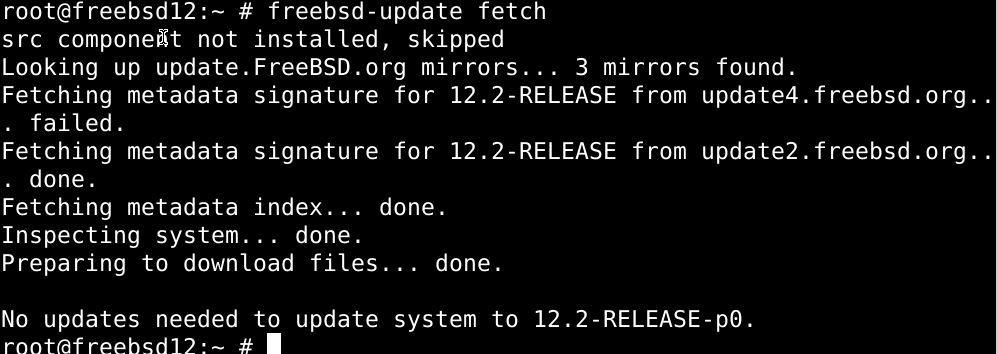
Once the search finishes, type in the following and press enter:

The command above should set any available updates to be installed on the system. If it is a bigger update, you might be prompted to reboot the system to let the changes apply.
Updating FreeBSD software with pkg
Any packages installed via pkg should be updated with the same to avoid issues with the installation.
Check the updates with pkg upgrade first:
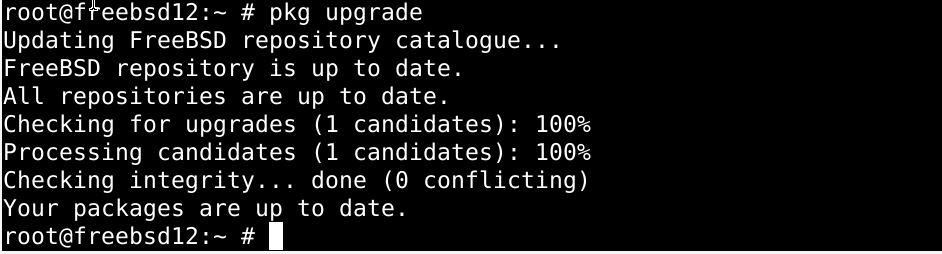
Then look up software updates with the pkg command.
Updating FreeBSD software with the Ports system
Like the packages installed with the package manager, those installed with the ports system should be updated with the same. To freeze the pkg on a particular package, use the command syntax below:

To install packages with the ports system, you have two ways:
- portmaster
- portsnap.
To use portsnap, type in the command below to update the local iteration of the ports tree:

Once you’re done updating the packages, you’ll be asked if you want to remove the older versions’ backups. These backups shouldn’t be of any use to us if the update were successful.
Wrapping things up
Today, we explained how to update the core OS and software packages in FreeBSD. To update the Core OS, you’d need to use the freebsd-update fetch and install commands, whereas the packages can be updated via either the ports tree or the pkg command. The packages should be updated with the same method they were installed with, as updating a ports tree installed software with pkg can lead to problems with the compilation and can severely offset the software’s code, essentially rendering it broken.
]]>