Spyse takes a very out-of-the-box route when it comes to online security, and for this reason, it has found a following among cybersecurity enthusiasts. It can be used in the service of a search engine; it can collect large swathes of data off the web. This translates into a compelling quality. This tool has its database, which is the biggest cybersecurity database on the internet. You can get your hands on some seriously heavy-duty reconnaissance data with the Spyse database.
This post describes how to recon domains and IPs with the Spyse toolset.
Getting started with Spyse
Spyse has a web-browser interface. It doesn’t have any installable package. I will show you how to access the Spyse toolset. On your browser window, open a new tab and type spyse.com. Next, click the signup button.

Now enter the details; you have two options, you can make an individual account, or you can link your company account. I have made an individual account.
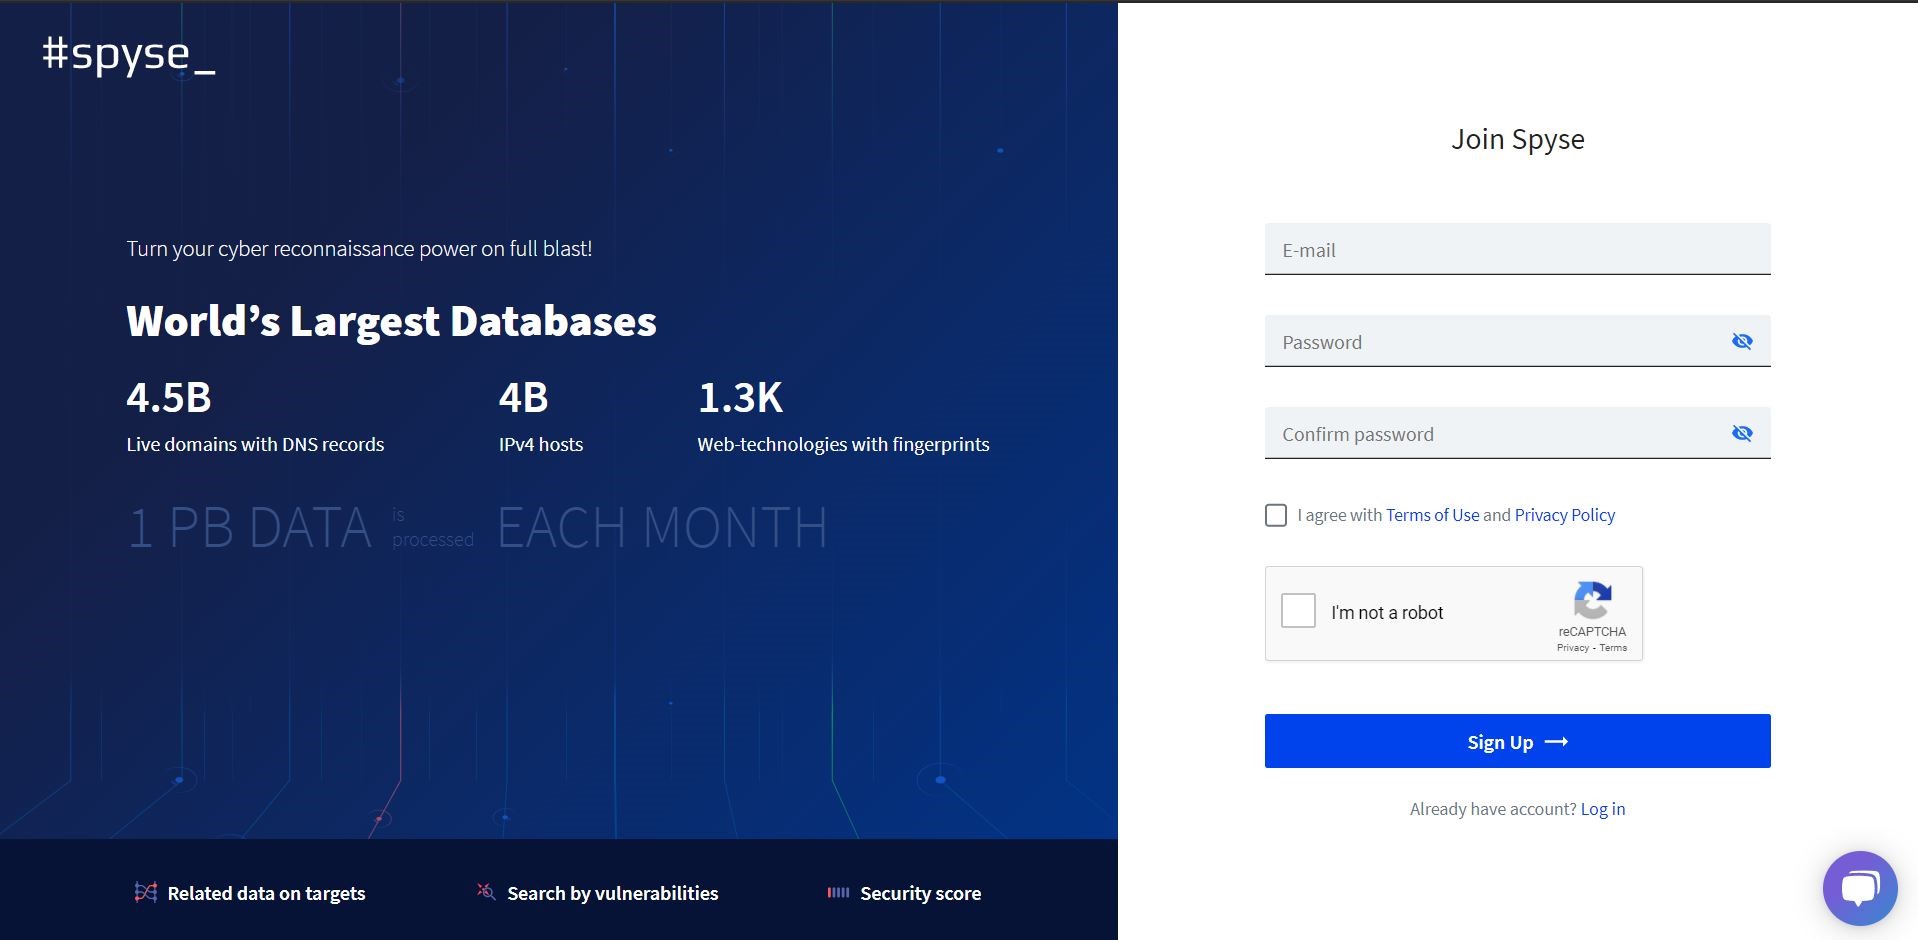
A verification/confirmation mail will be sent to your account. Go to your mail account and approve the link given. You will be awarded a guest account with limited functionalities. You can purchase the tool on subscription-based packages. A Standard package, Professional package, and Business package can be bought on each account.
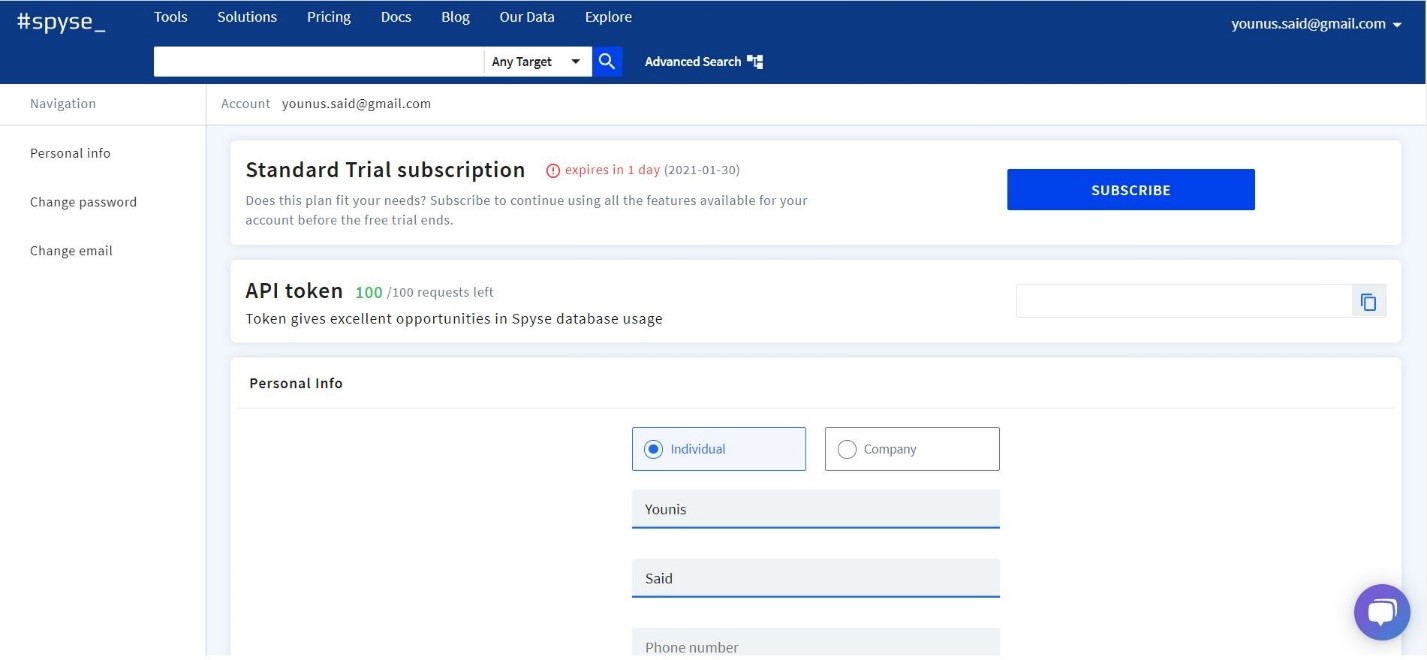
Spyse suite tools:
There are many tools associated with Spyse. All of these tools have a specific advantage in reconnaissance of the internet. The tools are mentioned below:
- API
- Advanced Search
- Bulk Search
- Subdomain Finder
- Port Scanner
- ASN Lookup
- Domain Lookup
- IP Lookup
- Reverse IP Lookup
- DNS Lookup
- NS Lookup
- MX Lookup
- Reverse DNS Lookup
- SSL Lookup
- WHOIS Lookup
- Company Lookup
- Reverse Adsense Lookup
- CVE Search
- Technology Checker

Now I will show you how to use some of these tools. I have used three domain names and one server IP for testing. I have attached screenshots that define the visual usage of the Spyse toolset.
Recon Domain with Spyse
To recon a domain with Spyse, on the dashboard screen, select the ‘Domain’ option from the given list and enter the domain in the search box.

Next, click on the ‘Search’ and Spyse will display all the related domain information. First, a General information section will be displayed. Additionally, Spyse displays the DNS record, DNS History, Technologies information, etc.

Recon IP with Spyse
Similarly to recon IP with Spyse, select the ‘IP’ option from the given list and enter the domain in the search box on the dashboard screen.
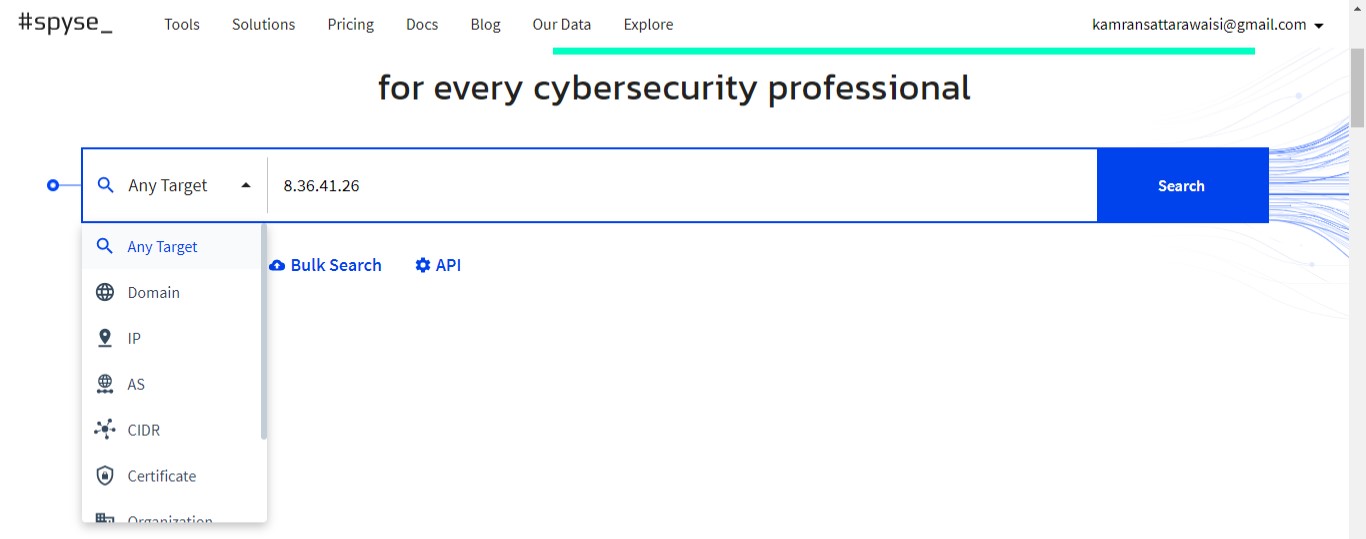
Click on the search button, and Spyse will display all the related information.
Advanced Search with Spyse
With the Spyse Advanced Search, you can collect data live while you’re browsing through sections of the database. Five search parameters can be added to each keyword that you enter in the advanced search option to yield results otherwise unavailable. Let’s say you were looking for port users. With advanced search, you can retrieve complementary information such as the open ports, CVEs, programs, the operating system in use, and other information related to the company.
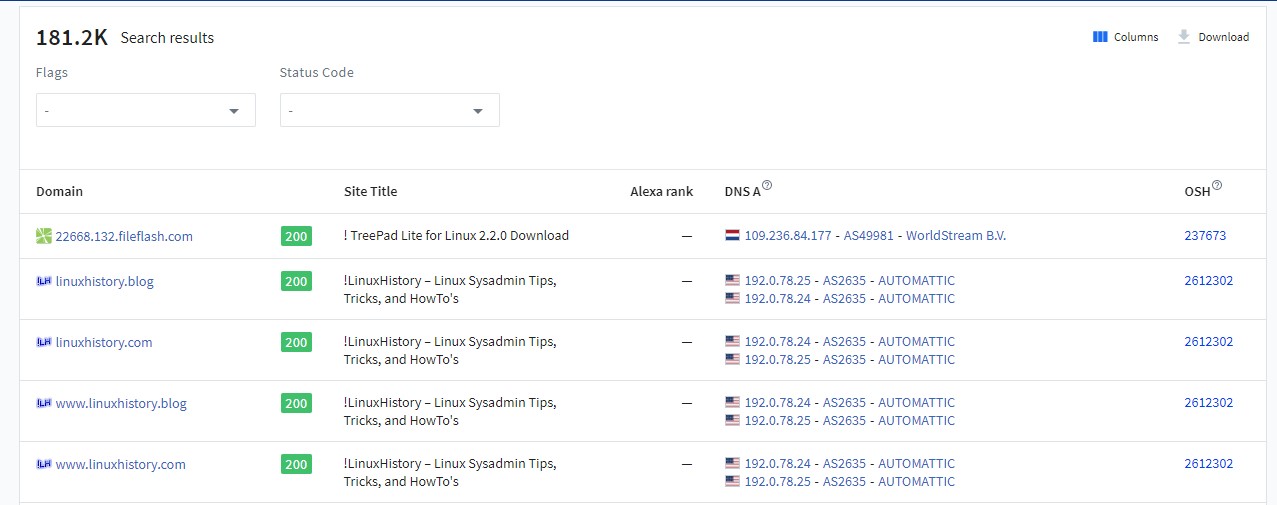
For instance, I have to search the domains that contain ‘linux’ in the title. For that purpose, click on ‘Domain’ and add a filter for title.
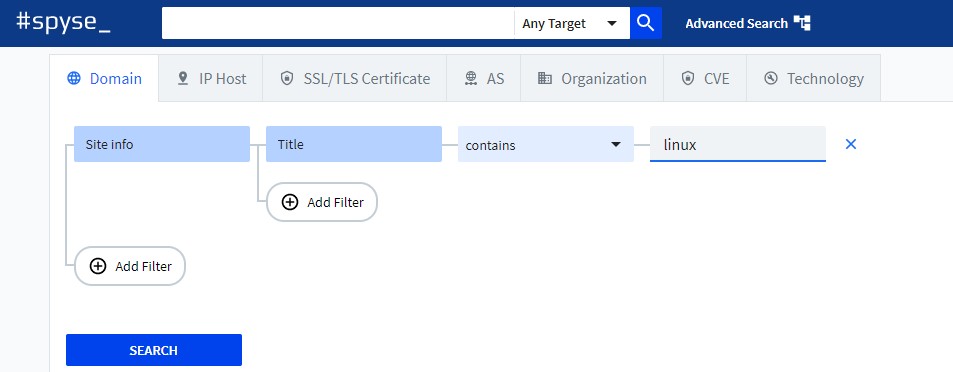
Now, click on search and Spyse will retrieve all the results from its database.
Wrapping up
Reconnaissance is performed to gather data about a website. When it comes to Cybersecurity, Spyse has knocked it right out of the park. This post explicates how to use the interface of Spyse with examples. The examples include domain search, IP search, and advanced search. ]]>
VPN creates a virtual network between the client and the host server and in that way it protects your computer from hackers and snoopers. All of your online activities use a virtual network that bypasses the network maintained by internet service providers (ISP).
Do I need a VPN on Linux?
The question is why VPN is important and do I need it on my device? The answer is Yes! Linux distributions are very secure but if you want to add an extra layer of security to your network, then having a VPN on your device is the best choice.
Let’s check some significant benefits of using VPN:
- It hides your private information.
- Protects you from being tracked by everyone and anyone since the connection is encrypted
- It makes you anonymous.
- It allows increase security of your wireless traffic when in public locations
- It allows you to appear that you are in a different geographical region when using internet services which can be convient in many scenarios
All of these advantages especially privacy and security would probably compel you to install a VPN on your Linux device. Let’s check how to get it on your Linux device.
Installing SurfShark VPN on Ubuntu:
There are many VPN services are available then why SurfShark? SurfShark is the latest, secure, cheaper, reliable, and fast VPN service that is available for Ubuntu. Let’s check step by step process of installing and setting up SurfShark on Ubuntu:
Step 1:
First, visit the download page and download VPN for Linux, SurfShark VPN package:

SurfShark VPN package will be downloaded:

Step 2:
Make sure that you are in the same directory where the package is downloaded. Open terminal and type the below-mentioned command to start the install process.:

Step 3:
Now, update the packages list by using:
Step 4:
To complete the installation process of SurfShark VPN use the command mentioned below:

Step 5:
Once the installation is completed, it’s time to connect SurfShark VPN. Type the following command to run SurfShark:

Step 6:
In this step, the setup process will begin. Firstly, it will ask you for the credentials of your account. If you have not subscribed SurfShark, then make an account by visiting (https://order.surfshark.com). Once the signup process for SurfShark is finished, then put your email and password:

Step 7:
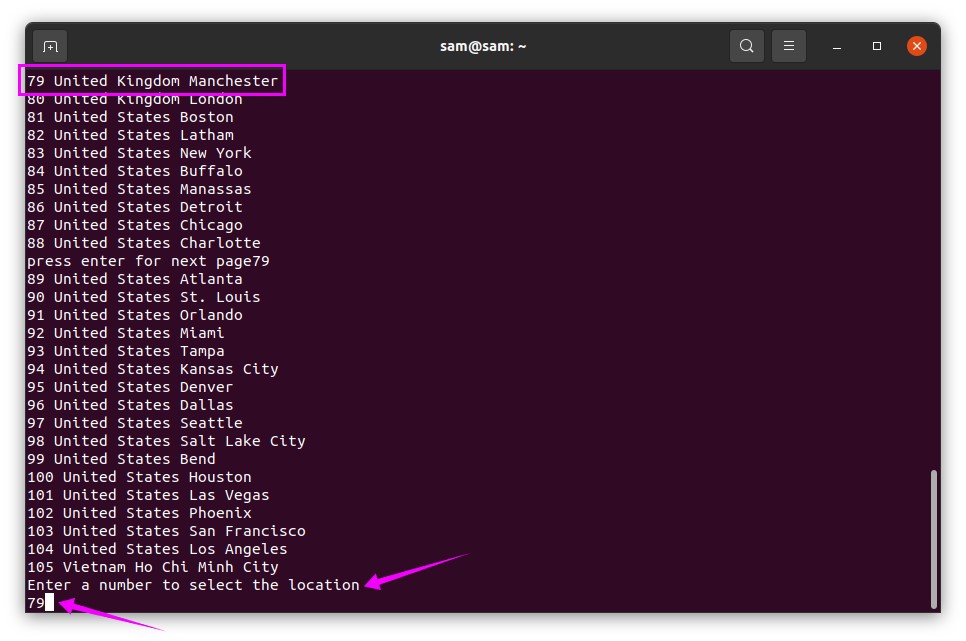
Now you will be given a list of different regions to select. Select any country by typing the number of that country. I am putting “79” for the United Kingdom:
Step 8:
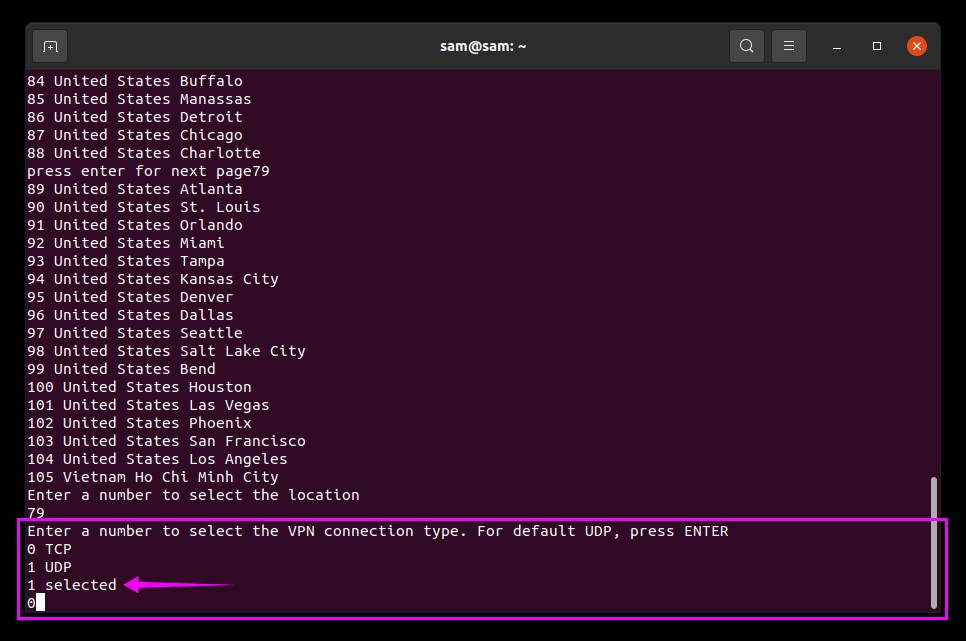
You will be prompted for the connection type. There are two options for connection, “0” for “TCP” and “1” for “UDP” if you press “Enter” UDP connection will be applied by default:
Now, it will take few seconds to set up the connection and show the status of the connection, see the image below:
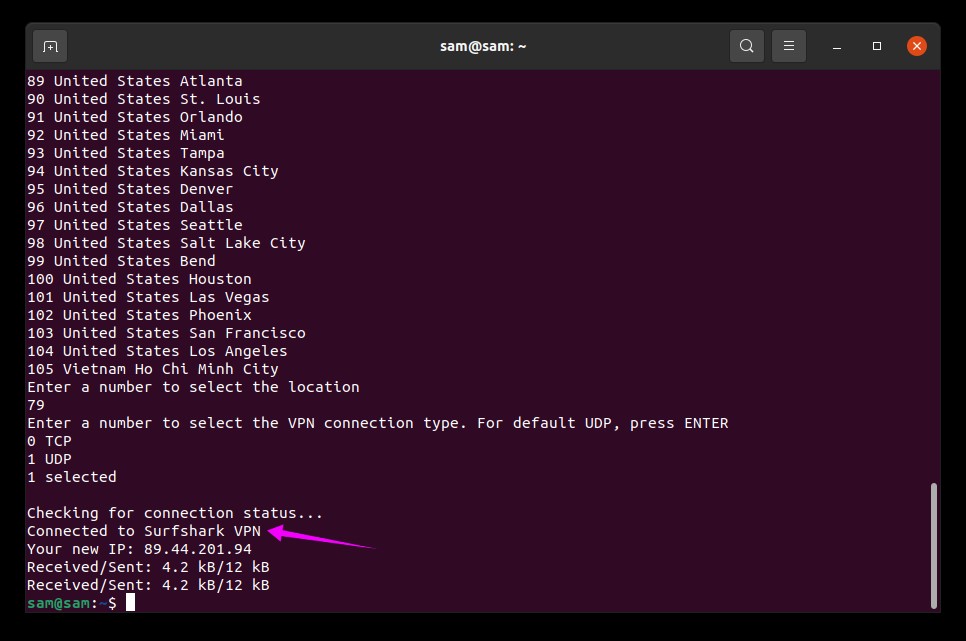
Now your device is on a virtual network, you can use it without compromising your data and sensitive information.
How to disconnect SurfShark VPN?
To disconnect SurfShark VPN use the below-stated command in terminal:

Other SurfShark useful commands:
Some other useful commands for SurfShark are:
For help and viewing all SurfShark command use:
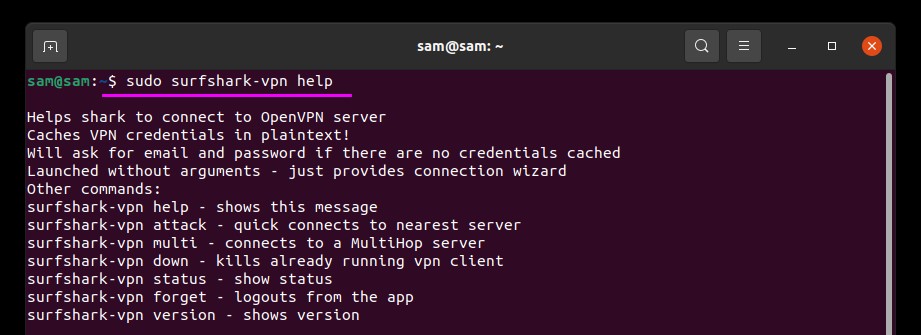
For connection status:

For a quick connection:

For Multihop connection use:
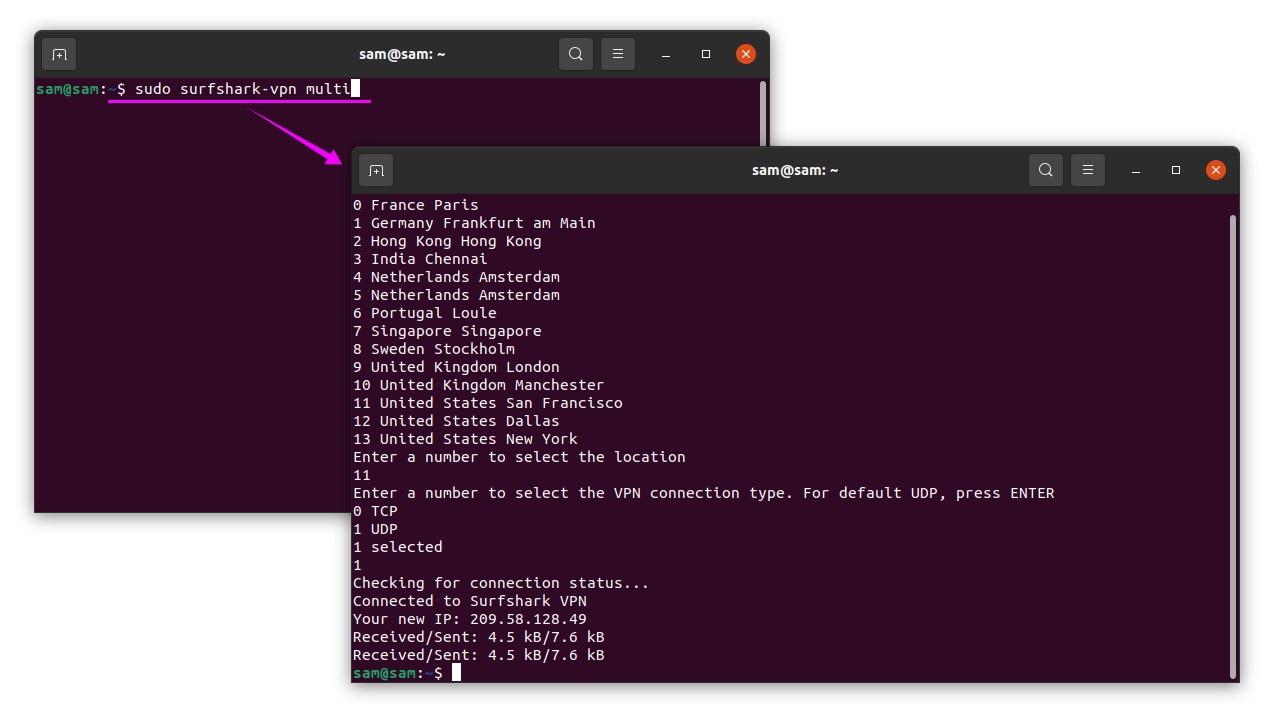
Conclusion:
VPN holds vital importance when it comes to protecting your device from trackers like websites and internet service providers. It hides your identity, protects your data on public wi-fi, and gives access to region-blocked websites. In this post, we understood how to get SurfShark VPN on Ubuntu and how to set up the connection. And then, we learned how to disconnect SurfShark VPN and then a few other useful commands.
]]>Here, we have compiled all the top Linux terminal commands that will help beginners, as well as intermediate and advanced users.
In this article, we will learn about these 25 Linux commands:
- ls
- echo
- touch
- mkdir
- grep
- man
- pwd
- cd
- mv
- rmdir
- locate
- less
- compgen
- “>”
- cat
- “|”
- head
- tail
- chmod
- exit
- history
- clear
- cp
- kill
- sleep
Now, let’s learn each of these commands one by one.
1. ls
‘ls’ command is the most widely used in the CLI interface. This command lists out all the files present in the current/present working directory. Open up the terminal by pressing ‘CTRL+ALT+T’, and write out the following command:

You can also list the files from a specific folder using this command:
It will show the list of files that resides in the ‘Desktop’ without changing the present work directory.

Another feature of the ‘ls’ command is that you can write ‘ls -al’, and it will print out all the doted files with the simple one, along with their file permissions.

2. echo
This command prints out the text to the command-line interface. The ‘echo’ command is used to print the text and can be used in the scripts and bash files as well. It can be put into the output status text to the main screen or any required file. It is also helpful in depicting environmental variables in the system. For example, write out the following command in the terminal:
It will show you the following results.

3. touch
The ‘touch’ command allows you to create any file. Use the ‘touch’ command with the ‘filename’ you want to give to the file and hit enter.
After that, type the ‘ls’ command in the terminal to confirm the file’s existence.

Here, you can see that the text file is created. Use the command given below to open the file:

Execute the command, and you will see the following result.

At this point, the file would be empty because you only created the file and have not added any content to it. This ‘touch’ command is not only used to create ‘text’ files but can also create multiple types of files by using their extensions. For example, you can also create a python script by using the following command:
Here, ‘.py’ is the extension for the python script.

4. mkdir
‘mkdir’ is used to create directories efficiently. This command will also let you create multiple directories at once, which would save you time.
First, view the list of files that exists in the present working directory by using the command given below:

Now, create a new directory by the name of ‘newDir’.
If you are working as a superuser, then the command will be executed, otherwise, you have to execute the following command instead of the one given above.
Now, type the ‘ls’ command to view the list of files and folders.

For creating multiple directories at once, give the names of the directories in a single ‘mkdir’ command.
Or
Now, list the files and folders using the ‘ls’ command.
You can see the dir1, dir2, and dir3 here.

5. grep
‘grep’ command is also known as the search command. It is a command to search for text files and performs the search through specific keywords. Before that, you should have some text in your text file. For example, use the following sample text in the ‘testfile’, which you already created using the ‘touch’ command.
Open up the file through the terminal.
Execute the command. It will give you the following output.

Now, write the following text in the file ‘testfile’.
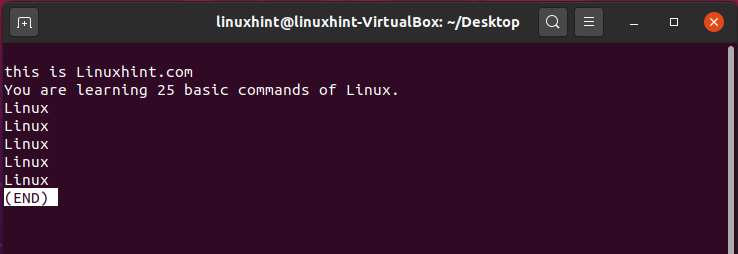
You are learning 25 basic commands of Linux.

Press CTRL+O to write this content in the file.

Come out of this file by pressing CTRL+X. Now, use the ‘grep’ command. The ‘-c-’ will let you know how many times the word ‘linuxhint’ appeared in the file.

As the output is ‘2’, it means that the word ‘Linux’ exists two times in the ‘testfile’.
Now, let’s make some changes to this file by opening the file using the ‘nano’ command.
You may write any text multiple times in this file to check the working of the above ‘grep’ command.
You are learning 25 basic commands of Linux.
Linux
Linux
Linux
Linux
Linux
Now, press CTRL+O to write out the updated content in the file.

Come out of this file by pressing CTRL+X, and now execute the following commands to check whether it performs correctly or not.

Different flags can be used with the ‘grep’ command for various purposes, for example, ‘-i’ make the search case sensitive. Once you got the idea about the ‘grep’ command, you can explore it further according to your need.
6. man
‘man’ command displays you a manual about the working of any command. For example, you don’t know what an ‘echo’ command does, then you can use the ‘man’ command to know its functionality.


Similarly, you can use the ‘man’ command for ‘grep’ as well.

Now, you can see all sources of options. Flags and all the other information related to ‘grep’.

7. pwd
‘pwd’ stands for print working directory. It is used to print the current working directory for an instance. If multiple instances are working and you want to know the exact working directory, then in this case use the ‘pwd’ command.
Here, you can see the path of the present working directory.

If you are working in the Desktop directory, in that case, this ‘pwd’ will print out the whole path leading towards the desktop.
8. cd
‘cd’ stands for change directory. It is used to change the current directory because you can access all the files and folders in different directories in your system. For example, making Desktop as the current or present working directory, write out the following command in the terminal:

To know the path of the present working directory, write the following command:

To go back to the directory, type this:

You can check the present work directory here.

9. mv
‘mv’ command is used to rename and move a directory. While working with files in a directory, each file should be renamed, which is a time-consuming process, so the ‘mv’ command comes into play here. For example, in our directory, we have ‘testfile’ as shown below.

To rename this file use the ‘mv’ command in the following pattern.

And then view the list of the files to check the changes.

You can also transfer this file to any other directory using this ‘mv’ command. Let’s say you want to move this ‘trialfile’ to desktop. For that, write out the following command in the terminal:

10. rmdir
This command is used for removing directories. ‘rmdir’ helps save a lot of space on the computer and organize and clean up files. Directories can be removed using two commands ‘rm’ and ‘rmdir’.
Now, let’s try to delete some directories. Step 1 is to view the directories in your current working space.

Now, we are going to delete the ‘newDir’ directory.
Now, use the ‘ls’ command to see if it exists or not.

Now, we are going to delete multiple directories at once.

Now, use the ‘ls’ command.

As you can see, all of those directories have been deleted from the home.
11. locate
‘locate’ command helps find a file or a directory. Through this command, a specific file or directory can be found. It also searches regular expressions by using wild-cards.
To find a file by its name, type the name of the file with the ‘locate’ command.
The output of this command will let you know the exact path to locate this file.

There are certainly other options for the ‘locate’ file. You will get to know all that stuff by using the ‘man’ command.
12. less
‘less’ command views the files without opening them in an editor tool. It is very quick and opens a file in an existing window while also disabling writing abilities such that the file cannot be modified. For that, write the ‘less’ command and define the file name.

It will give you the following output.

13. compgen
‘compgen’ command is a very efficient command that displays the names of all the commands, names, and functions on the command line interface. To display all the commands, write:

Here, you can see a long list of all commands that you can use in the terminal.
Similarly, you can also print out the functions and files name, which is also shown at the end of this list.
14. “>”
This character ‘>’ prints and redirects the shell commands. It displays output from the previous command in the terminal window and sends it to a new file. Now, if you want to send the output of the previous command to a new file, let’s use this command:
And then view the files.

Now open the file, it will be empty.

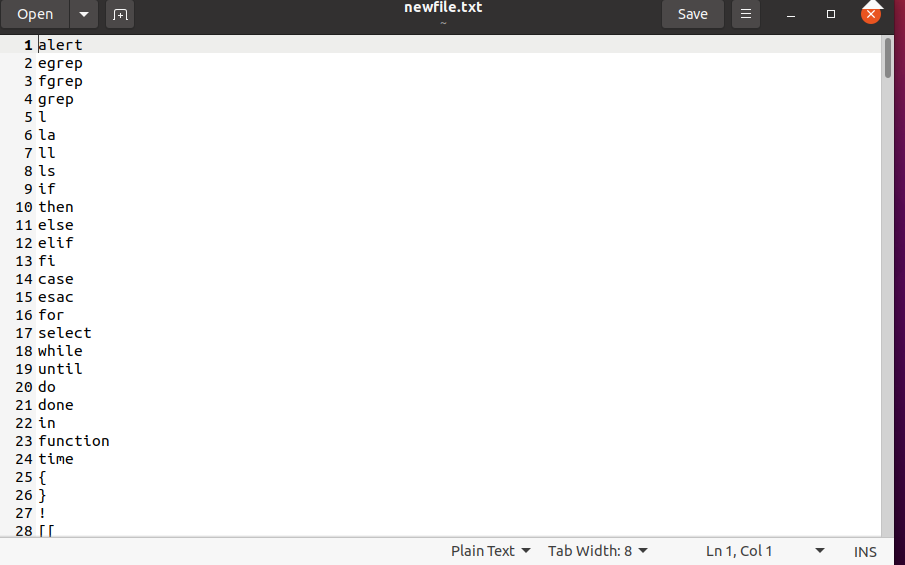
Now, we are sending the ‘compgen’ command result to this file.

Open the file to view the content, which is the result of the ‘compgen’ command.
15. cat
‘cat’ command is the widely used command, and it performs three main functions:
- Display file content
- Combine files
- Create new files
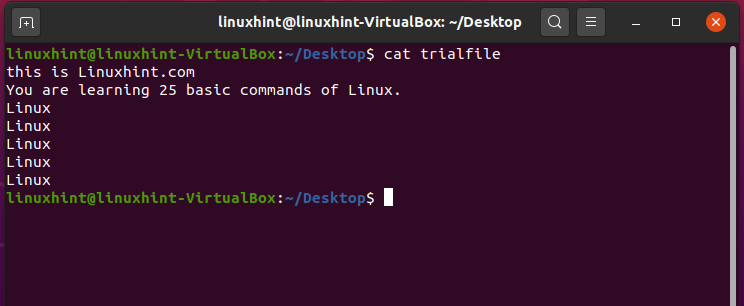
First of all, we are going to display the content of the ‘trialfile’.
It will give you the following output.
16. “|”
Pipe command “|” takes the output of the first command and utilize it as input for the second command. For example:
This command will be used to give input to another. We are using the filename and ‘less’ command as an input to that file.

17. head
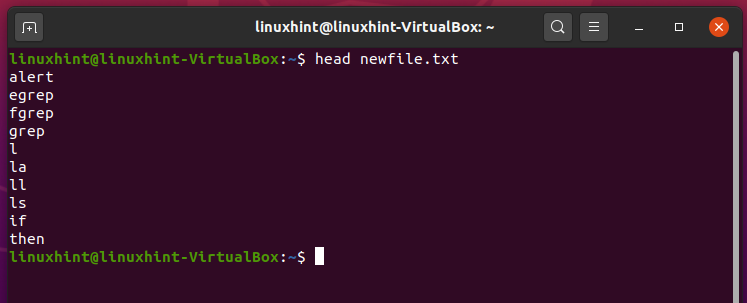
‘head’ command reads the start of a file. It shows you the first 10 lines of the file. It can also be customized for displaying more lines and the quickest way to read the content of a file. For example, the command given below will show you the first 10 lines from the file ‘newfile.txt’.
It is the perfect usage of the ‘head’ command in which you can quickly read the initial ten lines of the file and get the idea of what it is all about.
18. tail
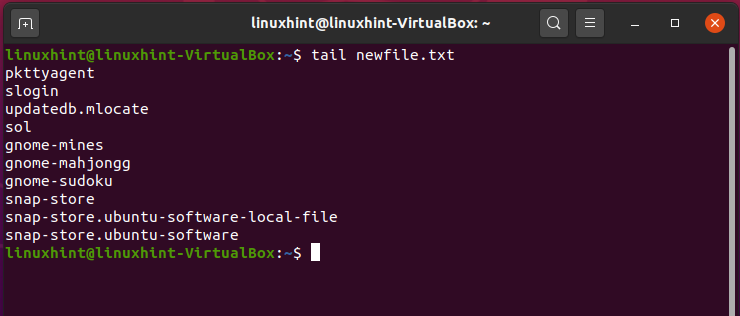
‘tail’ commands read the end of a file. It shows you the last ten lines of the file, but it can also be customized to display more lines.
It will print out the last ten lines of the ‘newfile’ file.
19. chmod
‘chmod’ command edits or sets permissions for a file or a folder. It is one of the best-known commands, and it changes the permissions of a specific file directory through a quick argument.
- W is used for writing permissions
- R is used for reading permissions
- X is used for the execution
- ‘+’ is used to add permissions
- ‘-’ is used to remove permissions
To view the files and folders with their permissions, type the following command in the terminal:
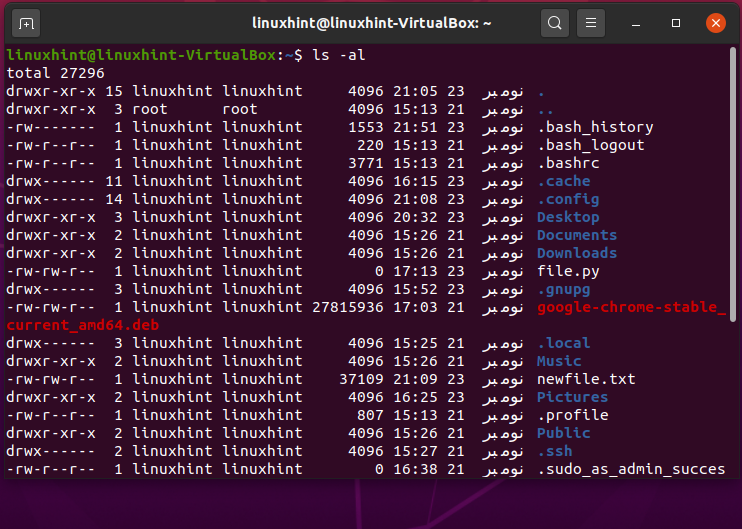
Here you can see that the highlighted portion represents the file permissions. The first section represents the permissions given to the owner, the second section represents the permissions given to the group, and the last section represents the permissions given to the public. You can change the permissions for all the sections. Let’s change the file permissions of ‘newfile.txt’.
This command will remove the writing permissions from all of the sections.
Type the ‘ls -al’ command for its confirmation.
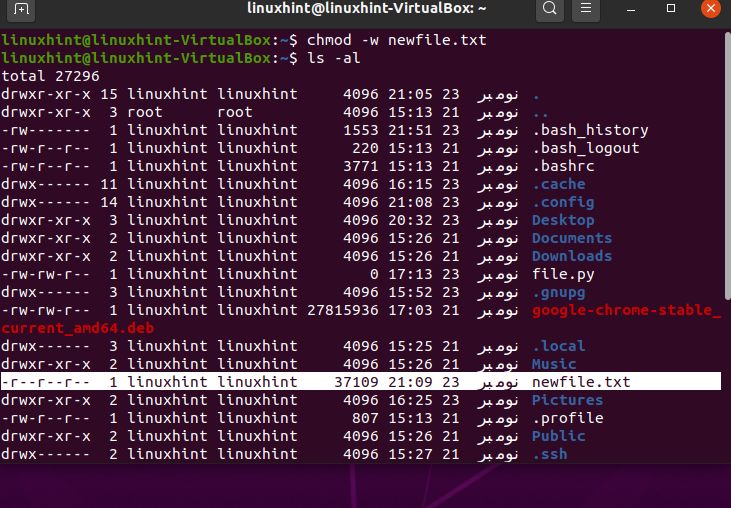
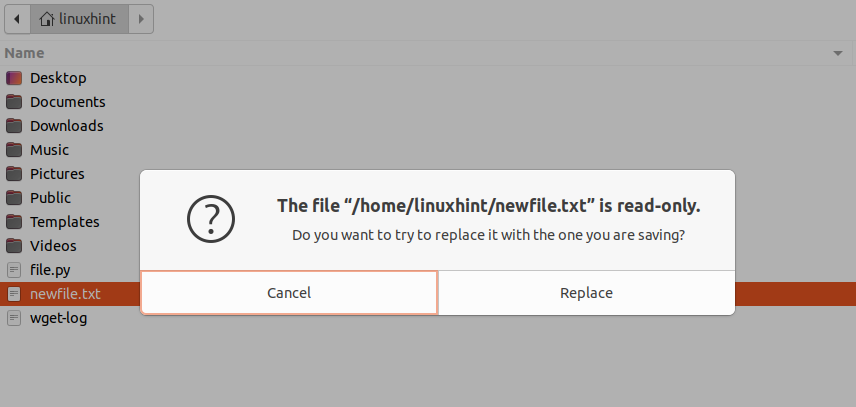
Open the file, and try to add some content to it and save this file. It will definitely give you a warning dialog box.
20. exit
This command is used to quit the terminal without GUI interaction. The terminal gives you the option to kill itself using the ‘exit’ command.

Press enter, and now you can see there is no terminal.

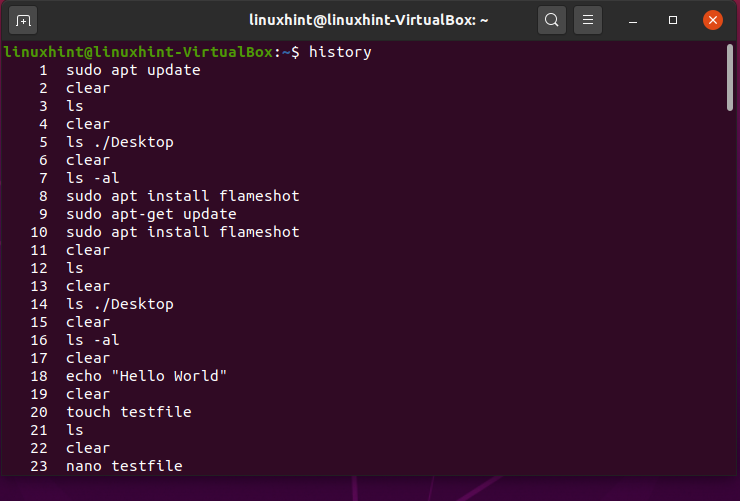
21. history
‘history’ command will show you a list that comprises the most recently used commands. It will display the record of the commands you used in the terminal for different purposes.
22. clear
This command clears the content of the terminal. It keeps the terminal clean.
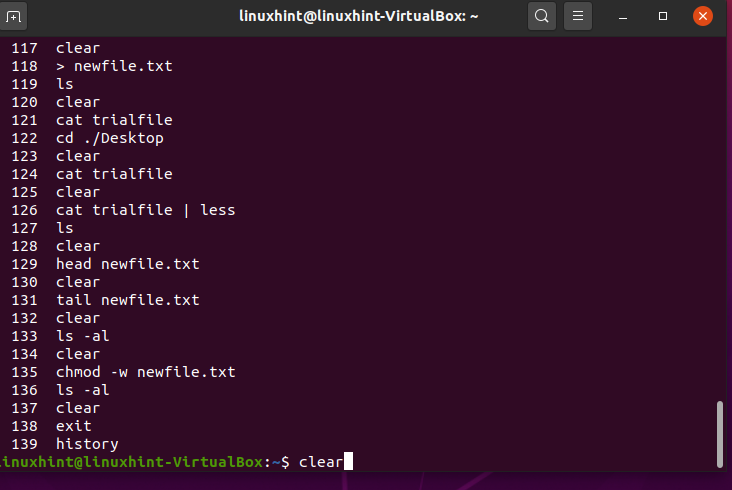
Press enter, and you will see a crystal-clear terminal.
23. cp
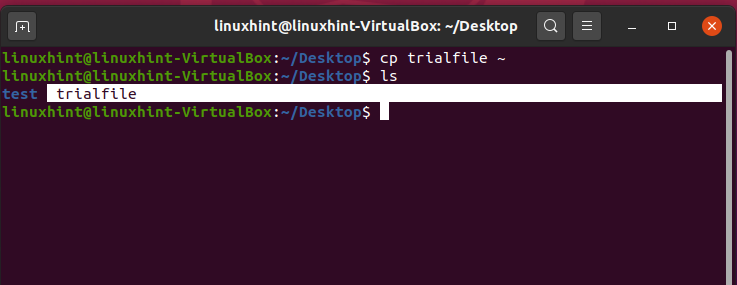
‘cp’ command stands for copying directory or file. You have to specify the destination with the filename.
Here, ‘~’ represents the home directory. Execute the command and then write the ‘ls’ command to check if it exists or not.
24. kill
‘kill’ command terminates the process of working on the command line interface. Before using the ‘kill’ command, you have to find out all processes that are currently happening in the system.
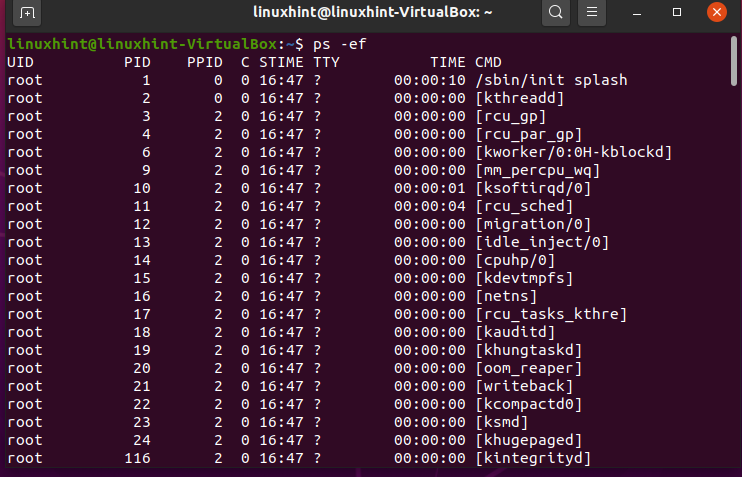
Let’s kill the ‘whoopise’ process by using its process ID ‘PID’.
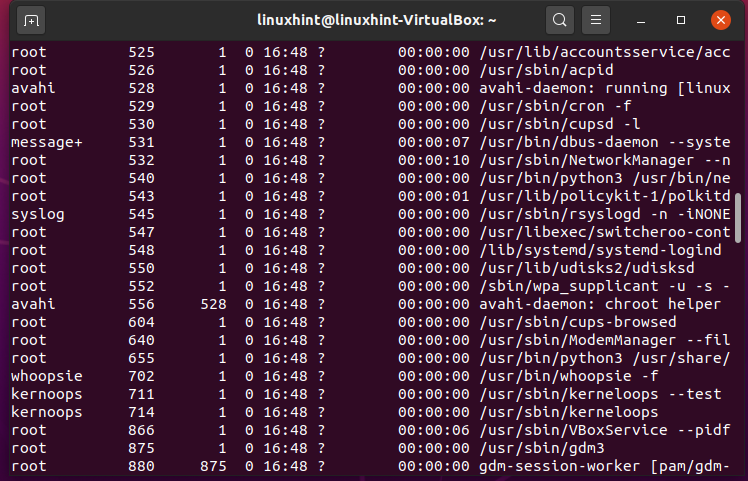
Enter your password to give permission.

Here, we have no error message, which means that the process is killed.
25. sleep
‘sleep’ command delays the process for a specific time. It controls and manages processes in scripts as well. It delays the elements of a process for processing till a specified time. The time can be specified using seconds, minutes, or even days.
Let’s sleep the process for two seconds.
It will take a delay of two seconds to execute that command.

Conclusion:
We have learned some top 25 Linux terminal commands in this article. These are the essential commands for beginners to learn more about the Linux command-line interface.
Watch our YouTube Video about 25 Linux Terminal Commands:
1. What is Linux?
Linux is a well-known operating system. In 1991, Linux was created by a university student named Linux Torvalds. All software’s architecture is covered with Linux, as it helps to communicate between the computer program and the system hardware and also manages the requests between them. Linux is open-source software. It is distinguishable from other operating systems in many ways. People having professional skills related to programming can also edit their code, as it is freely available for everyone. Torvalds intended to name his creation as ‘freaks,’ but the administrator used to distribute the code by its creator’s first name and Unix, so that name stuck.
2. Linux Distribution
Linux distribution is a kind of operating system that comprises a whole package management system with a Linux kernel. Linux distribution is easily accessed by downloading any Linux distribution.
A particular example of Linux distribution includes a Kernel, different libraries, GNU tools, a complete desktop environment, and some additional software documentation. McDonald’s example is best to understand the concept of Linux distribution. McDonald’s has multiple franchises in the world, but the services and the quality is the same. Similarly, you can download the operating system of Linux from other distributions from Red Hat, Debian, Ubuntu, or from Slackware where more or all the commands in the terminal would be the same. The McDonald’s example fits here. You can say that each franchise of McDonald’s is like a distribution. So, the examples of Linux distributions are Red Hat, Slackware, Debian, and Ubuntu, etc.
3. Installation Guide
This topic will give you a complete way through which you can install Ubuntu on your system. Follow the steps given below for a smooth installation of Ubuntu:
Step 1: Open up your favorite browser and then go the https://ubuntu.com/ and click the Download Section.
Step 2: From the Download Section, you have to download the Ubuntu Desktop LTS.

Step 3: Click to download the Ubuntu Desktop file; after clicking this, it will give you a Thank you Message that states Thank you for downloading Ubuntu Desktop.

Step 4: As you are in Windows, you have to make your USB bootable because directly transferring this downloaded operating system into your USN will not make it bootable.
Step 5: You can use the Power ISO tool for this purpose. Simply click this link to download the Power ISO tool https://www.poyouriso.com/download.php

Step 6: Use Power ISO to transfer the Ubuntu operating system into the USB. It will do this while making the USB bootable.
Step 7: Restart your system and go to your system’s boot menu by pressing F11 or F12 and set up your operating system from there.
Step 8: Save the settings and then restart your system again to welcome Ubuntu on your system.
4. Command-Line and Terminal
The first question that may come across your mind is, why learn the command line? The thing is that you can’t do everything with GUI; the things that you can’t handle with GUI are smoothly executed using the command line. Secondly, you can do it faster using the command line as compared to GUI.
Next, you are going to discuss two things: Shell and Terminal. The system communicates with the operating system using the shell. Whatever command you will write, the shell will execute it, communicate with the operating system, and will give a command to the operating system to do something that you asked it to do. Then it will provide you the results. The terminal is the window that is going to take that command and will display the results on itself. It is a tool that helps you to interact with the shell, and the shell helps you to interact with the operating system.
All commands are the same for different Linux based systems. If you want to open up the terminal, you can go search ‘terminal’ manually using the search bar.

There is an alternative way to open the terminal by pressing ‘CTRL+ALT+T’.
5. The Linux File System
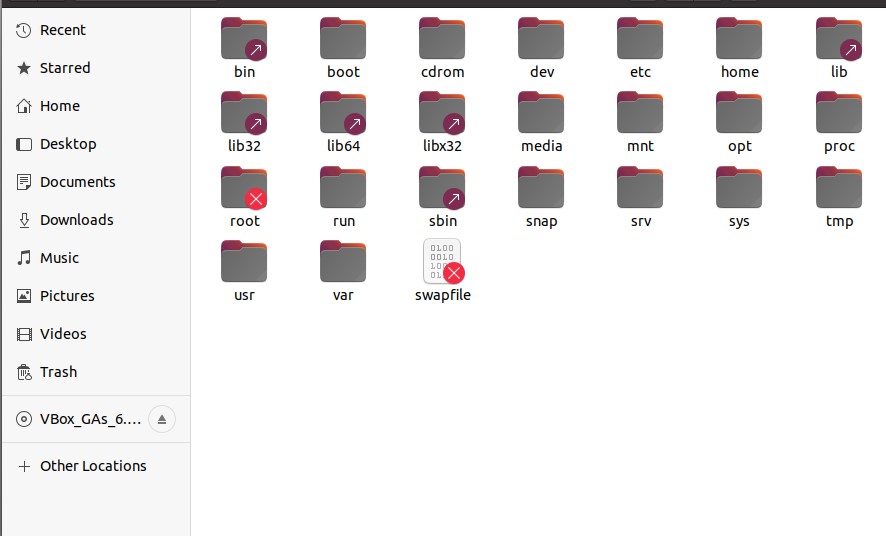
Linux has a hierarchy based file structure. It exists in a tree-like fashion, and all the files and other directories are involved in this structure. In windows, you have ‘Folders.’ Whereas Linux has ‘root’ as its basic directory, and under this directory, all files and folders reside. You can see your root folder in your system by opening the file system, as shown below. It has all the files and folders under it. The root folder is the main folder; then you have subfolders in it like bin, boot, dev, etc. If you click on any of these folders, it will show you different directories reside in it, proving that Linux has a hierarchical structure.
6. Few Example Commands
In this topic, you are going to discuss some example commands of Linux that may help to understand it.
Press CTRL+ALT+T to open terminal.

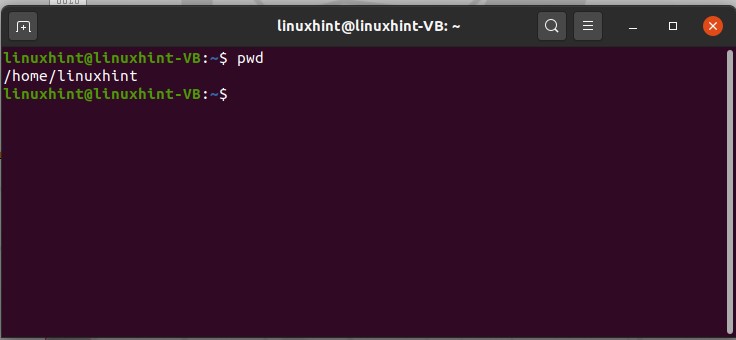
The first command is about the Linux file directory system. Linux has a tree-like system, and for example, if you want to jump into the folder which is deep down somewhere, then you have to go through each folder which is linked to its parent. The first command is ‘pwd command’. pwd stands for the present work directory. Type ‘pwd’ in your terminal, and it will let you know the current/present directory in which you are working. Results will lead you towards the root or home directory.
The next command to discuss is ‘cd command’. cd stands for ‘change directory’. This command is used to change the present work directory. Let’s assume you want to move from the current directory to Desktop. For that, type the command given below in your terminal.

For going back to the directory from which you came, write ‘cd ..’ and press enter.
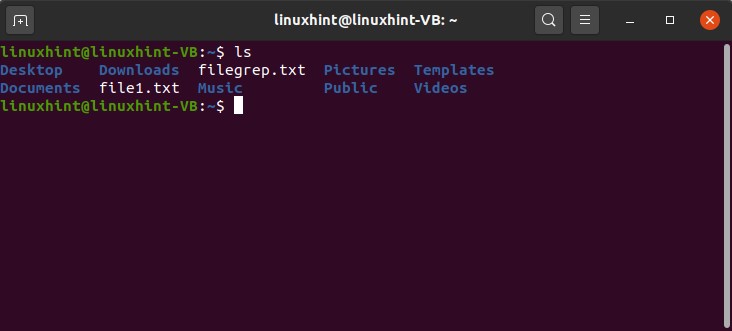
The next command you are going to study is ‘ls command’. As you are currently in your root directory, type ‘ls’ in your terminal to get a list of all the folders that reside inside the root directory.
7. Hard links and Soft links
First of all, let’s discuss what the links are? Links are a simple yet useful way of creating a shortcut to any original directory. Links can be used in many ways for different purposes, such as to link libraries, for creating an appropriate path to a directory, and to ensure that files are present in constant locations or not. These links are used for keeping multiple copies of a single file in different locations. So these are the four possible usages. In these cases, links are shortcuts in a way, but not exactly.
We have much more to learn about links rather than simply creating a shortcut to another location. This created shortcut works as a pointer towards the location of the original file. In the case of Windows, when you create a shortcut for any folder and open it. It automatically refers to the location where it was created. There exists two types of link: Soft links and Hard links. Hard links are used to link files, not the directories. Files other than the current working disk cannot be referred. It refers to the same inodes as the source. These links are useful even after the deletion of the original file. Soft Links, which are also known as symbolic links, are used to reference a file that can be on the same or different disk and to link directories. After the deletion of the original file, a soft link exists as a broken usable link.
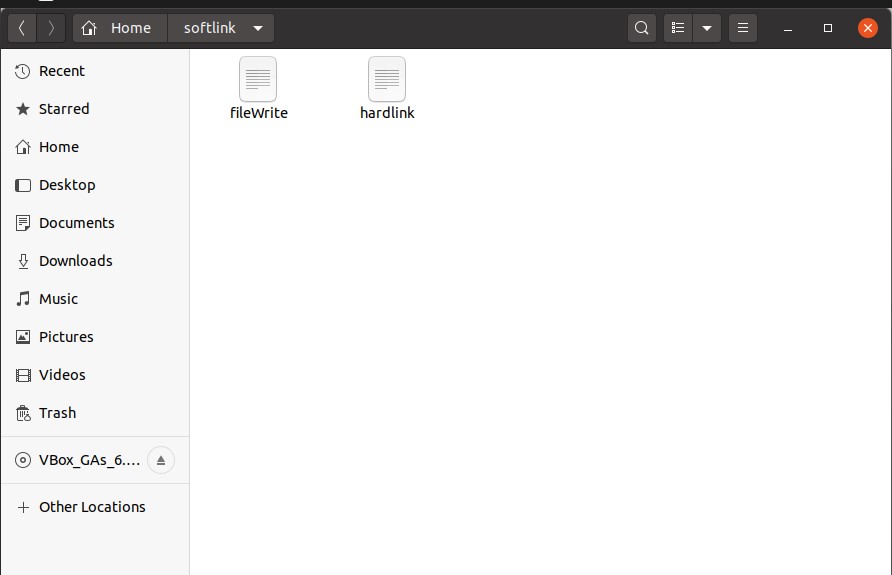
Now let’s create a hard link. For example, you create a text file inside the Document folder.

Write some content in this file and save it as ‘fileWrite’ and open the terminal from this location.
Type ‘ls’ command in the terminal to view the current files and folders in the working directory.

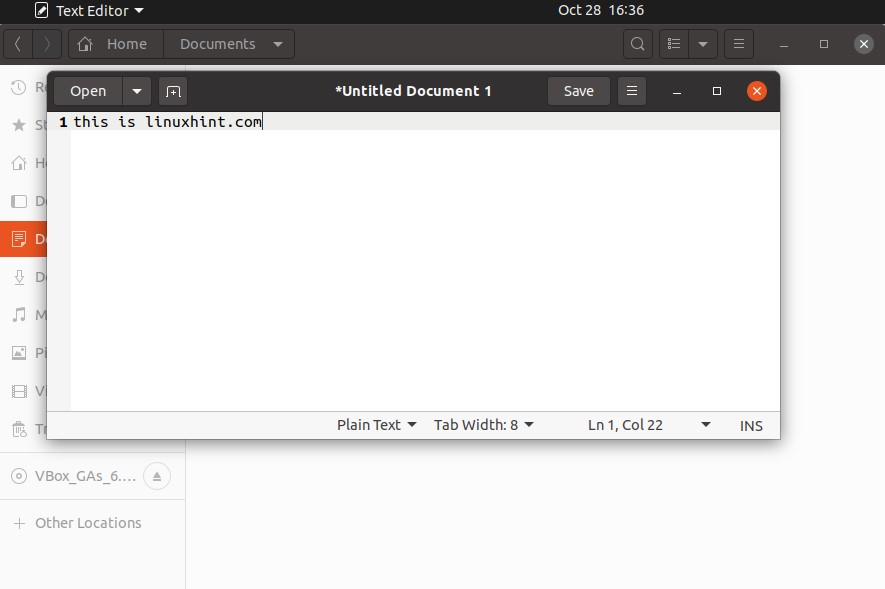
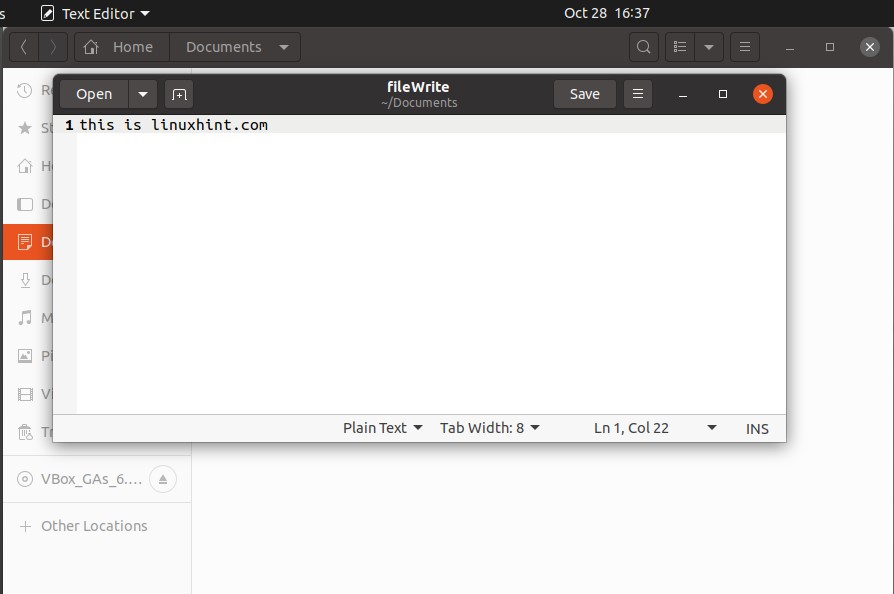
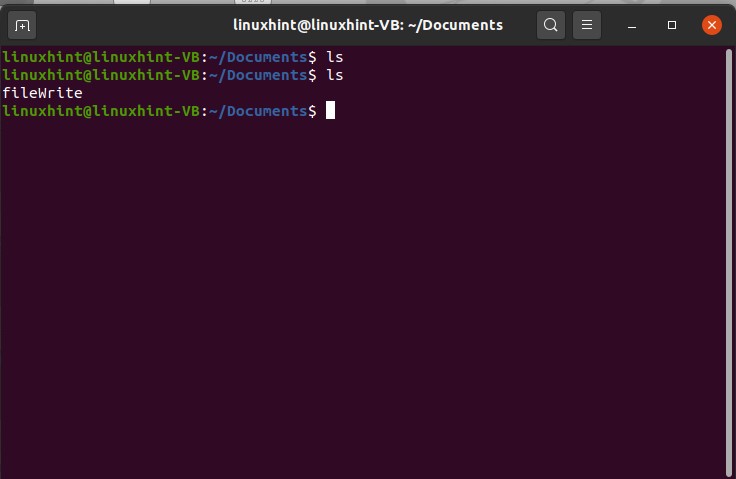
In this ‘ln’ command, you have to specify the file name for which you are going to create a hard link, and then write the name that will be given to the hard link file.
Then again, use the ‘la’ command to check the hard link existence. You can open up this file to check if it has the original file content or not.

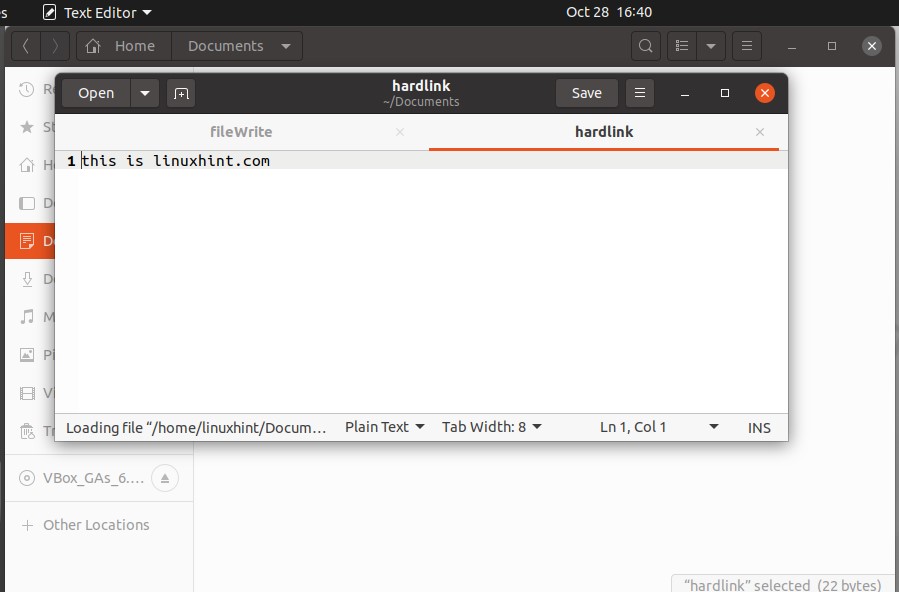
So next, you are going to create a soft link for a directory, let’s say for Documents. Open up the terminal from the home directory and execute the following command using the terminal
Then again, use the ‘ls’ command to check if the soft link is created or not. For its confirmation, openup the file and check the content of the file.


8. List File ‘ls’
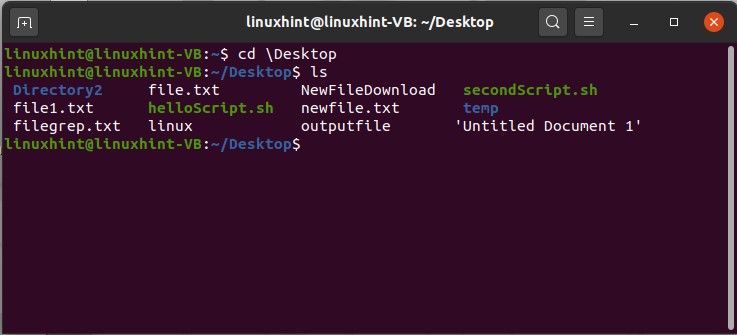
In this topic, you will learn to list files using the ‘ls’ command. Using the ‘pwd command’ first, check your present or current working directory. Now, if you want to know what is inside this directory, simply type ‘ls’ to view a list of files inside it.

Now, if you want to check what is inside the Documents folder, simply use the cd command to have access to this directory and then type ‘ls’ in the terminal.
$ ls
There are other methods to view the list of files, and this method will also give you some information about the files. For this, what you have to do is type ‘ls -l’ in the terminal, and it will show you a long format of the files containing the date and time of file creation, file permissions with the file name, and file size.

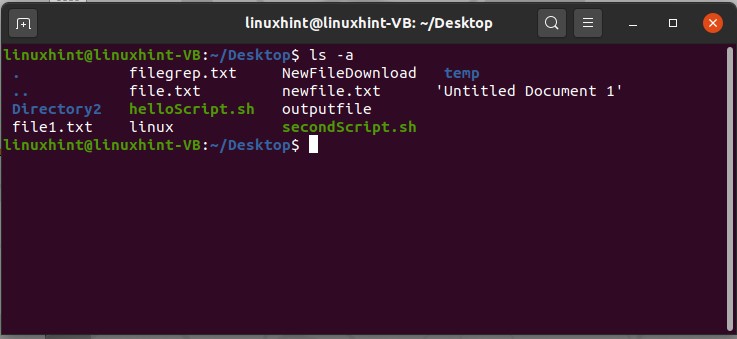
You also view hidden files in any directory. In this case, if you want to view the list of hidden files in the Documents directory, Write ‘ls -a’ in the terminal and hit enter. Hidden files have the starting of their filename with ‘.’, which is its indication as a hidden file.
You can also view the files in the long list, and hidden files combine format. For this purpose, You can use the ‘ls -al’ command, and it will give you the following results.

Use the ‘ls -Sl’ command is used to display a list of files which is sorted. This list is sorted based on the descending order of their size. As in output, you can see the first file has the largest file size among all of the other files. If two files have the same sizes, then this command will sort them based on their names.
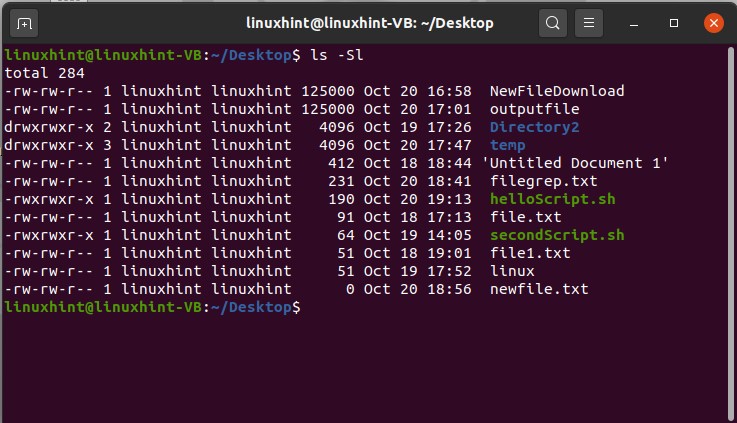
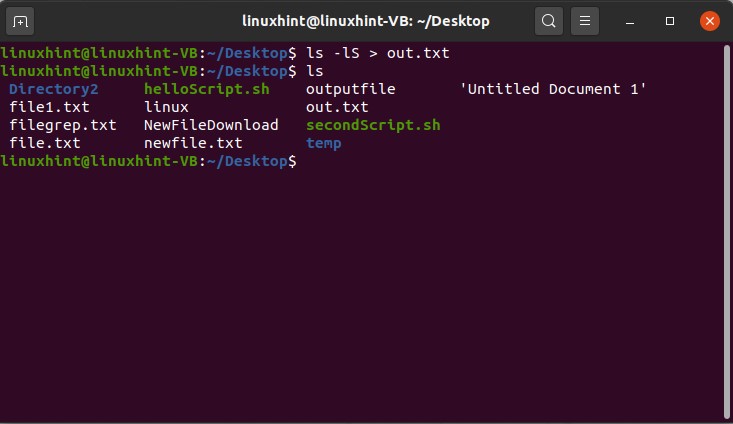
You can copy this information related to files that are currently displayed on the terminal by writing ‘ls -lS > out.txt’, out.txt is the new file that will contain the current content on the terminal. Execute this command, check the content of the out.txt file by opening it.

You can use the ‘man ls’ command to view the complete description of the commands related to ‘ls’ and can apply those commands to view their perspective results.


9. File Permissions
In this topic, you are going to discuss user privileges or file permission. Use the command ‘ls -l’ to see the long list of the files. Here the format ‘-rw-rw-r– ’ is divided into three categories. The first portion represents the owner’s privileges, the second one represents the group privileges, and the third one is for the public.
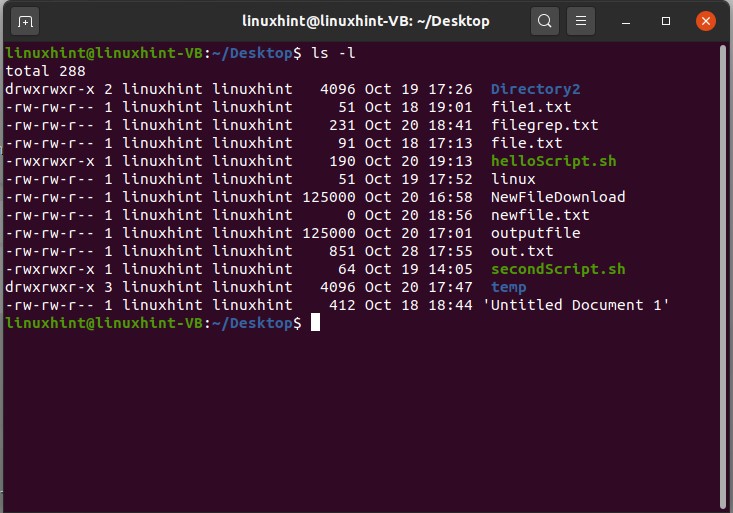
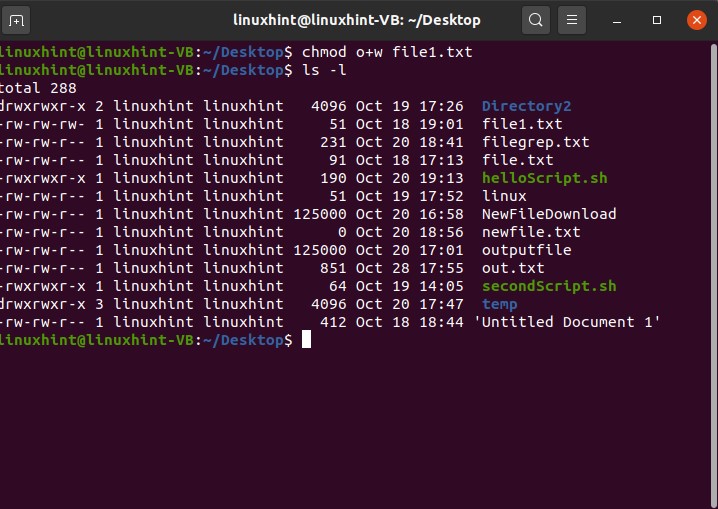
In this format, r stands for read, w stands for write,d for directory, and x for execution. In this format ‘-rw-rw-r– ’, the owner has the permissions to read and write; the group also has the read and write permissions, whereas the public only has the permission to read the file. The permission of these sections can be changed using the terminal. For that, you can remember this thing that here you will use ‘u’ for a user, ‘g’ for the group, and ‘o’ for the public. For example, you have the following file permissions ‘-rw-rw-r– ’ for the file1.txt, and you want to change the permissions for the public group. To add the writing privileges for the public group, use the following command
And press enter. After that, view the long list of the files for confirmation of the changes.
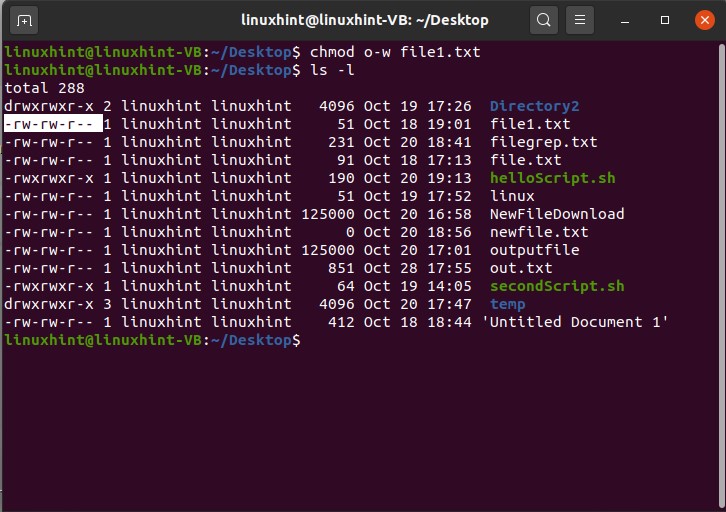
For taking back the writing privilege which is given to the public group of the file1.txt, write
And then ‘ls -l’ to view the changes.
For doing this for all the portions at once (if you are using this educational purpose), first of all, you should know these numbers, which are going to be used in the commands.
4 = ‘read’
2 = ‘ write’
1 = ‘execute’
0 = no permission’
In this command ‘chmod 754 file1.txt’, 7 deals with the owner’s permissions, 5 deals with the group permissions, 4 deals with the public or other users. 4 shows the public has the permission to read, 5 which is (4+1) means that the other groups have the permission to read and execute, and 7 means (4+2+1) that the owner has all the permissions.
10. Environment Variables
Before jumping right into this topic, you need to know what is a variable?.
It is considered as a memory location which is further used for storing a value. The stored value is used for different motives. It can be edited, displayed, and can be resaved after deletion.
Environment variables have dynamic values that affect the process of a program on a computer. They exist in every computer system, and their types may vary. You can create, save, edit, and delete these variables. The environment variable gives information about the behavior of the system. You can check the environment variables on your system. Open up the terminal by pressing CTRL+ALT+T and type ‘echo $PATH’

It will give the path of an environment variable, as shown below. Note that in this command ‘echo $PATH’, PATH is case sensitive.
For checking the user environment variable name, type ‘echo $USER’ and hit enter.
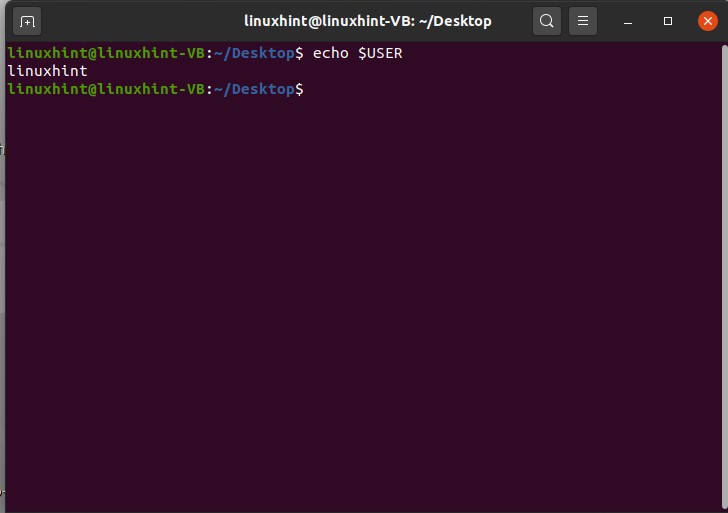
For checking the home directory variable, use the command given below
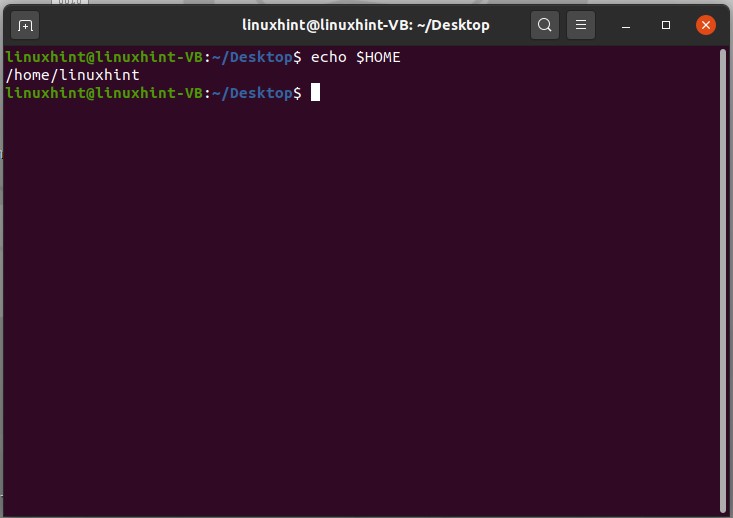
In these different ways, you can see the values stored in specific environment variables. To get a list of variables that exist in your system, type ‘env’ and press enter.
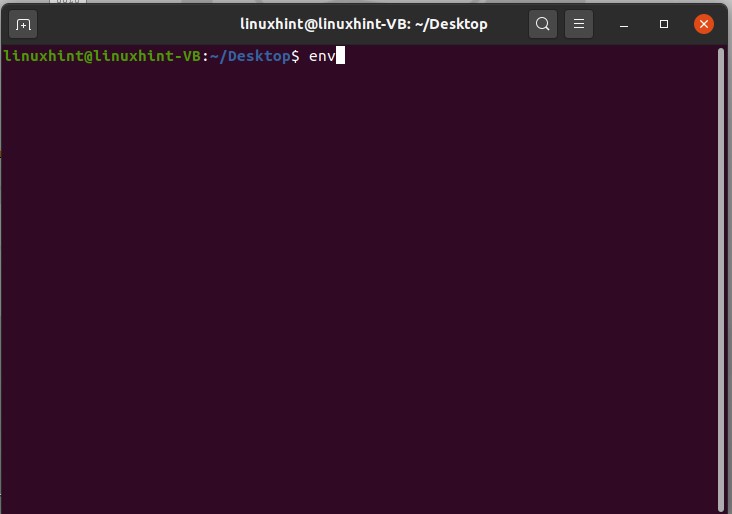
It will give you the following results.

Below written commands are used for the purpose of creating and assigning value to a variable.
$ echo $NewVariable
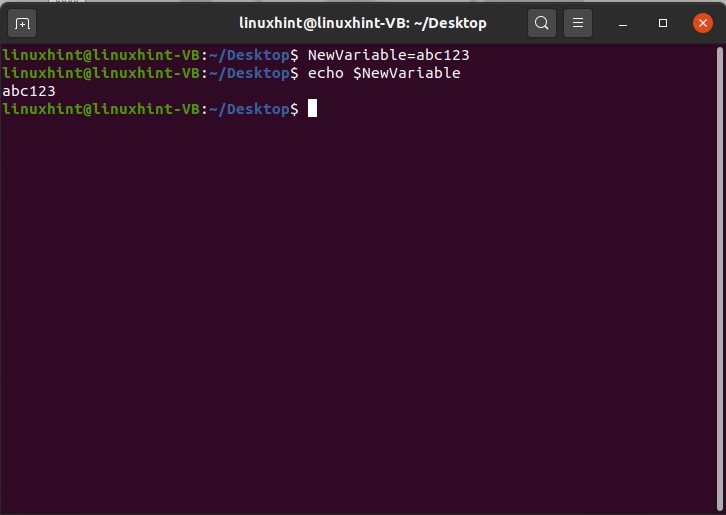
If you want to remove the value of this new variable, use the unset command
And then echo it to see the results
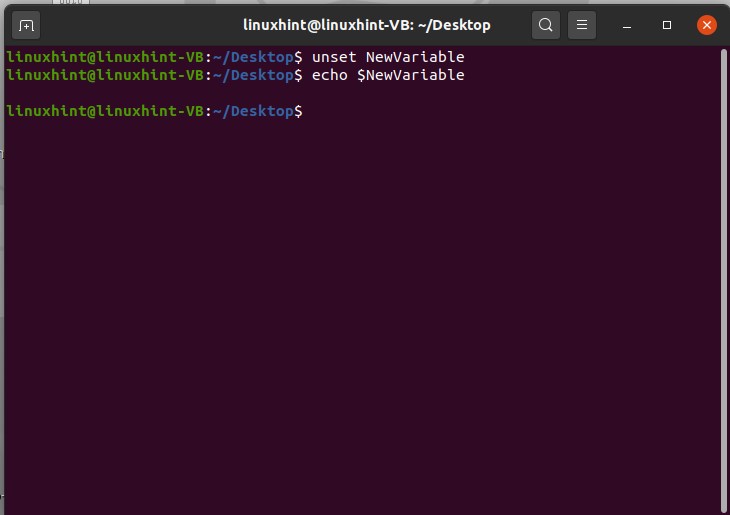
11. Editing Files
Open up the terminal by pressing CTRL+ALT+T, and then list the files by using the ‘ls’ command.
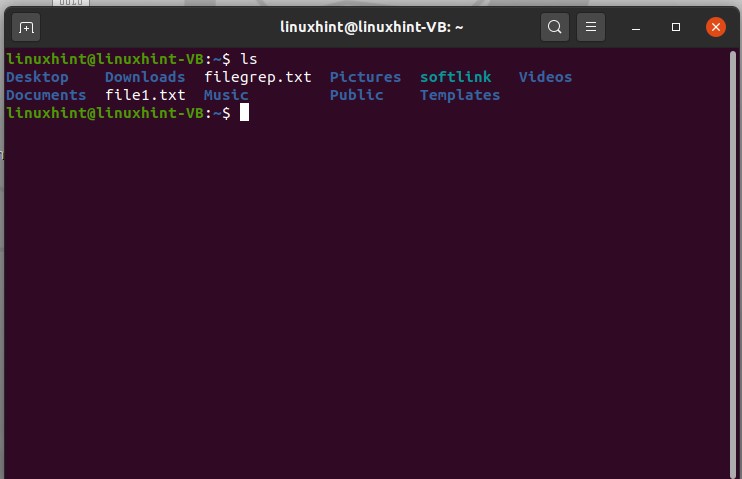
It will display the filenames present in the current working directory. For example, you want to create a file and then edit it by using the terminal, not manually. For that, type the content of the file and write out the file name you want to give.
$ echo ‘This is a file” > linuxhint.txt and then use ‘ls’ command to view the list of files.
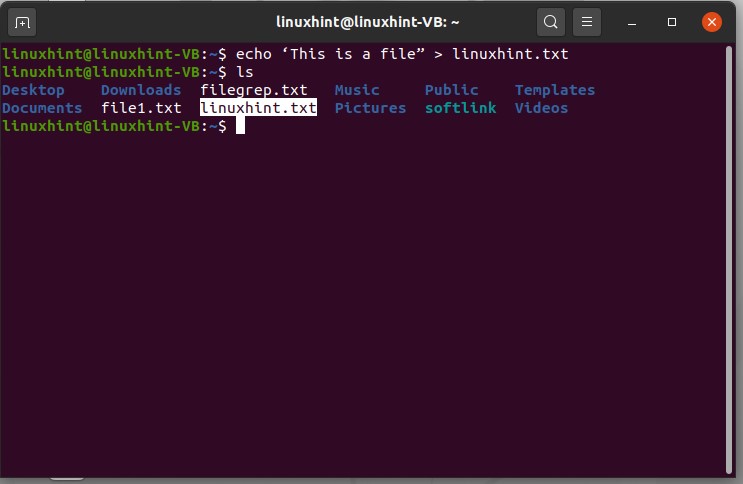
Use the following command to view the file content.

To edit the file using the terminal, type the following command
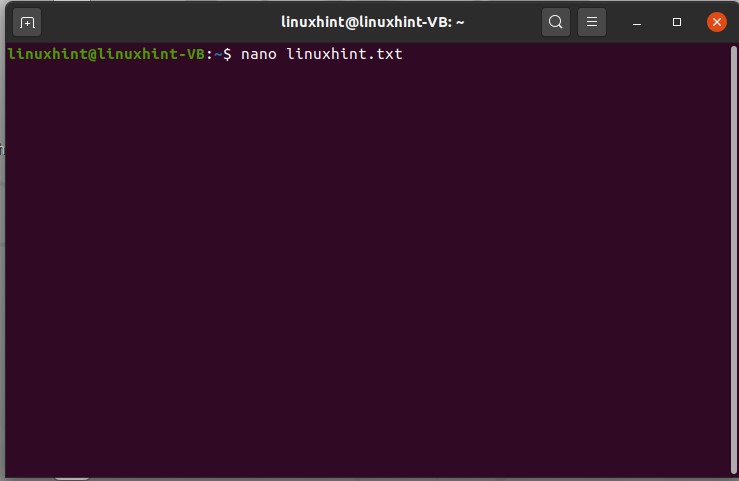
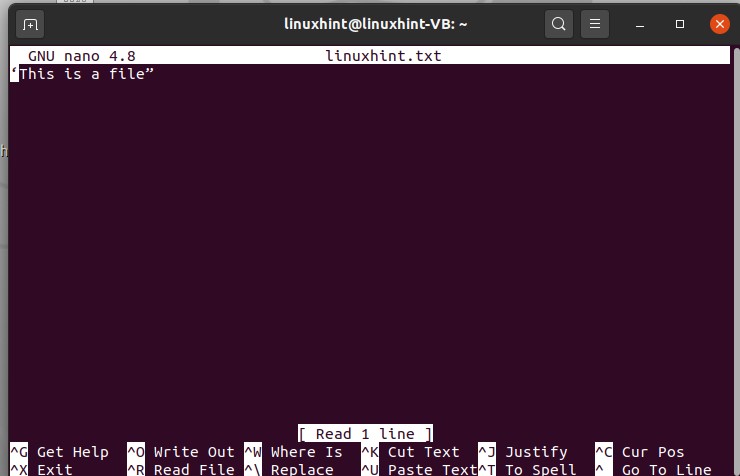
This is Linux hint
Visit our channel, which is also named as linuxhint
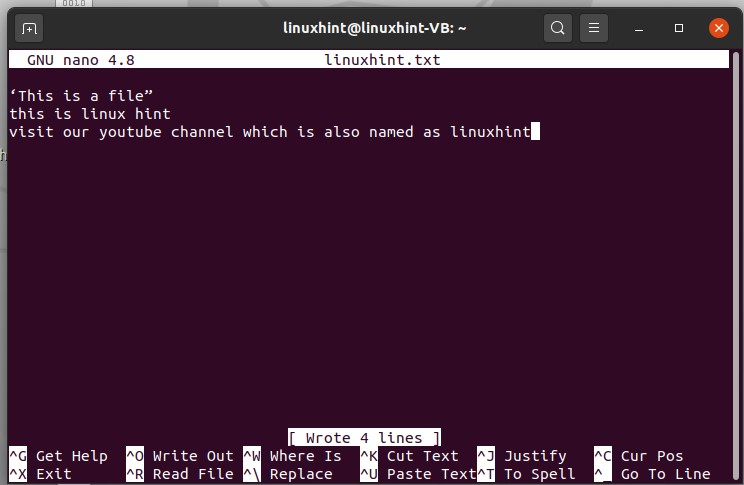
Write the content you want to add to this file and press CTRL+O to write it in the file, and then press enter.
Press CTRL+X to exit.
You can also view the content of the file to check the edited text in it.

12. Pseudo File system (dev proc sys)
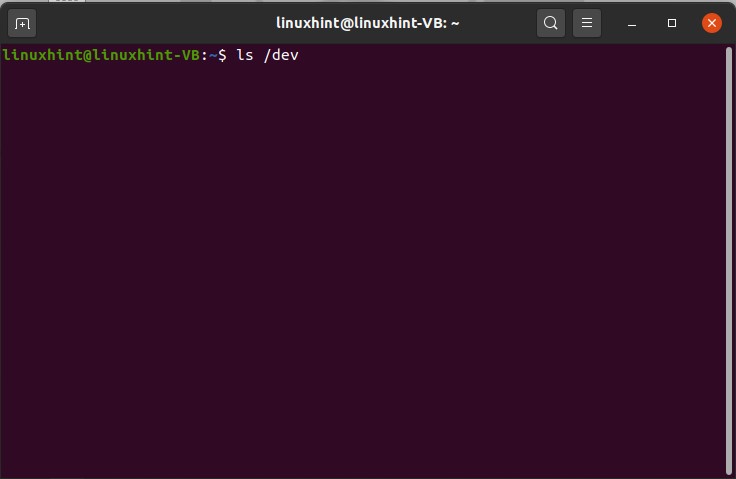
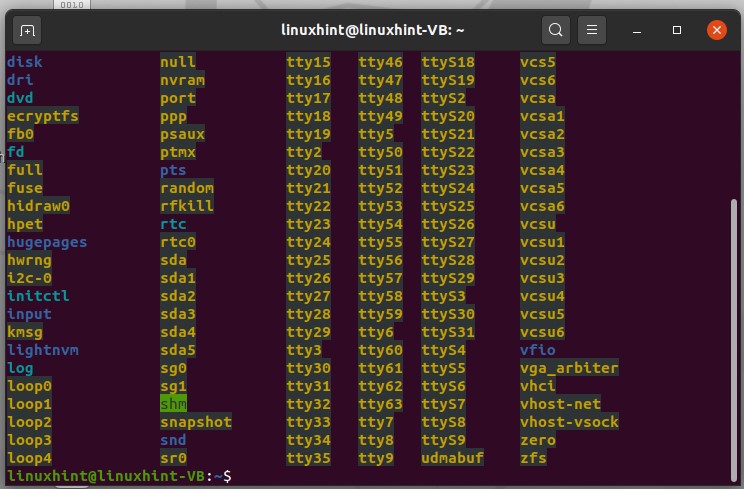
Open up the terminal and type ‘ls /dev’, and press enter. This command will you the list of devices that the system has. These are not physical devices, but the kernel has made some entries.
 3
3
If you want to access the device itself, you have to go through the device tree, which is the result of the above command.
Type ‘ls /proc’ and press enter.
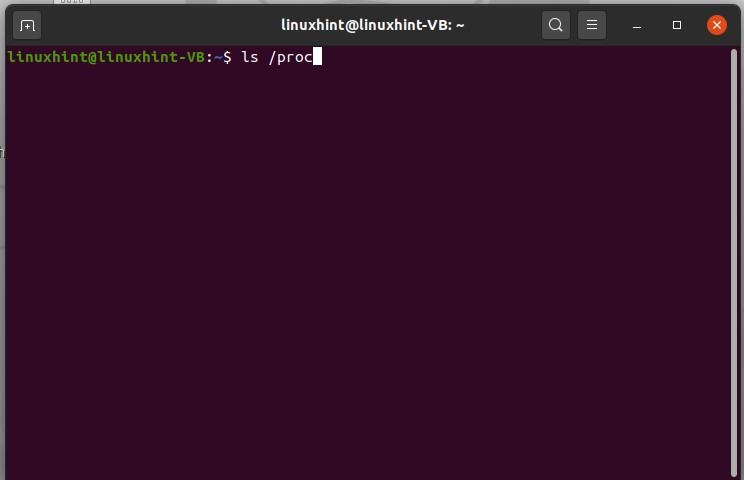
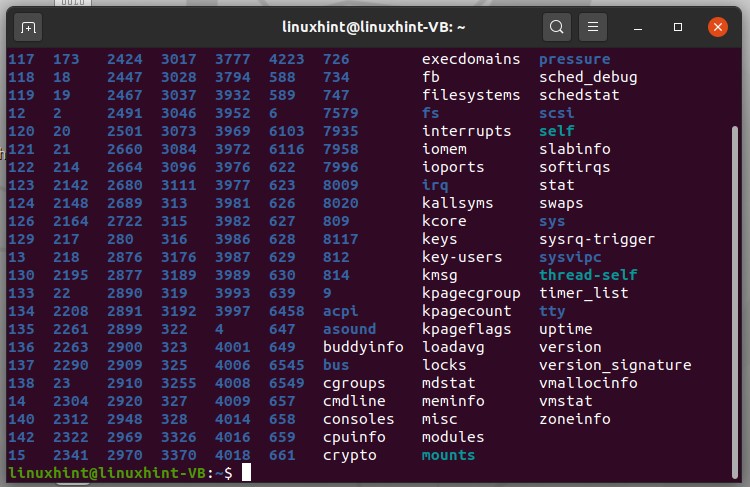
The numbers here represent the ids of the running processes. Number ‘1’ is the first process of the system, which is ‘init process’.Use the process ID to check its status in your system. For example, if you want to check the status of process 1, type ‘cd /proc/1’ and then type ‘ls’ and execute it.
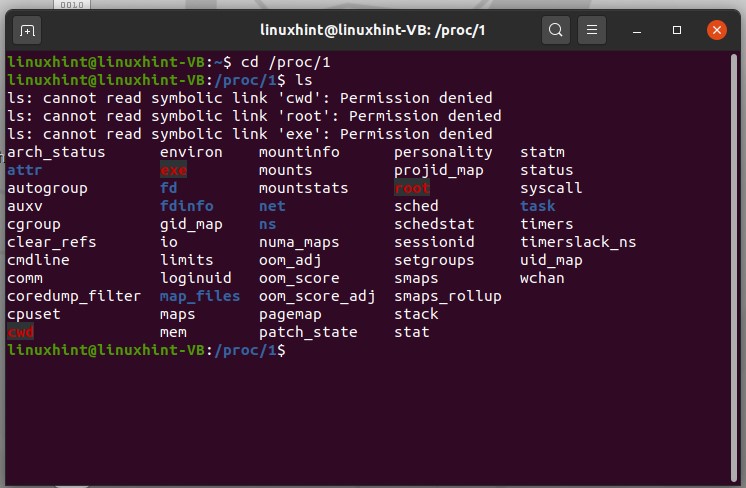
Come out of that path by using ‘ cd ..’

Next, we are going to discuss ‘sys’. write down the following command in your terminal
Now you can see all of the important directories. This is where you cant get a lot of settings that exist within the kernel or operating system. You can get into the kernel and list its files as well.
Now you can see a list of flags, processes.

You can view the content of any of these files by using the cat command with ‘sudo’ as it will require the admin permission.
Enter your password.

Here 0 indicates that the flag is at default. Setting the flag can drastically change the system’s behavior.
13. Find Files
The purpose of this topic is to make you learn about searching and finding files through the terminal. First of all, open up the terminal and use the ‘ls’ command, and then to find a file from here, you can write


you can see the command result with all the files having ‘.’ and ‘file1’ in it.
To especially find the file write the command.

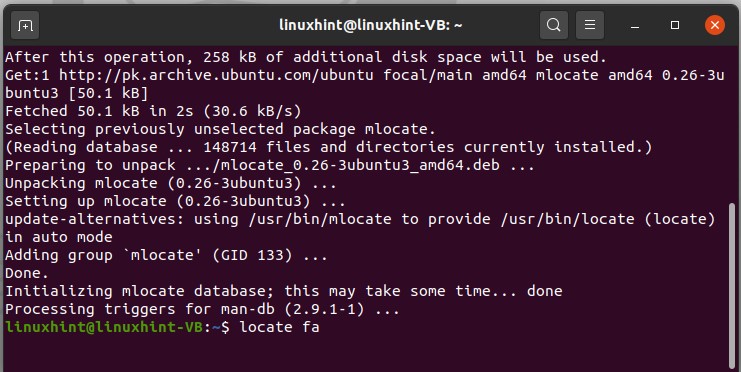
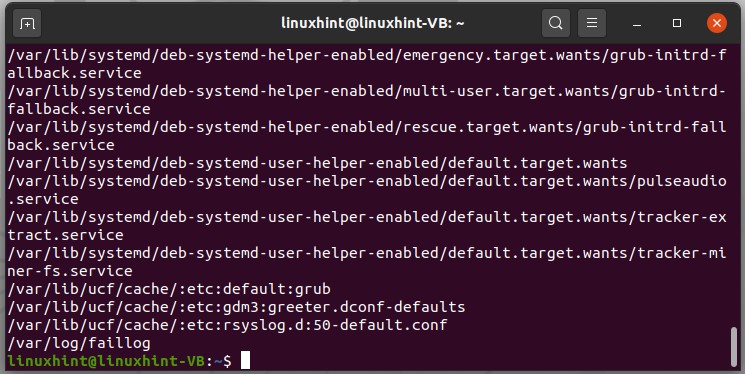
There is another method for doing this thing is by using the ‘locate’ command. This command is going to locate and find everything which matches your keyword.
If the terminal window shows an error for the command, then first install ‘mlocate’ in your system and then try this command again.
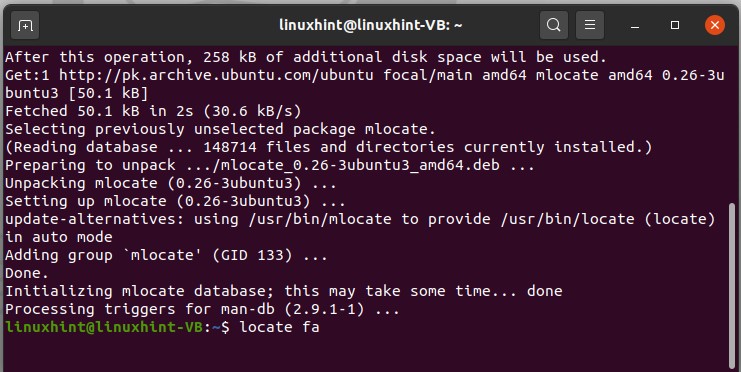
It will printout all of the information containing ‘fa’ in it.
14. Dot files
Dot files are those files that are hidden in the normal file system. First of all, to see a combined list of files, type the following command in the terminal.
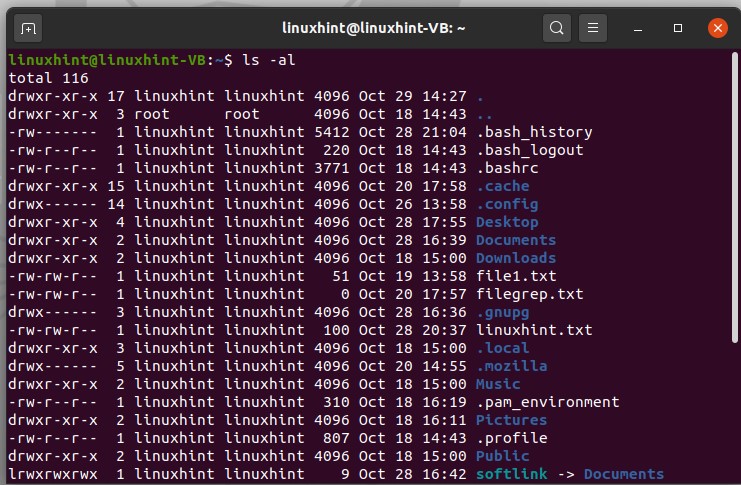
Here, you can see that one dot represents the user name and two dots represent the root folder.
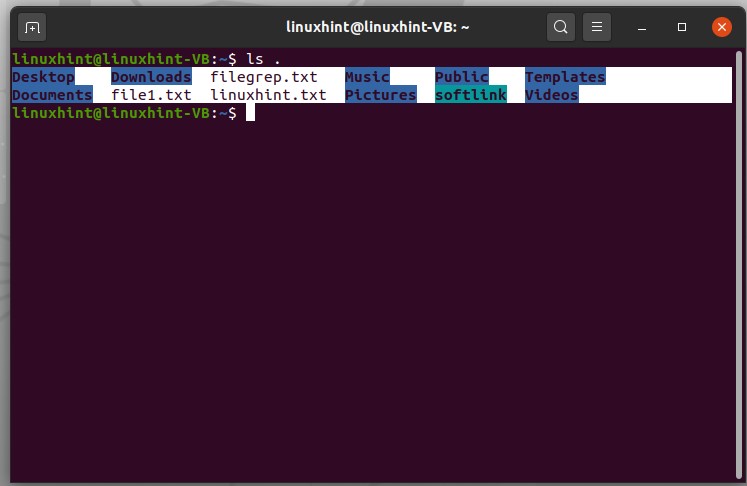
Using the command ‘ls .’ will result in a list of files or the content present in the current directory
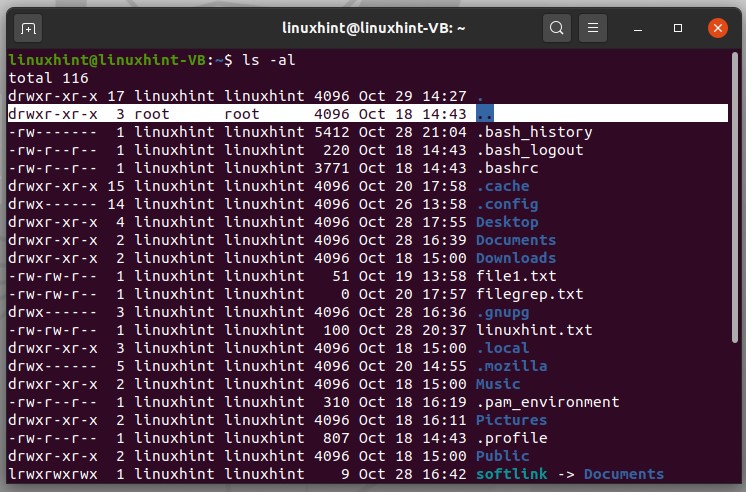
‘ls ..’ will display the folder above, which is essentially the user name in this case.
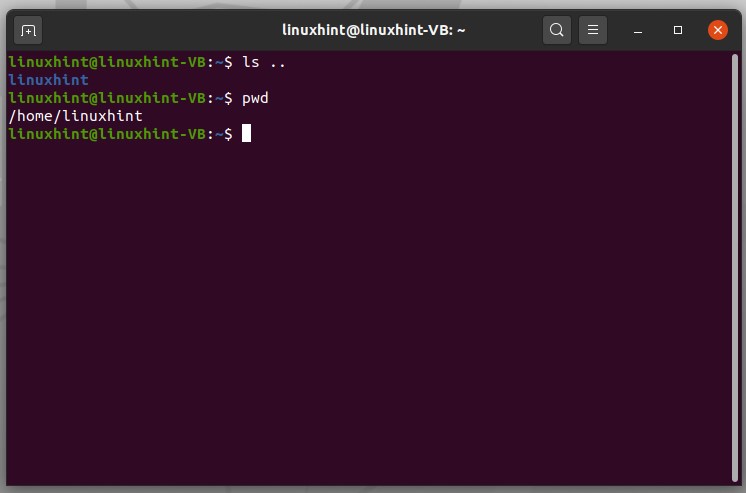
To jump into the content of some forward file, use the command given below.
It will display all the content in this passwd file of etc., directly by using double dots.

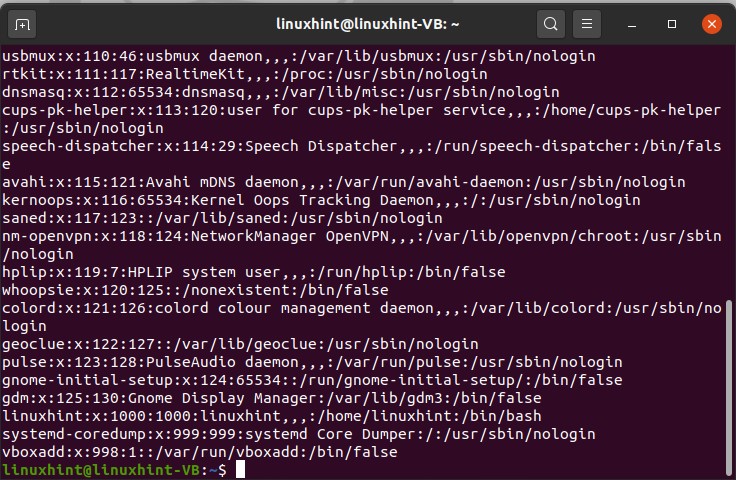
15. Compression and Decompression
To compress a file from any location, step 1 is to open the terminal from that location of simple open the terminal and use the ‘cd’ command to make that directory the present working directory.
To compress any file, type ’gzip filename’. In this example, you compressed a file named ‘file1.txt’, which is present on the desktop.
Execute the command to see the results.
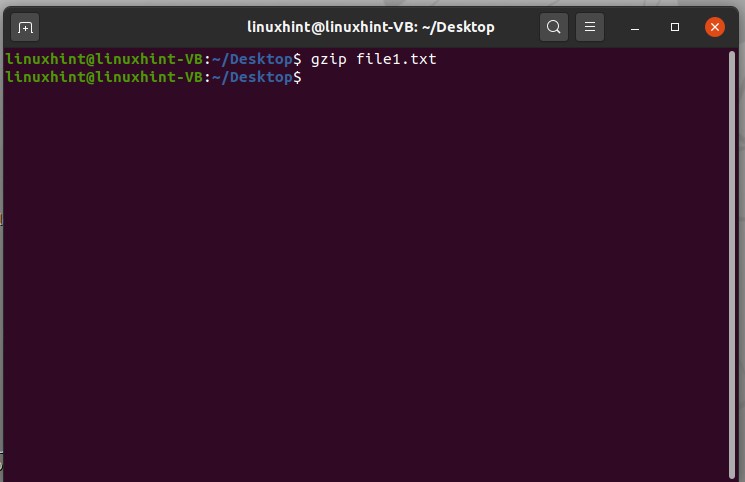
To uncompressed this file, simply write the ‘gunzip’ command with the file name and extension of ‘.gz’ as it is a compressed file.
And now execute the command.
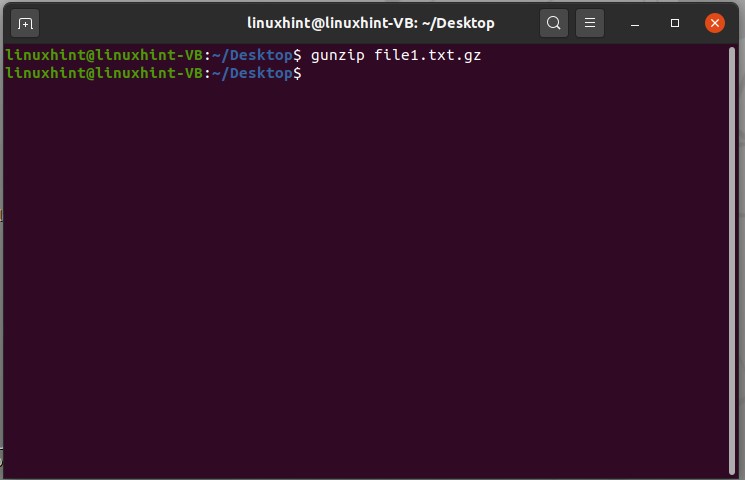
You can also zip multiple files at once in a single folder.
Here, c is for create, v is for display, and f is for file options. These commands will operate in this way: first, it will create a compressed folder, which is named as ‘compressfile’ in this car. Secondly, it will add the ‘file1.txt’ and ‘newfile.txt’ in this folder.
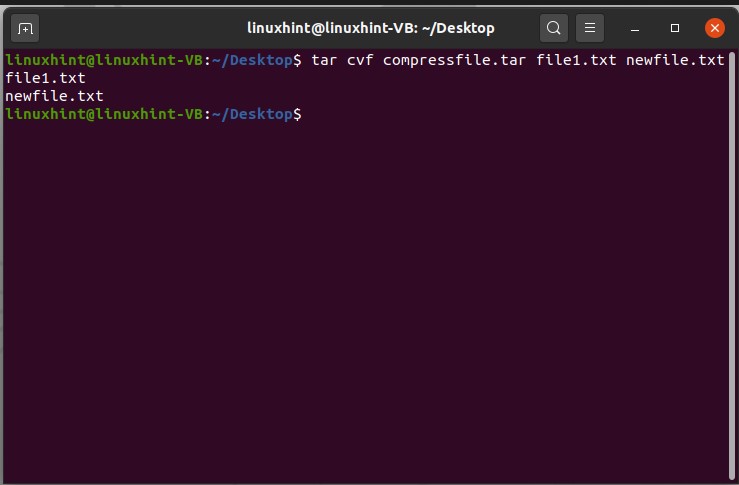

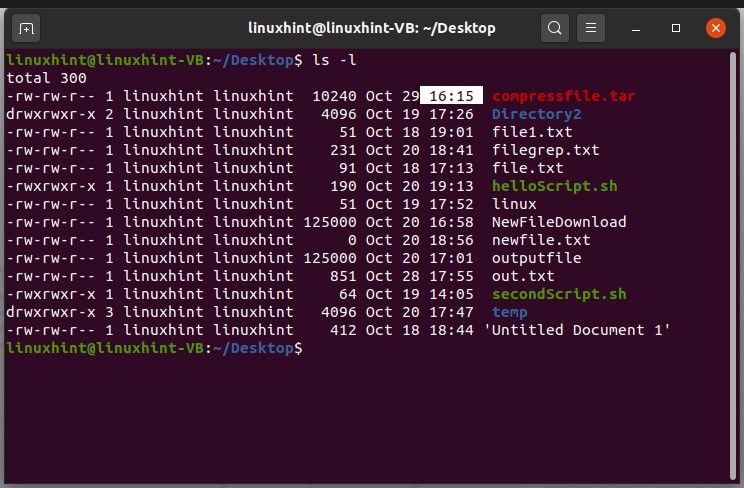
Execute the command and then check the compressfile.tar to see if the file exists there or not.
To decompress the file, type the following command in the terminal

16. Touch command in Linux
To create a new file using the terminal, a touch command is used. It is also used for changing the timestamp of a file. First, type the ‘ls -command; it will give you a list of files that are present in the current working directory. From here, you can easily see the timestamps of the files.
Let’s create a file first and name it ‘bingo’
And then view the list of the files to confirm its existence.
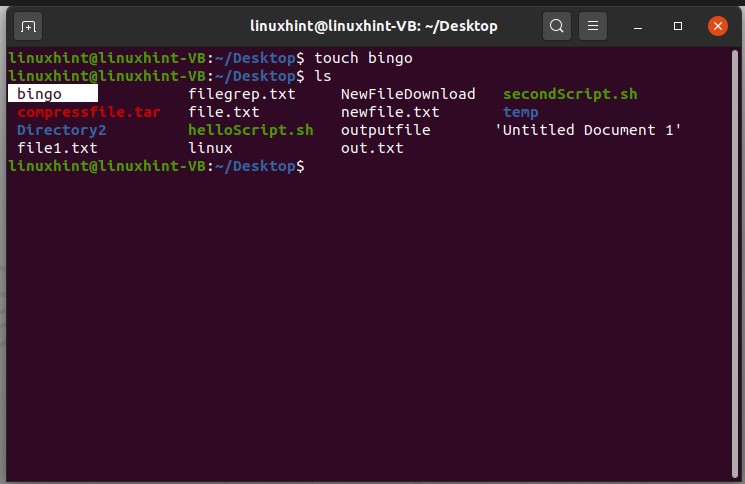
And now, view a long list of files to see the time stamp.
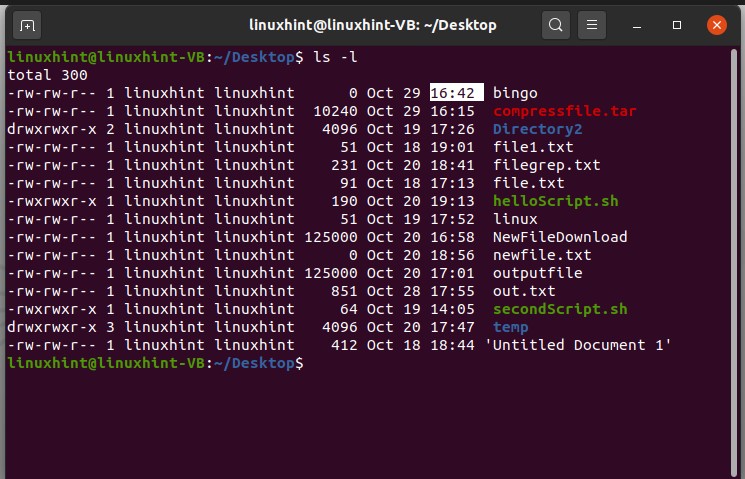
Let’s say you want to change the timestamp of a file named ‘file1.txt’. For that, write the touch command and define your file name with it.
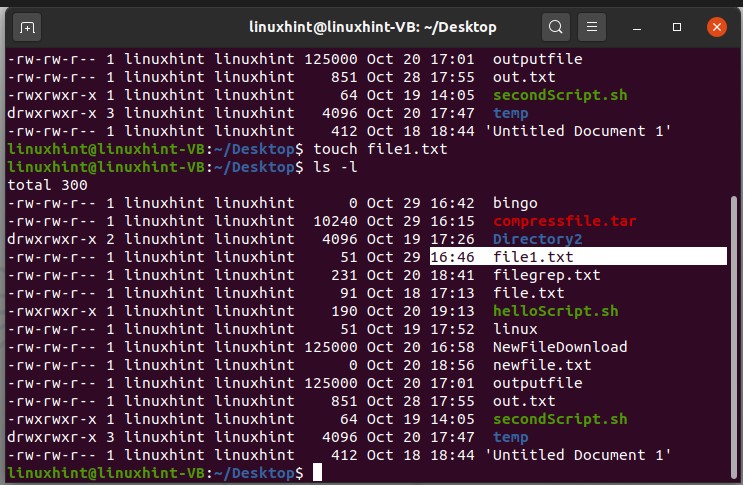
Now, if you have any existing file named ‘file1.txt’, then this command will only change the time stamp of this change and will contain the same content.
17. Create and remove Directories
In this topic, you are going to learn how you can create and remove directories in Linux. You can also call those directories ‘folders’. Go to the desktop and open up the terminal. Type the following command for getting the file list.
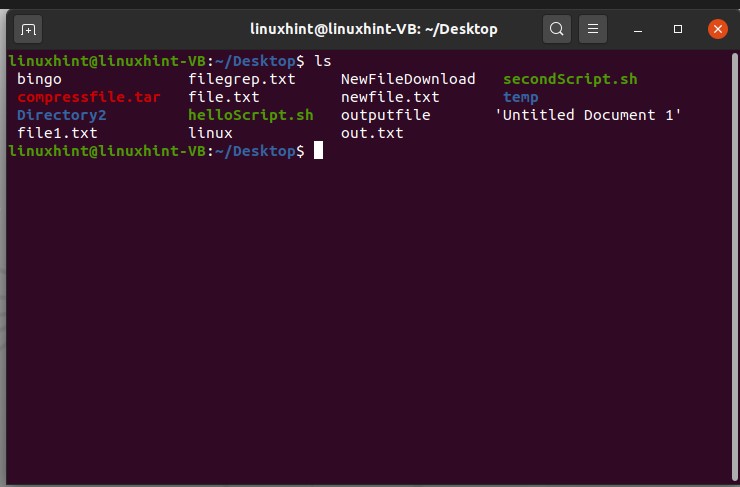
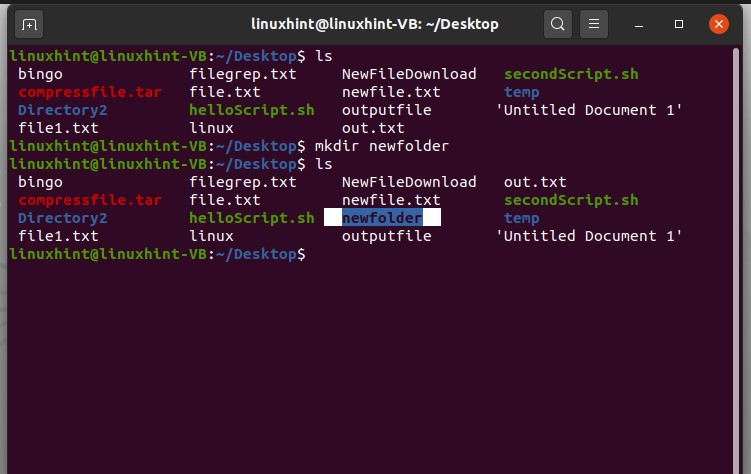
Now create a folder here. For this, you can use the ‘mkdir’ command, which is the make directory command and type the folder name with it.
Execute the command and again list the files to check that the command worked or not.
You can also delete this folder too. For that, you have to write a command that tells the shell to communicate with the operating system to delete the folder but not the files inside.
And then verify its removal by using the ‘ls’ command.

18. Copy, Paste, Move and Rename files in Linux
To execute all of the functions mentioned in this topic, firstly, you have to create a separate file. Open up the terminal from the desktop.
Write the command to create a file.
And write some content in it and save the file.

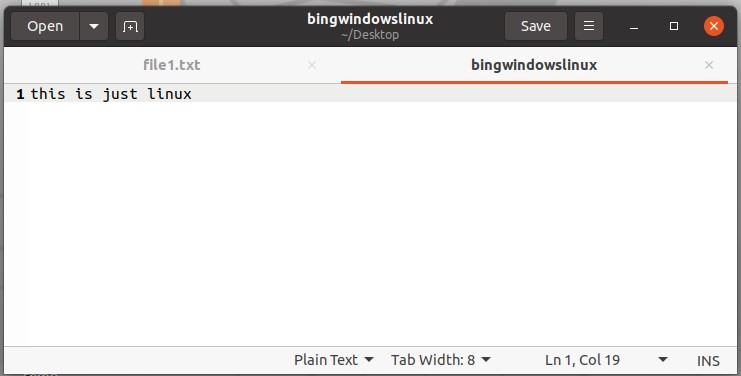
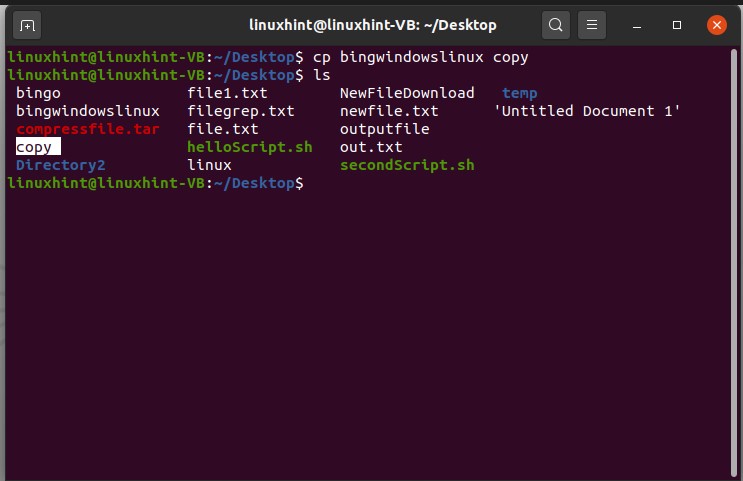
After that, open the terminal again. To copy the content of this ‘bingowindowslinux’ to another file, use the ‘cp’ command with the first file name from which the content is going to be copied to another file.
And then view the list of files.
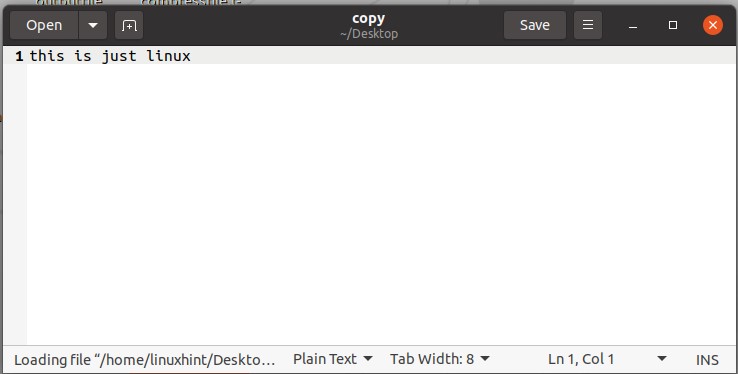
Now open up the file ‘copy’ to see if it’s copied the file content of ‘bingowindowslinux’ in itself.
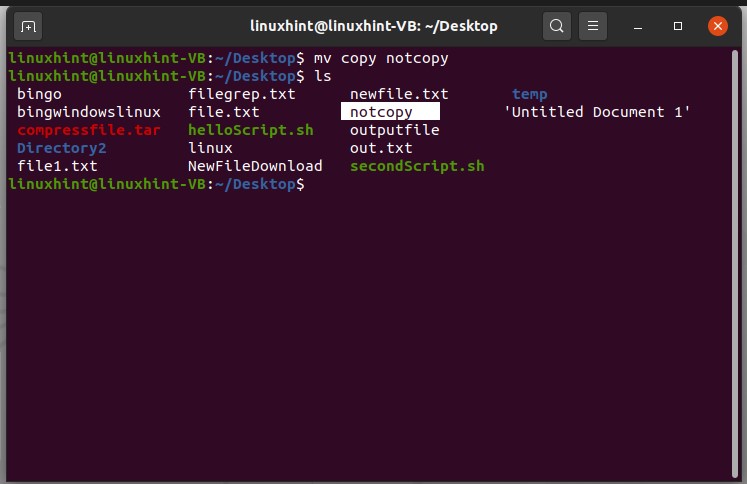
To rename this file, use the move command. ‘move’ command is used to move the file from directory to another, but if you operate this command in the same directory, it will rename the file.
Open this renamed file to view its content.
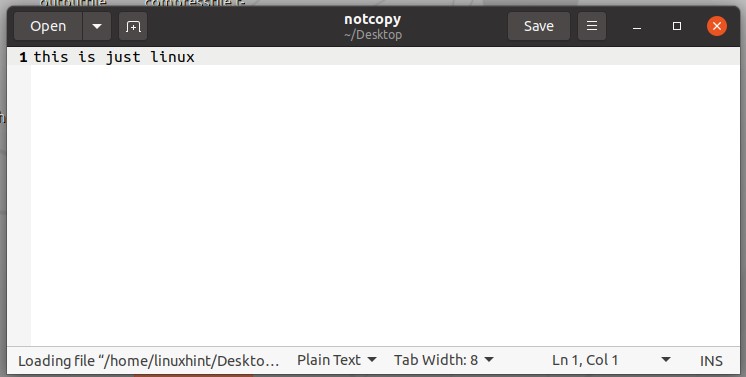
If you want to change the location of this file, you can use the ‘move’ command again by defining the location where you want to move the file.
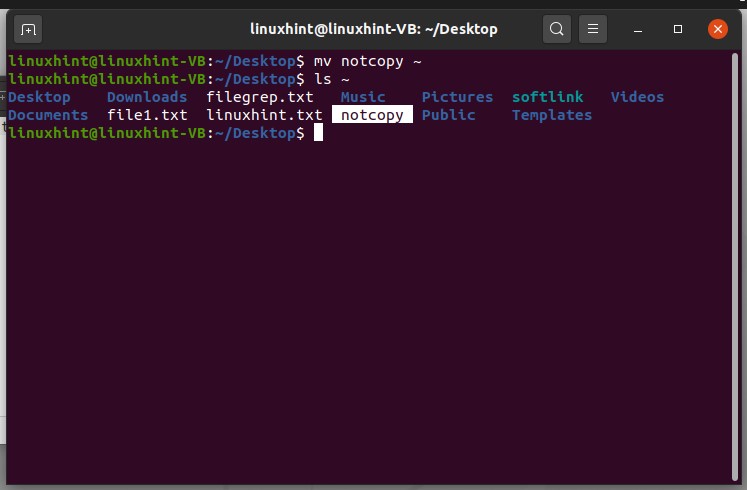
To move the ‘notcopy’ file to the root’~’ directory, simply write
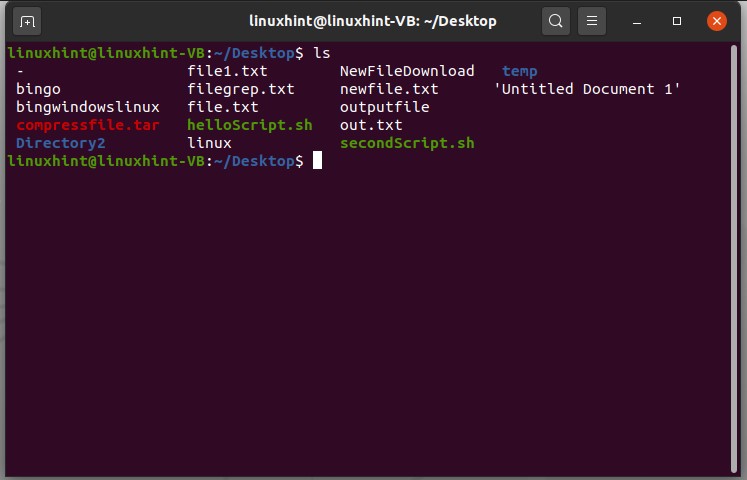
Then ‘ls ~’ to view the files of the root directory.
19. File name and Spaces in Linux
Firstly view the files on your desktop by $ ls command. If you want to create a file having a file name with space, there exists some modification in the simple touch command.
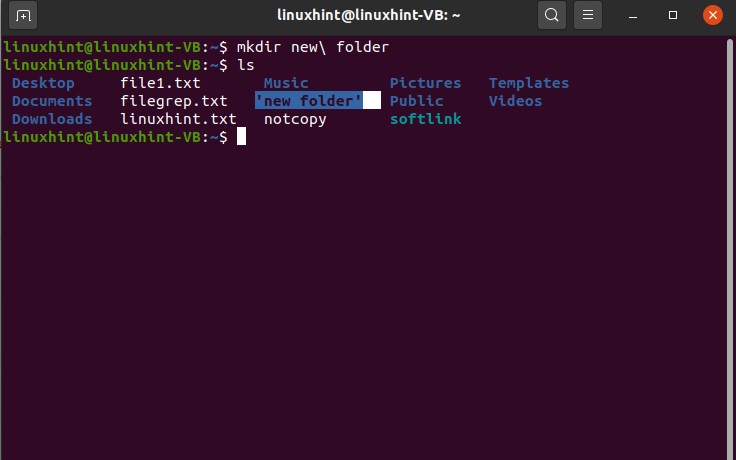
Executing the command ‘touch new file’ will create separate files, as shown below.
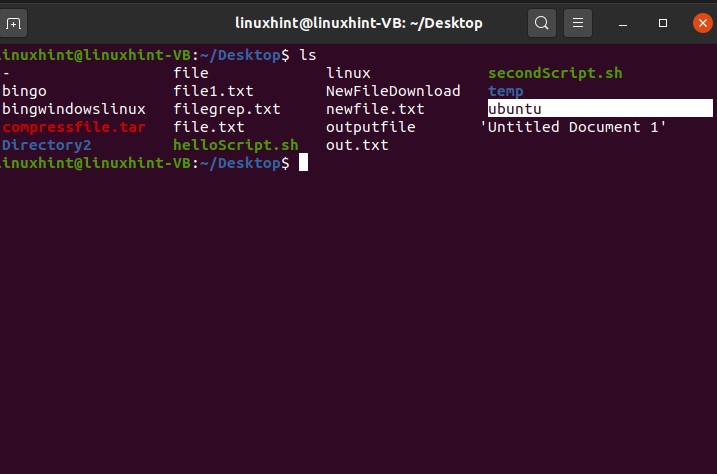
To create a file having spaces in the file name, consider this format:
Execute the command and list the files to see the results.


If you want to create a directory with its name in spaces, simply write
And run the command to see the results.
20. AutoCompletion in Linux
In this topic, you are going to discuss autoCompletion in Linux. Go to your desktop and open the terminal from there.
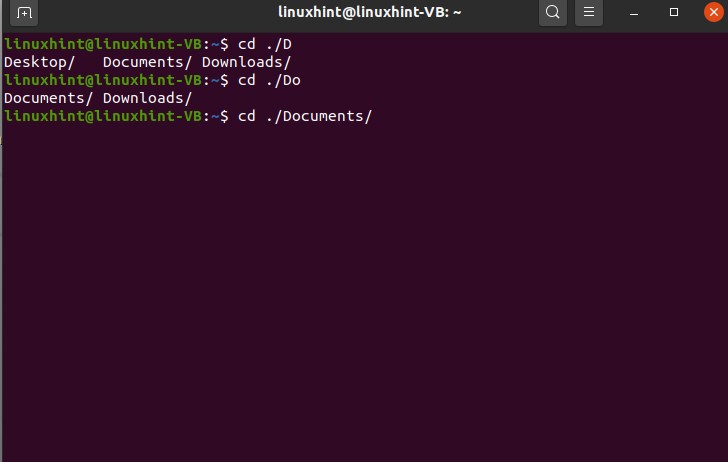
Write ‘ cd./D’ and press the tab
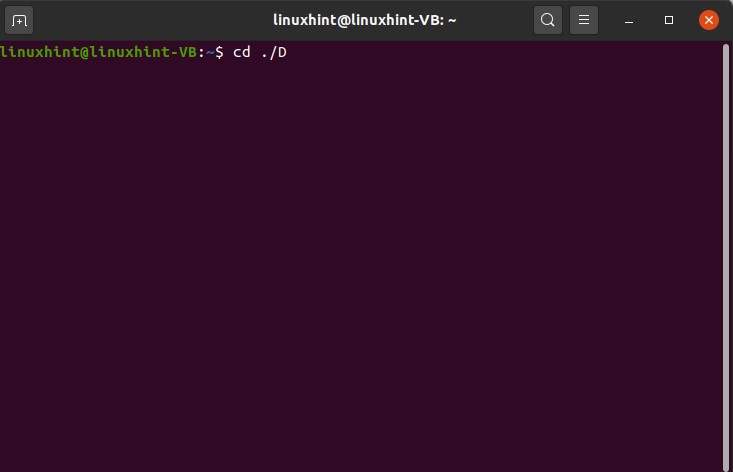
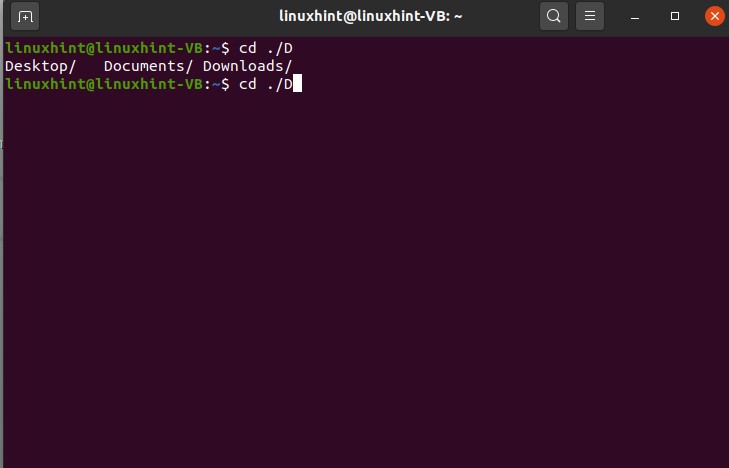
This commands results in giving you three autocompletion possibilities for the ‘D’.
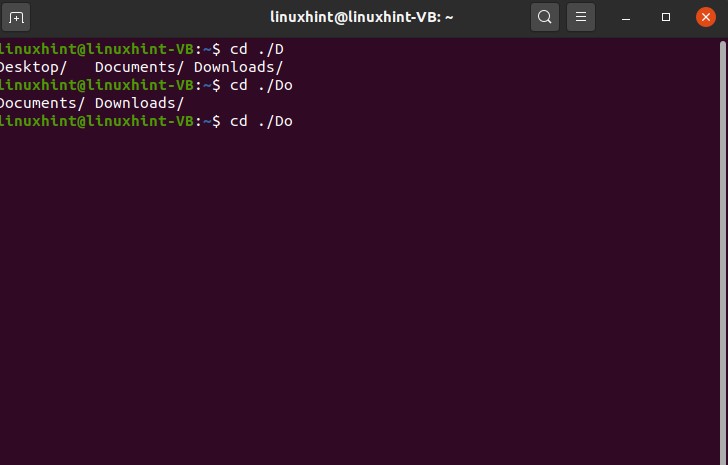
Then type ‘o’ and press tab NOT ENTER, and now you see the autocompletion possibility for the word ’Do’.
Then press ‘c’ and tab; it will automatically complete the word cause there exists only a single possibility for this option.
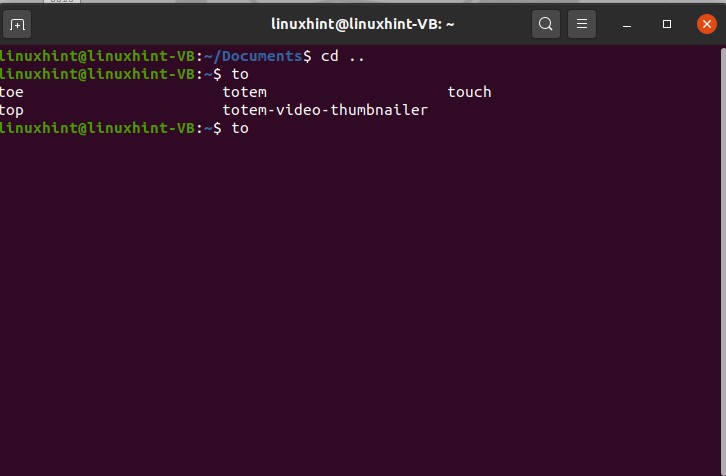
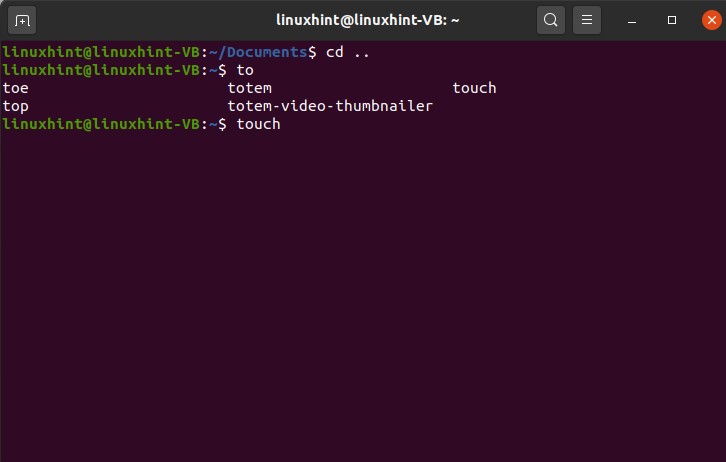
You can use this for the commands too. Autocompletion in commands will let you the options for commands for that specific word.
Type ‘to’ and then press tab. This action will give you the following results
21. Keyboard Shortcuts
In this topic, you will learn about different keyboard shortcuts in Linux.
CTRL+Shift+n is used for creating a new folder.
Shift+delete to delete a file
ALT+Home for going into the home directory
ALT+F4 Close the window
CTRL+ALT+T to open terminal.
ALT+F2 to enter a single command
CTRL+D to remove a line
CTRL+C for copy and CTRL+V for paste.
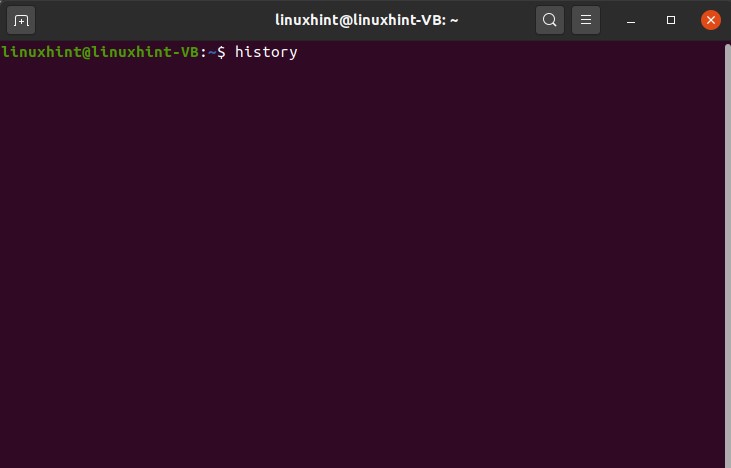
22. Command-Line history
You can use the ‘history’ command to view the command line history in Linux.

To use any of the commands again from this list, use the following format
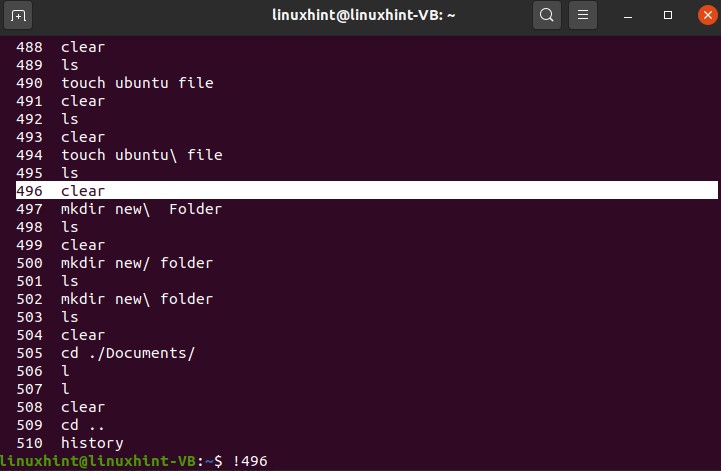
It will clear the window.
Let’s try another command
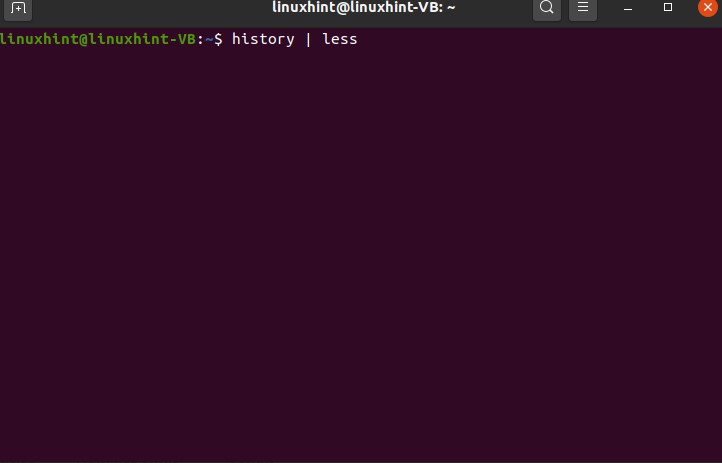
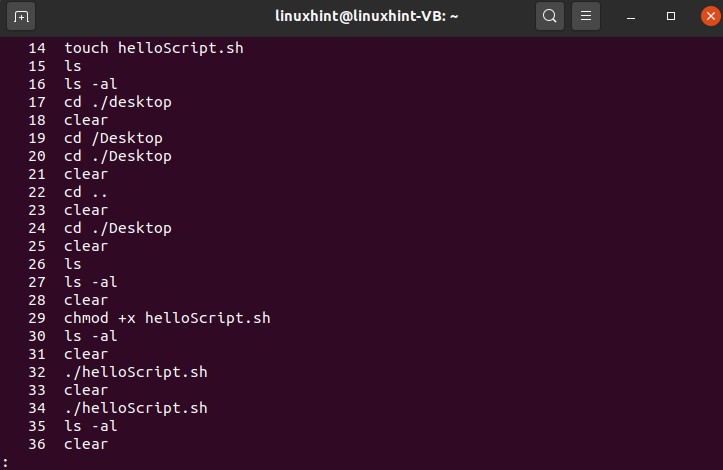
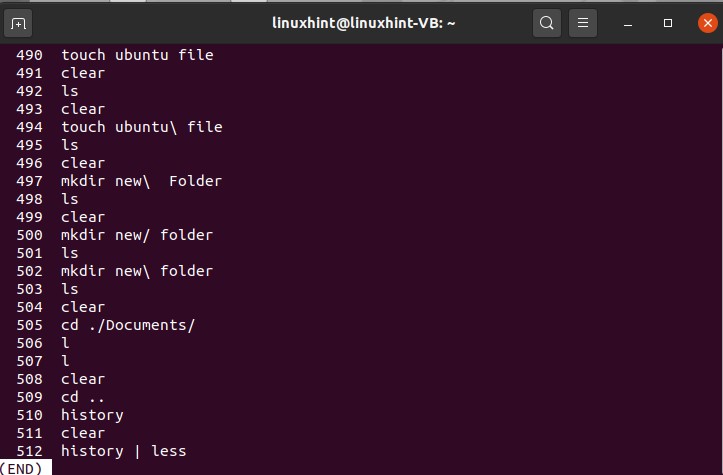
It will result in some of the commands and press enter to see more and more from the total commands. This command will only store the ’500’ commands, and after that, it will start vanishing.
23. Head and Tail commands
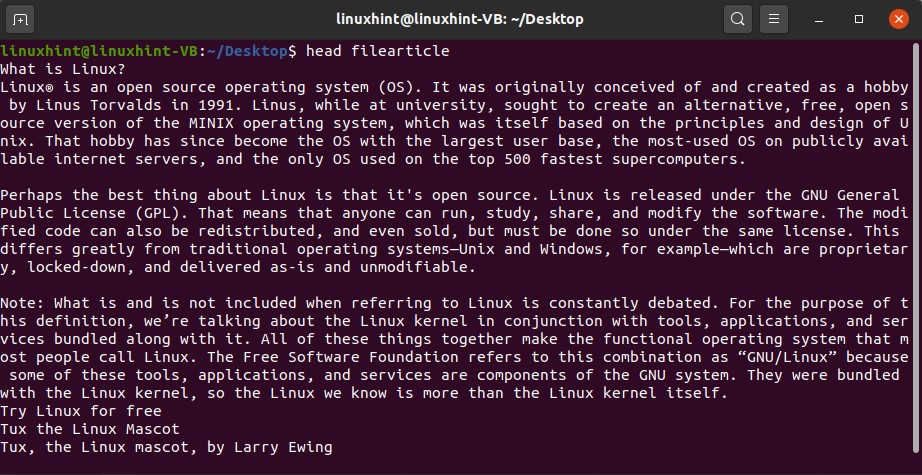
Head command is used to get the first part of the upper part of the file whereas, the Tail command is used to get the last part of the lower part of the text file, which is of fixed length.
Open up the terminal using CTRL+ALT+T and go to the desktop directory.
Execute the command to see the results.
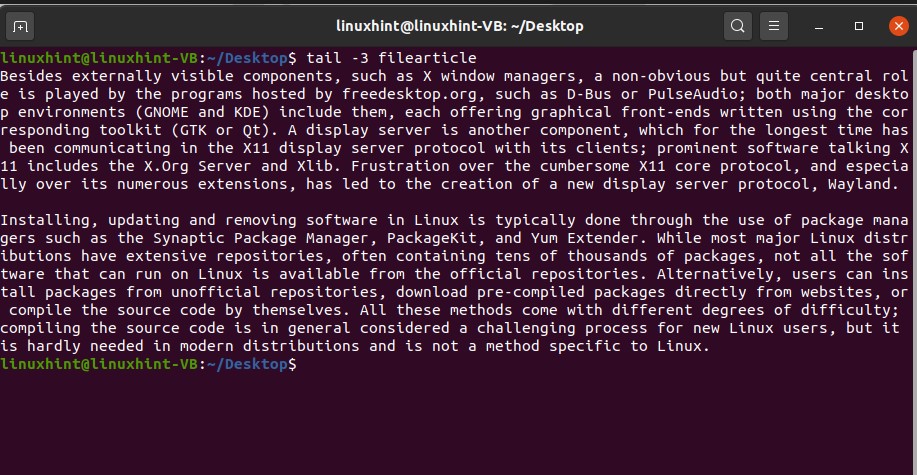
To read the last few lines of the document, use the following command
This command will retrieve the last part of the document.
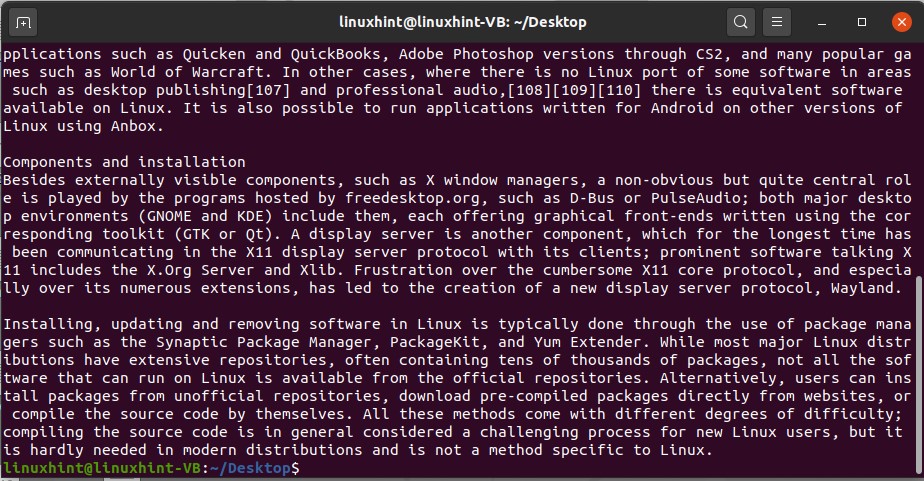
You can read two files at a time, and also extract their upper and loyour part of the documents.


24. wc command
In this topic, you are going to learn about the ‘wc’ command. Wc command tells us about the number of characters, words, and lines of a document.
So try this command on your ‘fileessay’ file.
And check out the values.
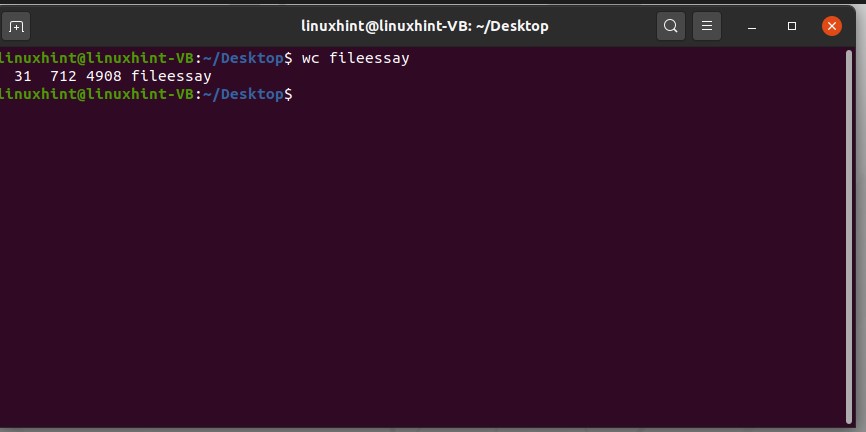
Here, 31 represents the number of words, 712 number of lines, and 4908 number of characters in this ’filessay’ document.
You can change the content of the file, and then again use this ‘wc’ command to see the visible difference.
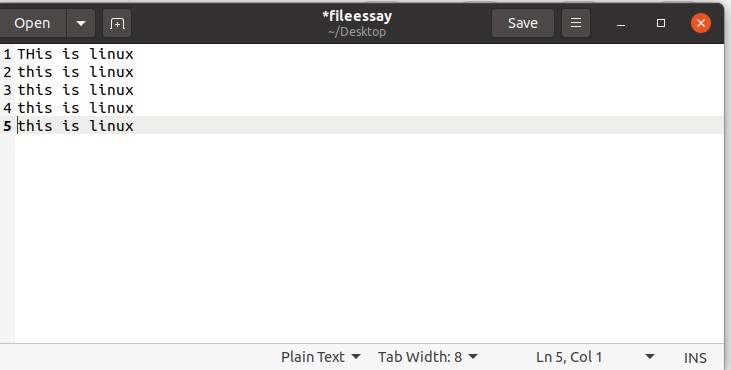
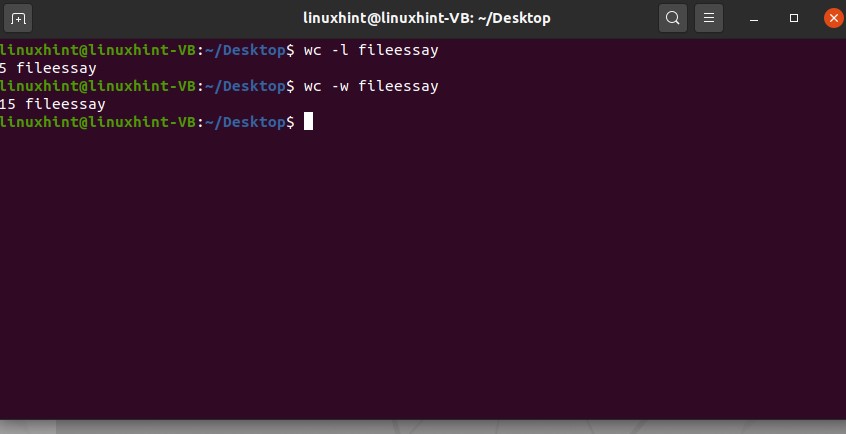
You can also check these attributes separately. For example, to know the number of characters in this ‘fileessay’ file, type the following command in the terminal.

Use ‘-l’ for getting the number of lines and ‘-w’ for the number of words in this command.
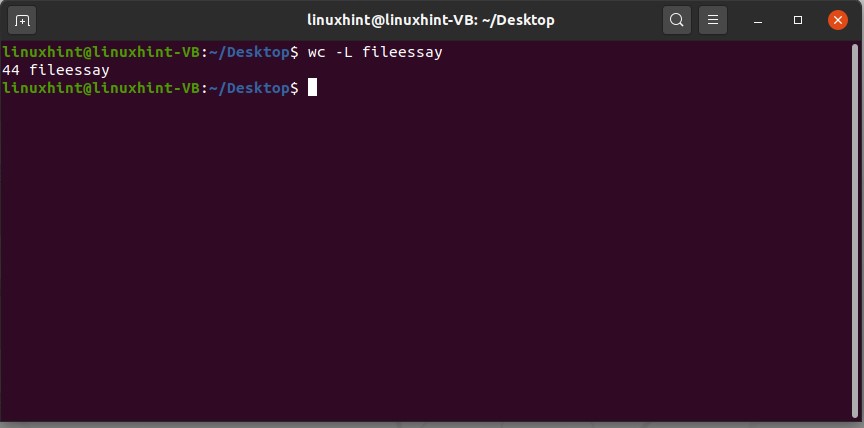
You can also get the number of characters from the longest line of the file. In this, first of all, the command will check the longest line of the document, and then it will display you the number of characters it currently has.
Execute the command to see the query result.
25. Package sources and updating
First of all, you need to know what a package is? A package refers to a compressed file containing all the files that comes with a particular application. The latest Linux distributions have standard repositories that include much software you want to have to have on your Linux system. The built-in Package managers manage the whole installation procedure. The system’s integrity is maintained by ensuring that the installed software is known by the packet manager.
You would be able to download the software from the repository in the following cases. The first one is that the package is not found in the repository, the second is that a package is developed by someone and is not released yet, and the last reason is that you need to install a package with custom dependencies or options that those dependencies are not general
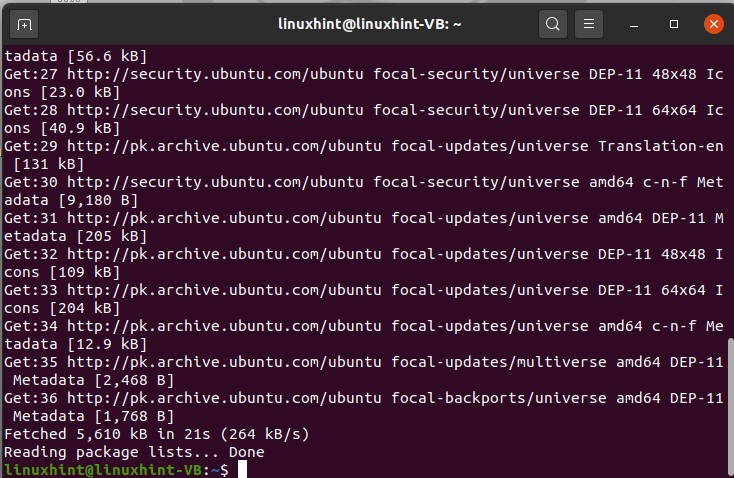
Any package can be easily installed using the sudo command. Sudo is for becoming the root user or superuser. There exist certain tasks that you cannot perform without being the superuser; updating the repository is one of them. Type the following command for updating the repository through the terminal.
Enter your password to give permission, and then wait for the completion of this process.

26. Package management, Search, Install, Remove
‘apt-cache’ is the simple command that is used for searching a package through the terminal.
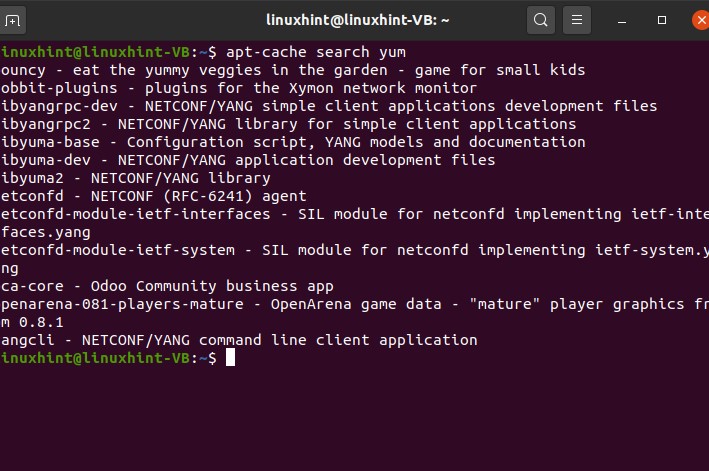
In this command, you are going to search the ‘yum’ package. So this is a simple command to search whatever package name you want to search. This search command will show everything related to yum.
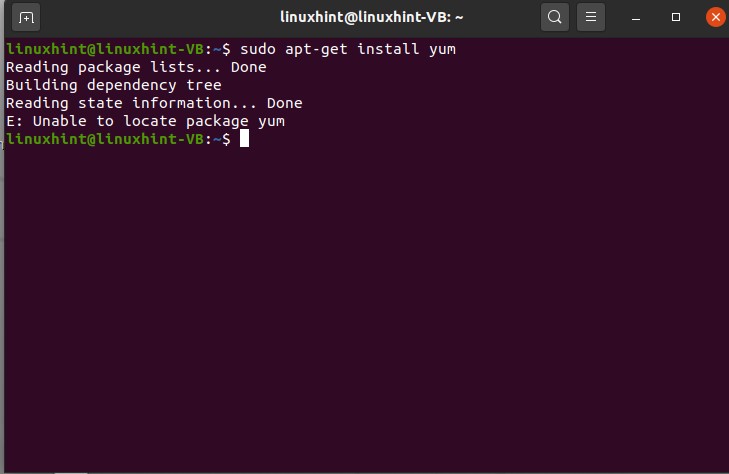
To uninstall this yum package, you can simply use the following command
To delete any package with its configuration settings, the purge command is used.
27. Logging
In Linux, logs are stored in ‘/var/log’ directory. If you want to see the log files, use the following command.
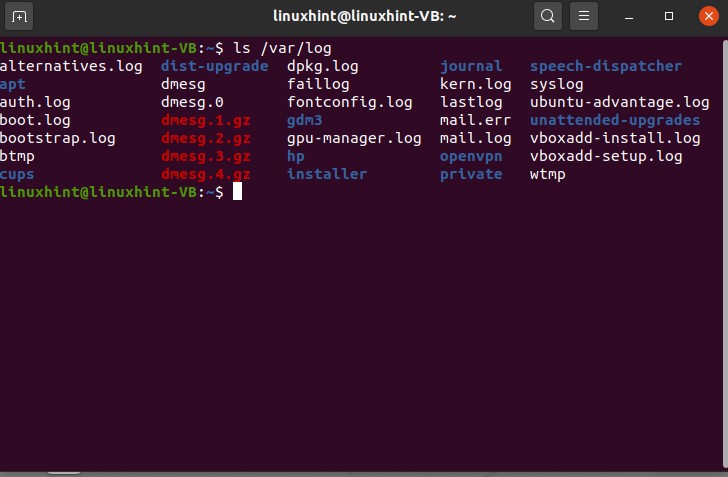
From the output, you can see there exist various log files in your system, like some of them are related to authorization, security, and some are related to kernel, system boot, system log, etc.
To view the content inside of these files, you have to use the ‘cat’ command with the path of the log file. Example command execution is given below.
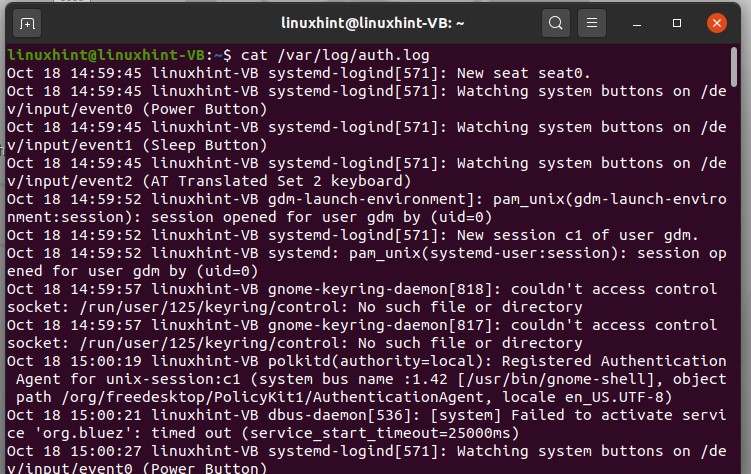


The output shows all the information related to the authorization and security things you have done today, all the files and sessions in which you used your root permissions and worked as a superuser.
28. Services
This topic is about services, okay, so you are going to discuss services in Linux. First, understand the basics of the services. Services in Linux are the background tasks that are waiting to be used. These background applications or sets of applications are the set of essential tasks running in the background, and you don’t even know. An example of typical services would be apache and MySQL.
Now let’s see how you can work with services on how you can start, stop, restart, and even check the status of it or check all the services that are running on your system. First of all, you will open up your terminal by pressing CTRL+ALT+T.
here you are going to write

It will tell you about all the services which are running in the background, and ‘+’ means that the service is up and running and it is active the ‘-’ means that the service is not active and it is not running, or maybe it is unrecognized.
Let’s explore the ‘Apache’ service. First of all, you are going to write ‘service’ and then the service name, which is essentially Apache, and then you write ‘status.’
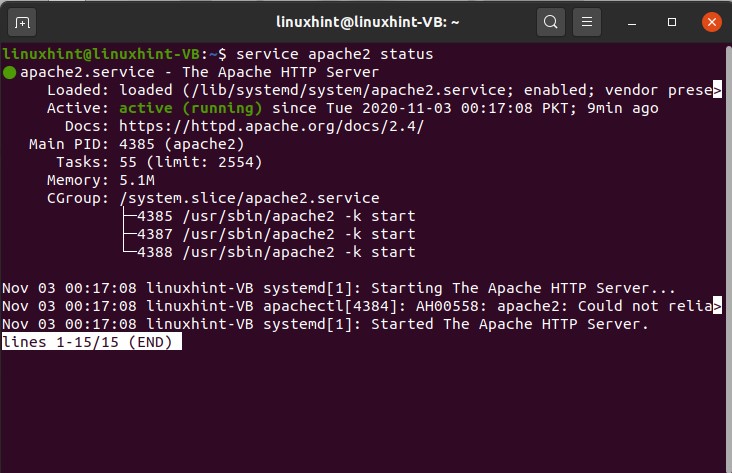
The green dot shows that it is running, and the white dot shows that it has been stopped.
Press ‘CTRL+c’ so that you can come out of it, and you can simply write your command in the terminal.


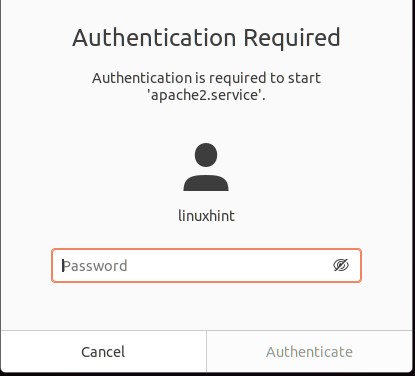
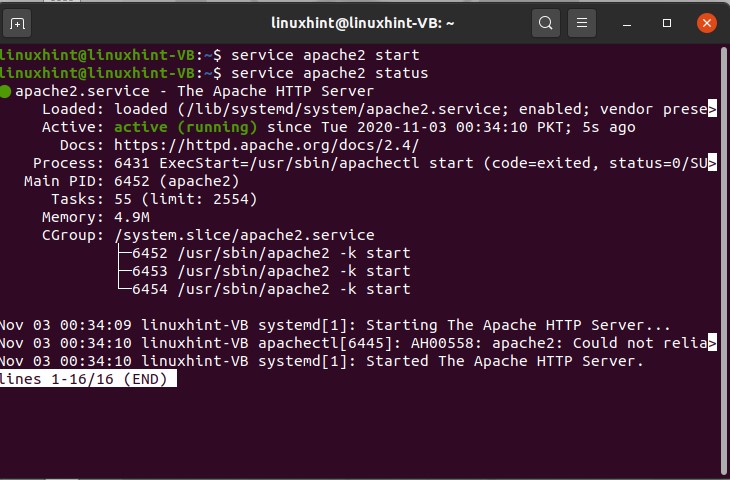
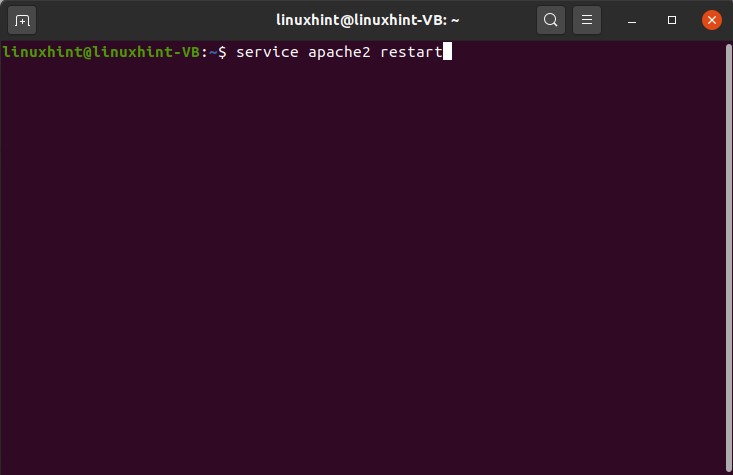
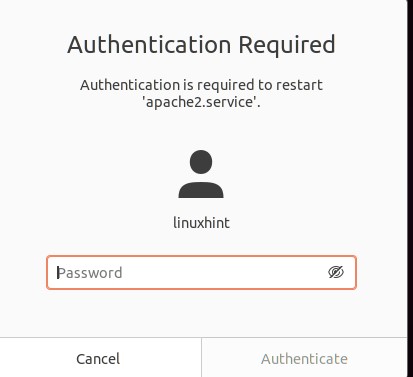
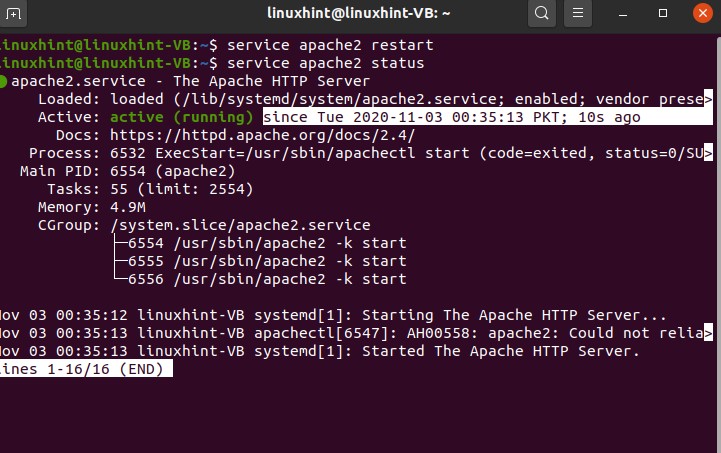
29. Processes
The process is a computer program in action and carryout the task of the operating systems. Now, what if you want to, you know, see, or check what are the processes that are like going on your system.

Here you can see that you have a list of the processes which are like going on. The PID is nothing but a unique process ID that is given to the process, so it is ideal for defining and identifying a process or anything any entity by the ID number. TTY is the terminal from it is running, and time is the CPU time that it has taken to run the process or complete the process, and CMD is the basic name of the process.
Let’s run an example and see how you can check out the processes and run them. If you run a process named Xlogo, you hit enter, and you can see that this is a process it takes a lot of time here, and you cannot run anything right here.

To write anything, you have to press CTRL+C. It is visible that the Xlogo window is now gone.
To shift this process into the background, what you can do is that you can write
You can see that now this process is running in the background.

30. Utilities
Utilities are also known as commands in Linux.
Utilities are also known as commands; although there is no real differentiation between a command and a utility, there is still a difference between Linux shell commands and standard Linux commands. The utility is nothing but a tool to run a command. ‘ls’, ‘chmod’, ‘mdir’ are some of the utilities used in general.
31. Kernel Modules
Kernel modules are stored in the home directory or the root folder. These are the drivers that can be loaded and unloaded as well as needed or at the boot time. The kernel is the low-level aspect of your computer that sits between the user and hardware, and its job is to how to you know, talk to CPU to communicate with the memory and the communication with the devices. It takes all the information from the application and communication with the hardware, and it also takes all the information from the hardware, and it communicates with the application, so you can say that kernel is a bridge which takes the information from the application to the hardware and from the hardware to the application. For the kernel to communicate with the hardware, it needs to have some specific modules. It needs to have a module that can tell it how to do that, and those modules are available and built-in, and a few of them can be imported. They are externally available, and you can use them as you need them.
Use the following command to check the list of the available modules in your system.
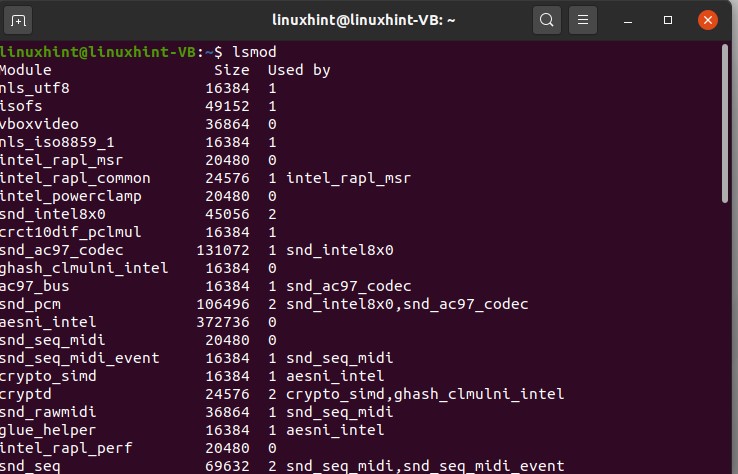

So here, you can see the name of the modules in the first row, and the second row is for a module, and the third one is just the comments or the information against each driver or each kernel module.
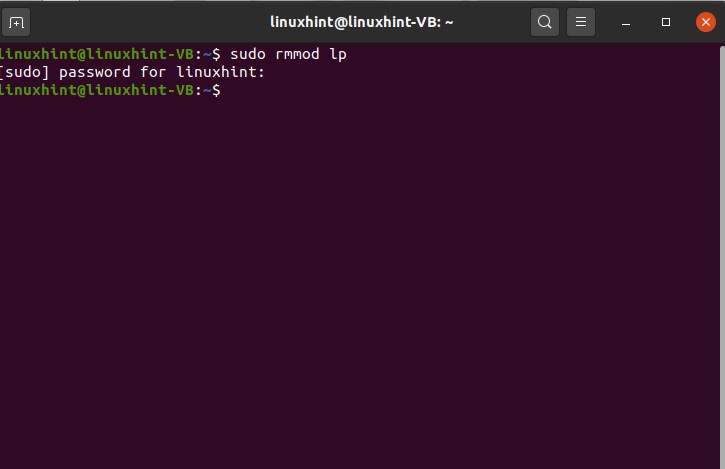
To uninstall a module named ‘lp’, you can write
32. Adding and changing users
This topic is about adding users and changing users. When you add a user, you will add it to a specific group, or you can also create a user as if you don’t want to add it to any group then the user will you will be created and it will generate its own like sort of a unique identity and a unique group sort of thing.
Open up our terminal, so before you add a user to the group, there are a couple of things that you need to know. You should know that in which group you are going to add the user. To know which groups exist on our system, you need to write this command
You can see that you have several groups available. Let’s say you want to add a user to this group, so l the user name you want to name the user as John.

As you created the users successfully, you can write
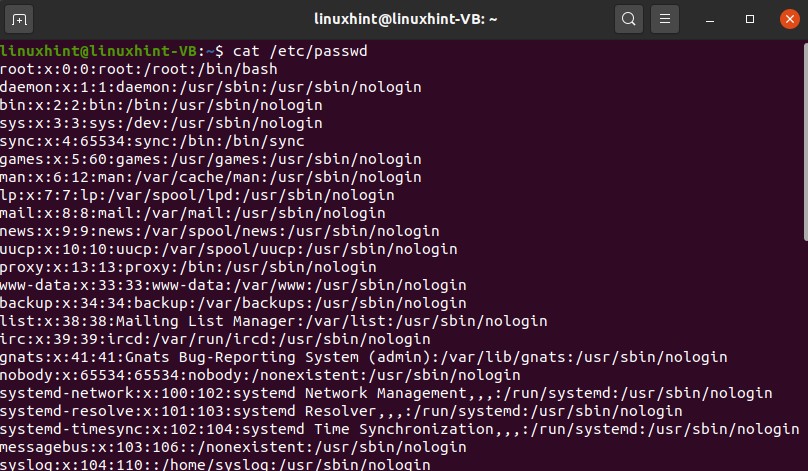

Here you can see that you have a user named John, and this 126 is the group ID of the group ‘colord’.
33. User group and user privileges
In this topic, you are going to learn how to create and delete a user as well as a group and also discuss the user privileges.
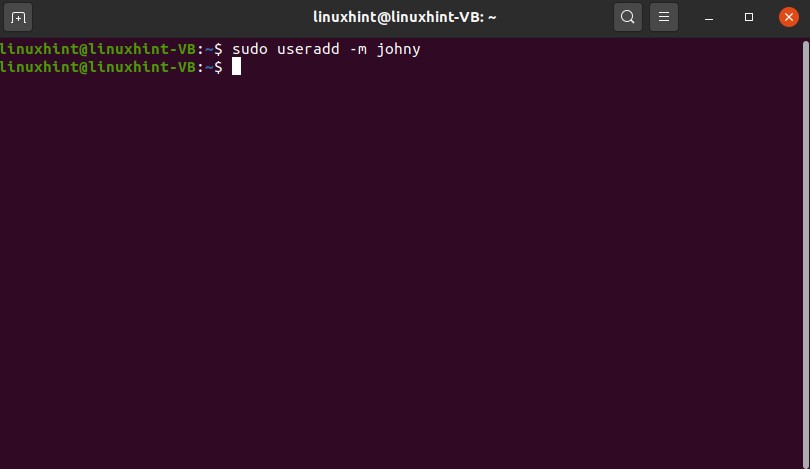
Open up the terminal and create a user with its unique group. You can add users individually as well.
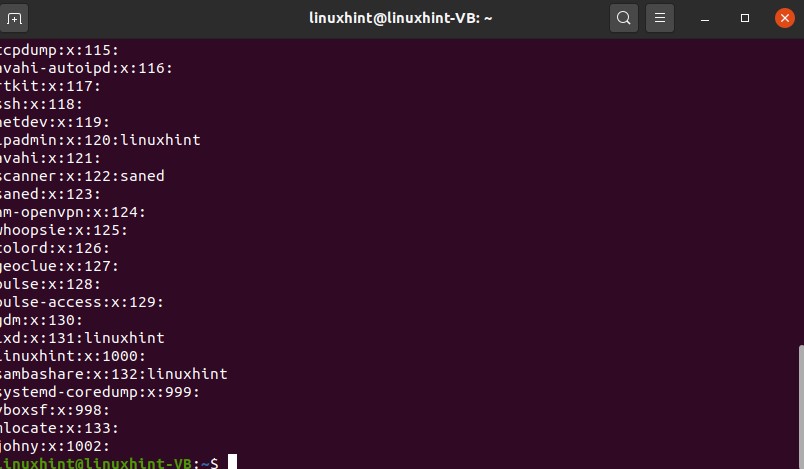
And now confirm the existence of this user by opening the content of the ‘passwd’ file
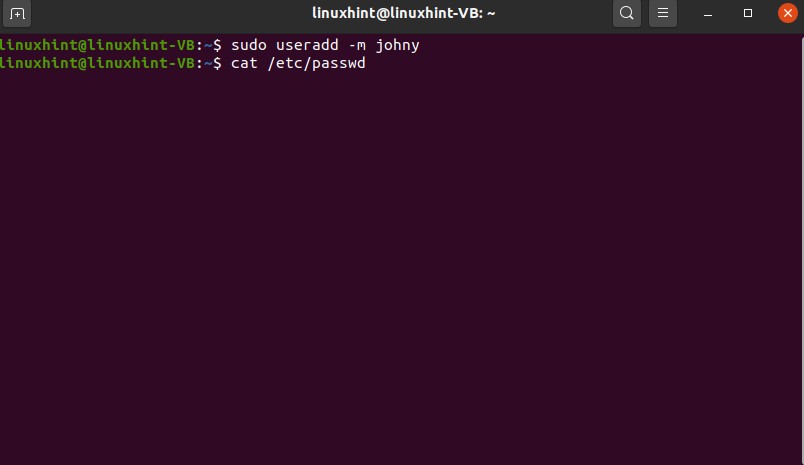
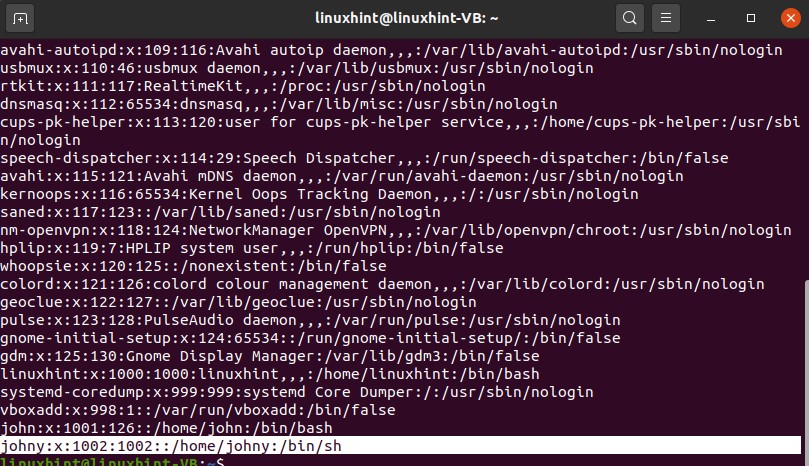
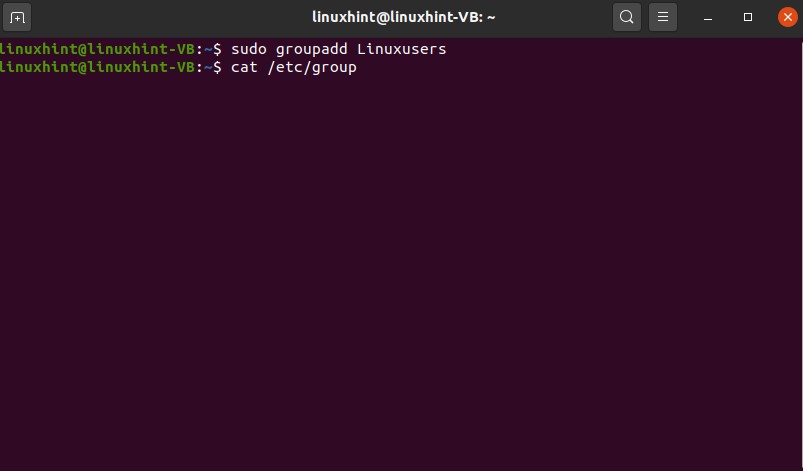
What if you want to create another specific group, and you want to add users to that so adding users to that is very simple, and it is discussed in the previous topic. Now write a command to create a unique group so that you can add any member to it.
Check the content of the group file
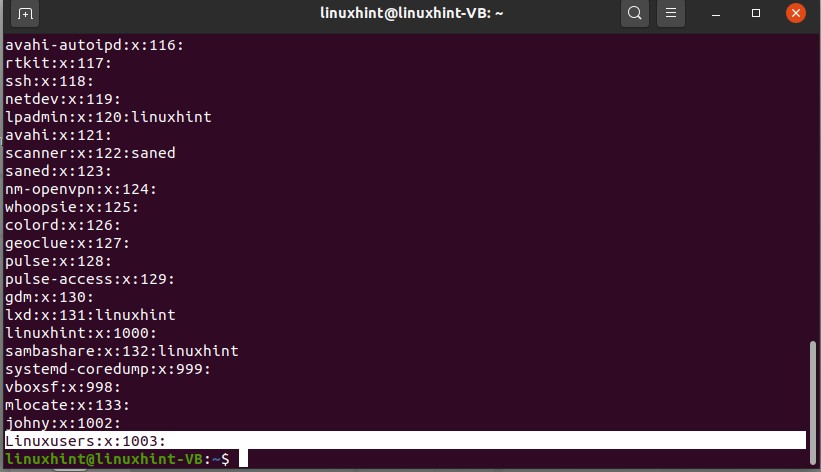
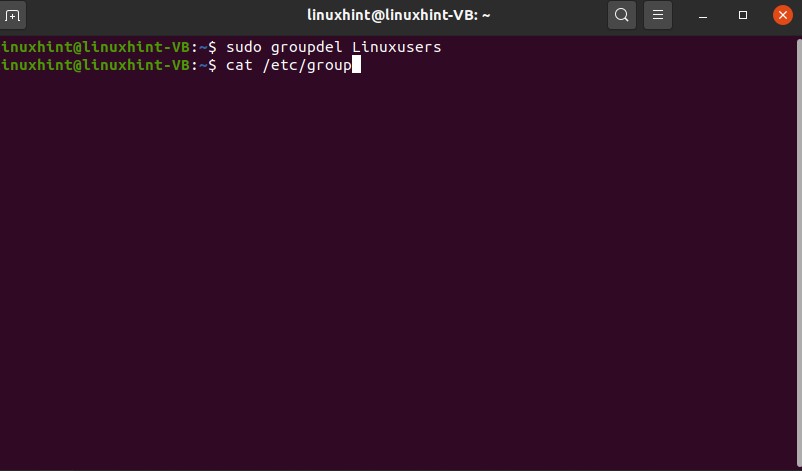
You can also delete the group by using the ‘groupdel’ command
And again, check the group file to confirm its deletion.
34. Using sudo
sudo stands for ‘superuser do’. The idea is that you cannot perform certain actions without being a superuser, and you can ask why is that so? You cannot perform any installation or changes in the root folder without being a superuser because your system needs to be saved so no other user can make any changes other than you. So you have to put in your password, and you need to make your system make sure that it’s you, and then you can make changes in the root folder; otherwise, whatever commands you would write, it would give you the error or the warning. Whenever you see that permission denied message, it means that you need to work as a superuser because these changes are going to affect your root folder.
Using the sudo command, you can update your system.

You can create or delete a new directory and many more actions by becoming a superuser.

35. Network UI
Openup the terminal and write here the first command, which is
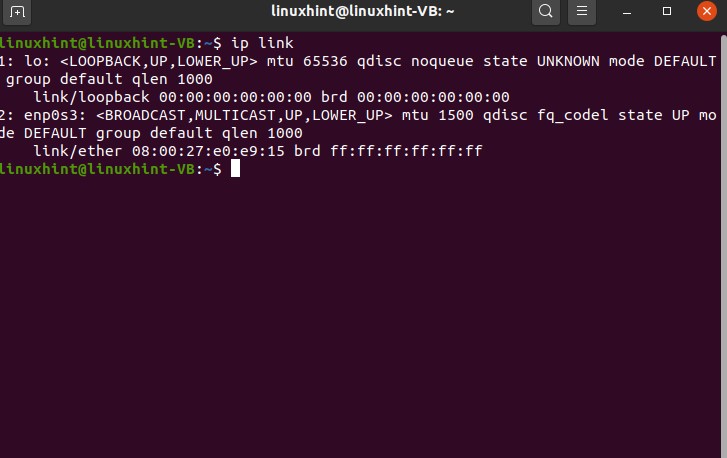
Press enter and see different network interfaces. The number one is this ‘lo’, which stands for Linux host, and others are the ethernet networks. You can see there is a MAC address, which tells us that it is the ether link. If you see here we have ‘UP’, it means that it is ready and available and it can be used so up just tells you that it is available. It doesn’t mean that it is being used; it means that it is available to use. ‘LOWER_UP’ shows that a link is established at the physical layer of the network.
We will also see you know the IP addresses and how do we check them.

To get the information about all of the commands related to ip link, type
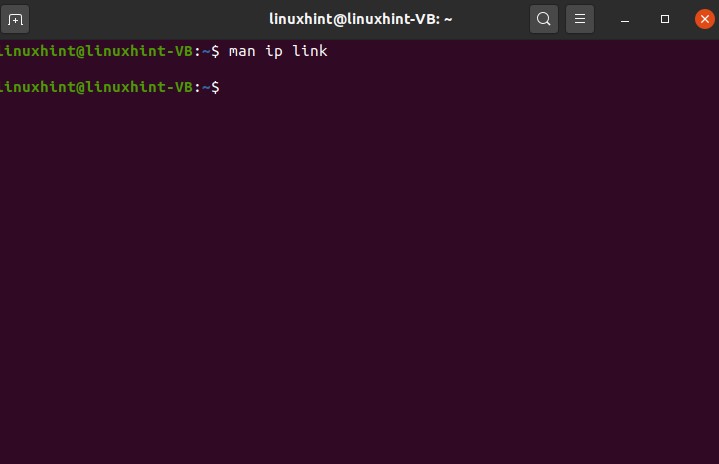

Try some of those commands for a better understanding of the topic.
36. DNS (incomplete)
$ hostnamectl set-hostname SERVER.EXAMPLE.COM
10.0.2.15
~$ sudo nano /etc/network/interfaces
$ sudo apt-get install bind9 bind9utils
$ cd /etc/bind
$ nano etc/bind/name.conf
37. Changing nameservers
Open your terminal by using ‘CTRL+ALT+T’ and write the following command in it.
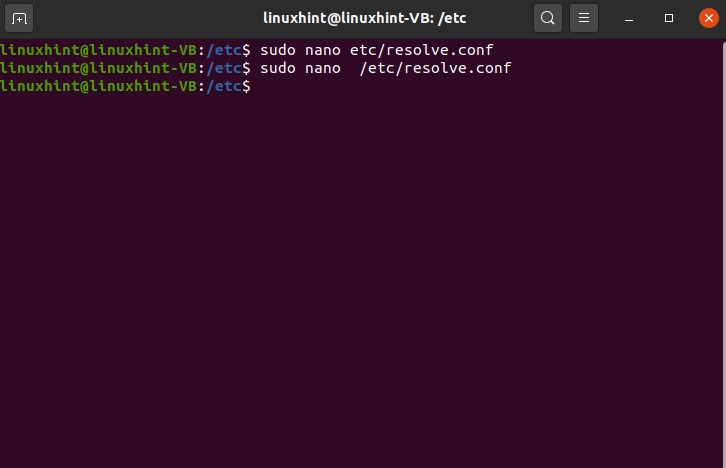
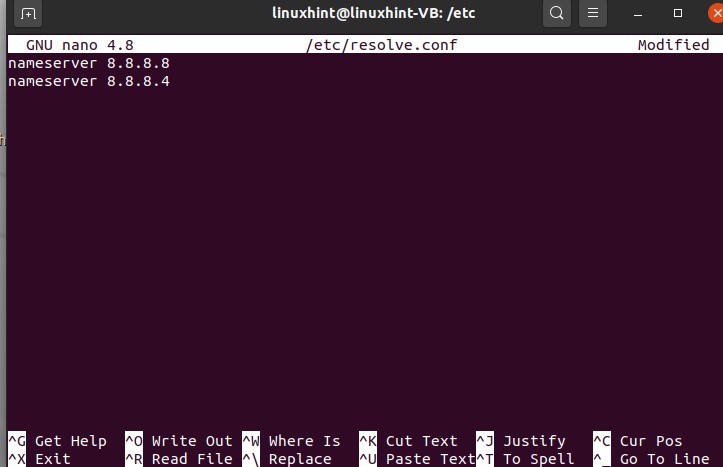
This is the configuration file that has been opened. Now, we are going to write ‘8.8.8.8’ and then we’re going to change another server we’re going to write here ‘8.8.4.4’ so save it, write it out, and then we exit it.
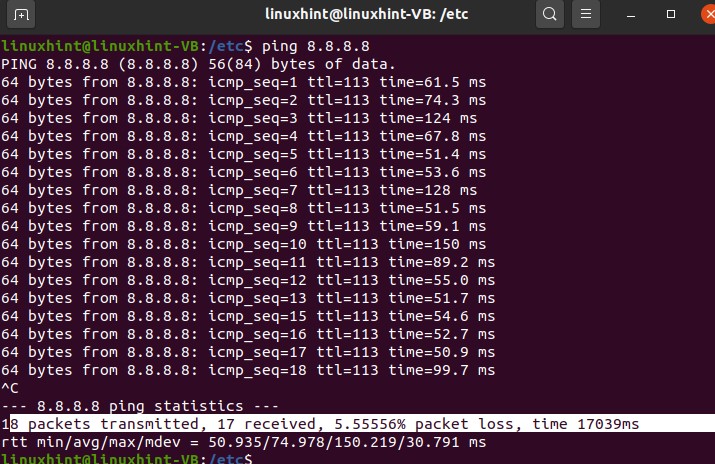
Now before doing anything, let’s let us check that if the changes have been made in the file successfully or not. Write this command ping, which is the packet internet groper, so P is for packet I for Internet, and G is for groper. It communicates between the server and the source and the server and the host. It will verify that our main service has been changed and they’re like a set.

We have set the name server as 8.8.8.8, and now you can see we have started to get reserves; we are getting all the packets, and the communication has begun.
Press ‘CTRL+C’ and you can see it has shown us all the details about the packets which have been sent, received and the information about the packet lost.
38. Basic Troubleshooting
We are going to discuss some basic troubleshooting commands on this topic. Before everything, whenever you get to a Linux host, run the following command to know the version of the Linux.
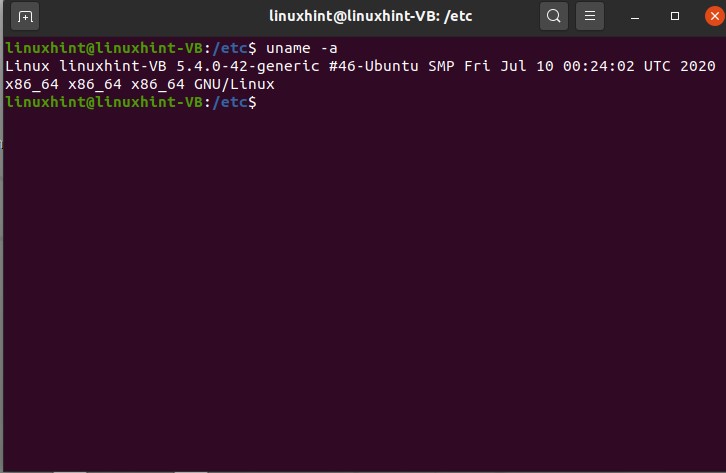
This is essential to know because of the version across different distributions of Linux; the commands might differ. But these commands will work on any Linux distribution, so the first command that we are going to discuss the ping command.
Ping is used for network reachability tests, so if you want to test the network reachability, you will write this ping command. Let’s try to send five requests, and we send it to the IP address 8.8.8.8
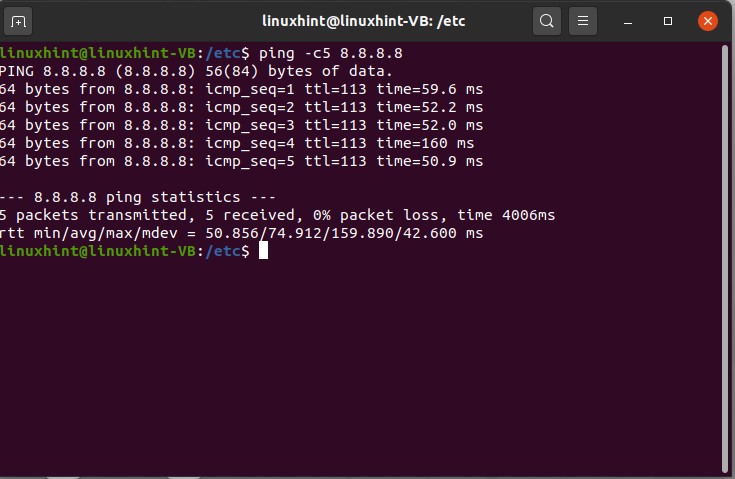
Now it would send like five requests, and you can see that five packets have been transmitted, and five have been received, and in that whole scenario, there is a zero percent packet loss.
You can also test the ping command on some IP address where you know there might be a packet loss or something. Give a random IP address and test the command.
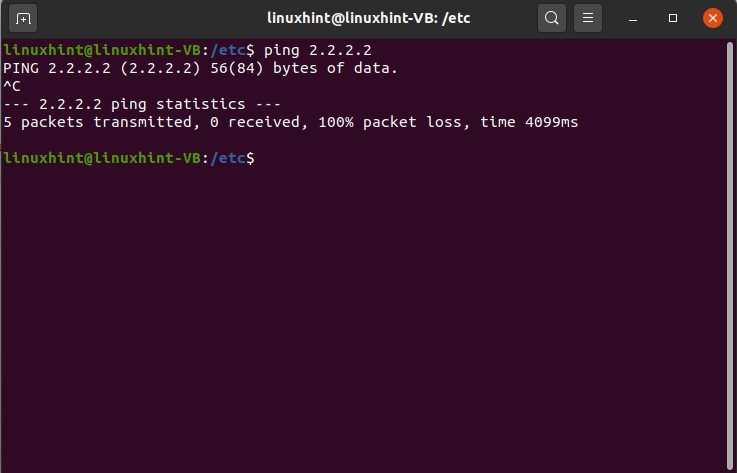
Press ‘CTRL+C’ to know the results.
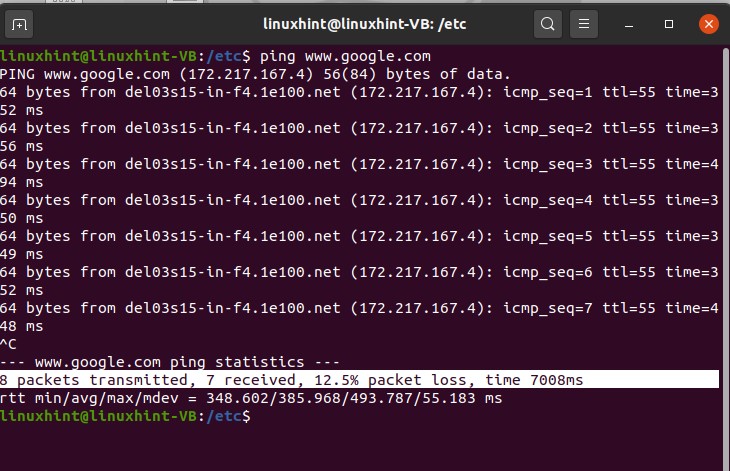
Ping can also be used with the DNS name as well; you can test it with the ‘www.google.com’.
Now let’s discuss another command, which is ‘traceroute’. This traceroute command trace all the path of the network, and it displays you each activity on each hop.
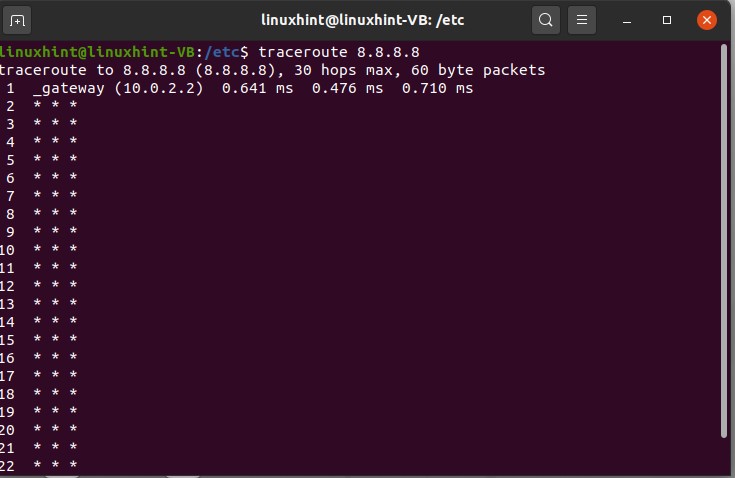
Results have shown you all the activity through every hop. There is another command that will troubleshoot commands that we would like to discuss, which is ‘dig’. let’s try digging amazon.com, so we have tried to dig amazon.com
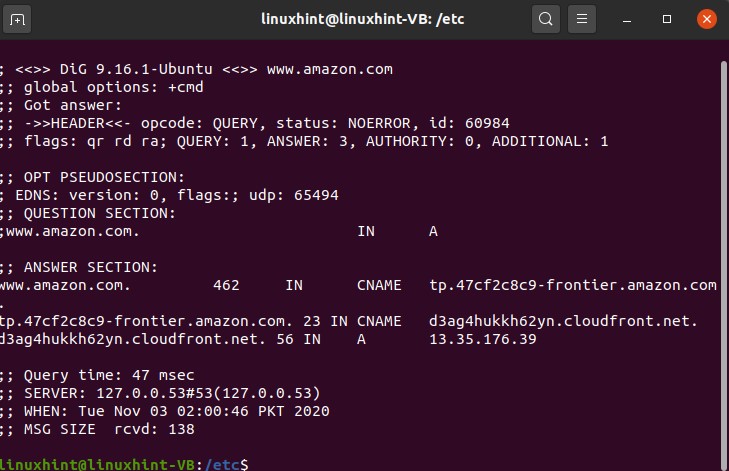
We can get the message size, the name, server IP, QE time.
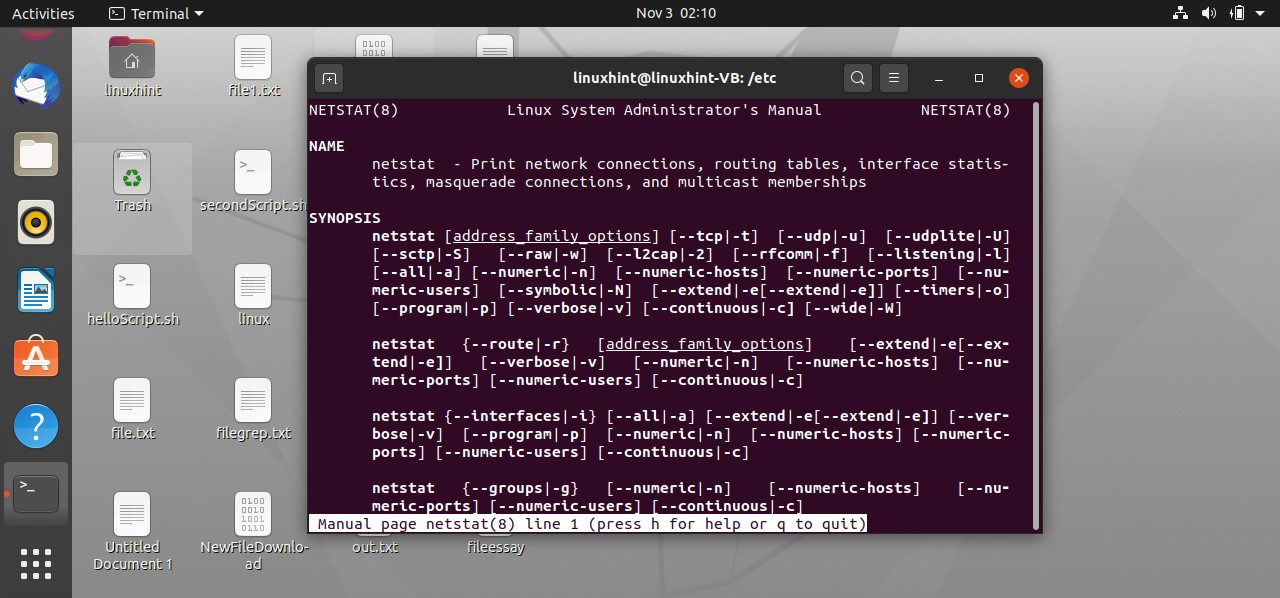
There is another command, ‘netstat’, which represents the network status statistics; it displays you all the active sockets and internet connection.
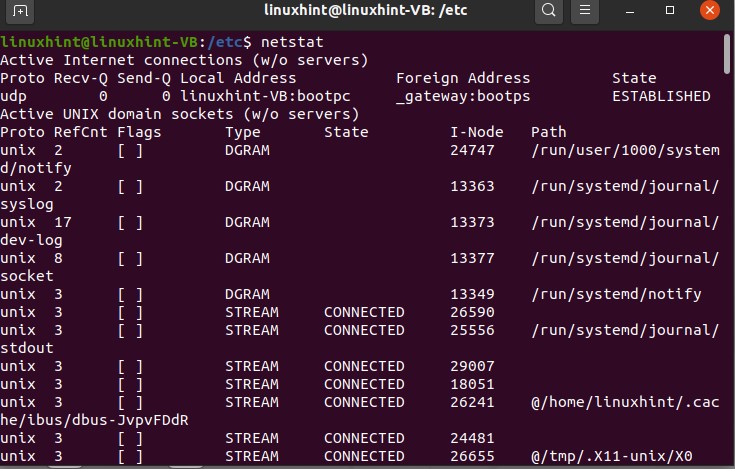
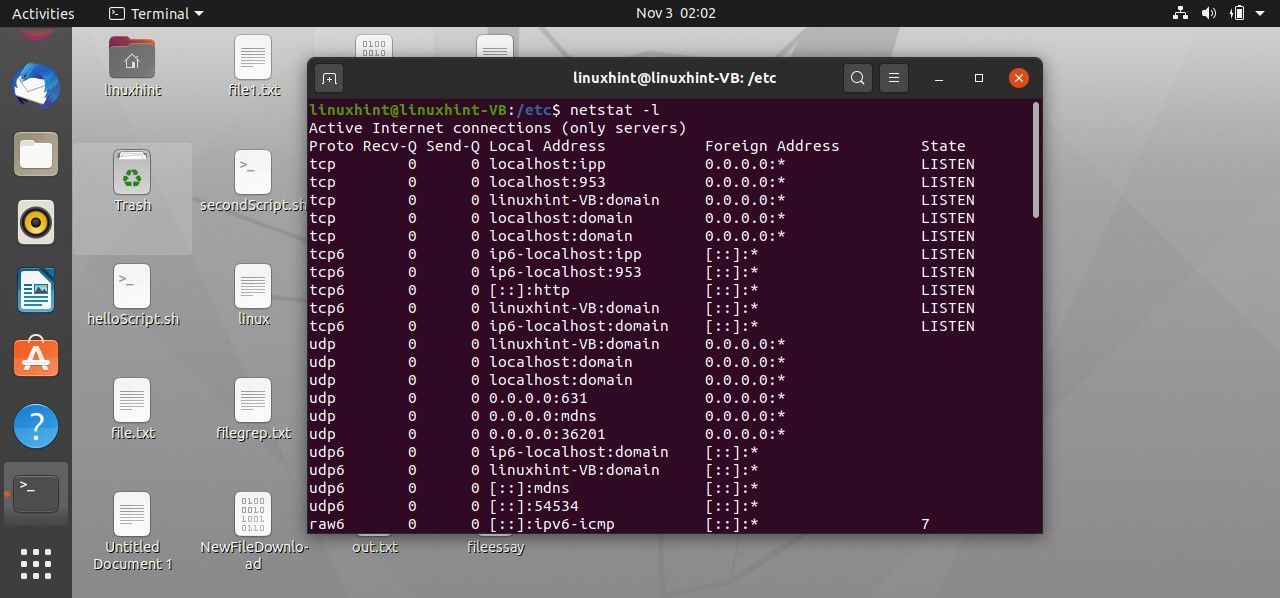
This command will display all the programs which are currently listening and all the internet connections which are listening as well.
39. Informational utilities
Let’s look at some utilities which could provide information about your networking subsystem. The first command is the ‘arp’ command. arp stands for address resolution protocol, so the idea is that every machine has a unique address like every DNS has a unique address in the form of an IP address similarly every machine has a unique address as well which is known as MAC address. ‘arp’ or the address resolution protocol matches the IP address with the MAC address. Locally wherever you want to communicate or you want to communicate in that case, we need a MAC address specifically for local communication from one machine to another machine on the same network or from one machine to the router on the same network.

There is another informational utility, which is ‘route.’
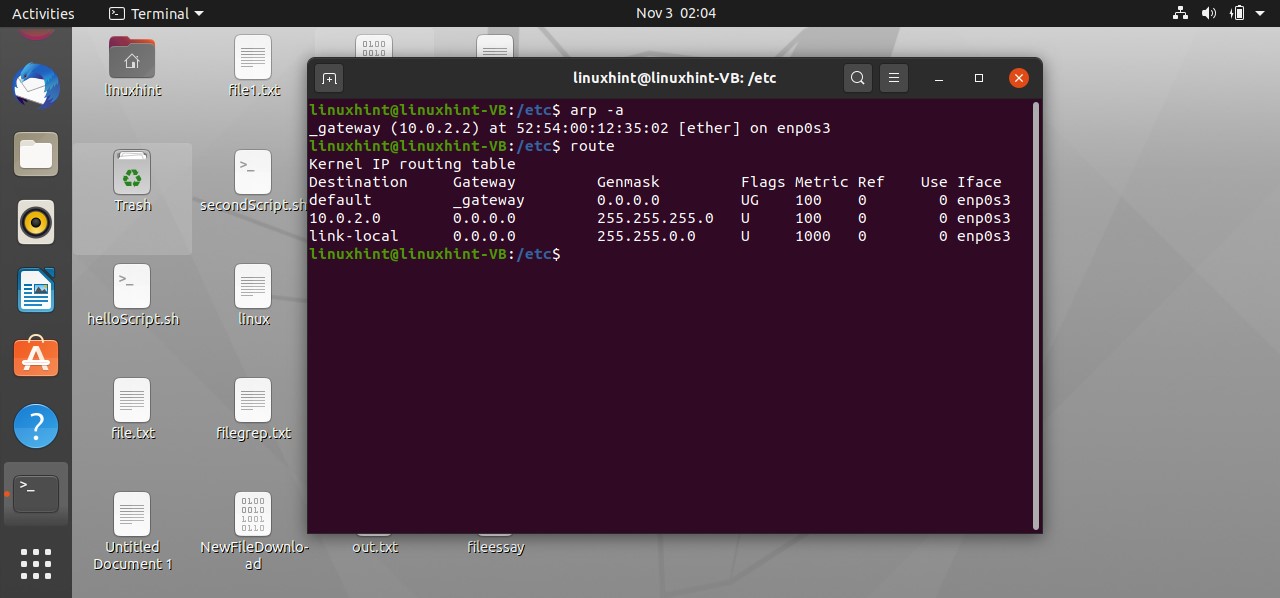
you can see a routing table as a result of the route command execution.
You can also use another utility to view the routing table, but this one shows the IP addresses of the destination instead of its name.

40. Packet Captures
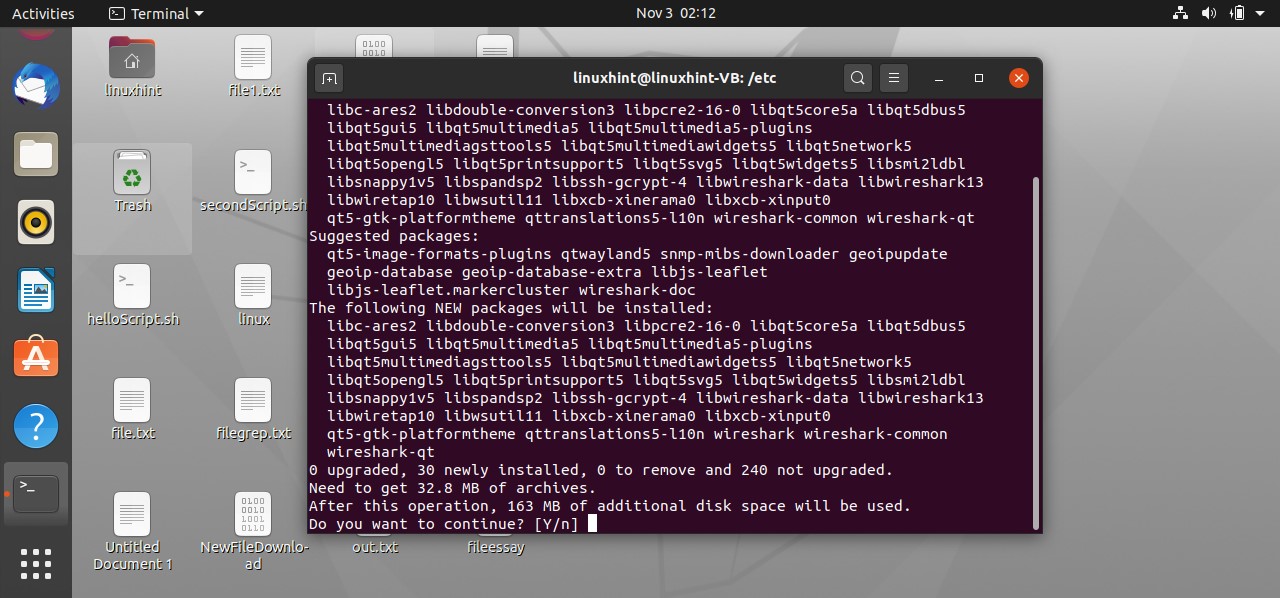
In this topic, you will learn how to capture packets, and we can do that using some packet capturing tool. The most used tool for this purpose is ‘wireshark’. Write the following command to begin its installation on your system.
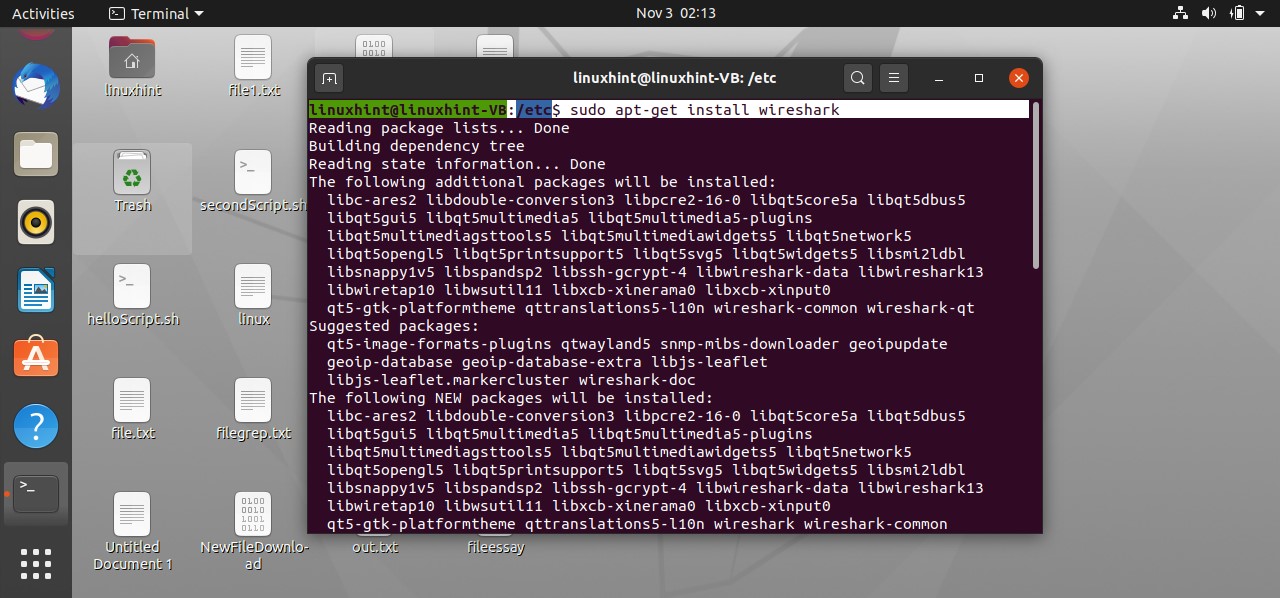
Enter your password when it asks for it. After that, it would ask you for the configuration of Wireshark that if you want to give access to non-superusers so you have to select yes because we want to give access to non-superusers as well and now it would start to you know unpack the packet.


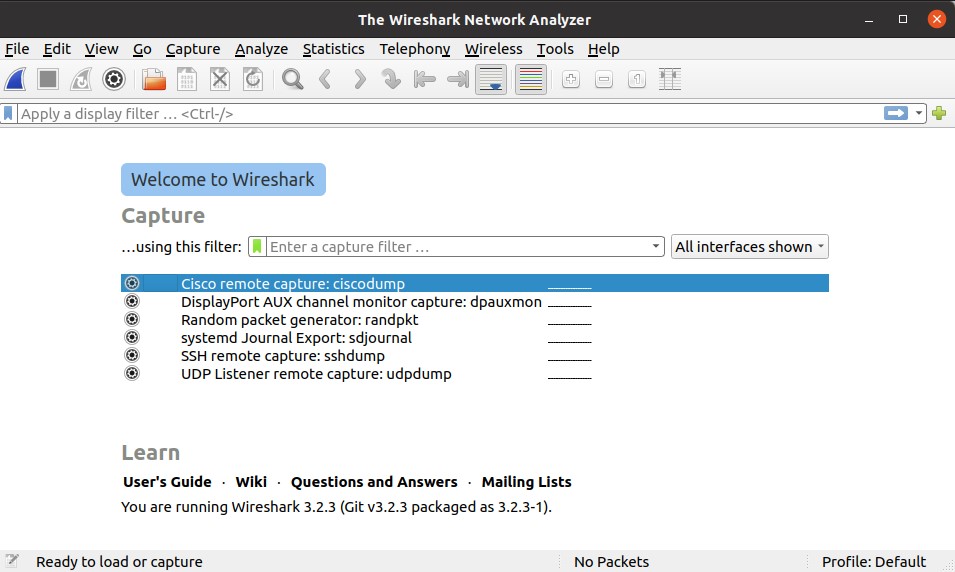
After its installation, open the Wireshark software; first of all, go here on the capture options, and you can see that we have input as cisco remote capture random pattern generator and ssh remote capture, UDP listener. Select the random packet generator, and once you click start and if you do not see any of these options, ten simply restart your system. Sometimes you need to restore the system.
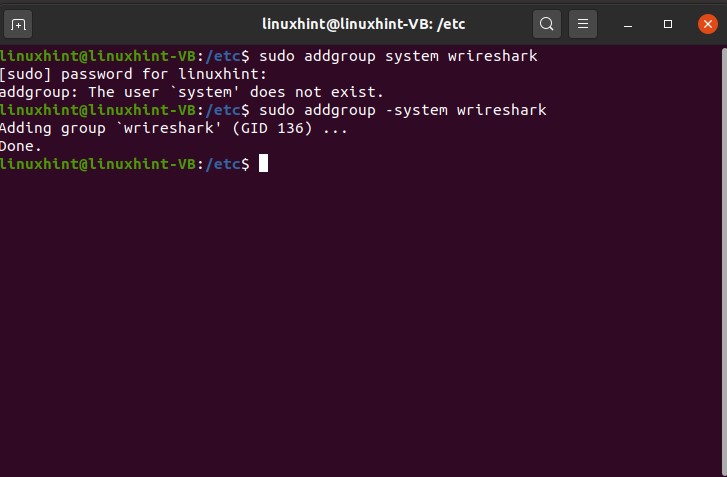
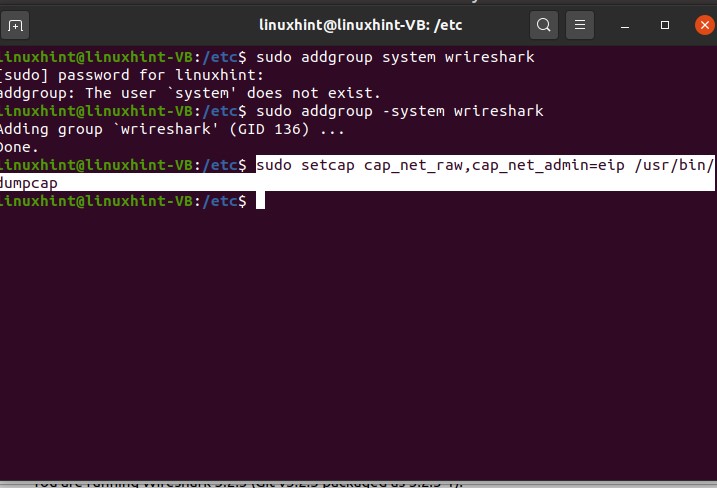
Run a few commands before starting the process of packet capturing and to make sure that you set everything. First of all, check the group of the Wireshark
Make sure that this group exists.
After that write another command
After that, add the user to the Wireshark group.
Now go back to the Wireshark software, and under the same settings, you will see the packet capturing process.

41. IP Tables
In this topic, we are going to discuss IP tables. IP tables are just a set of rules which define your network’s behavior, your machine’s behavior on your network.
The command to view the IP table is given below
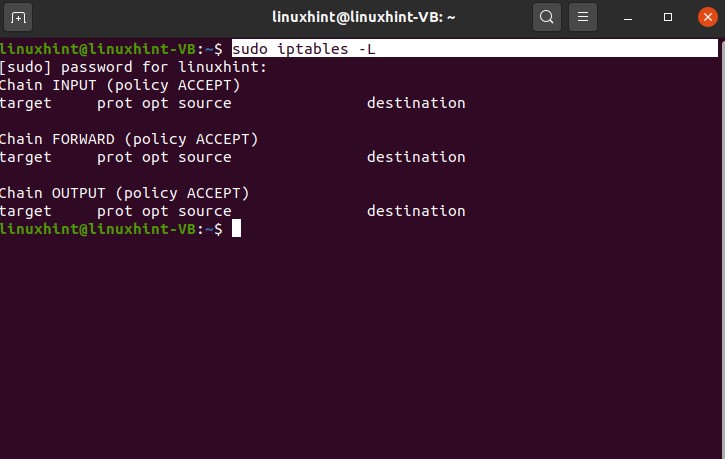
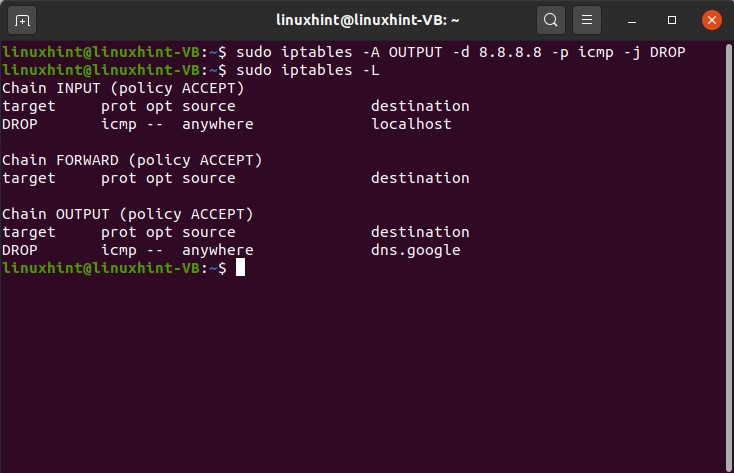
you can see this is the first chain is the input, then the second chain that we have is the forward chain, then we have the output chain. Whatever rules you will give to this in this IP table, your machine will follow it. This input rule or the input policy is for sending that traffic to itself like your machine right now whatever input it is taking like if you send traffic you’re sending traffic from your machine to your machine is called the input chain. Whatever rules you will set here, they will be for your machine or your localhost.
Output chain would send from your machine to some other machine out there in the world or out there on the network that would be the output chain. You can set and define rules for dealing with the output traffic from here, the traffic that you’re sending from your machine to the outside world to any other machine. In this example, you are trying to send traffic from your machine to the outside world to any other machine.
For sending a packet to the local host, execute the following command

Now let’s say we define a rule here, and we do not want to send any packet to ourselves. We define a rule, and we drop the package that we intend to send to ourselves. For that, we set a rule in the IP tables.
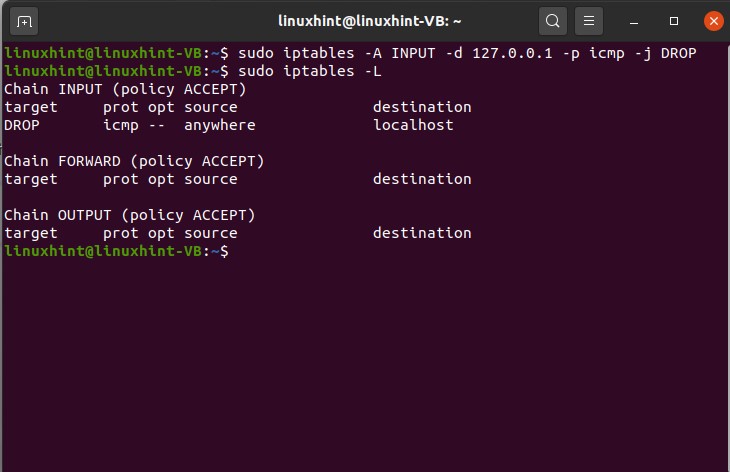
You can see that this command has been executed successfully, so now, if you check the IP tables, you can see that this is a rule that has been added to the input chain, right. You can also define rules for the OUTPUT chain. An example of this is given below.
42. SSH servers
In this topic, you are going to learn how you can enable SSH and install an open server in your system. If your system is an SSH client, then it can connect to any SSH server out there using a simple command. It can connect to any of the SSH servers, and it can use the operating system remotely. To check that if SSH is installed or enabled on your system, type ssh and press enter.
If you see, you know things like this.
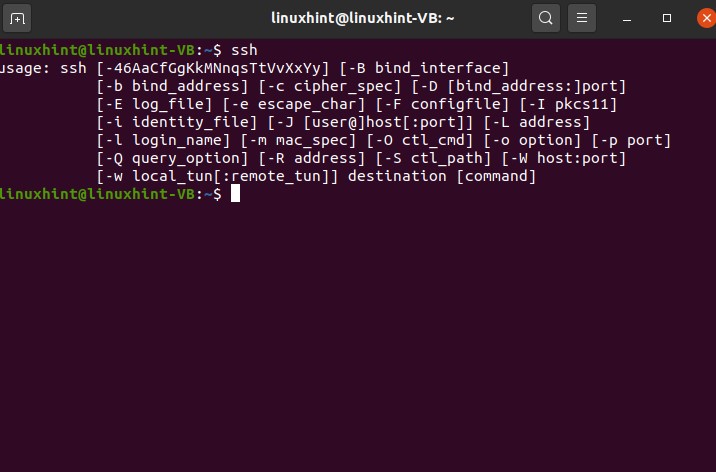
then it means that you are an SSH client, or your machine is an SSH client.
simply if you want to connect your machine to a remote machine and you want to use it like any server out there which is hundreds of miles away from you, you can do that by writing a command like this
SSH then the username of that server, then the IP address of that server, and then if there is a special port, you can write here.
Now you are going to learn going to connect to your localhost. It means that you are going to connect to our machine and use your operating system. First of all, check whether SSH is enabled in your system or not.
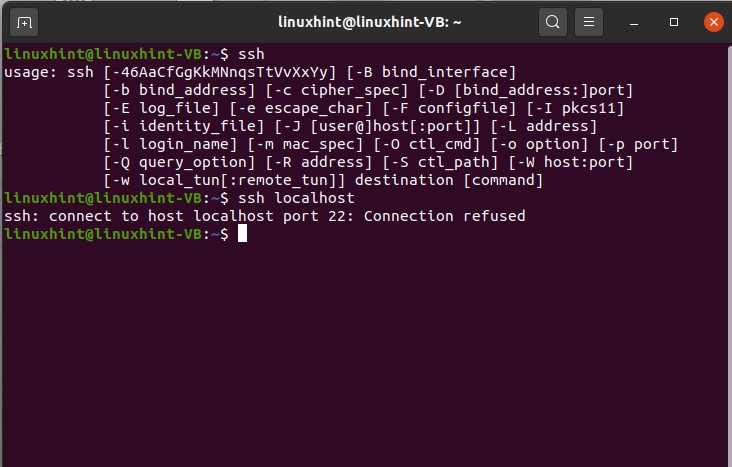
After this step, install the open shh server on your system
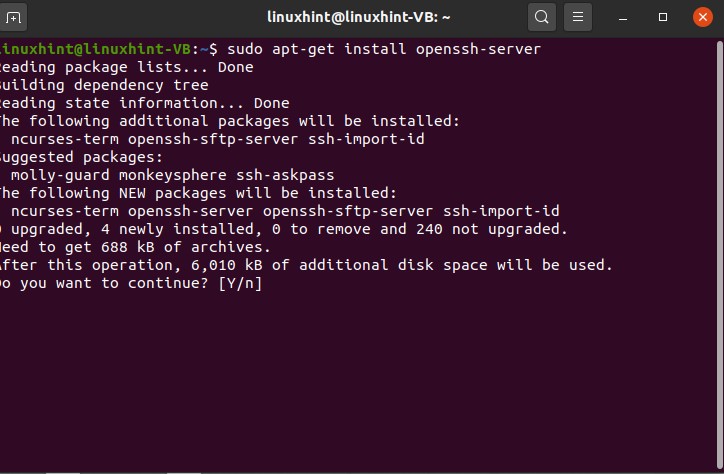
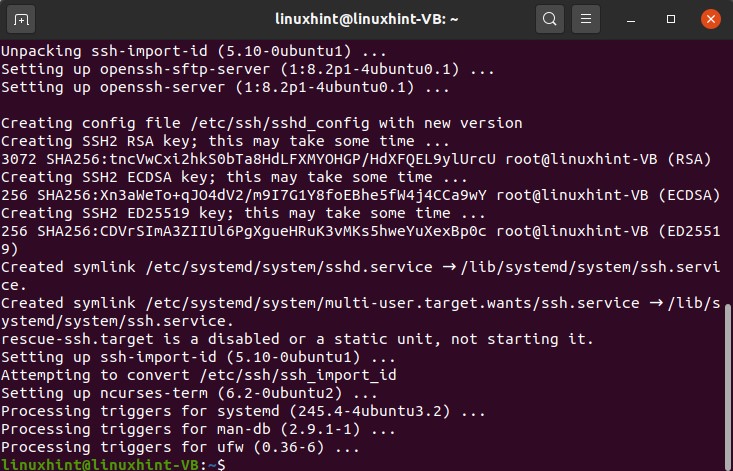
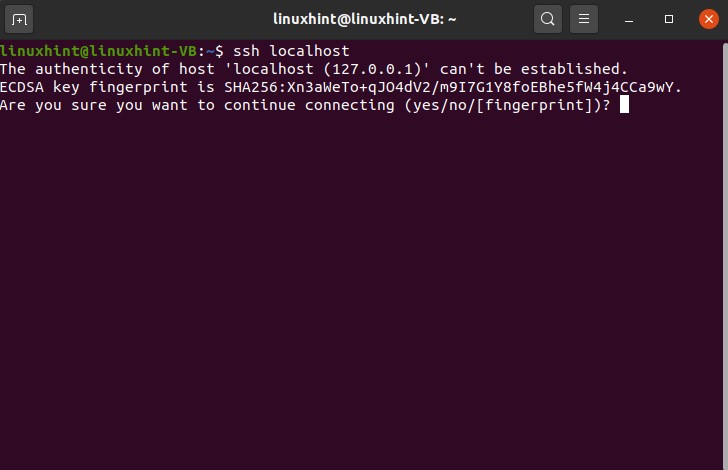

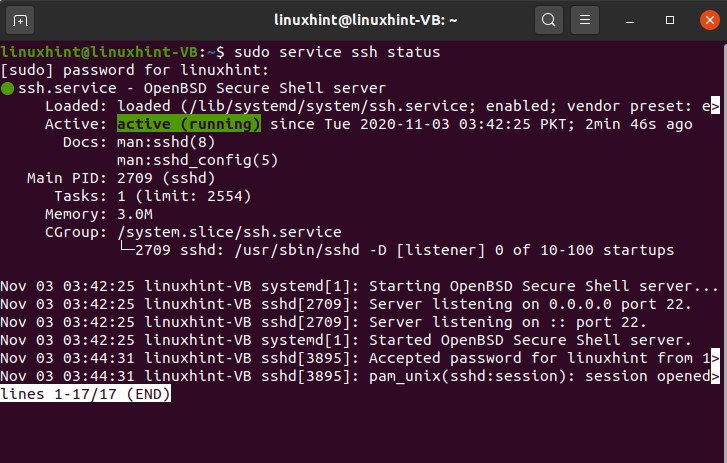
Now check the status of the SSH service by using the following command.
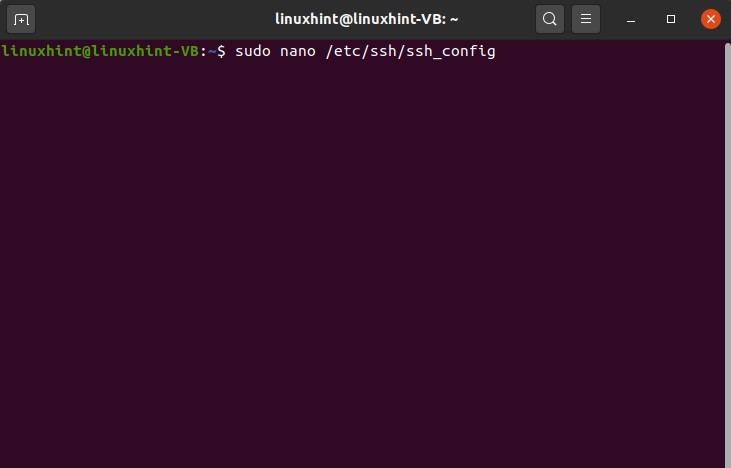
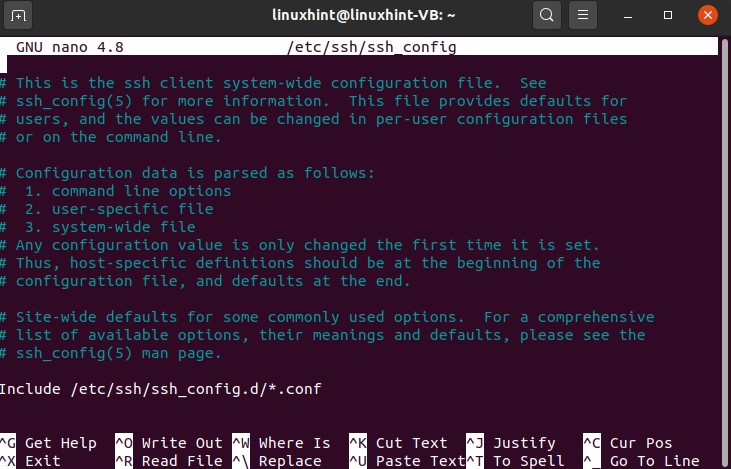
You can also make a different kind of changes in this whole procedure. You can edit the file for that.
43. Netcat
Netcat is a popular network security tool. It was introduced in 1995. Netcat runs as a client to initiate the connections with other computers, and it can also operate as a server or listener in some specific settings. Some common usages of Netcat are using it as a chat or messaging service or file transfers. Netcat is also used for port scanning purposes.
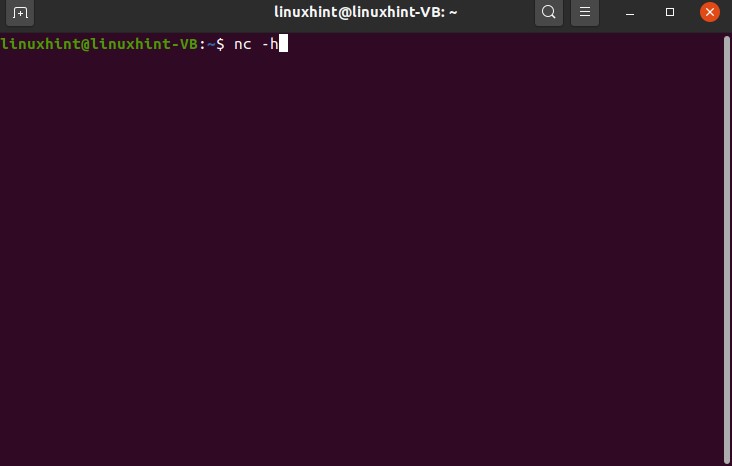
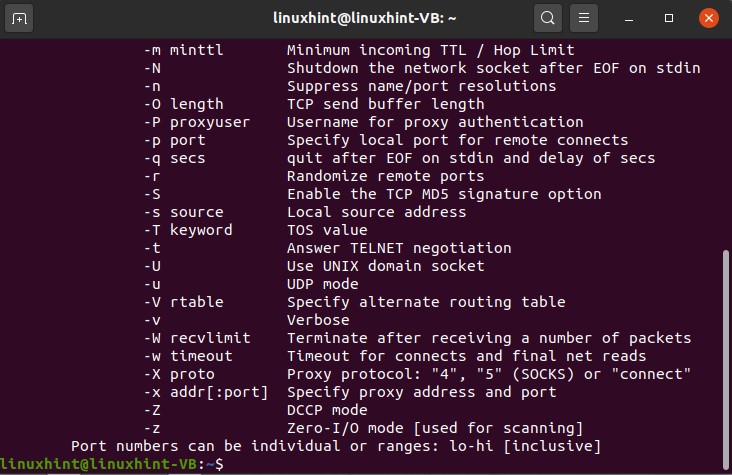
To know that your system has netcat or not, type the command given below in your terminal.
Next, you are going to learn how to create a chat service using Netcat on a terminal.
For this, you have to open two windows of the terminal. One is then considered ad server and the other window as a client. Use the following command in the server terminal for the establishment of a connection.
Here 23 is the port number. At the client-side, execute the following command.
And here we are with our chat service.


44. Installing Apache, MySQL, Php
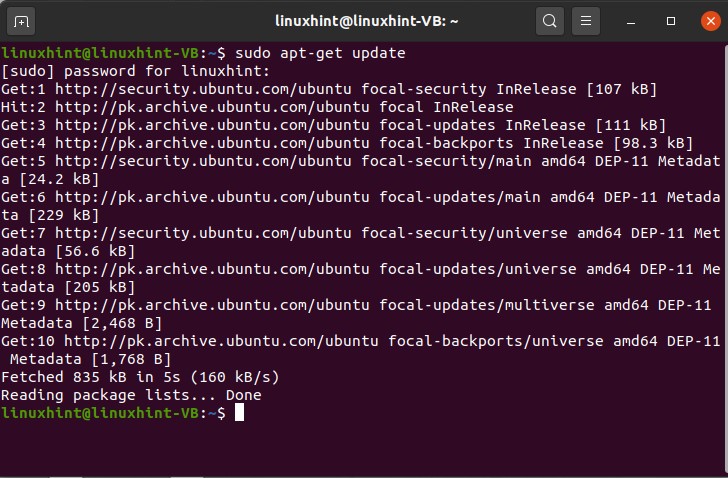
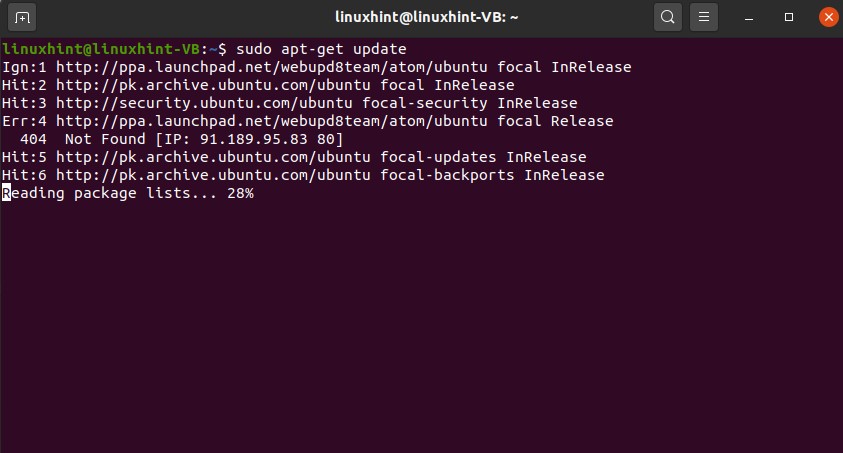
First of all, we are going to install Apache, but before that, update your repository
After updating the repository, install apache2 on your system.
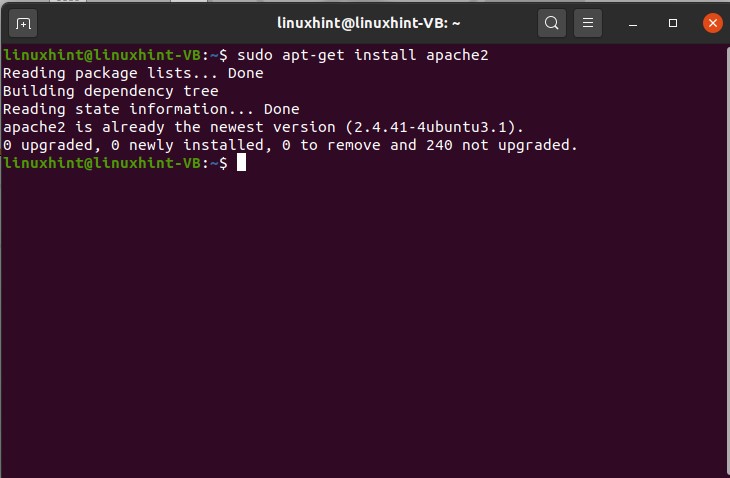
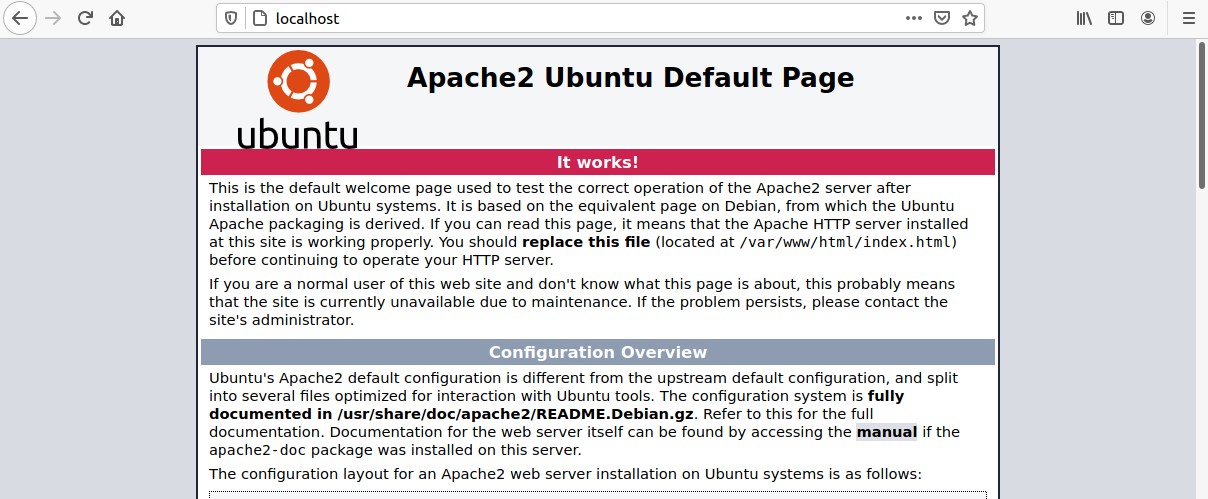
You can confirm its existence by checking the system services and by typing localhost in your web browser.
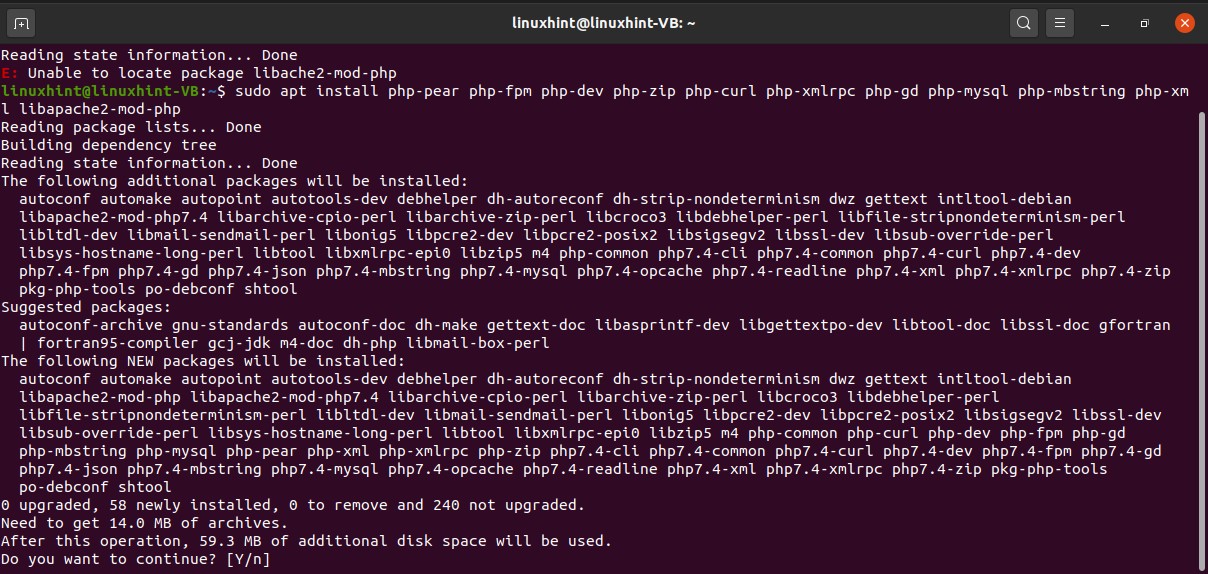
The next package is the PHP, so you have to write the following command on your terminal.
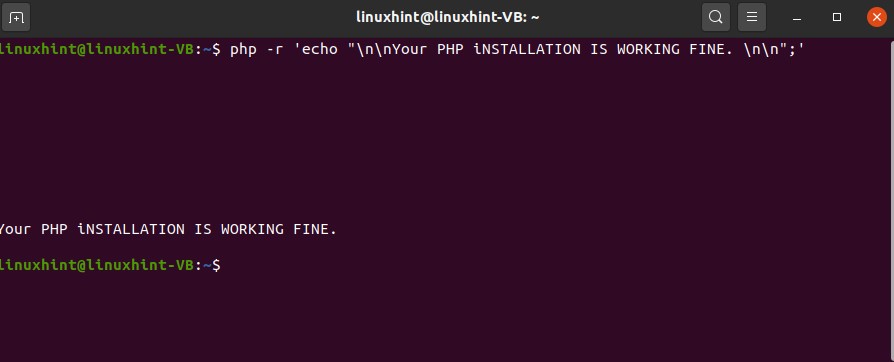
Now, test the terminal by executing the following command.

Execute the following command for the installation of MySQL.
After that, run some test commands on this MySQL terminal for testing.
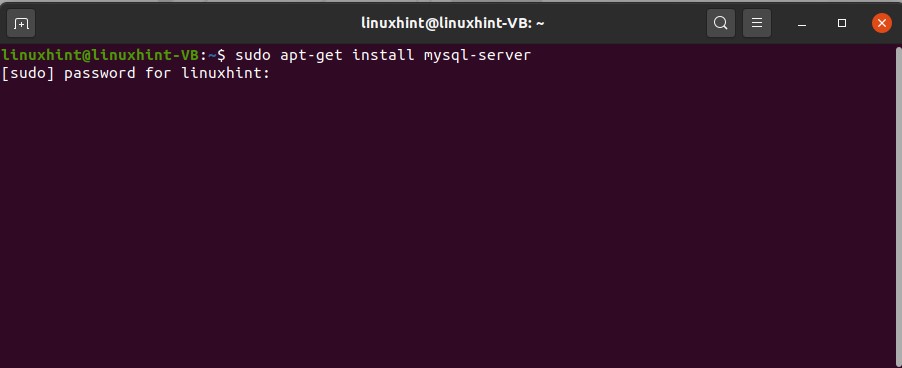
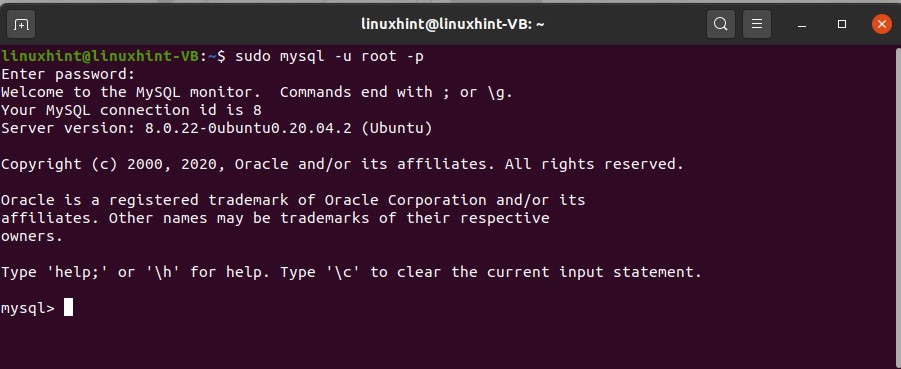
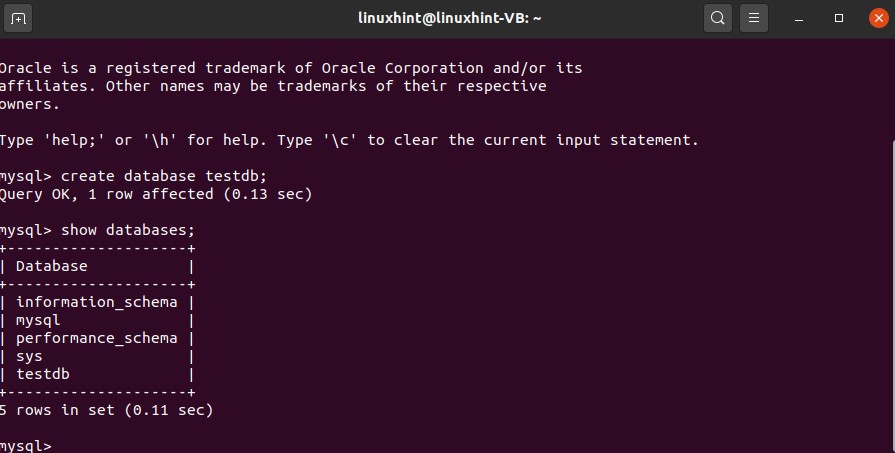
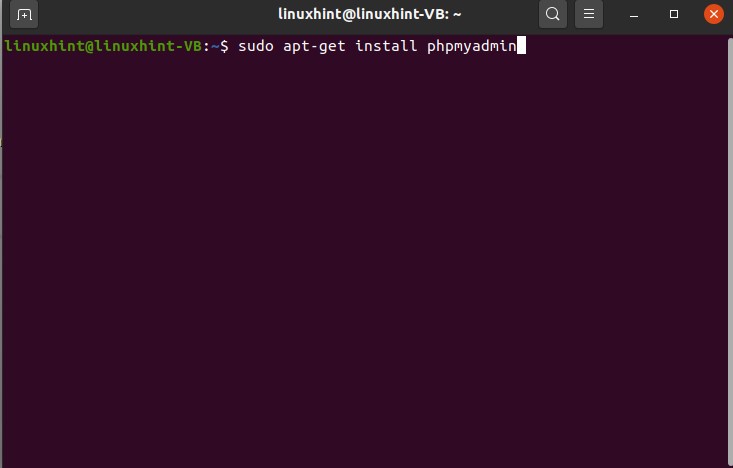
To install PHPMyAdmin, follow these steps:

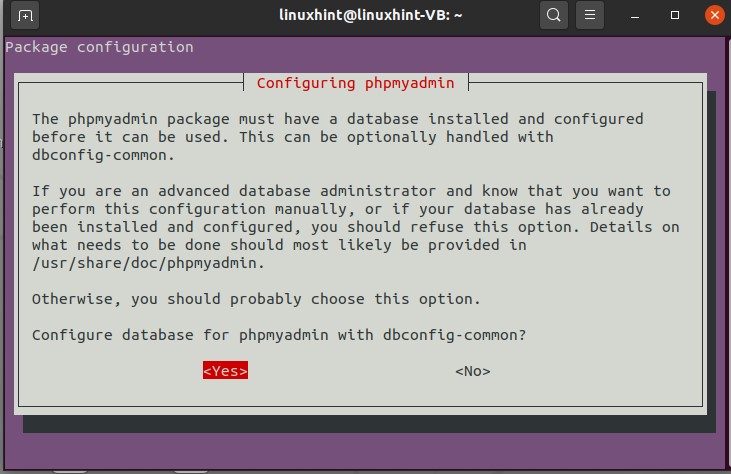
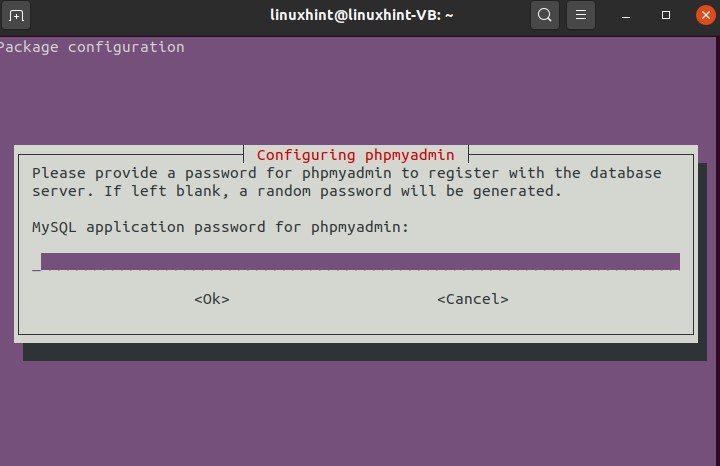

45. Best youtube editors
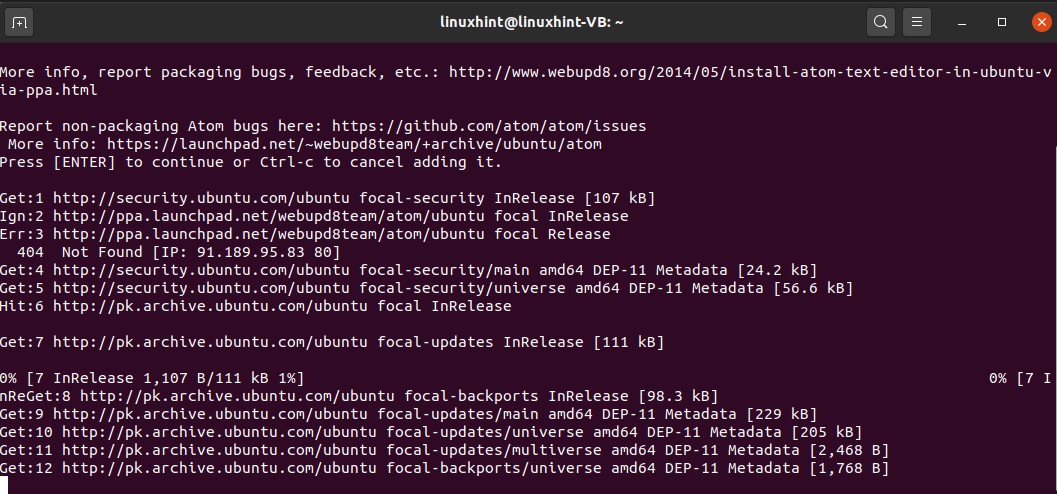
We have plenty of editors that we can install, which are best. The first one that we are going to recommend is ‘Sublime text’; then, we have ‘brackets,’ and the one you are going to install on Ubuntu is named ‘Atom’.
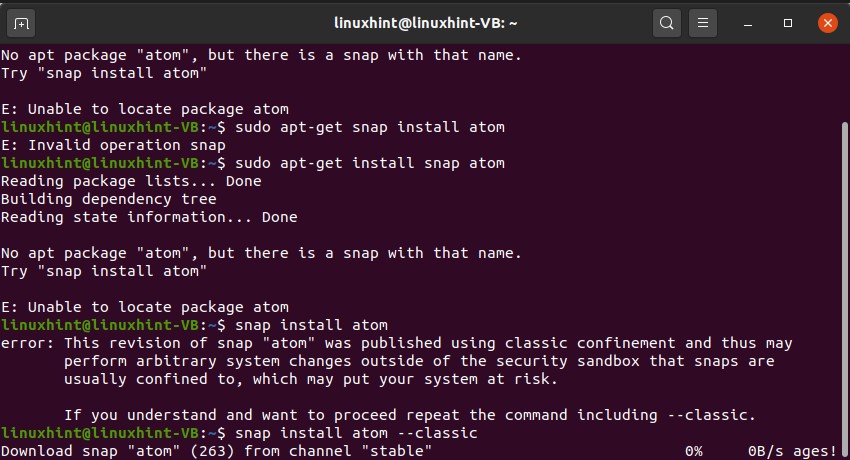

You can open it up, and then you can open all sorts of reading web files JS files, HTML files, CSS, or PHP files, whatever files related to the web development sort of thing.
46. Bash script
Open up your terminal by pressing ‘CTRL+ALT+T’. In this window, you can write and execute commands, and you will also get the instant output for that too. Below is a simple example is given for a better understanding of a bash script.
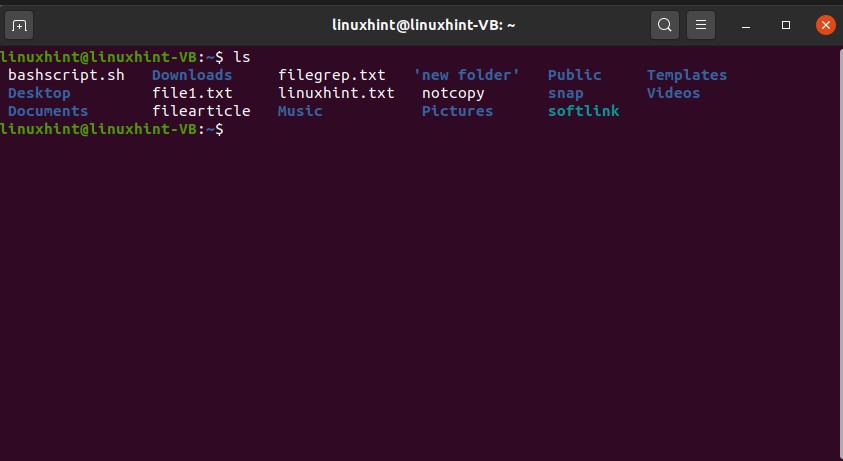
In step 1, you can view the list of files in your current working directory. Execute the ‘ls’ command for this purpose.
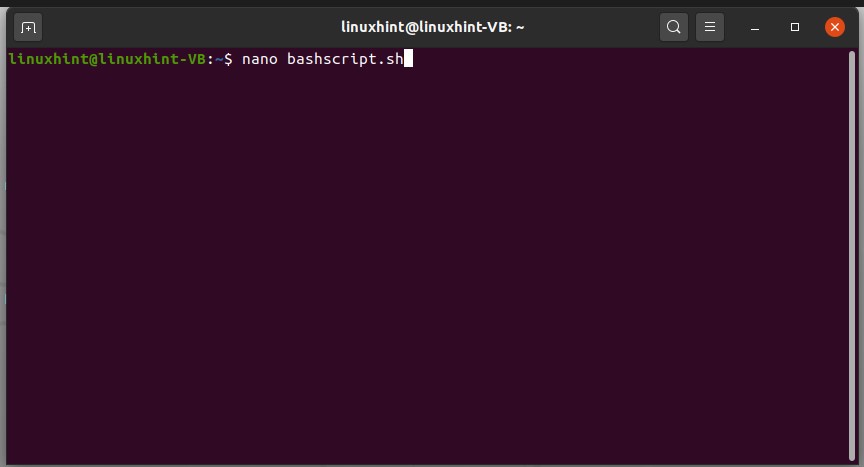
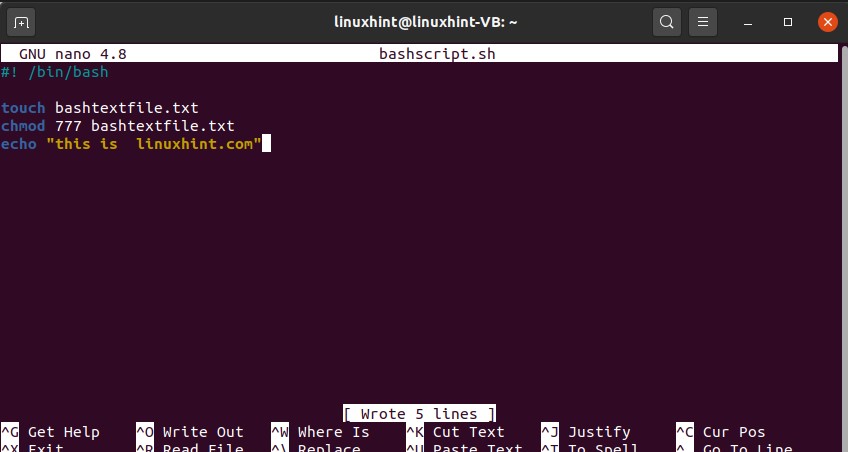
Now, let’s create and edit a bash script file through the terminal. For that, write the following ‘nano’ command in your terminal.

touch bashtextfile.txt
chmod 777 bashtextfile.txt
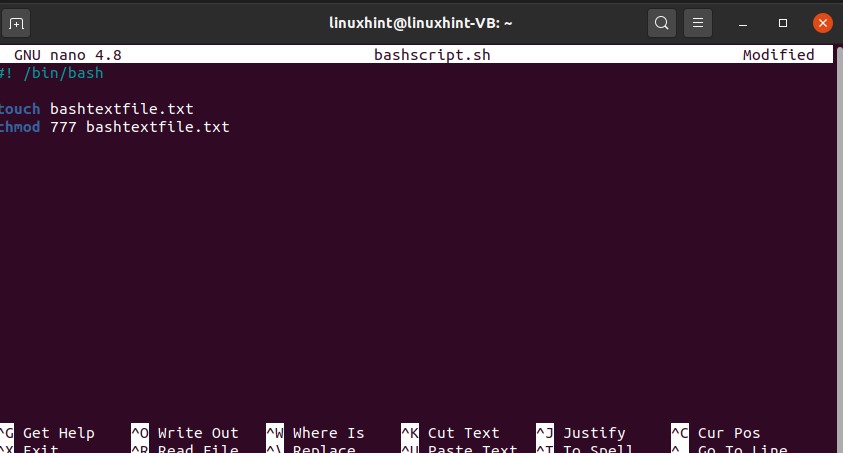
Now let’s create another file using this bash script. You can use the ‘touch’ command for creating the file and ‘chmod’ for changing the file privileges.
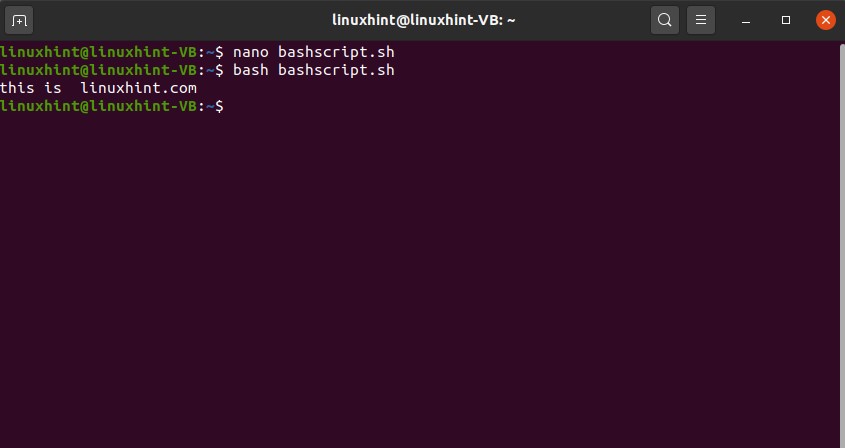
Write out the content using ‘ctrl+o’ and exit this window. Now execute ‘bashscript.sh’ and list the files to see if the ‘bashtextfile.txt’ is created or not.

The ‘bashscript.sh’ is not executable yet. Change the file permissions of this file by the ‘chmod’ command.
‘775’ is the file privileges given to the owner, groups, and public. File privileges are already well explained in the previous topic.

You can also write some statements using the ‘echo’ command.
touch bashtextfile.txt
chmod 777 bashtextfile.txt
echo “this is linuxhint.com”
47. Python scripts
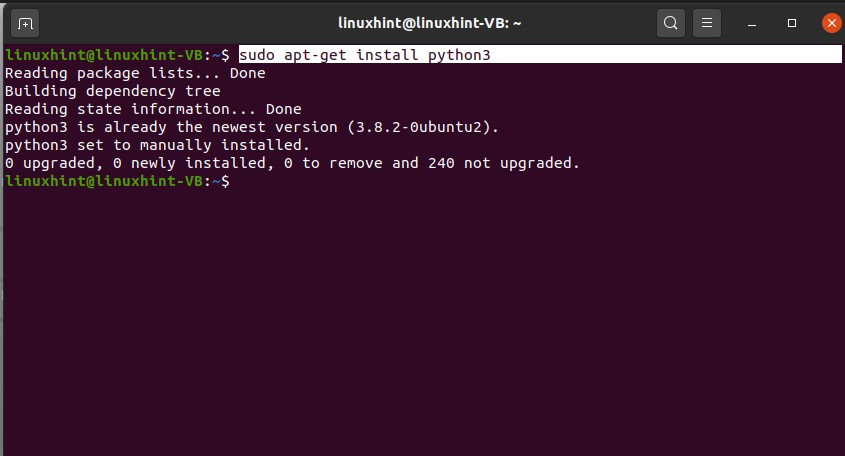
To work with python scripts, First of all, install python3 in your system using the terminal.
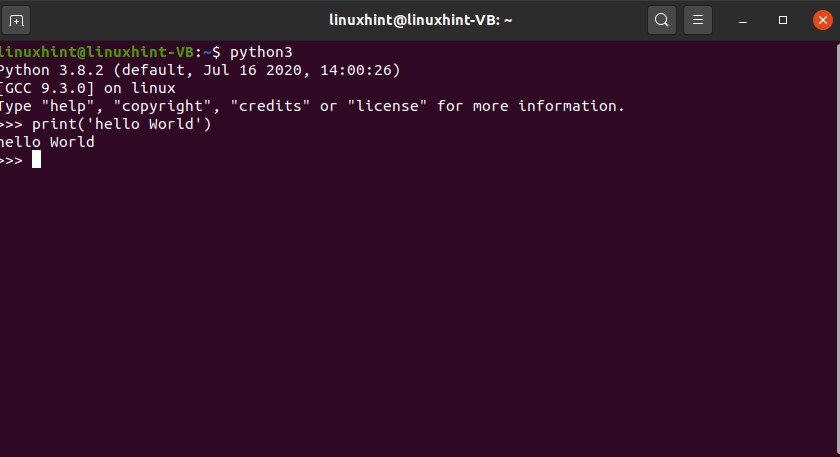
Follow the installation procedure and install it. After the successful installation of python, test it on the terminal
Write some python commands to see the results.

There are other methods of running python using the terminal, which is considered to be the conventional one. First, create a file using the ‘.py’ extension and write all of your python code you want to execute and save the file. To execute this file, simply write the following command in the terminal, and you will get your desired results in seconds.

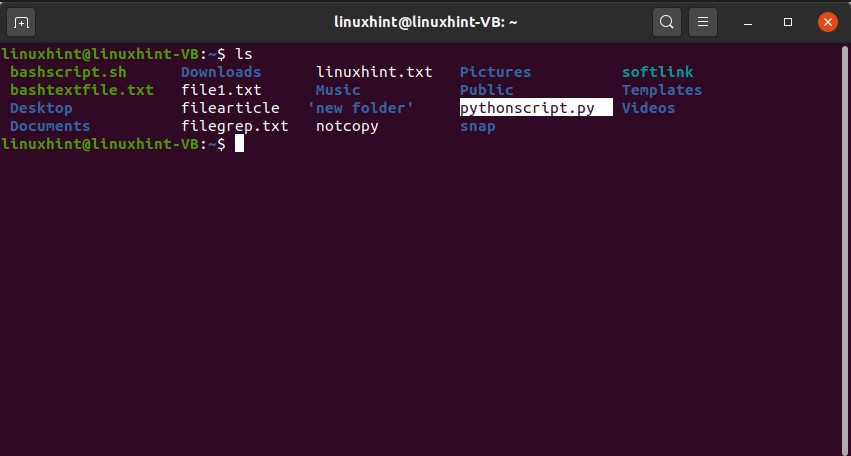

48. C programs
To work with ‘C programs’ using terminal, first of all, you should know whether ‘gcc’ is installed on your system or not and what is the version of ‘gcc’. To know this thing, write the following command in the terminal.

Now install the ‘build-essential’ package in your system.

Create a ‘c’ file using the touch command.
List the files to check its existence.

Write the program in this ‘hello.c’ file for which you want to get the output.
int main()
{
printf(“hello World”);
return 0;
}

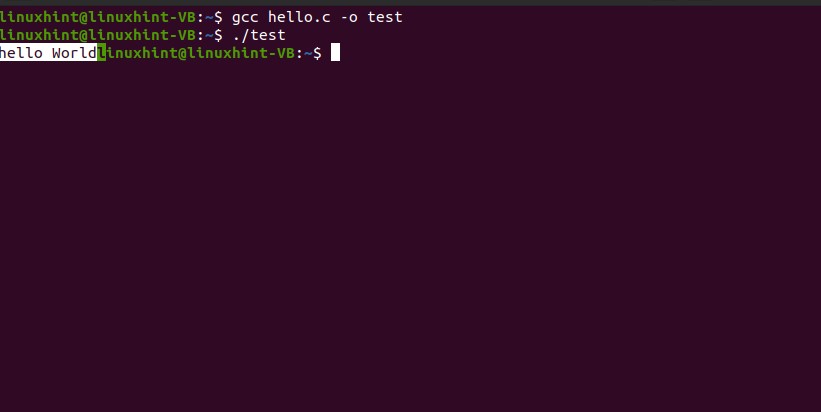
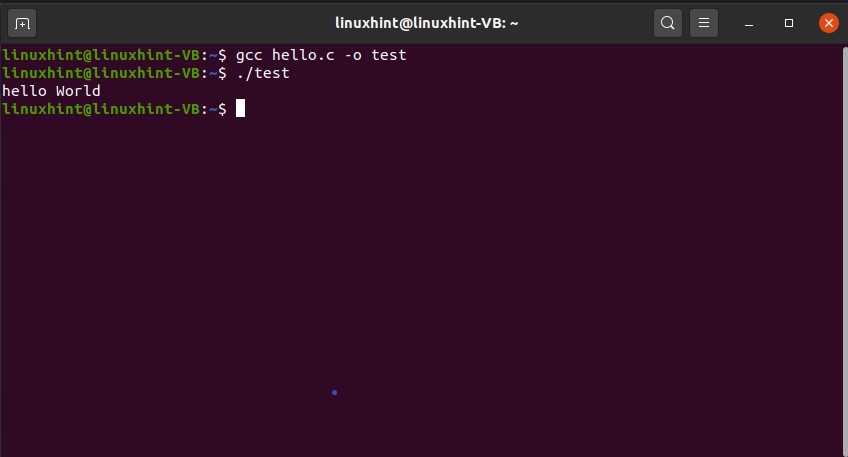
After that, execute the file on the terminal, using the following command.
Now see the desired result.
Watch FULL VIDEO Course of 4 HOURS:
The following topics of bash scripting are covered in this article:
- Hello Bash Scripting
- Redirect to File
- Comments
- Conditional Statements
- Loops
- Script Input
- Script Output
- Sending output from one script to another
- Strings Processing
- Numbers and Arithmetic
- Declare Command
- Arrays
- Functions
- Files and Directories
- Sending Email via Script
- Curl
- Professional Menus
- Wait for a File system using inotify
- Introduction to grep
- Introduction to awk
- Introduction to sed
- Debugging Bash Scripts
1. Hello Bash Scripting
In this topic, you will learn about the basics of Bash scripting and how you can create a file for writing the script to print ‘Hello’ by using bash scripting. After that, you know how to allow the file to become executable.
Press ‘CTRL+ALT+T’ to open up the terminal or you can search the terminal manually. Type the following command in the terminal
Running the above ‘cat’ command gives the following output.
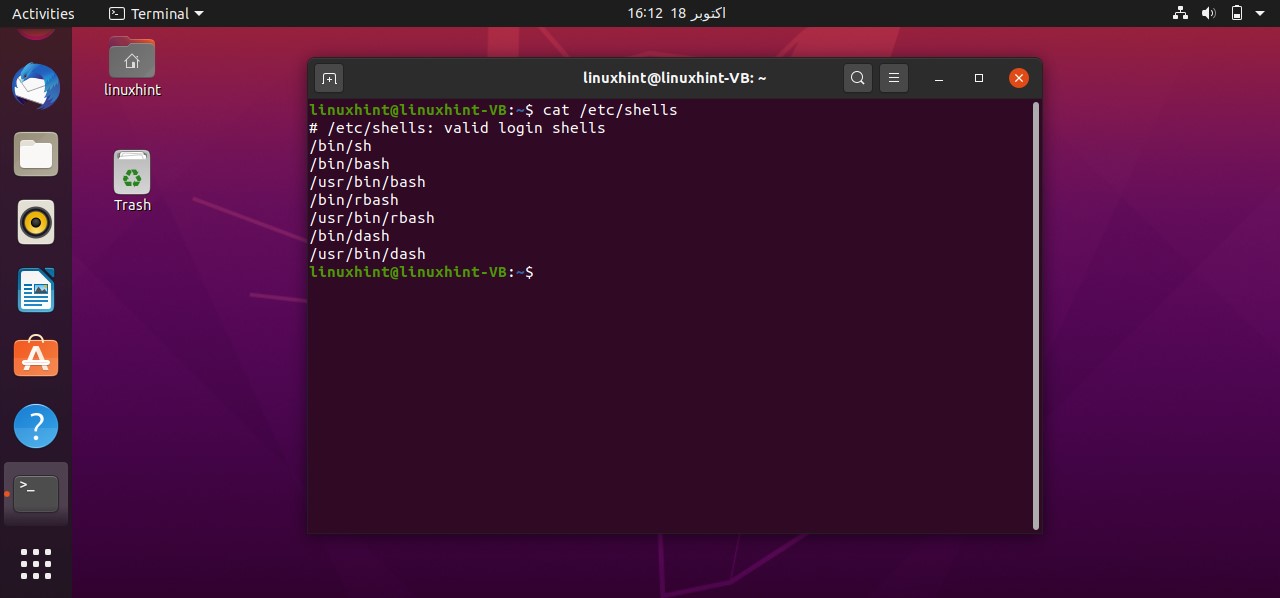
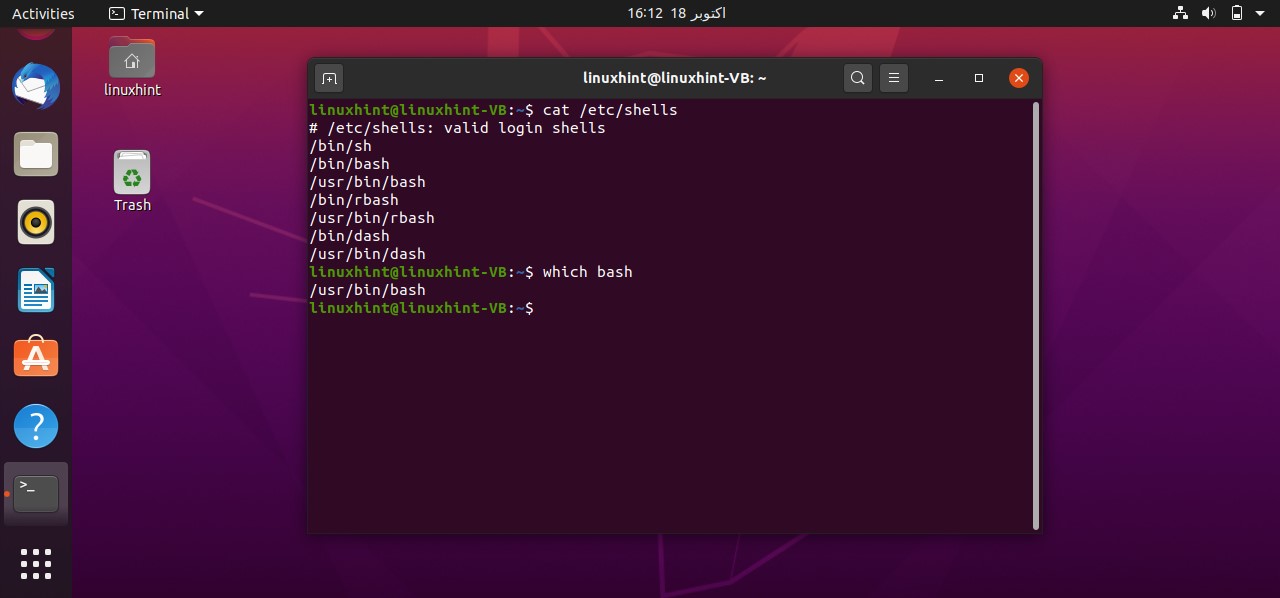
This command shows all the shells available on your system and you can use any of them. For this task, you should check whether you have a bash shell in your system or not. To know the path of the bash, you have to write the command ‘which bash’ in the terminal that gives the path of the shell. This path should be written in every bash script for its execution.
Now open the terminal from the Desktop. You can do it manually by going to the desktop and then by selecting the option of ‘open in terminal’ or by using the command ’cd Desktop/’ in the current terminal. Create a script using the command ‘touch helloScript.sh’

Open the ‘helloScript.sh’ file and the following commands in the file.
echo "hello bash script"
Save the file, go back to the terminal, and execute the ‘ls’ command to confirm your file existence. You can also use the ‘ls -al’ to get the details about your file, which results in the following:
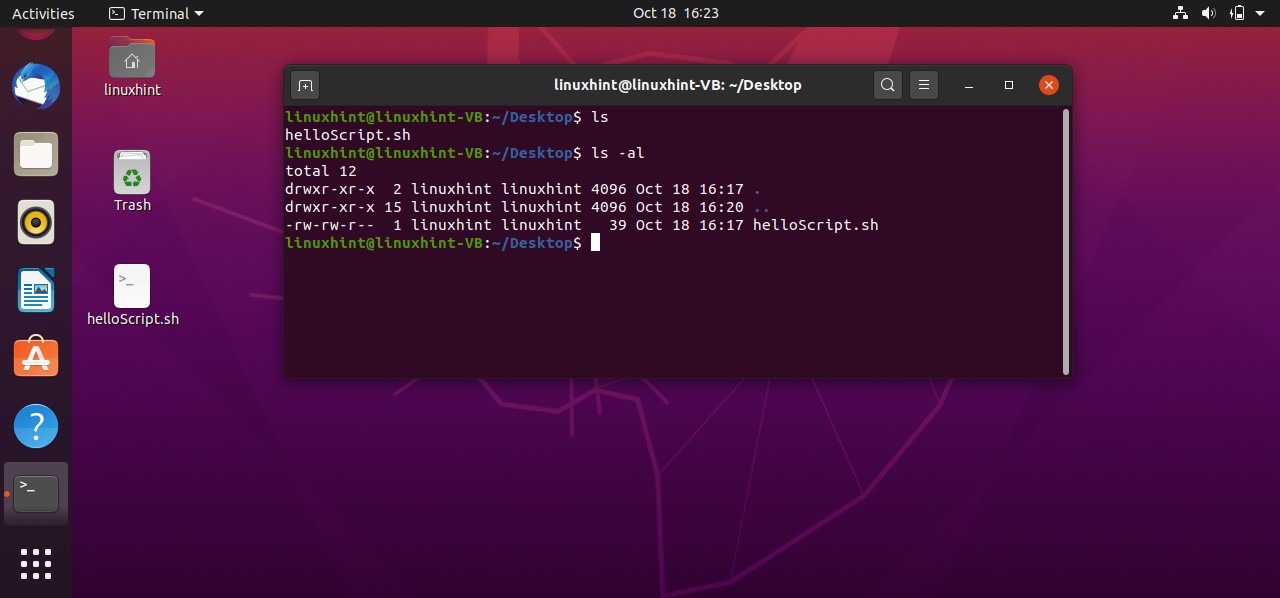
It is clear from the output that the file is not executable yet. ‘rw-rw-r–’ shows that the Owner of the file have the read and write permission related to the file, others Groups also have the same permissions, and the public have the only the permission to read the file. To make this script executable you have to run the following command in your terminal.
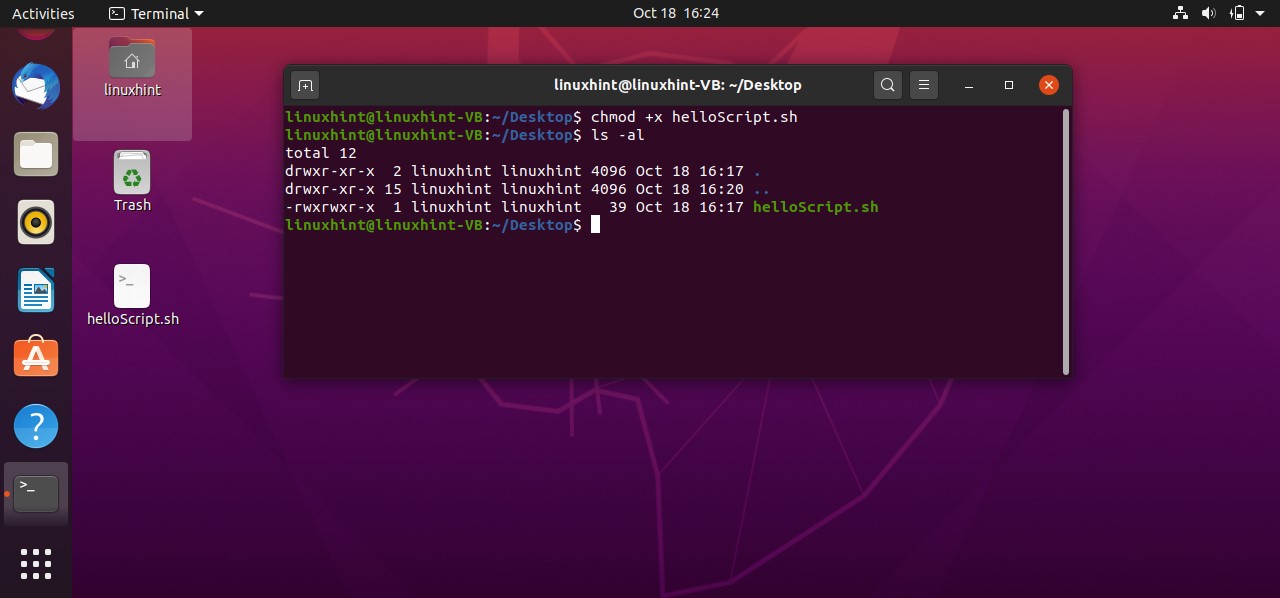
Then use the ‘ls -al’ command to check ‘helloScript.sh’ file permission, which should give you the following output.
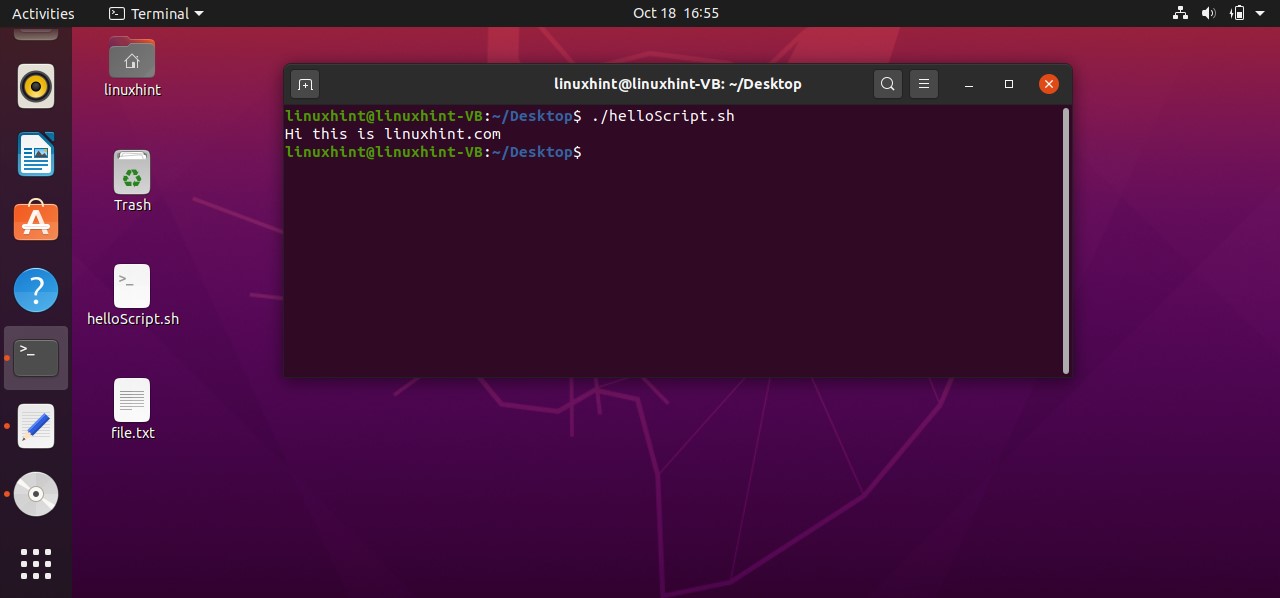
Now execute the file using the command‘./helloScript.sh’ in the terminal. For changing the file content, you can go back to the file. Edit the content given in the ‘echo’ command and then execute the file again. It will display the desired result hopefully.
2. Redirect to File
In this topic, you will learn how to capture the output from the shell or the output of a file and send it to another file. For that, you have to add the following command in your ‘helloScript.sh’
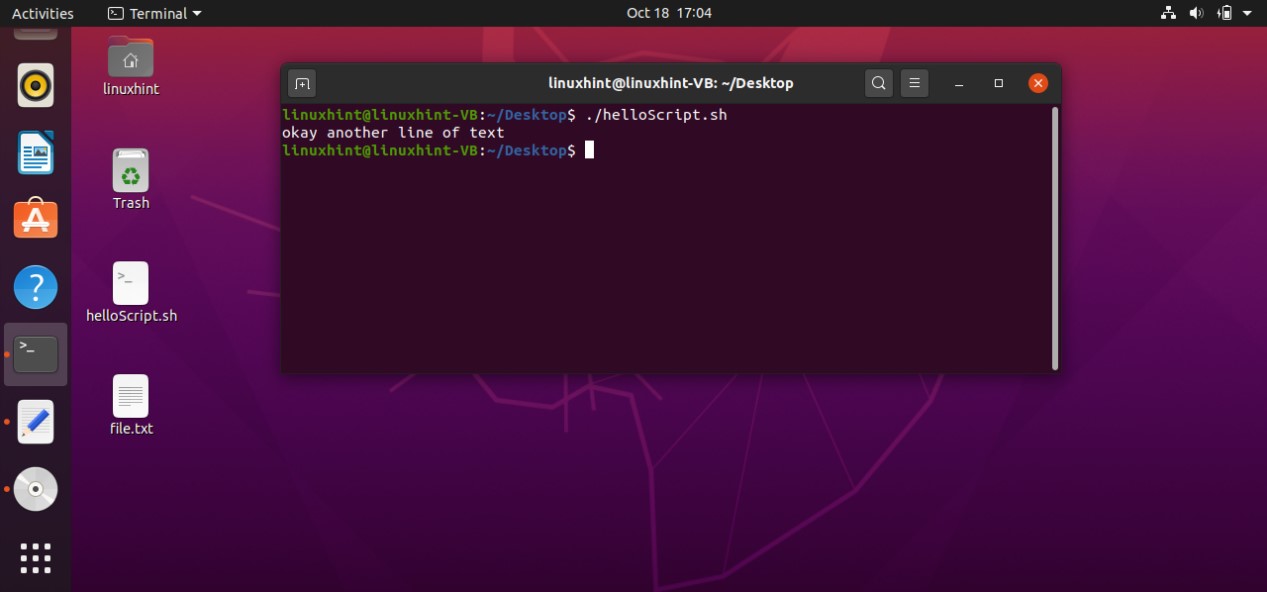
Save the file and go back to the terminal and run your script by the command ‘./helloScript.sh’. It will show you the following output. Press ‘ls -al’ to confirm the existence of a new file.

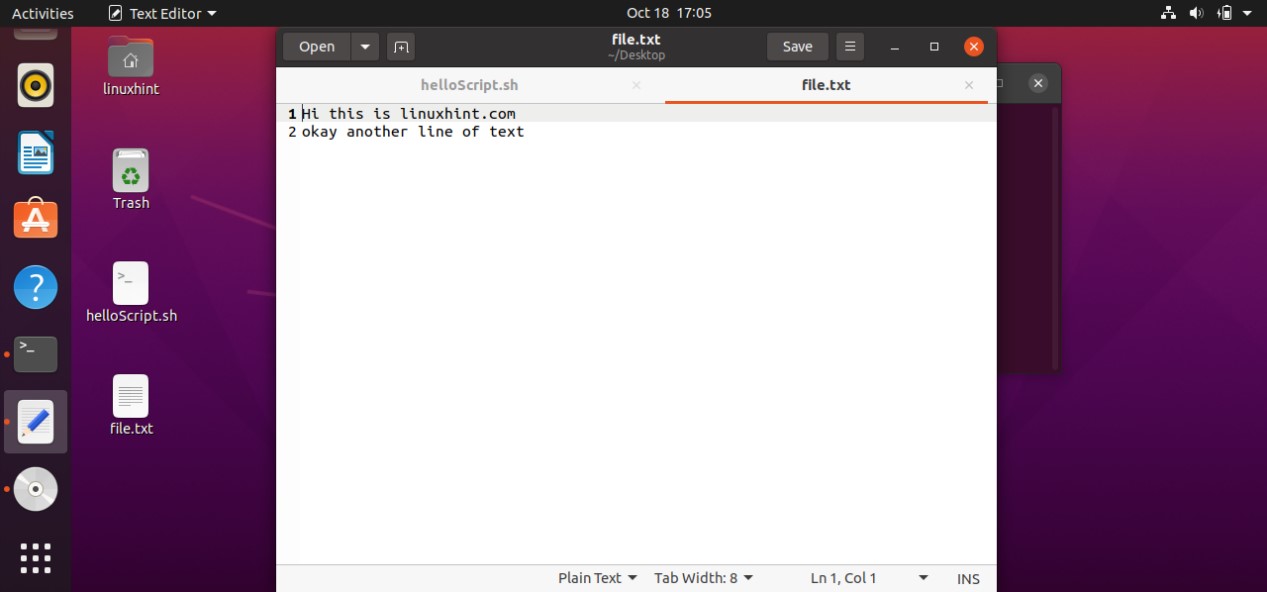
You can also take the file from the shell and save it into a file. For that, you have to write the script ‘cat > file.txt’. Save it and run the script. Now whatever you will write in this shell will be stored in the ‘file.txt’

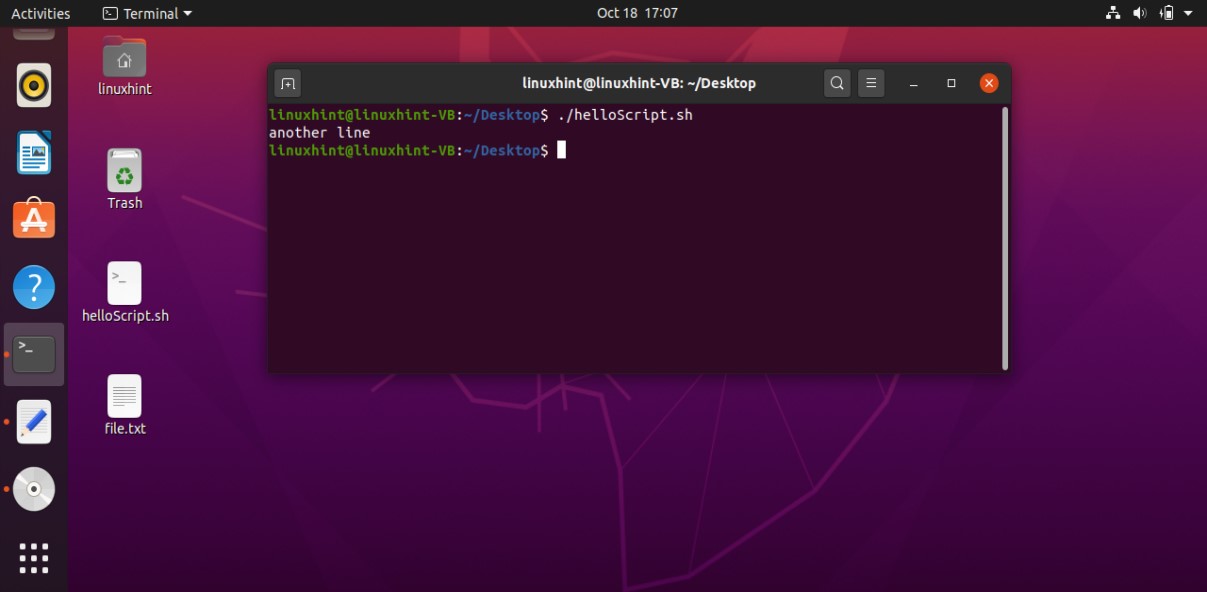
And then come out of this process by pressing ‘CTRL+D’. The script ‘cat > file.txt’ will replace the text with whatever you write in the terminal. To create a script that can append the content of ‘file.txt’ you have to write ‘cat >> file.txt’ in your script. Save the file, run the script by the command ‘./helloscript.sh’ in the terminal. Now, anything you will write in the terminal will be added to the file along with the text the file already has.

3. Comments
Comments have no value in the script. In the script, if you write comments it does nothing. It explains the code to the current programmer which was written earlier. In the topic, you will learn these three things.
- One-line Comments
- Multi-line Comments
- HereDoc Delimeter
For a One-line comment, you can use ‘#’ sign before the comment statement. You can write the following code in your ‘helloScript.sh’.
#this is a cat command
cat>> file.txt
While programming, you may have multiple lines of code and for that case, you cannot simply use these one-line comments line by line. This will be the most time-consuming process. To solve this problem, you can prefer the other method of commenting, which is a Multi-line comment. All you have to do this is to put ‘: ‘ ‘ before the beginning of the first comment and then write ‘ ‘ ‘after the last comment. You may look up to the following script for a better understanding.
: ‘
This is the segment of multi-line comments
Through this script, you will learn
How to do multi-line commenting
‘
cat>>file.txt
So these lines have no value. They just exist in your script for a better understanding of the code.
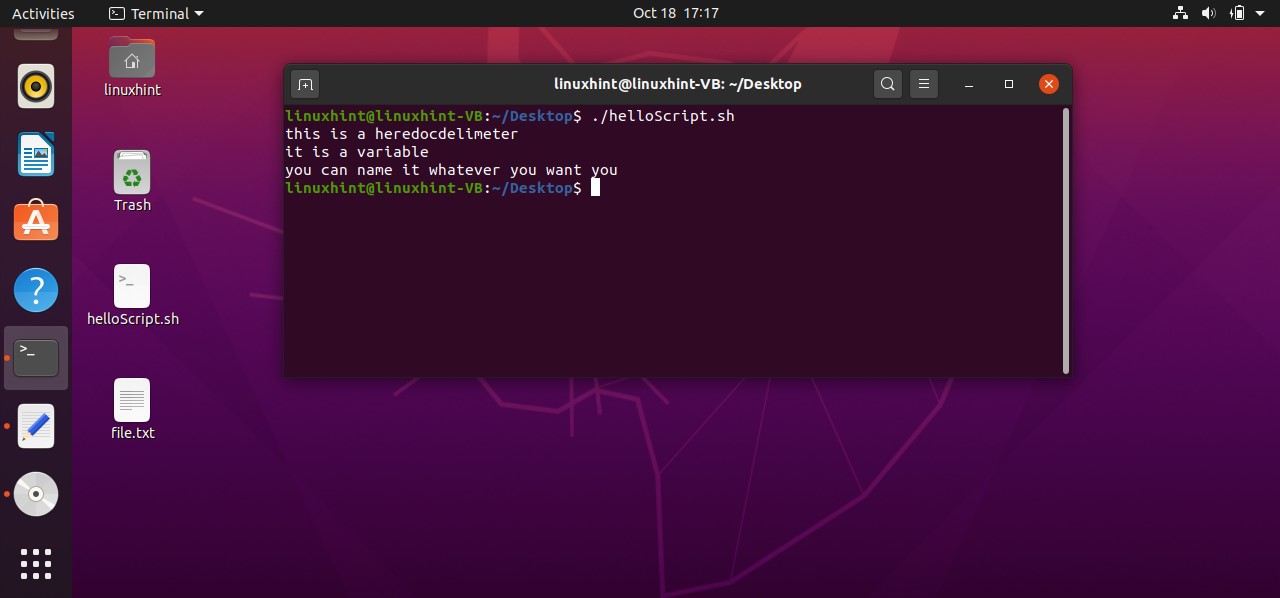
The next thing you are going to learn is hereDocDelimeter. Heredoc is a phenomenon, that helps you interact with the shell. The visible difference between the comments andhereDocDelimeter is that the lines under hereDocDelimeter are going to be displayed on the terminal and in the case of comments, the comments only exist within the script after their execution. The syntax of the hereDocDelimeter is given below.
cat << hereDocDelimeter
this is a hereDocDelimeter
It is a variable
You can name it whatever you want to
hereDocDelimeter
Execute the script and you will see the following output.
4. Conditional Statements
In this topic, you are going to know about if statements, if-else statements, if-else if statements, conditional statements using AND and OR operators.
If statement
To write the condition in if segment you have to give an extra within ‘[ ]’ before and after the condition. After that, state your condition code, go to the next line, write ‘then’, and state the lines of code you want to execute if the condition is true. In the end, use ‘fi’ to close the if statement. Below is an example script code that comprehends the syntax of the if statement.
count=10
if [ $count -eq 10 ]
then
echo "the condition is true"
fi
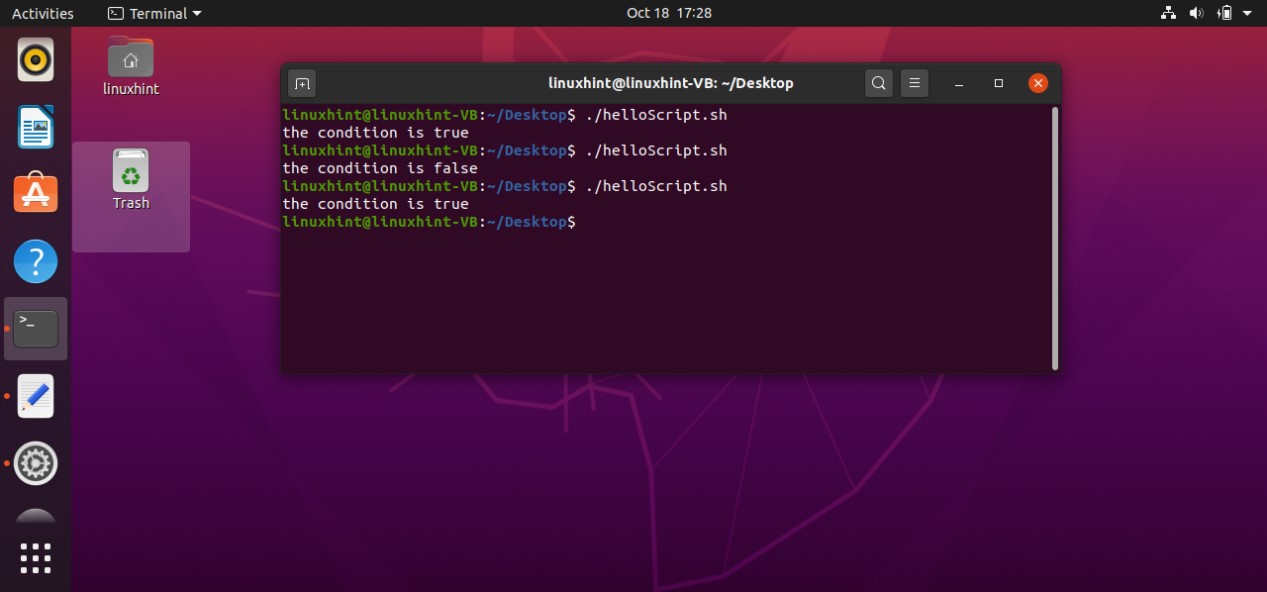
Firstly this script assigns a value of ‘10’ to a variable ‘count’. Coming towards the block of the ‘if’, ‘[ $count -eq 10 ]’ is a condition that checks whether the value of the count variable is ‘equals to’ 10 or not. If this condition becomes true, then the execution procedure will be moved towards the next statements. ‘then’ specify that if the condition is true, then execute the block of code written after me. At the end ‘fi’ is the keyword that shows the ending of this if-statement block. In this case, the condition is true, as the ‘$count’ is representing the value of the variable count which is 10. Condition is true, moving to ‘then’ keyword and printing ‘the condition is true’ on the terminal.

What if the condition is false? The program doesn’t know what to do because you don’t have an ‘else block’. In ‘else clock’ you can write the statements which are going to be executed when the condition is wrong. Here is the code you can write in your ‘helloScript.sh’ file to see how the else block works in your program.
count=11
if [ $count -eq 10 ]
then
echo "the condition is true"
else
echo "the condition is false"
fi
In this program, the ‘count’ variable is assigned with the value of 11. The program checks the ‘if statement’. As the condition in if block is not true, it will move towards the ‘else’ block ignoring the whole ‘then’ section. The terminal will show the statement that the condition is false.

There also exists another format for writing the condition. In this method all you have to do is to replace the ‘[ ]’ with ‘(( ))’ brackets and write the condition between them. Here is an example of this format.
count=10
if (( $count > 9 ))
then
echo "the condition is true"
else
echo "the condition is false"
fi
Executing the above code written in ‘helloScript.sh’ file will give you the following output.
If-else if statements
When you use an if-else if as a block of statements in your script, the program double-checks the conditions. Likewise, if you write the below example code in ‘helloScript.sh’, you will see that, the program first checks the ‘if’ condition. As the ‘count’ variable is assigned the value of ‘10’. In the first ‘if’ condition, the program makes sure that the ‘count’ has a value greater than 9 which is true. After that the statements written in the ‘if’ block will be executed and come out of it. For example, if we have a case in which the condition written in ‘elif’ is true, then the program will only execute the statements written in the ‘elif’ block and will ignore the ‘if’ and ‘else’ block of statements.
count=10
if (( $count > 9 ))
then
echo "the first condition is true"
elif (( $count <= 9 ))
then
echo "then second condition is true"
else
echo "the condition is false"
fi

AND operator
To use an ‘AND’ operator in your conditions you have to use the symbol ‘&&’ between your conditions to check both of them. For example, if you write the following code in your ‘helloScript.sh’ you will see that the program will check both conditions ‘[ “$age” -gt 18 ] && [ “$age” -lt 40 ]’ that if the age is greater than 18 AND the age is less than 40 which is false in your case. The program will neglect the statements written after ‘then’, and will move towards the ‘else’ block by printing “age is not correct’ on the terminal
age=10
if [ "$age" -gt 18 ] && [ "$age" -lt 40 ]
then
echo "age is correct"
else
echo "age is not correct"
fi
By executing the above code written in ‘helloScript.sh’, you will see the following output.
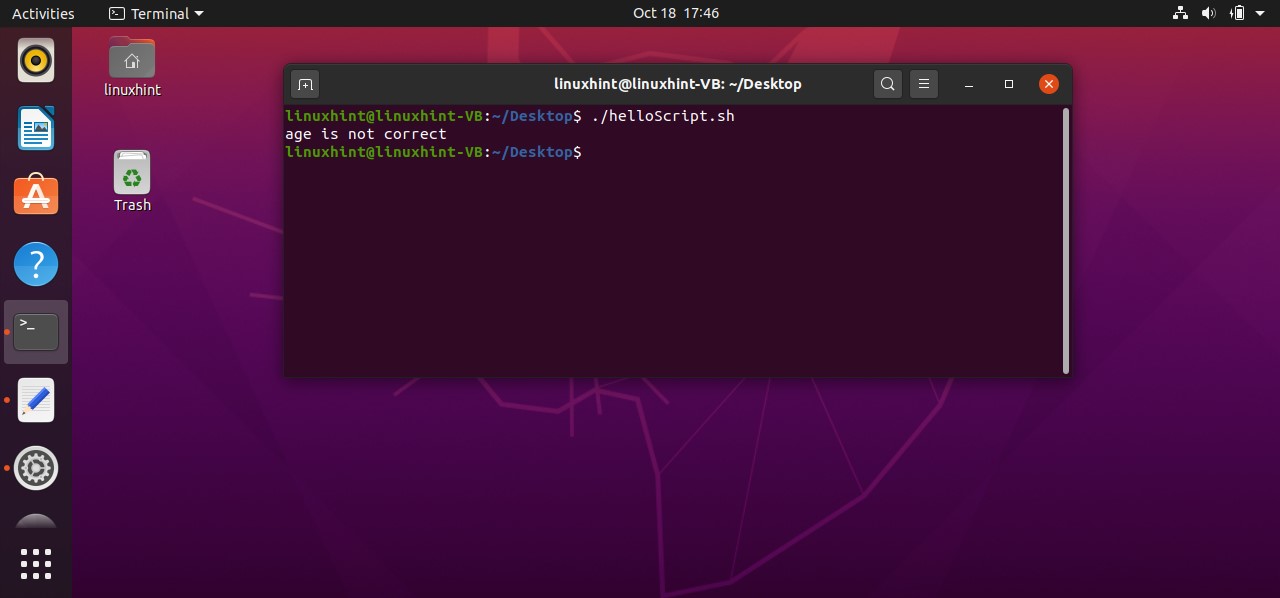
You may also write the condition in the following format.
age=30
if [[ "$age" -gt 18 && "$age" -lt 40 ]]
then
echo "age is correct"
else
echo "age is not correct"
fi
The condition is correct in this case, as the age is ‘30’. You will have the following output.
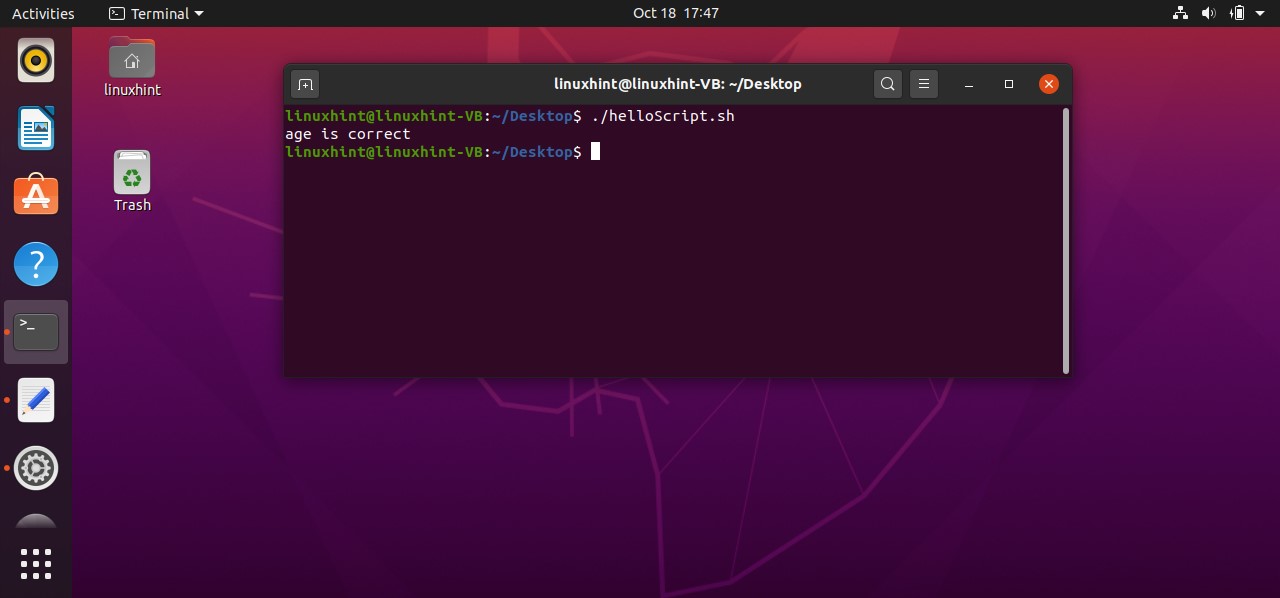
You can also use ‘-a’ in place of ‘&&’ to use the AND operator in your program’s conditions. It will work the same.
age=30
if [ "$age" -gt 18 -a "$age" -lt 40 ]
then
echo "age is correct"
else
echo "age is not correct"
fi
Save this code in your ‘helloScript.sh’ script and execute it from the terminal
OR operator
If you have two conditions and you want to execute the preceding statements if any of them or both of them are true, OR operators are used in these cases. ‘-o’ is used for representing OR operator. You can also use the ‘ || ’sign for it.
Write the following sample code in ‘helloScript.sh’ and execute it from the terminal to check its working.
age=30
if [ "$age" -gt 18 -o "$age" -lt 40 ]
then
echo "age is correct"
else
echo "age is not correct"
fi
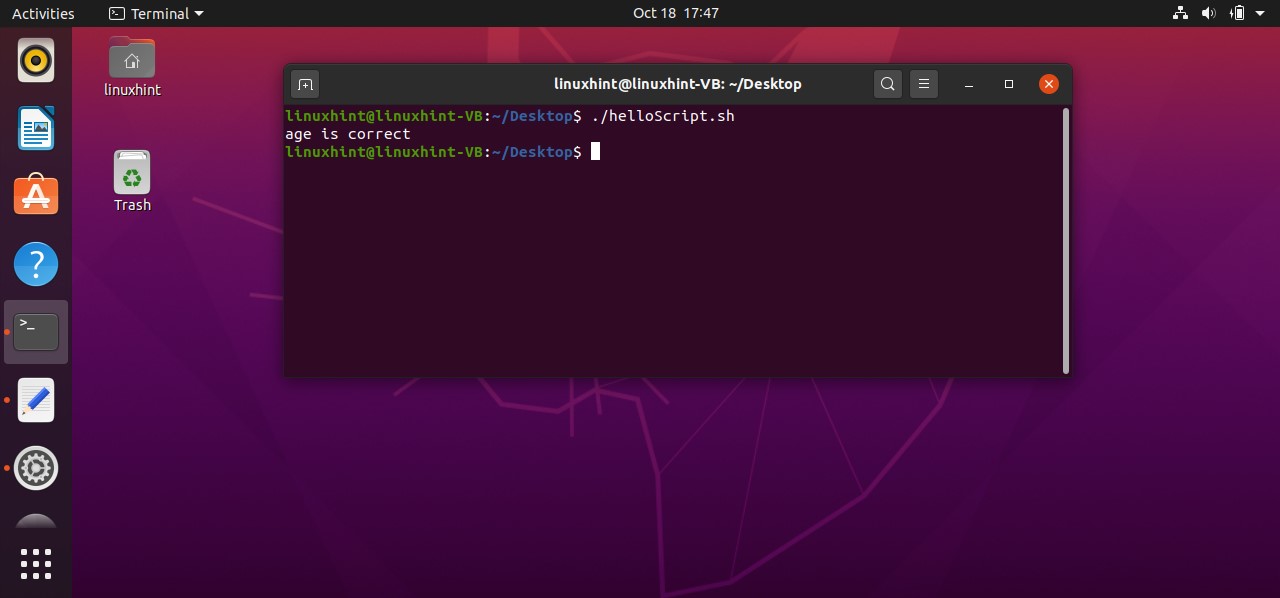
You can also try different conditions for a better understanding of the OR operator.
Some of the examples are given below. Save the script in ‘helloScript.sh’ and execute the file through the terminal by writing the command
age=30
if [ "$age" -lt 18 -o "$age" -lt 40 ]
then
echo "age is correct"
else
echo "age is not correct"
fi
age=30
if [ "$age" -lt 18 -o "$age" -gt 40 ]
then
echo "age is correct"
else
echo "age is not correct"
fi
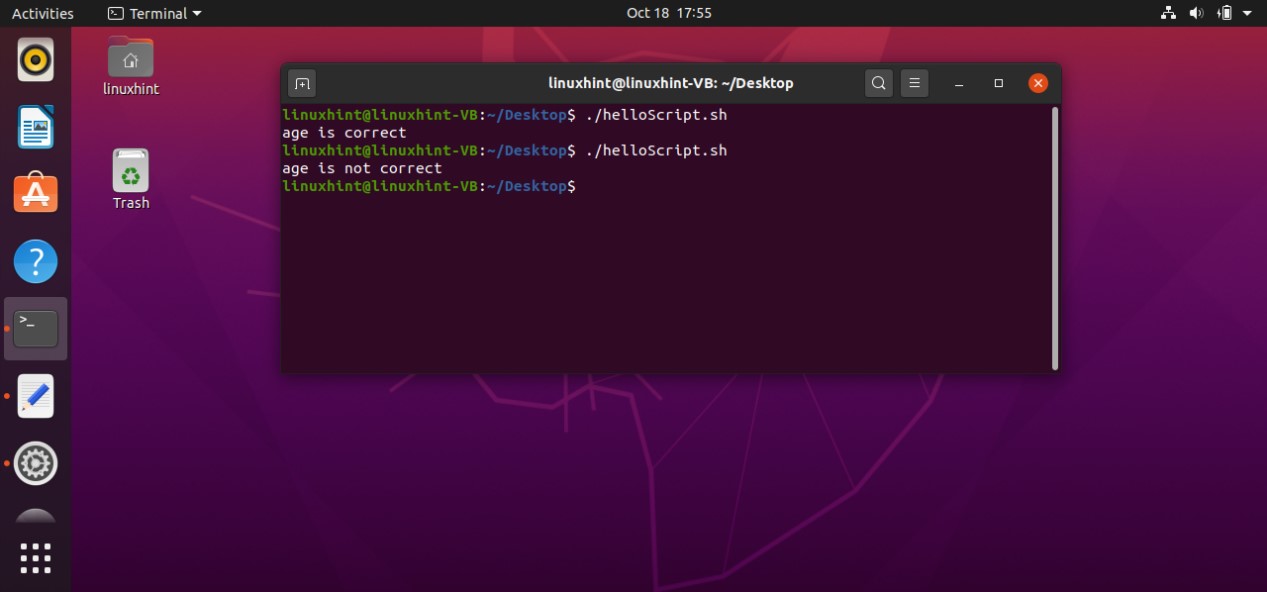
age=30
if [[ "$age" -lt 18 || "$age" -gt 40 ]]
then
echo "age is correct"
else
echo "age is not correct"
fi
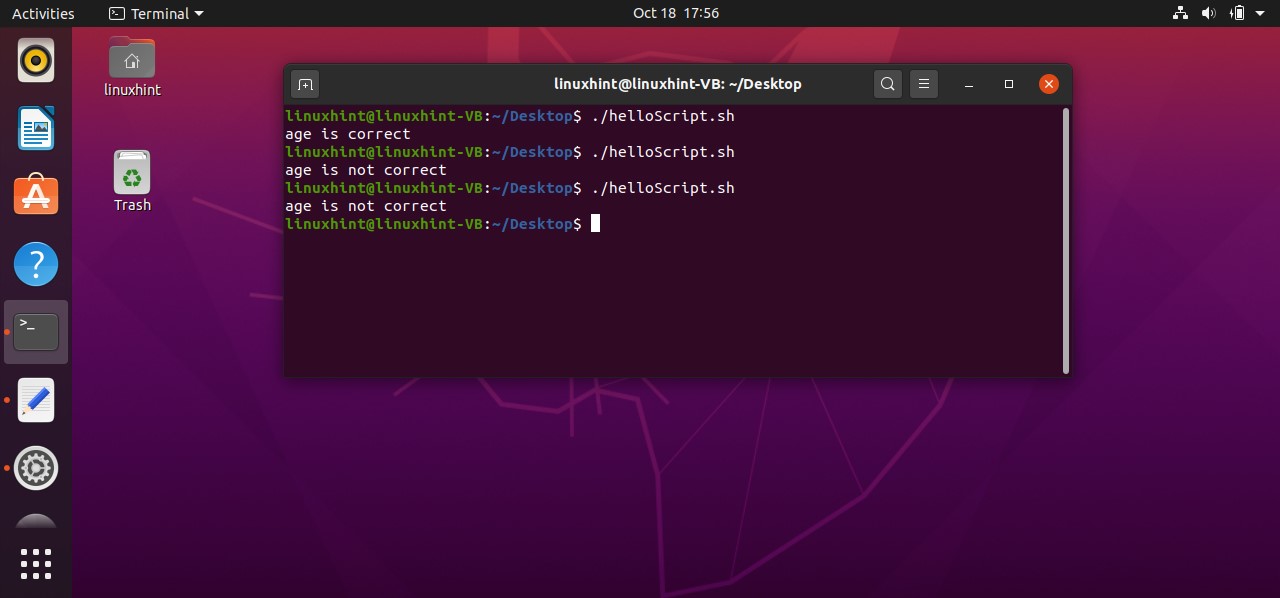
age=30
if [ "$age" -lt 18 ] || [ "$age" -gt 40 ]
then
echo "age is correct"
else
echo "age is not correct"
fi

5. Loops
In this topic, we will discuss
- While loops
- Until loops
- For loops
- Break and Continue statements
While loops:
While Loop executes the block of code (enclosed in do…done) when the condition is true and keeps executing that till the condition becomes false. Once the condition becomes false, the while loop is terminated. Go back to your script for writing the code has a loop in it. Use the keyword ‘while’ and after that write the condition to check. After that use the ‘do’ keyword, and then write a bunch of statements you want to execute if your program’s condition is true. You also have to write the increment status here as it let the loop to go on. Close the while loop by writing the keyword ‘done’. Save the script as ‘helloScript.sh’.
number=1
while [ $number -lt 10 ]
do
echo "$number"
number=$(( number+1 ))
done
Run the script using ‘$ ./helloScript.sh’ command in the terminal and you will see the following output on your terminal.
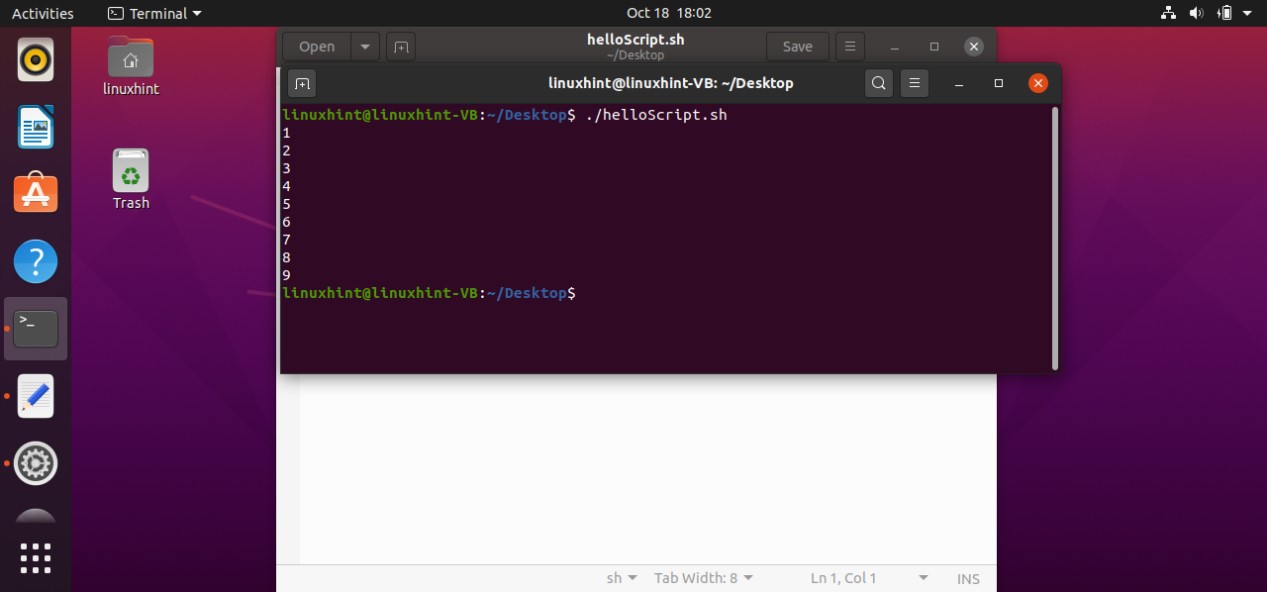
In the While loop, first of all, the condition is checked if it is true or not. In case the condition is false, it will come out of the loop and terminate the program. However, if the condition is true, the execution sequence will move toward the statement written after the keyword ‘do’. In your case, it will print the number due to the use of the ‘echo’ statement. Then you have to mention the increment statement that let the loop to loop itself. After incrementing the condition variable, It will again check the condition and move forward. When the condition becomes false it will come out of the loop and terminate the program.
number=1
while [ $number -le 10 ]
do
echo "$number"
number=$(( number+1 ))
done
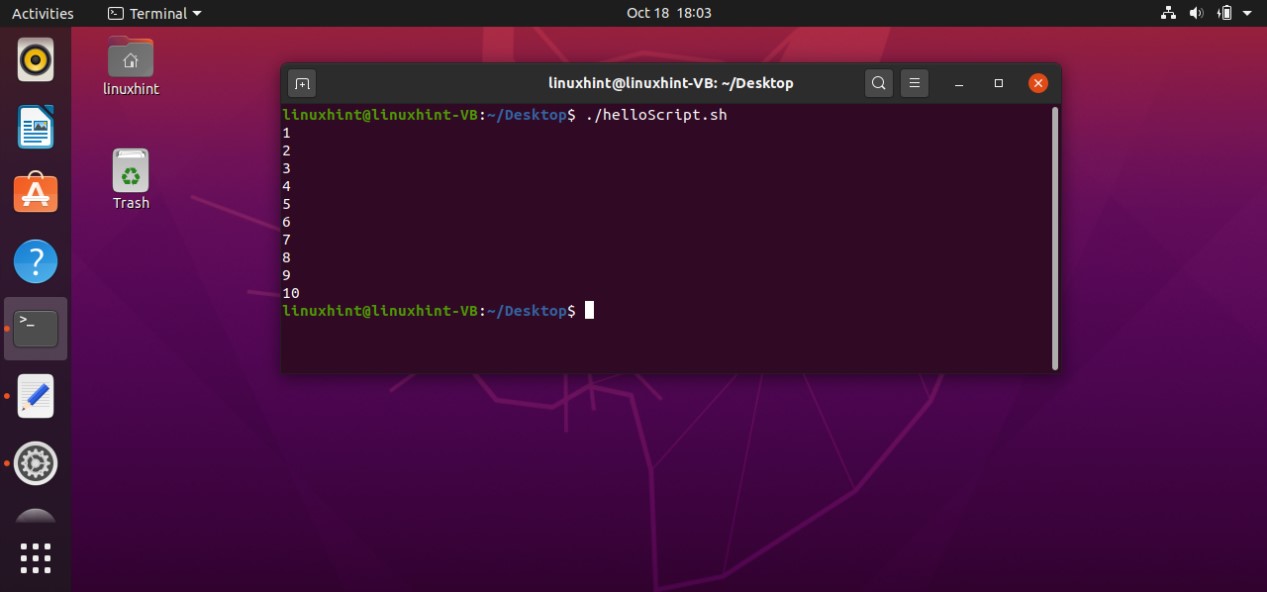
Until loops:
Until Loop executes the block of code (enclosed in do…done) when the condition is false and keep executing that till the condition becomes true. Once the condition becomes true, the until loop is terminated. The syntax of Until loops are almost the same as that of while loop except you have to use the word ‘until’ in place of ‘while’. In the example given below, a variable named ‘number’ is assigned a value of ‘1’. In this example, the loop will check the condition, if it is false it will move forward and print the value of the ‘number’ variable on the terminal. Next, we have the statement related to the increment of the ‘number’ variable. It will increment the value and will check the condition again. The value will be printed again and again until the ‘number’ variable values become 10. when the condition becomes false, the program will be terminated.
number=1
until [ $number -ge 10 ]
do
echo "$number"
number=$(( number+1 ))
done
Save the above code in your ‘helloScript.sh’ file. Run it using the command
You will see the following output.
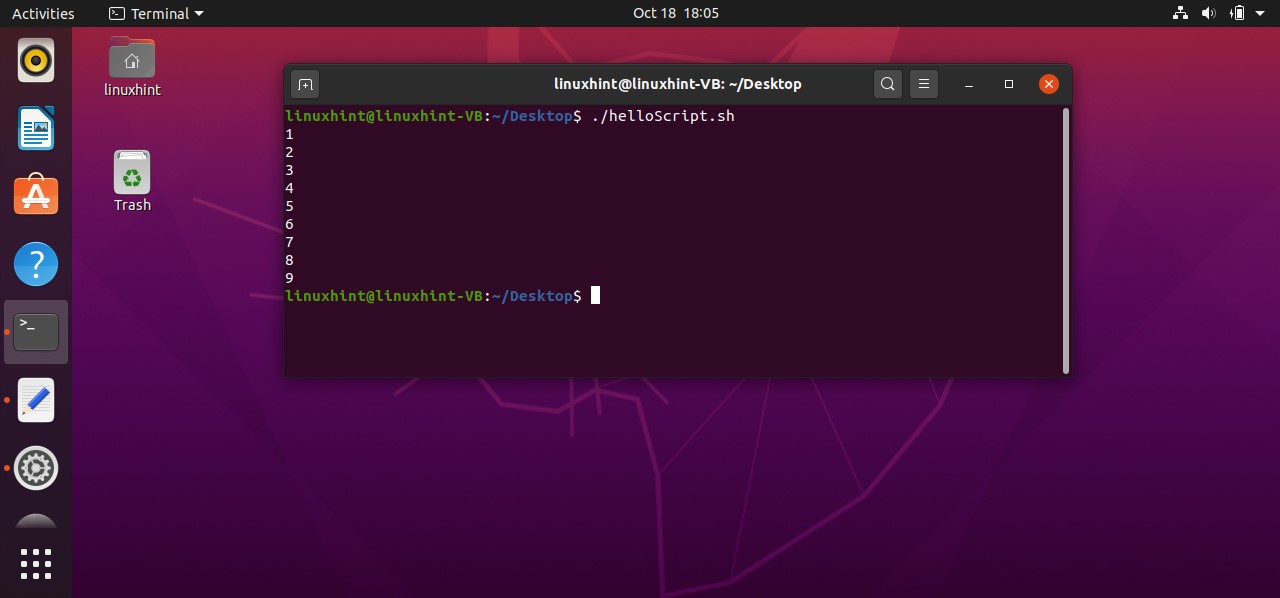
For loops:
It is a type of loop in which we specify the condition according to which the loop will be executed repeatedly. There are two fundamental ways of writing the for loops in your code. In the first method, you can write the numbers for iteration. In the code given below, for loop will be executed 5 times, as these iterations are specified for the variable ‘i’ that controls the iterations. Save the code in the script file ‘helloScript.sh’.
for i in 1 2 3 4 5
do
echo $i
done
Execute the ‘helloScript.sh’ file by typing the following command in the terminal.
You will get the following output for the script.

This method seems simple, but what if you want to execute 1000 times? You don’t have to write the number of iterations from 1 to 1000 instead use the other method of writing for a loop. In this method, you have to declare the starting and ending point of the iteration such as in the below example code ‘for i in {0..10}’, for loop will be executed 10 times. ‘0’ is defined as the starting point and ‘10’ is defined as the ending point of the iteration. This for loop will print the value of ‘i’ in each iteration.
for i in {0..10}
do
echo $i
done
Save the code in the file ‘helloScript.sh’. Execute the file and you will see the following output.
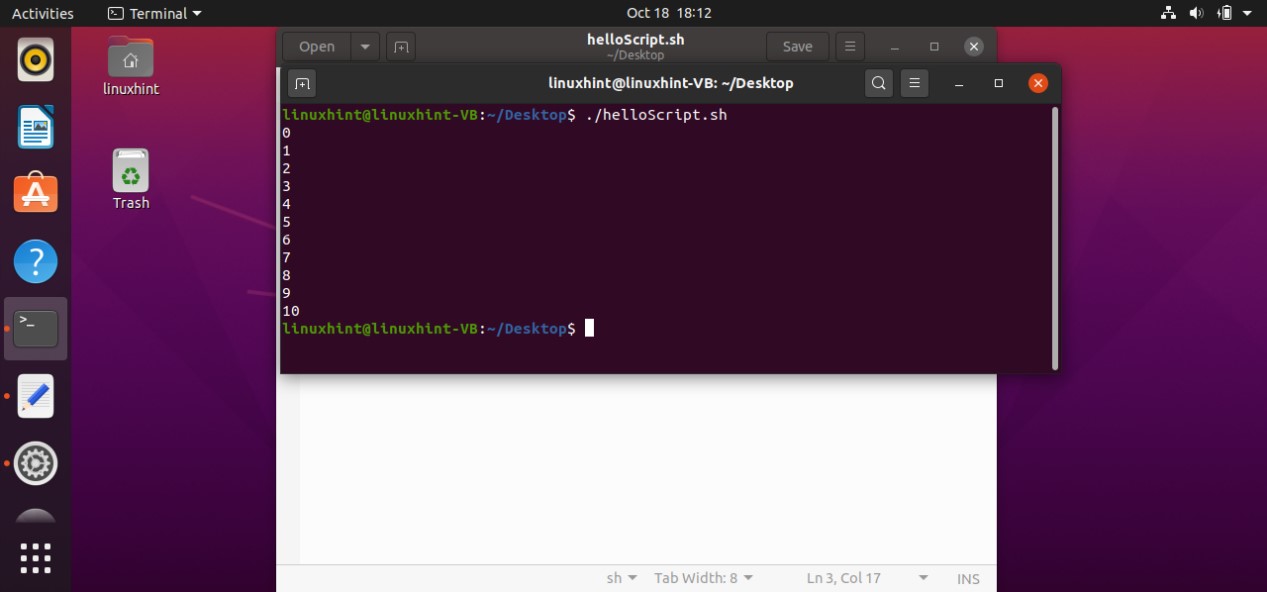
You can also define the increment value for the variable that controls the loop. For example in ‘for i in {0..10..2}’, 0 is the starting point of the loop, 10 is the ending point and the loop will execute the ‘echo $i’ statement with the increment of 2 in ‘i’. So in the example given below the program will printout 0 in the first run of the loop, then it will increment the value of ‘i’. Now the value of ‘i’ is 2. It will print 2 on the terminal. This code will print the value of ‘i’ as 0,2,4,6,8,10.
for i in {0..10..2}
#{starting..ending..increment}
do
echo $i
done
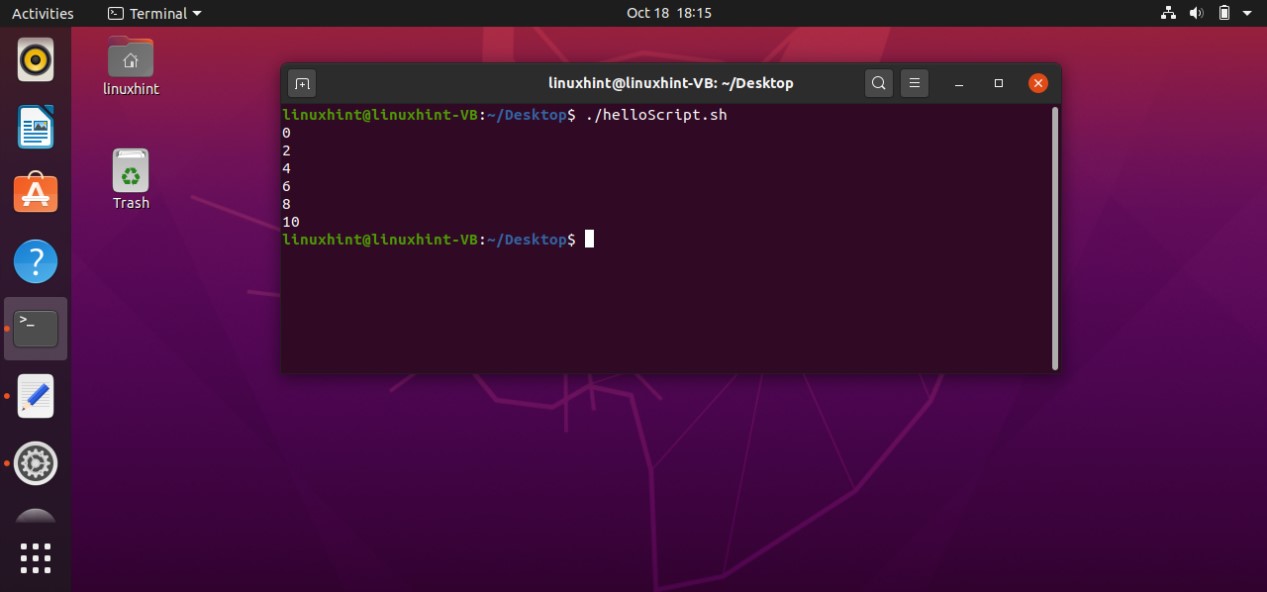
There is another method of writing the ‘for loop’ which is conventional across all the programming language. The below example code used this method to represent the ‘for loop’. Here in the statement ‘ for (( i=0; i<5; i++ ))’, ‘i’ is the variable that controls the whole loop. Firstly it is initialized with the value ‘0’, next we have the control statement of the loop ‘i<5’ that states that the loop will be executed when it has the value 0,1,2,3, or 4. Next, we have ‘i++’ which is the increment statement of the loop.
for (( i=0; i<5; i++ ))
do
echo $i
done
The program will come to the for a loop. ‘i’ is initialized with 0 and it will check the condition that ‘i’ has a value less than 5, which is true in this case. It will move on and print the value of ‘i’ as ‘0’ on the terminal. After that value of ‘i’ is incremented, and then the program will again check the condition whether its value is less than 5 which is true, so it will again printout the value of ‘i’ which is ‘1’. This execution flow goes on until ‘i’ reaches the value of ’5’ and the program will come out of the for loop and the program will be terminated.
Save the code. Execute the file from the terminal and it will show the following output.
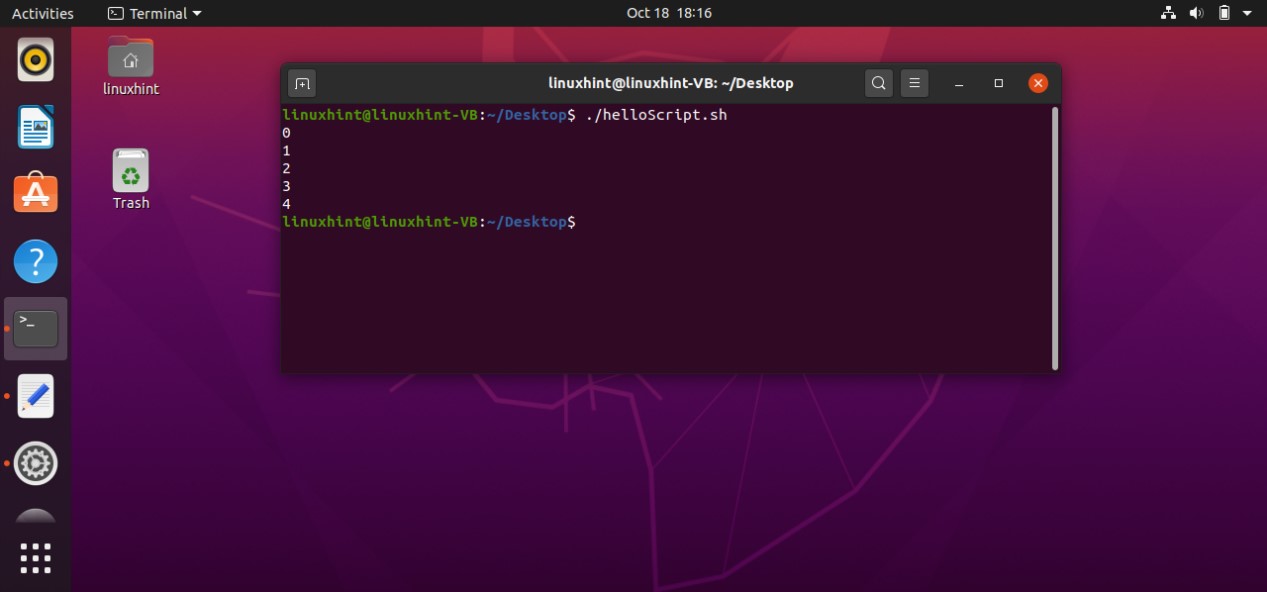
Break and continue statement
A break statement is used to terminate the loop at the given condition. For example, in the code given below, for loop will do its normal execution until the value of ‘i’ is 6. As we have specified this thing in code that the for loop will break itself and stop further iterations when ‘i’ become greater than 5.
for (( i=0; i<=10; i++ ))
do
if [ $i -gt 5 ]
then
break
fi
echo $i
done
Save the script and execute the file. It will give you the following output.
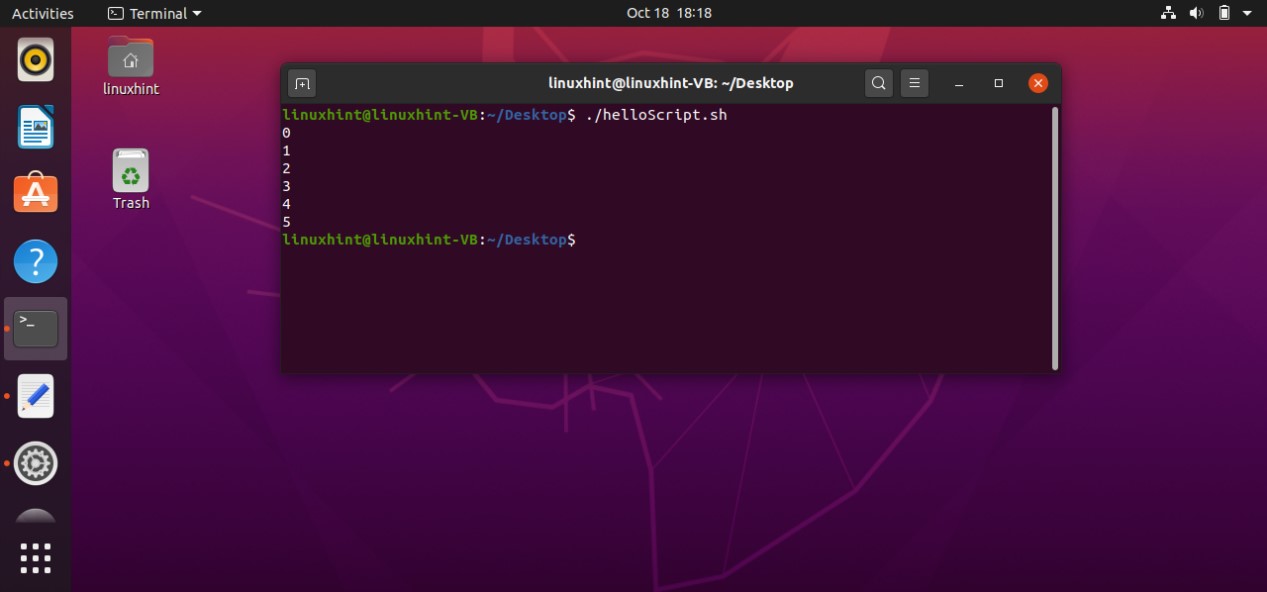
Continue statement works as opposed to the break statement. It skips the iteration wherever the condition is true, and move toward the next iteration. For example, the code given below for loop will print the value of ‘i’ variable on the terminal from 0 to 20, except for 3 and 7. As the statement ‘if [ $i -eq 3 ] || [ $i -eq 7 ]’ tell the program to skip the iteration whenever the value of ‘’i equal to 3 or 7, and move to the next iteration without printing them.
Execute the following code for a better understanding of this concept.
for (( i=0; i<=10; i++ ))
do
if [ $i -eq 3 ] || [ $i -eq 7 ]
then
continue
fi
echo $i
done
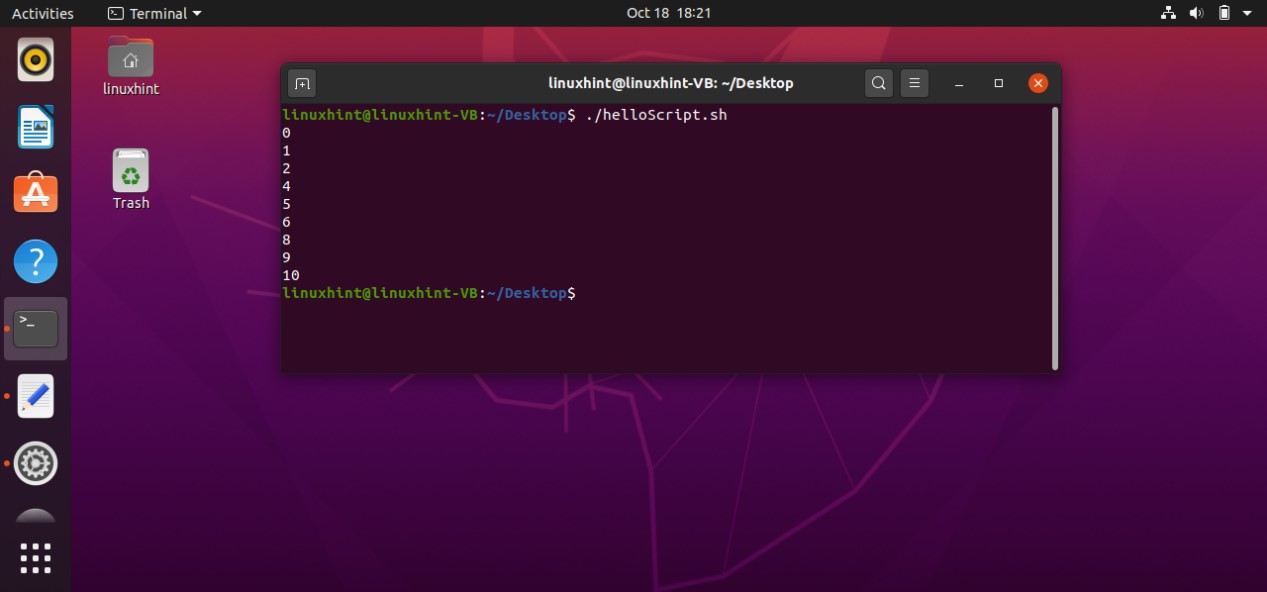
6. Script input
The first example in this topic refers to the code where you can give a single command for executing your script and giving values as an input for the script.
echo $1 $2 $3
This code will print out three values on the terminal. Save the above code in the script ‘helloScript.sh’ and write the command to ‘./helloScript.sh’ with three values which will be printed on the terminal In this example ‘BMW’ represents ‘$1’, ‘MERCEDES’ represents ‘$2’, and ‘TOYOTA’ represents ‘$3’.
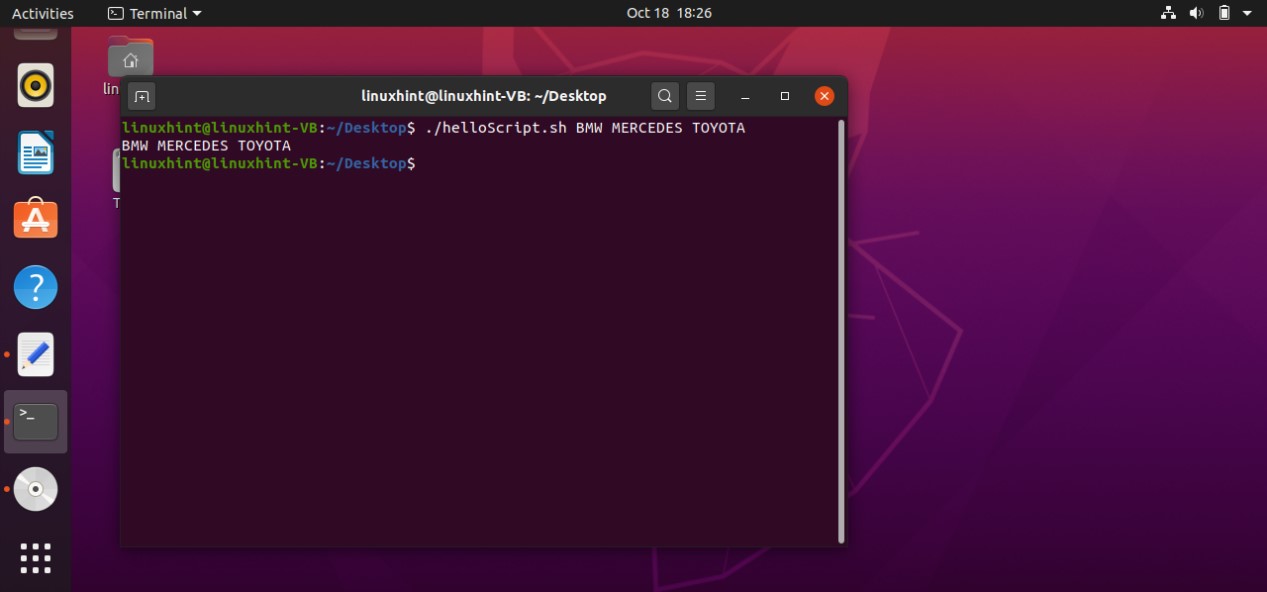
If you also specify ‘$0’ in the echo statement, it will print the script name also.
echo $0 $1 $2 $3
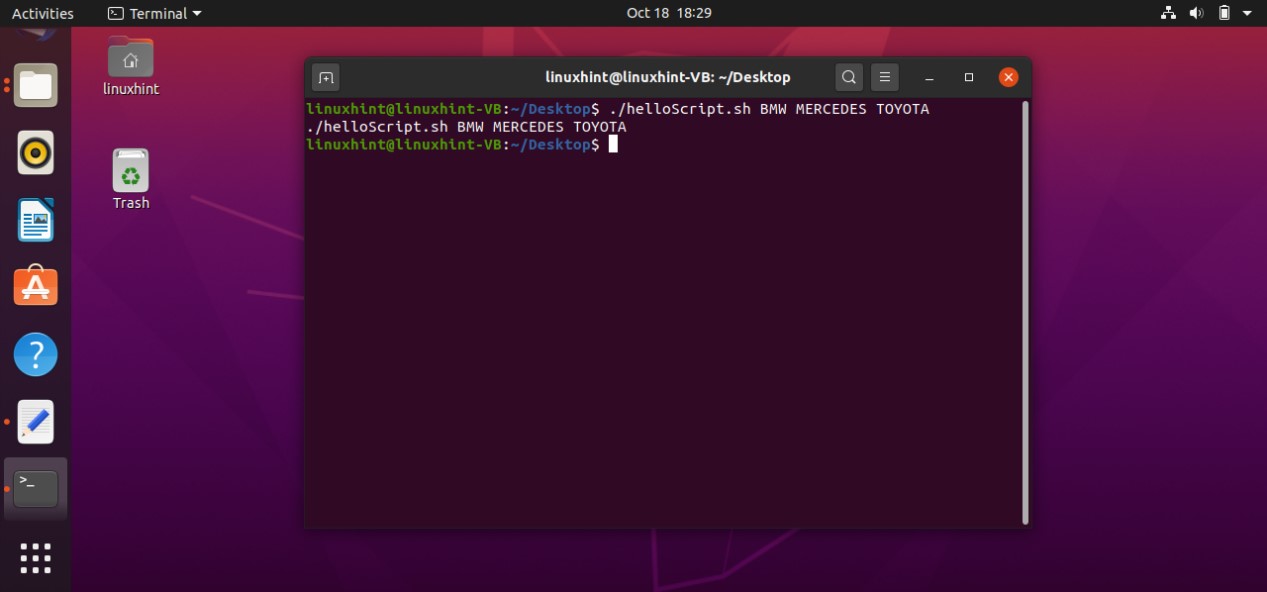
You can also use the arrays for this purpose. For declaring an array of infinite numbers use the code ‘args=(“$@”)’, in which ‘args’ is the name of the array and ‘@’ represents that it may have an infinite number of values. This type of array declaration can be used when you don’t know about the size of the input. This array will assign a block for each of the input and will continue to do so until it reaches the last one.
args=("$@") #you can also specify the array size here
echo ${args[0]} ${args[1]} ${args[2]}
Save the script in the file ‘helloScript.sh’. Open up the terminal and execute the file using the command ‘./helloScript.sh’ with the values that represent the elements of the declared array in the script. According to the command used below, BMW’ represents ${args[0]}, ‘MERCEDES’ represents ${args[1]}, and ‘HONDA’ represents ${args[2]}.
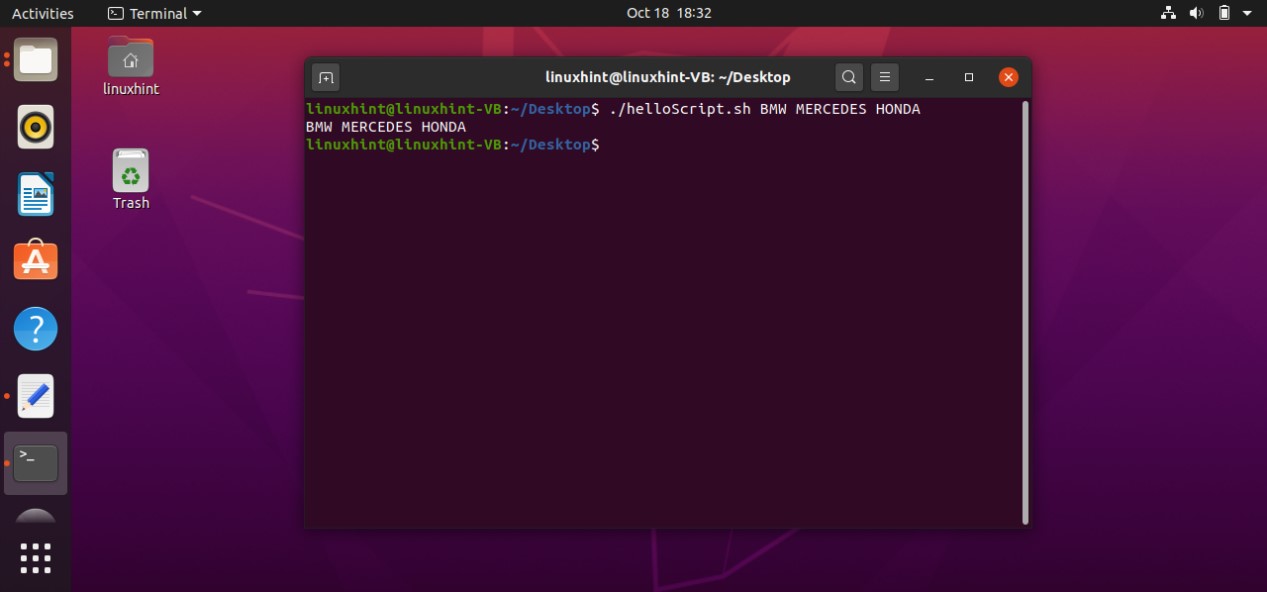
The code given below can be used to declare an array having an infinite number of values, and printing those values on the terminal. The difference between this and the previous example is that this example will print out all the values that represent the array elements and the command used in the previous example ‘ echo ${args[0]} ${args[1]} ${args[2]} will only print first three values of the array.
args=("$@")
echo $@
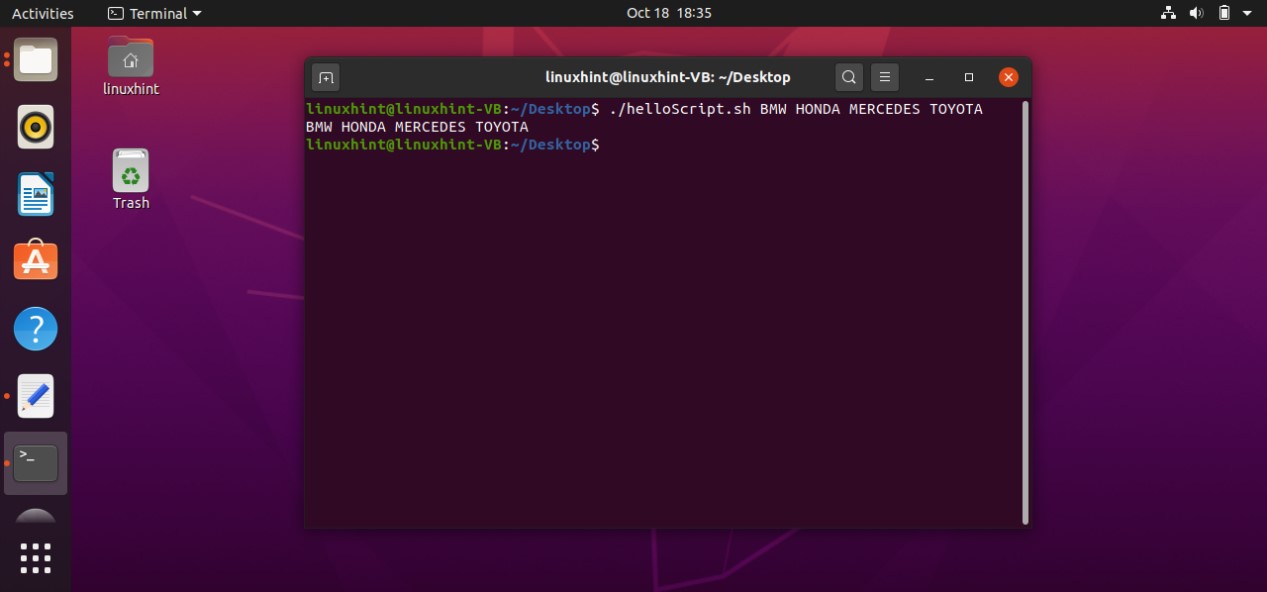
You can also print out the array size by writing ‘echo $# ’ in the script. Save the script. Execute the file using the terminal.
args=("$@")
echo $@ #prints all the array elements
echo $# #print the array size
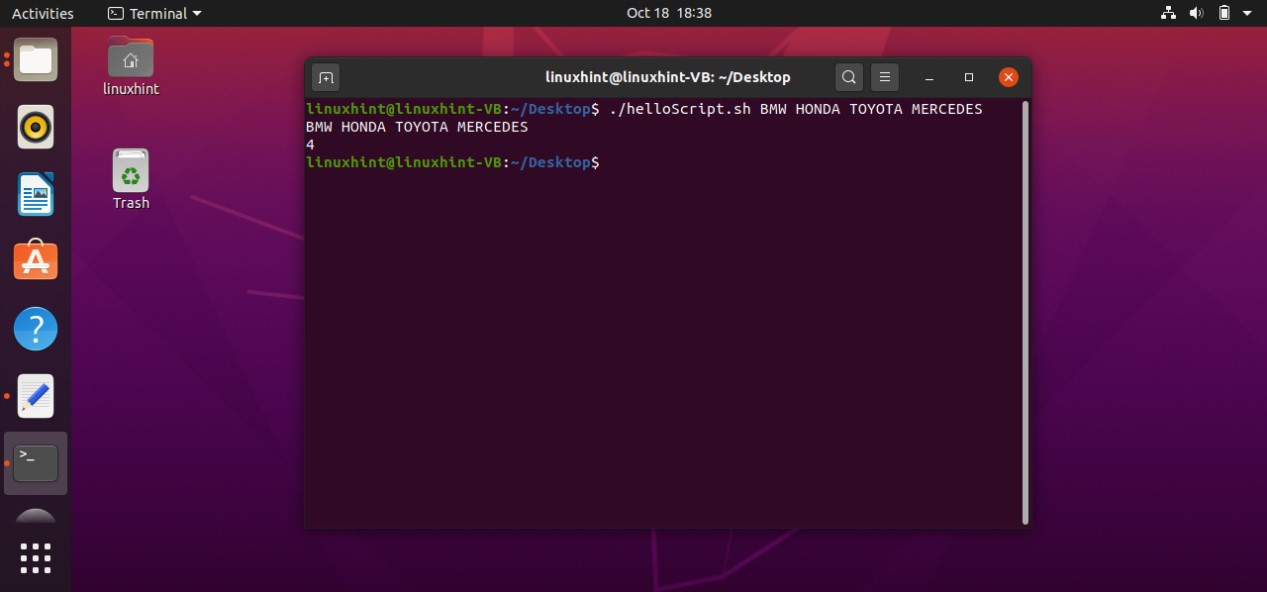
Reading file using stdin
You can also read a file using ‘stdin’. To read a file using a script what you have to do is first use a while loop in which you will write the code to read the file line by line and printing that on the terminal. After closing the while loop using the keyword ‘done’, specify the path of the ‘stdin’ file’ < "${1:-/dev/stdin}" ’ as we are using it for reading a file. The script given below can be used for a better understanding of this concept.
while read line
do
echo "$line"
done < "${1:-/dev/stdin}"
Save the script in the file ‘helloScript.sh’. Open up the terminal and write the command to execute ‘helloScript’ with the file name you want to read. In this case, the file we want to read is placed on Desktop with the name ‘Untitled Document 1’. Both ‘\’ is used to represent that this is a single file name, Otherwise simply writing ‘Untitled Document 1’ will be taken as multiple files.
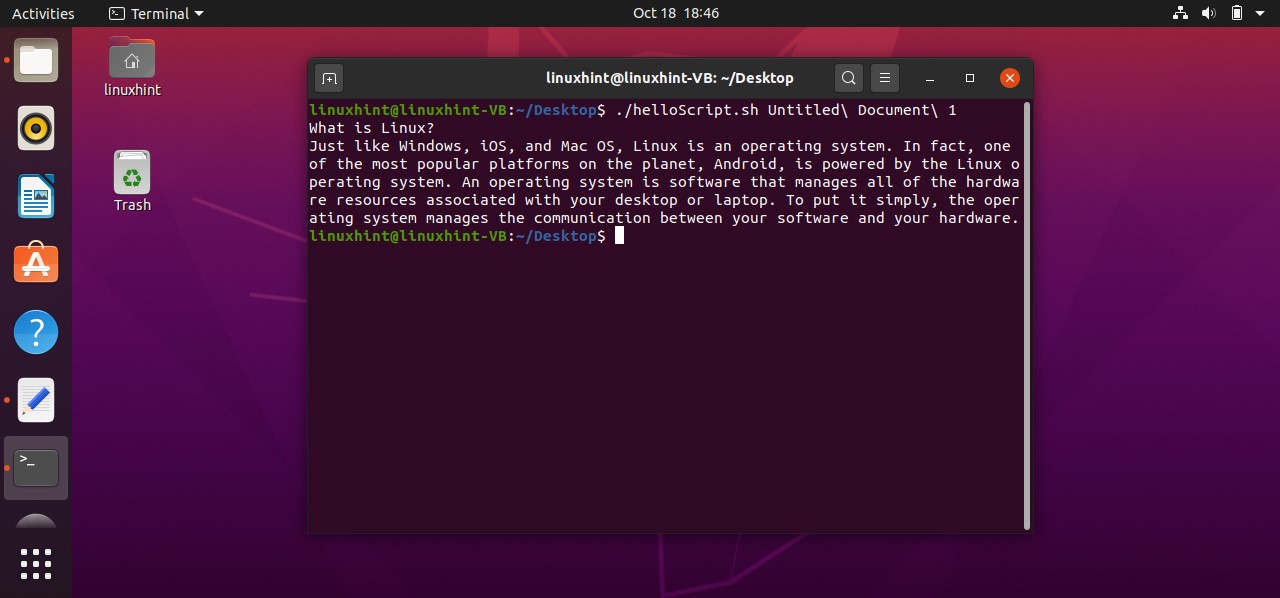
7. Script output
In this topic, you are going to learn about standard output and standard error. Standard output is the output stream of the data which is the result of the commands whereas standard error is the location of the error messages from the command line.
You can redirect the standard output and standard error to single or multiple files. Script code given below will redirect both to a single file. Here ‘ls -al 1>file1.txt 2>file2.txt’, 1 represents the standard output and 2 represents the standard error. Standard output will be redirected to ‘file1.txt’ and standard error will be redirected towards ‘file2.txt’.
ls -al 1>file1.txt 2>file2.txt
Save this code in ‘helloScript.sh’ and run it through the terminal using the command ‘$ ./helloScript.sh’. Firstly it will create the two files on Desktop and then redirect their respective output. After this, you can use the ‘ls’ command to check whether the files are created or not.
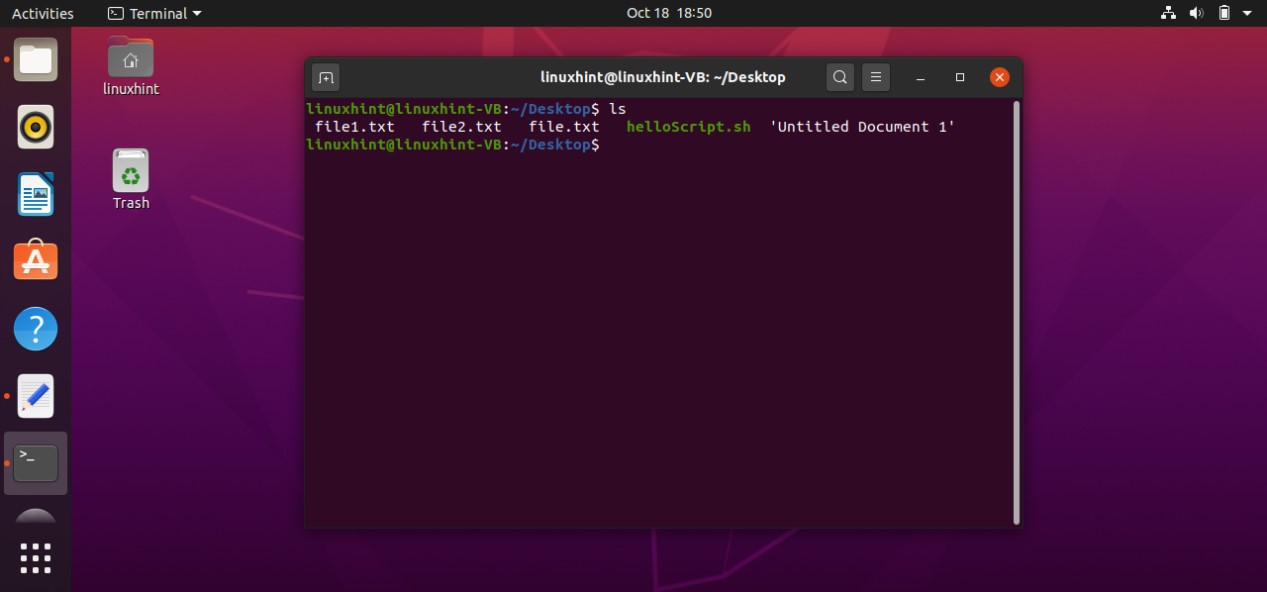
After that check the content of both files.
As you can see standard output is redirected to ‘file1.txt’.
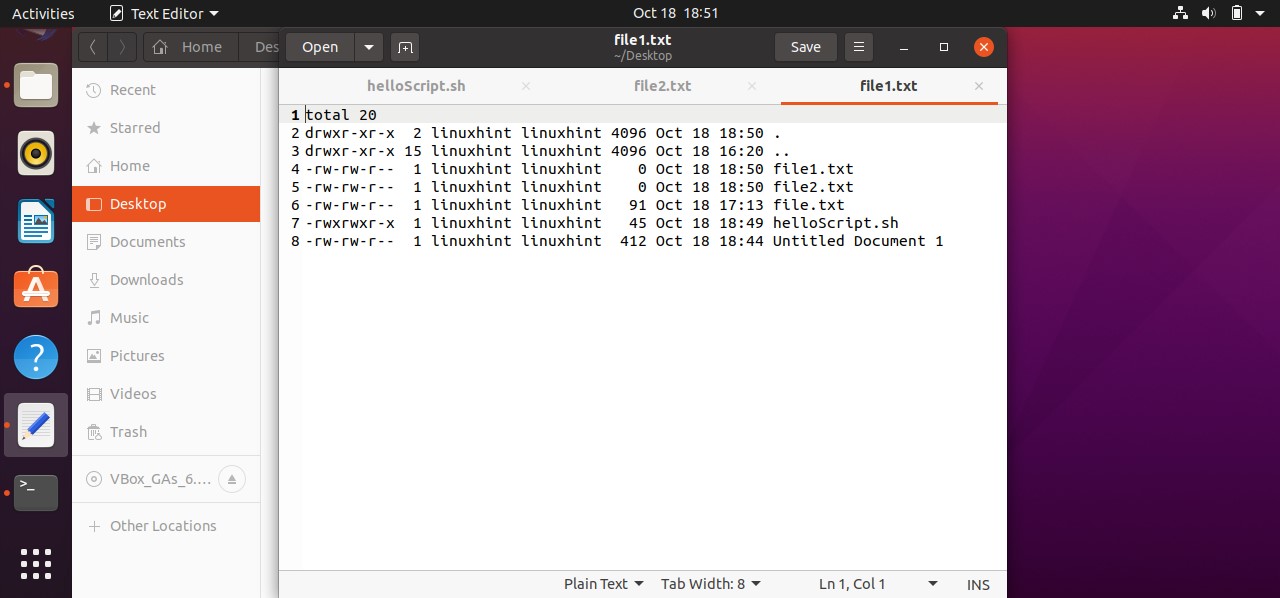

‘file2.txt’ is empty because there exists no standard error for the script. Now let’s try to create a standard error. For that, you have to change the command from ‘ls -al’ to ‘ls +al’. Save the script given below execute the file from the terminal, reload both files and see the results.
ls +al 1>file1.txt 2>file2.txt
Execute the file using the command ‘./helloScript.sh’ on the terminal and now check the files.
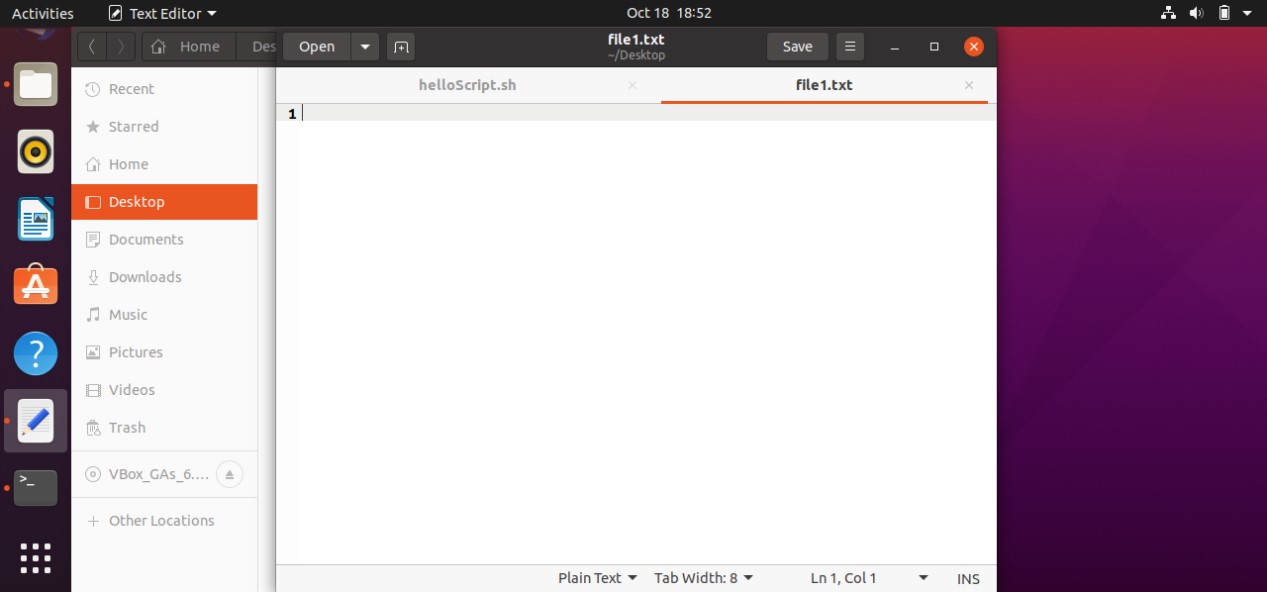
‘file1.txt’ is empty because there exists no standard output for the script and standard error will be saved in ‘file2.txt’, as shown below.

You can also create two separate scripts for this purpose. In this case, the first script is going to store the standard output in the ‘file1.txt’ and the second script will store standard error. Both scripts are given below with their respective outputs.
ls -al >file1.txt

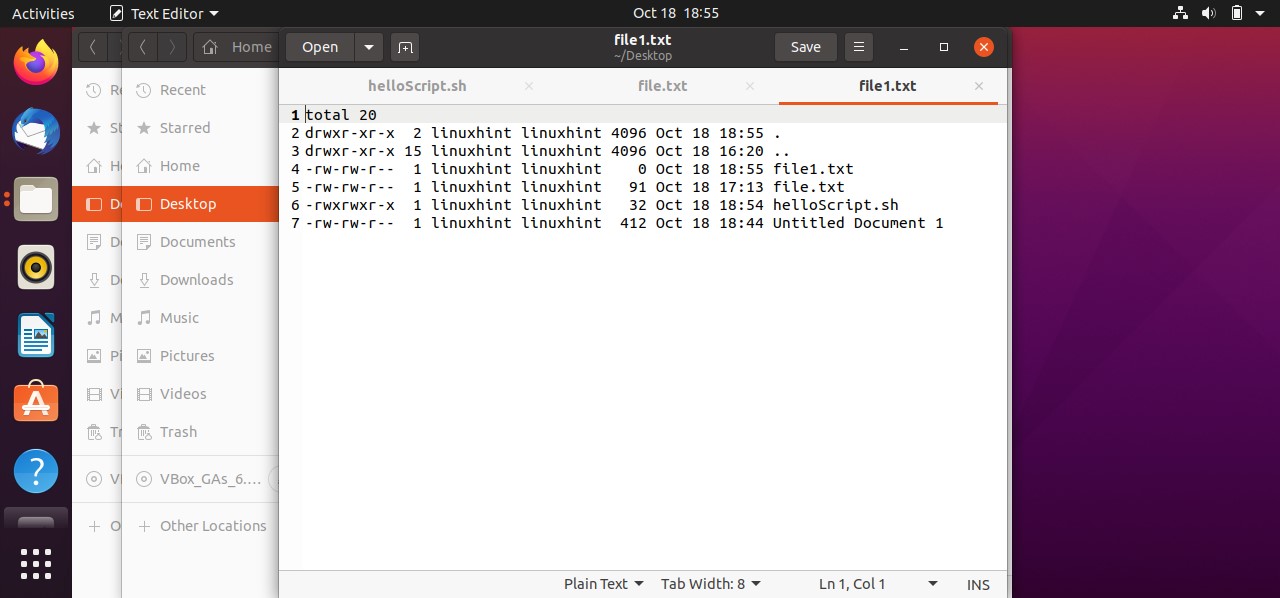
ls +al >file1.txt
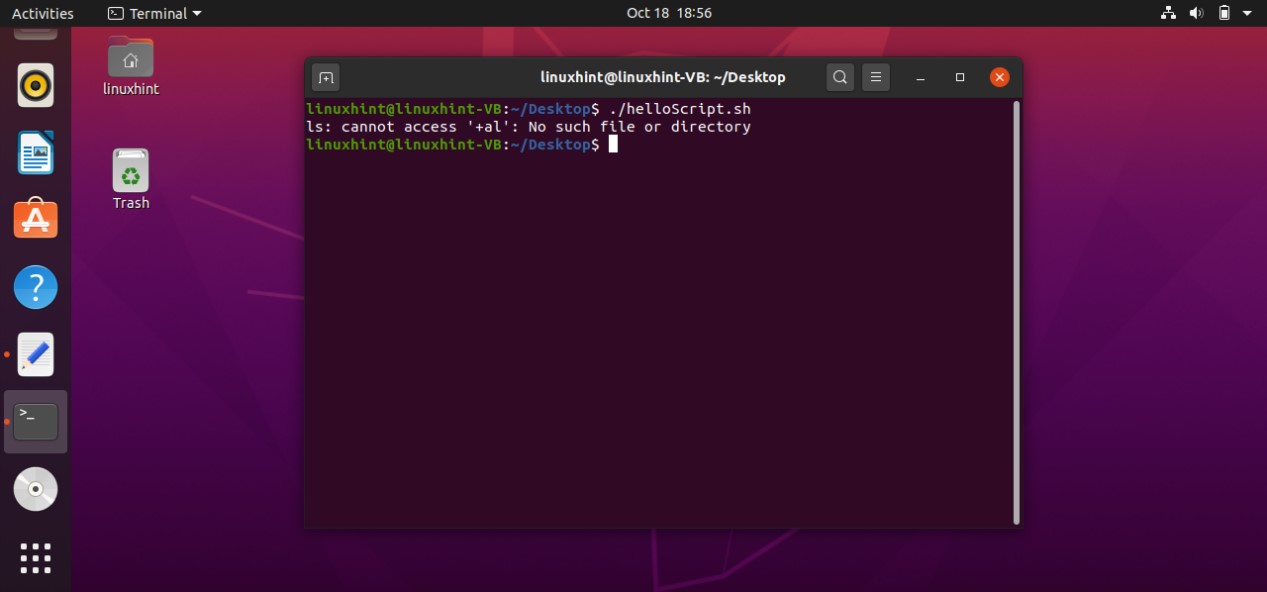
You can also use a single file for storing standard output and standard output. Here is the example script for that.
ls -al >file1.txt 2>&1
8. Send output from one script to another script
To send output from one script to another script, two things are essential to have. Firstly, both scripts should exist at the same place and both files have to be executable. Step 1 is to create two scripts. Save one as ‘helloScript’ and the other as ‘secondScript’.
Open the ‘helloScript.sh’ file and write the code given below.
MESSAGE="Hello LinuxHint Audience"
export MESSAGE
./secondScript.sh
This script will export the value stored in the ‘MESSAGE’ variable which is essential “Hello LinuxHint Audience” to ‘secondScript.sh’.
Save this file and move on to other for coding. Write the following code in ‘secondScript.sh’ to get that ‘MESSAGE’ and printing it in terminal.
echo "the message from helloScript is: $MESSAGE"
So till now, both scripts have their code to export, get , and print the message on the terminal. Make the ‘secondScript’ executable by typing the following command on the terminal.
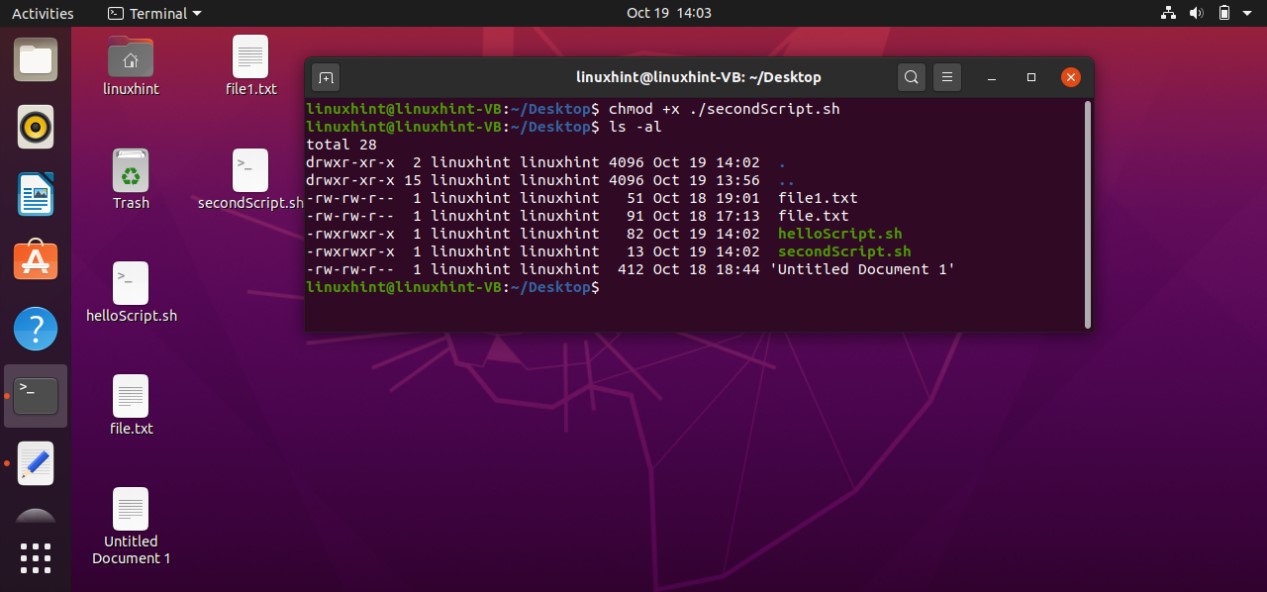
Now execute the ‘helloScript.sh’ file to get the desired result.
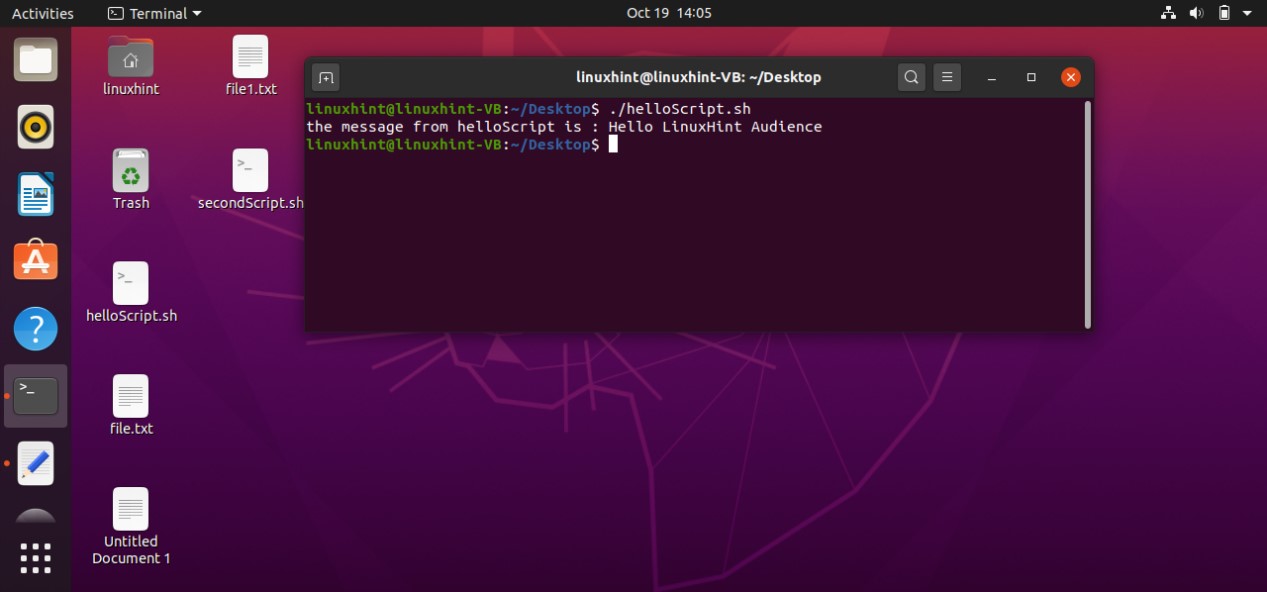
9. Strings processing
The first operation you are going to learn in this topic is string comparison. Take two inputs from the user in the form of strings. Read that values from the terminal and store that in two different variables. Use an ‘if’ statement to compare the values of both variables using the ‘==’ operator. Code the statement to display that the ‘strings match’ if they are the same and write ‘strings don’t match’ in its ‘else’ statement and then close the ‘if’ statement. Below is the script code of this whole procedure.
echo "enter Ist string"
read st1
echo "enter 2nd string"
read st2
if [ "$st1" == "$st2" ]
then
echo "strings match"
else
echo "strings don't match"
fi
Save the script in ‘helloScript.sh’. Execute the file from the terminal and give two strings for comparison.
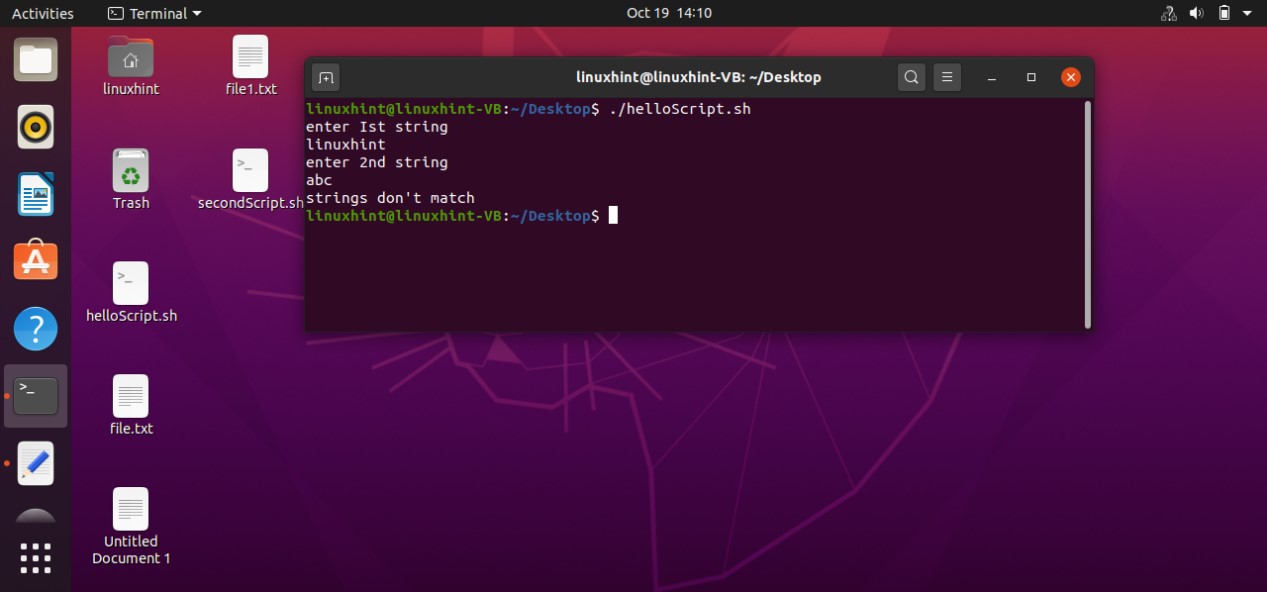
You can also test the code using different inputs.
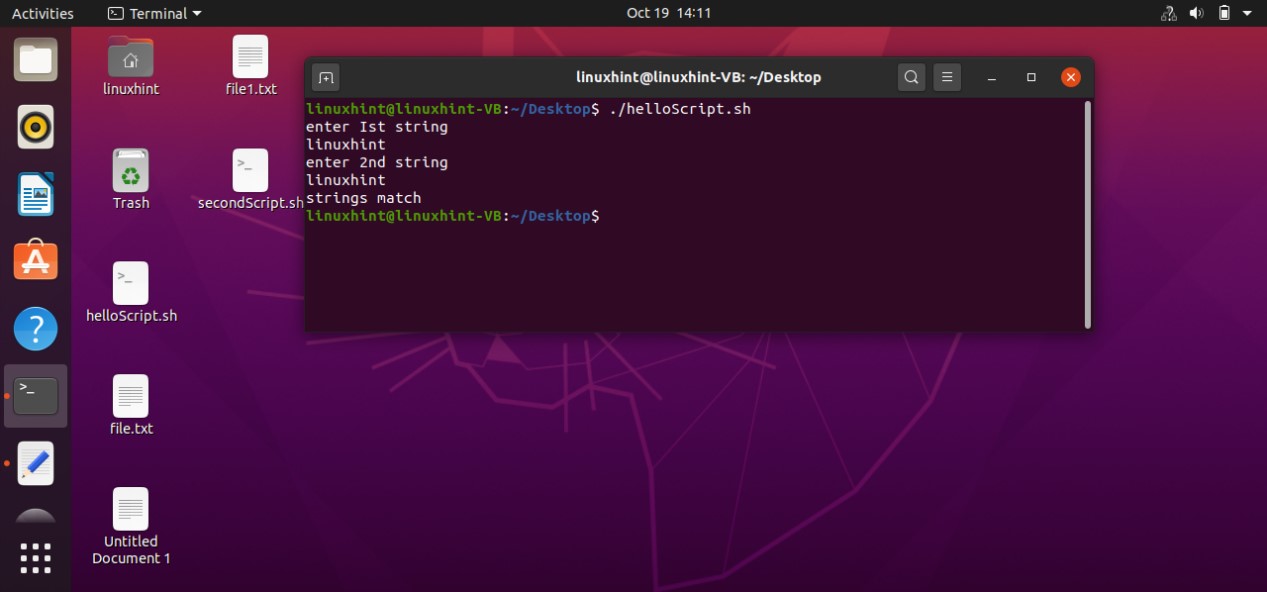
You can also check that if your program is actually comparing the strings or not just checking the length of the strings.

Checking string is smaller or not
You can also check that if a string is smaller or not. Take the input from the user, read the values from the terminal. After that compare the strings using the ‘\’ the first string or not.
echo "enter Ist string"
read st1
echo "enter 2nd string"
read st2
if [ "$st1" \ "$st2" ]
then
echo "Second string $st2 is smaller than $st1"
else
echo "strings are equal"
fi
Save this ‘helloScript.sh’ and execute it.
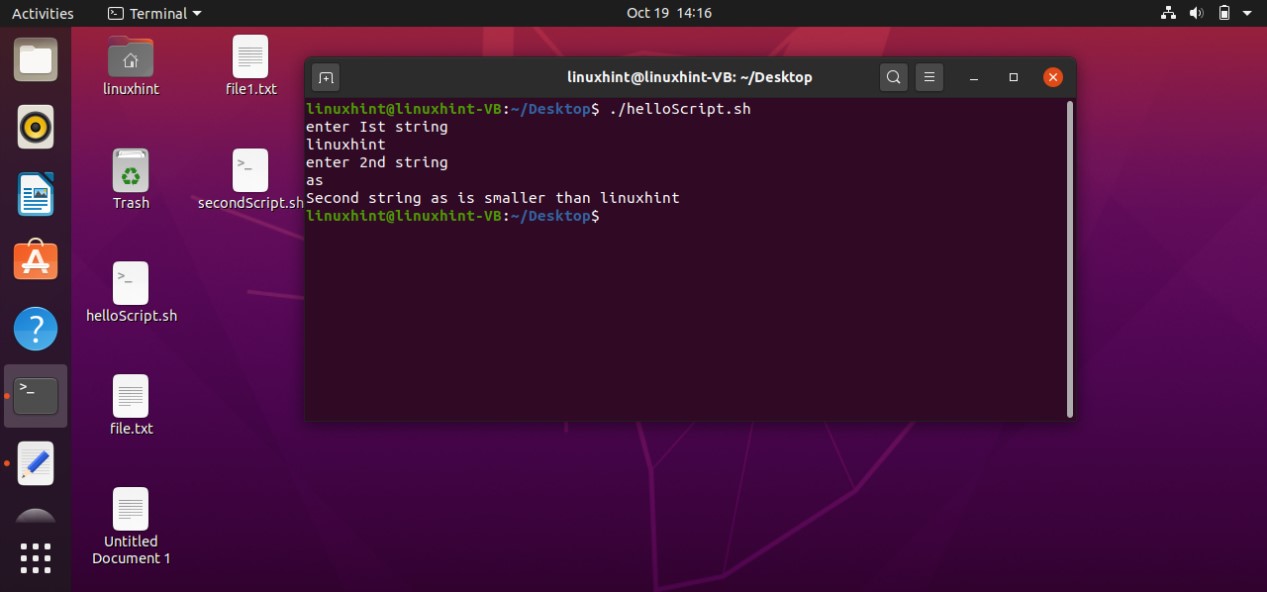


Concatenation
You can also concatenate two strings. Take two variables, read the strings from the terminal, and store them in these variables. The next step is to create another variable and concatenate both variables in it by simply writing ‘c=$st1$st2’ in the script and then print it out.
echo "enter Ist string"
read st1
echo "enter 2nd string"
read st2
c=$st1$st2
echo $c
Save this code in ‘helloScript.sh’, execute the file using the terminal, and check out the results.

Converting the input into lowercase and uppercase
You can also convert the input into lowercase and uppercase. For this, what you have to do is simply write a script to read the values from the terminal and then use the ‘^’ symbol with the variable name to print it in lowercase, and use ‘^^’ for printing it in upper case. Save this script, and run the file using the terminal.
echo "enter Ist string"
read st1
echo "enter 2nd string"
read st2
echo ${st1^} #for lowercase
echo ${st2^^} #for uppercase

Turning first letter capital
You can also convert only the first letter of the string by simply writing the variable as ‘$[st1^l}’.
echo "enter Ist string"
read st1
echo "enter 2nd string"
read st2
echo ${st1^l} #for capitalizing the first letter
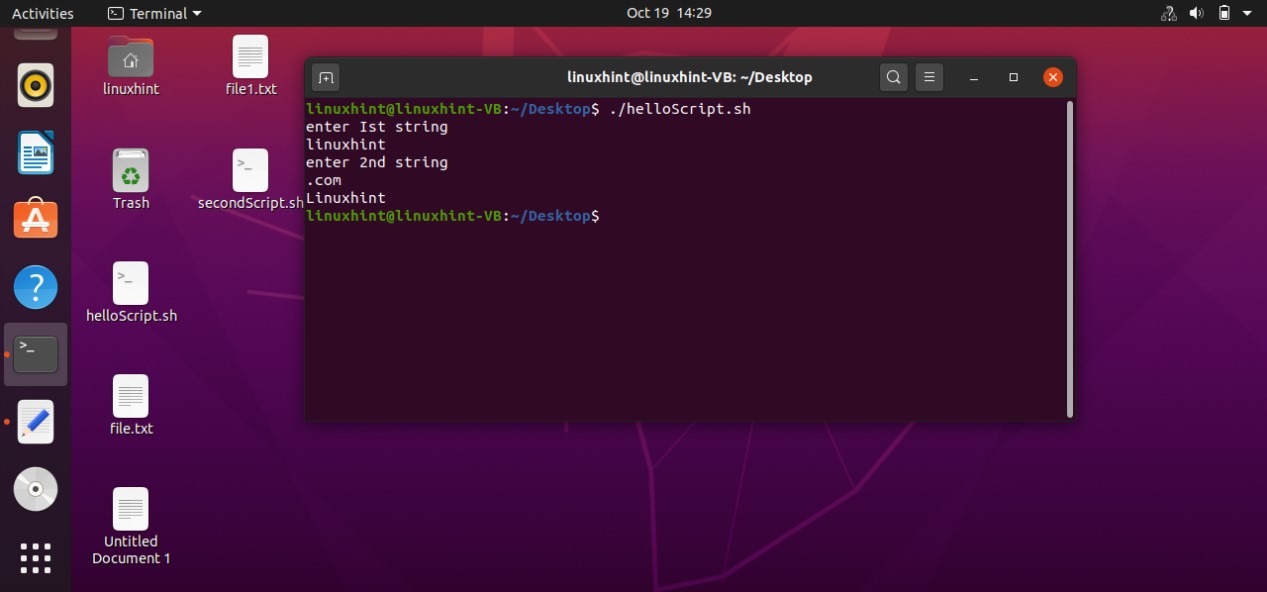
10. Numbers and Arithmetic
In this topic, you will learn how to perform different arithmetic operations through scripting. Here, you will also see different methods for that. In the first method, step 1 is to define two variables with their values and then use the echo statement and the ‘+’ operator for printing the sum of these variables on the terminal. Save the script, execute it, and check out the result.
n1=4
n2=20
echo $(( n1 + n2 ))
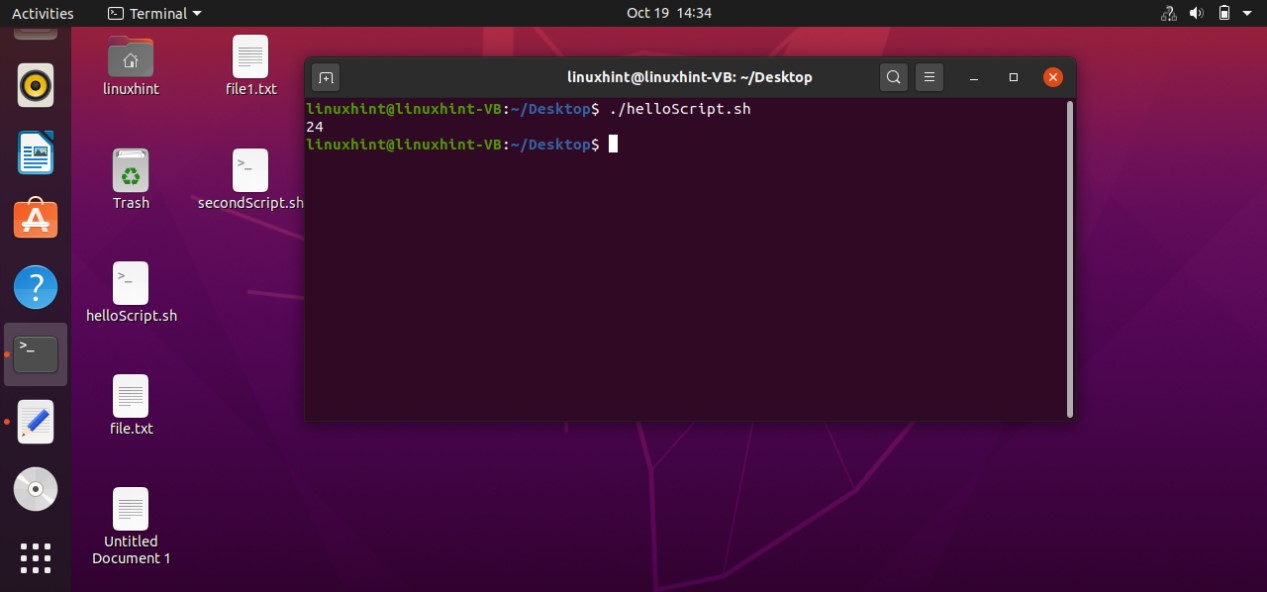
You can also write a single script for performing multiple operations like addition, subtraction, multiplication, division, etc.
n1=20
n2=4
echo $(( n1 + n2 ))
echo $(( n1 - n2 ))
echo $(( n1 * n2 ))
echo $(( n1 / n2 ))
echo $(( n1 % n2 ))
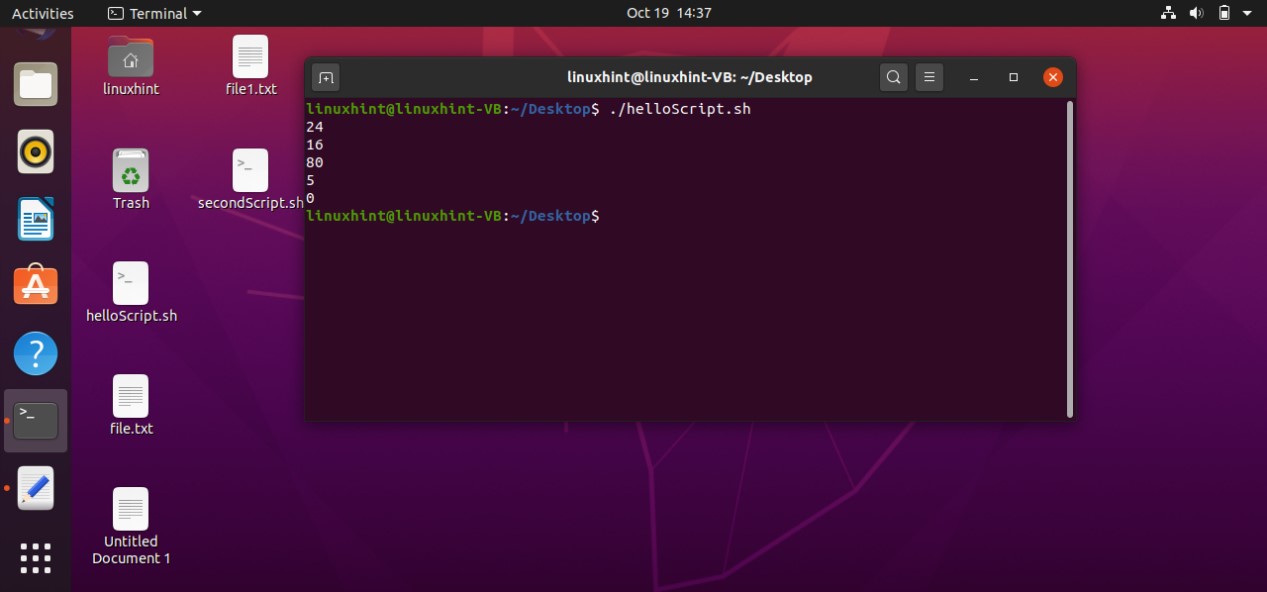
The second method for performing the arithmetic operation is by using ‘expr’. What this ‘expr’ does is that it considers these n1 and n2 as other variable and then perform the operation.
n1=20
n2=4
echo $(expr $n1 + $n2 )

You can also use a single file to perform multiple operations using ‘expr’. Below is a sample script for that.
n1=20
n2=4
echo $(expr $n1 + $n2 )
echo $(expr $n1 - $n2 )
echo $(expr $n1 \* $n2 )
echo $(expr $n1 / $n2 )
echo $(expr $n1 % $n2 )
Converting hexadecimal into decimal
To convert a hexadecimal number into a decimal, write a script that takes the hex number from the user, and read the number. We are going to use the ‘bc calculator’ for this purpose. Define ‘obase’ as 10 and ‘ibase’ as 16. You can use the script code below for a better understanding of this procedure.
echo "Enter Hex number of your choice"
read Hex
echo -n "The decimal value of $Hex is : "
echo "obase=10; ibase=16; $Hex" | bc
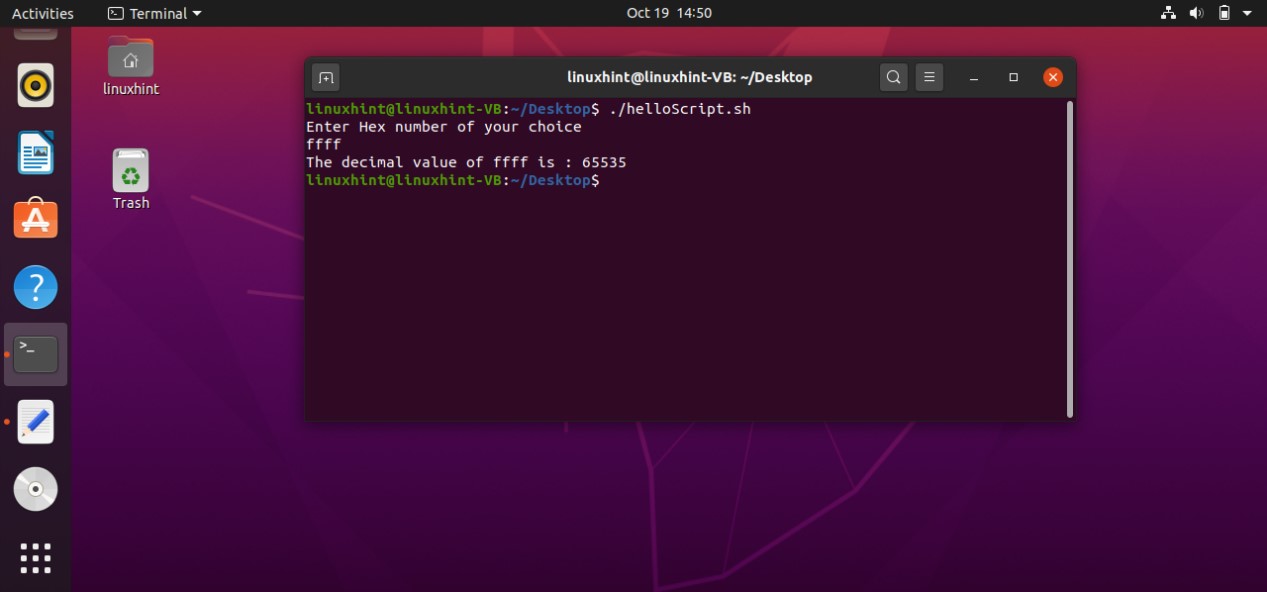
11. Declare command
The idea behind this command is that bash itself doesn’t have a strong type system, so you cannot restrict the variable in bash. However, to allow type like behavior it uses attributes that can be set by a command which is the ‘declare’ command. ‘declare’ is a bash built-in command that allows you to update attributes applied to variables within the scope of your shell. It allows you to declare and peek into the variables.
Writing the command given below will show you a list of variables that exist already in the system.
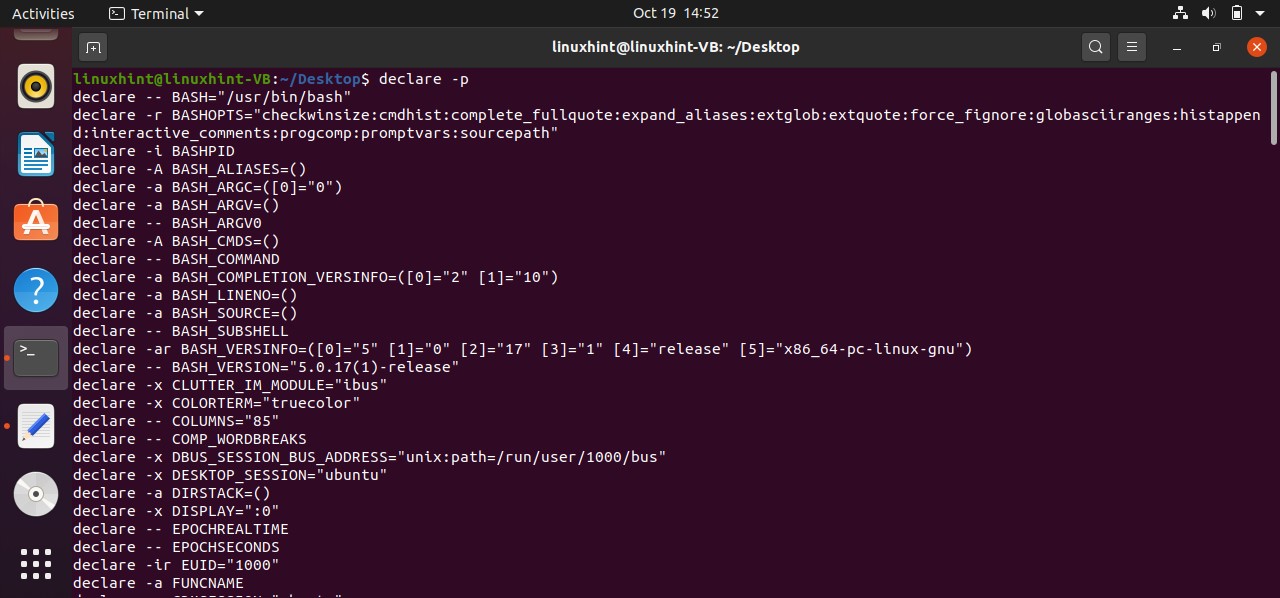
You can also declare your own variable. For that what you have to do is to use the declare command with the name of the variable.
After that use the ‘$ declare -p’command to check your variable in the list.
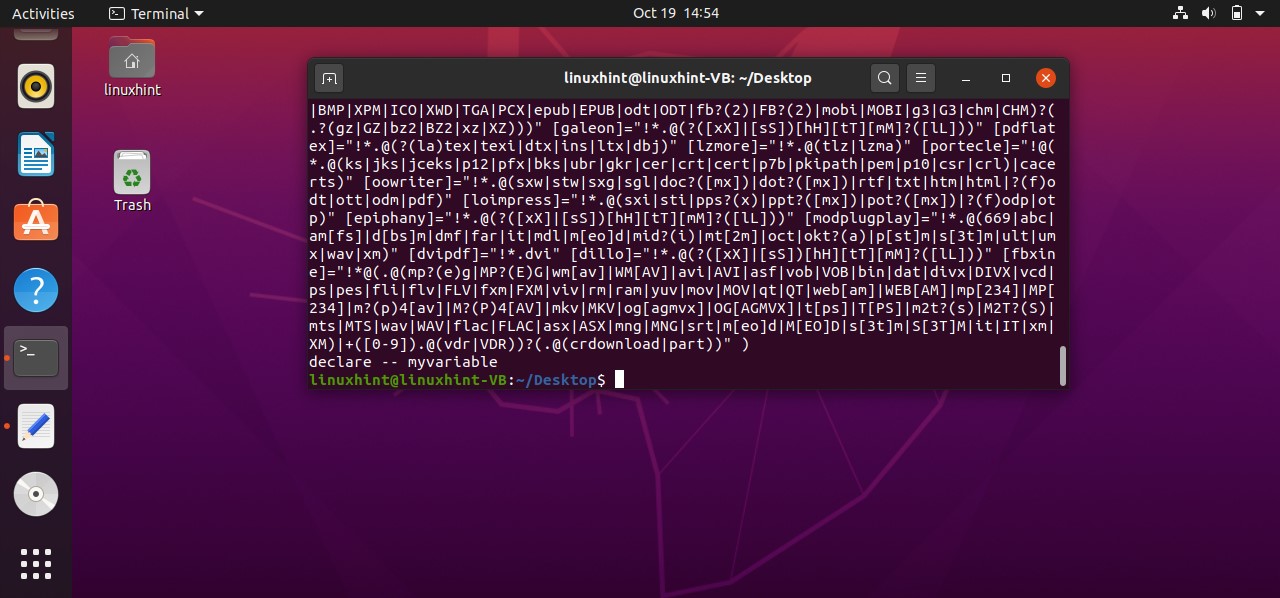
To define a variable with its value, use the command given below.
$ declare -p

Now let’s try to restrict a file. Use ‘-r’ to apply the read-only restriction to a file and then write the name of the variable with its path.
declare -r pwdfile=/etc/passwd
echo $pwdfile

Now let’s try to make some changes to the file.
declare -r pwdfile=/etc/passwd
echo $pwdfile
pwdfile=/etc/abc.txt
As the ‘pwdfile’ is restricted as a read-only file. It should display an error message after script execution.

12. Arrays
First of all, you are going to learn how to declare an array and store values in it. You can store as many values as you want. Write the name of the array and then define its values in ‘( )’ brackets. You may look up the below code to see how it works.
car=('BMW' 'TOYOTA' 'HONDA')
echo "${car[@]}"
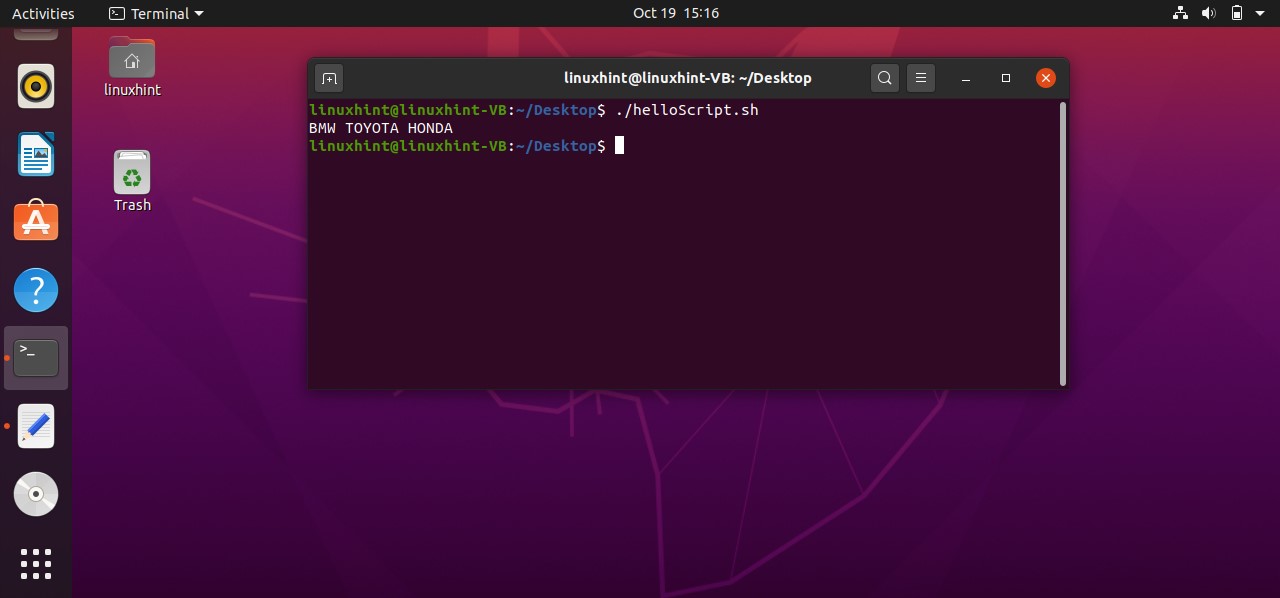
You can also use the index of the array elements for printing them such as in below example ‘BMW’ is stored at ‘0’th index, ‘TOYOTA’ is stored at ‘1’ st index, and ‘HONDA’ is stored at ‘2’nd index. For printing ‘BMW’ you should write ${car[0]}, and vice versa.
car=('BMW' 'TOYOTA' 'HONDA')
echo "${car[@]}"
#printing value by using index
echo "printing value using index"
echo "${car[0]}"
echo "${car[1]}"
echo "${car[2]}"

You can also print the indexes of the array. For this, you have to write “${!car[@]}”, here ‘!’ is used to representing the index, and ‘@’ represents the whole array.
car=('BMW' 'TOYOTA' 'HONDA')
echo "${car[@]}"
echo "printing the indexes"
echo "${!car[@]}"
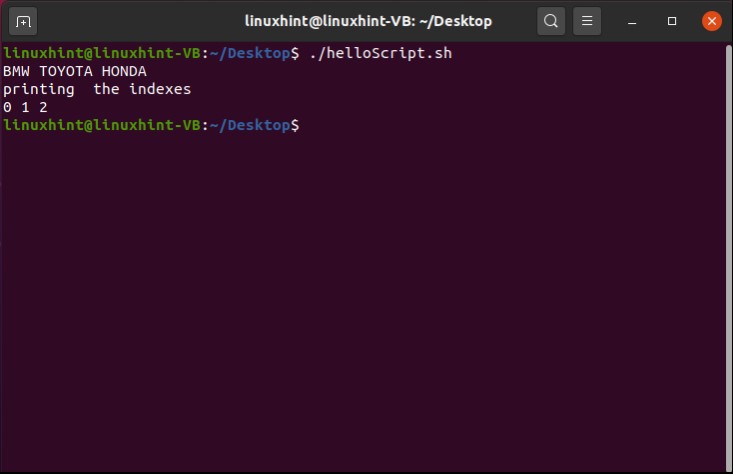
If you want to print the total number of values in an array, simply write ‘${#car[@]}’ here # represents the total number of elements.
car=('BMW' 'TOYOTA' 'HONDA' 'ROVER')
echo "${car[@]}"
echo "printing the indexes"
echo "${!car[@]}"
echo "printing number of values"
echo "${#car[@]}"
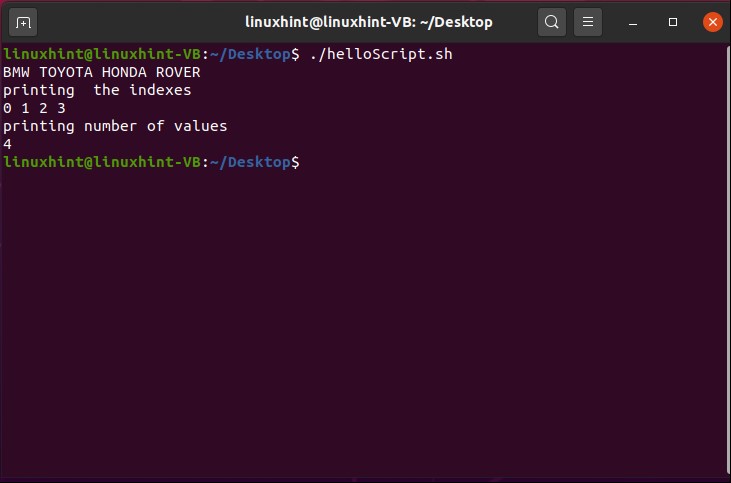
Let’s suppose, you declared an array, and then you want to delete any element. For deleting any element use the ‘unset’ command with the array name and the index of the element you want to delete. If you want to delete the value stored at the 2nd index of the ‘car’ array, simply write ‘unset car[2]’ in your script. Unset command will remove the array element with its index from the array Check out the following code for better understanding.
car=('BMW' 'TOYOTA' 'HONDA' 'ROVER')
unset car[2]
echo "${car[@]}"
echo "printing the indexes"
echo "${!car[@]}"
echo "printing number of values"
echo "${#car[@]}"
Save the following code in the ‘helloScript.sh’. Execute the file using ‘./helloScript.sh’.
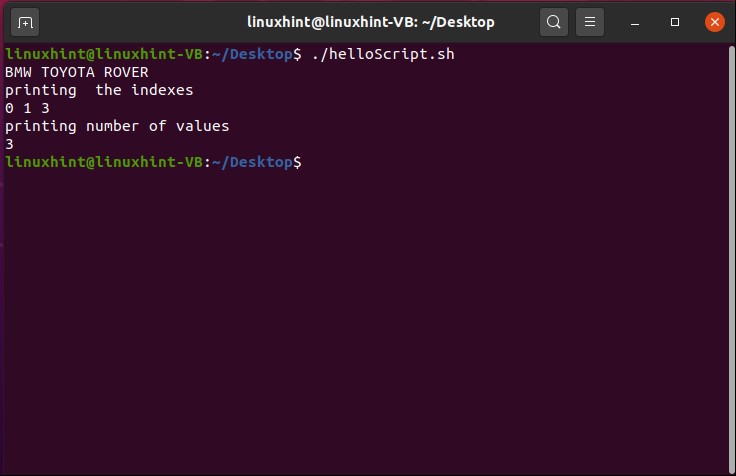
Now you know to delete an array element, but what if you want to store any other value such as ‘MERCEDES’ at its index which is 2. After using the unset command, in the next line write ‘car[2]=’MERCEDES’. That’s it.
car=('BMW' 'TOYOTA' 'HONDA' 'ROVER')
unset car[2]
car[2]='MERCEDES'
echo "${car[@]}"
echo "printing the indexes"
echo "${!car[@]}"
echo "printing number of values"
echo "${#car[@]}"
Save the script and run the file through the terminal.
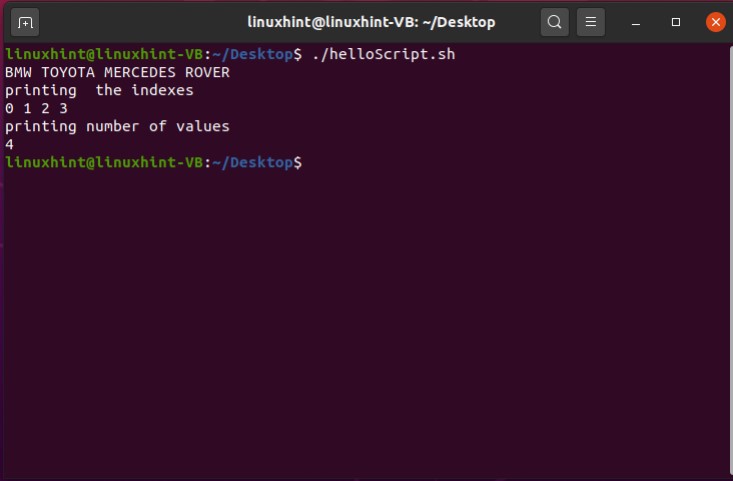
13. Functions
Functions are basically reusable lines of code, that can be call out again and again. When you want to perform a certain operation again and again or you want to execute something repeatedly, it is a sign to use a function in your code. Functions save your time and effort to write tons of lines again and again.
Below is an example to show you the syntax of the function. One thing which is the most important thing to remember is that you should define or declare your function first, somewhere in the coding before calling it. For defining a function in your code, Step 1 is to use the ‘function’ command with the function name you want to give and then ‘( )’. Step 2 is to write the function code within the ‘{ }’. Step 3 is to call the function by using the function name, where you want to have its execution.
function funcName()
{
echo "this is new function"
}
funcName

You can also give parameters to the function. For example, you want any word as an argument, which will be given at the time of function call. For this, what you have to do is simply create the function using the syntax discussed above, and in the body of the function write ‘echo $1’, this line will print the first parameter assigned at the time of function call. Come out of the body, call the function by using the function name, and with the words as ‘parameter’ you want to show on the terminal.
function funcPrint()
{
echo $1
}
funcPrint HI
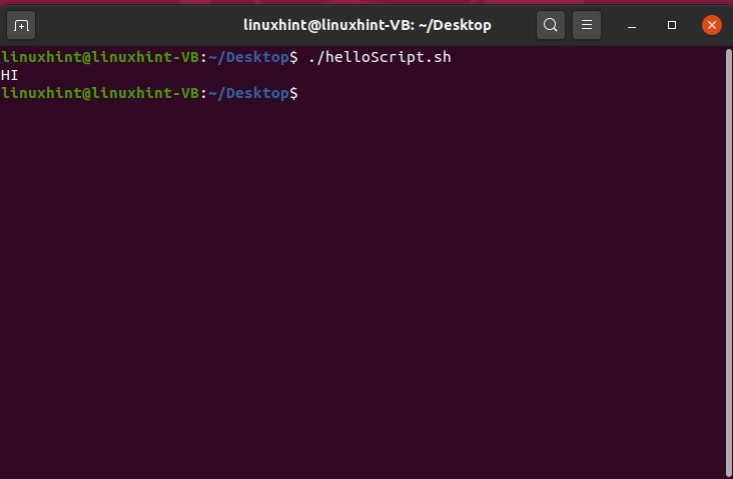
You can use multiple parameters or arguments according to your program and then mention those parameter values at the time of function call.
Here is an example code.
function funcPrint()
{
echo $1 $2 $3 $4
}
funcPrint Hi This is Linuxhint
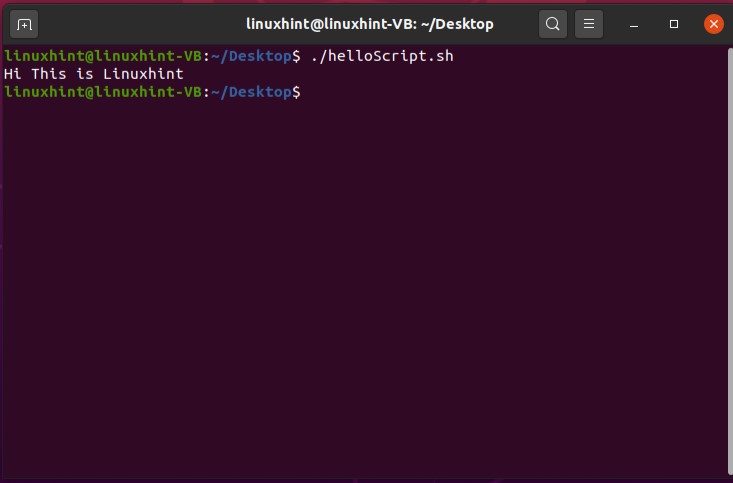
You can also check that the function is working perfectly or not.
function funcCheck()
{
returningValue="using function right now"
echo "$returningValue"
}
funcCheck
Save the code in ‘helloScript.sh’ and execute it through the terminal.

The variable which is declared inside of a function is local variable. For example, in the code given below ‘returningValue’ is a local variable. By the term local variable, we mean that its value is ’I love Linux’ within the scope of this function and we cannot access this variable outside of the function body. Wherever you call this function, the variable ‘returningValue’ will be assigned the value ‘I love Linux’.
function funcCheck()
{
returningValue="I love Linux"
}
returningValue="I love MAC"
echo $returningValue
funcCheck
echo $returningValue
In this script, you have a local function named as ‘funcCheck()’. This function has a local variable ‘returningValue’ with the value ‘I love Linux’. This ‘returningValue’ is a local variable. After defining the function, you see there is another statement as ‘returningValue=”I love MAC”’ but this time it is another variable, not the one defined in the function. Save the script and execute it you will see the difference.
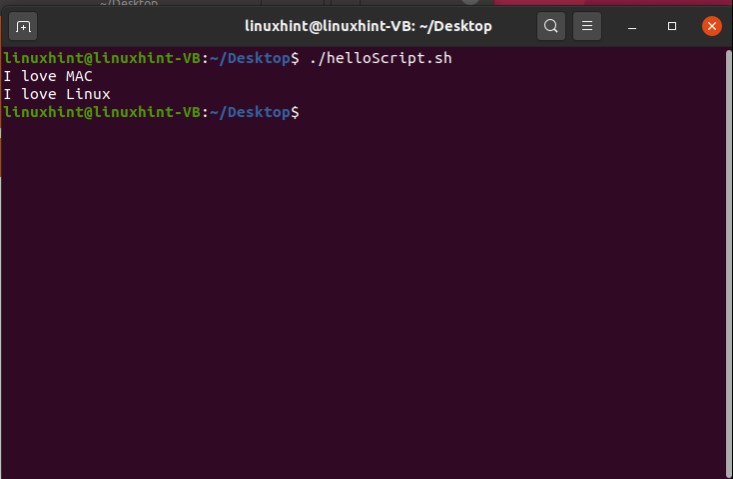
14. Files and Directories
In this topic, you are going to learn how to create files and directories, how to check the existence of these files and directories using a script, reading text from the files line by line and how to append text in the files and last thing, how to delete a file.
The first example script is to create a directory named ‘ Directory2’. Creating a directory ‘mkdir’ command is used with the flag ‘-p’ that deals with the error of creating same directories or folder at a place.
Save this ‘helloScript.sh’. Open up the terminal and execute the file. Then use ‘ls -al’ to check its existence.
mkdir -p Directory2

You can also use this ‘.helloScript.sh’ to check whether a directory exists in the current location or not. Below is the sample script for executing this idea. The first thing you have to do is to get the directory name from the terminal. Read the terminal line or directory name and store it in any variable. After that use an ‘if’ statement plus ‘-d’ flag which checks that the directory exists or not.
echo "enter directory name to check"
read direct
if [ -d "$direct" ]
then
echo "$direct exists"
else
echo "$direct doesn't exist"
fi
Save this ‘helloScript.sh’ file. Execute it from the terminal and enter the directory name to search.
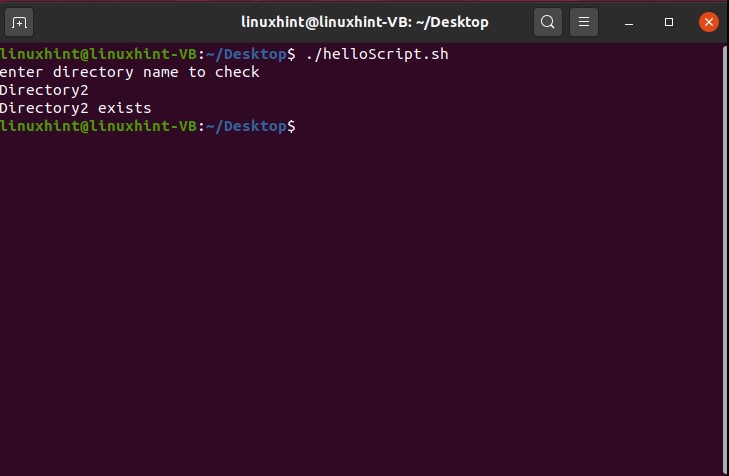
Moving on towards creating a file. the ‘touch’ command is used to create a file. The whole procedure of taking a name and reading from the terminal is the same as that for creating a directory but for creating a file you have to use the ‘touch’ command instead of ‘mkdir’.
echo "enter file name to create"
read fileName
touch $fileName
Save the script, execute it, and check its existence through the terminal by using the ‘ls -al’ command.

You can also follow the script for searching a directory through the script, except for a little thing. What you have to do is to simply replace the ‘-d’ flag with ‘-f’, as the ‘-f’ flag searches for the file and ‘-d’ for the directories.
echo "enter file name to check"
read fileName
if [ -f "$fileName" ]
then
echo "$fileName exists"
else
echo "$fileName doesn't exist"
fi

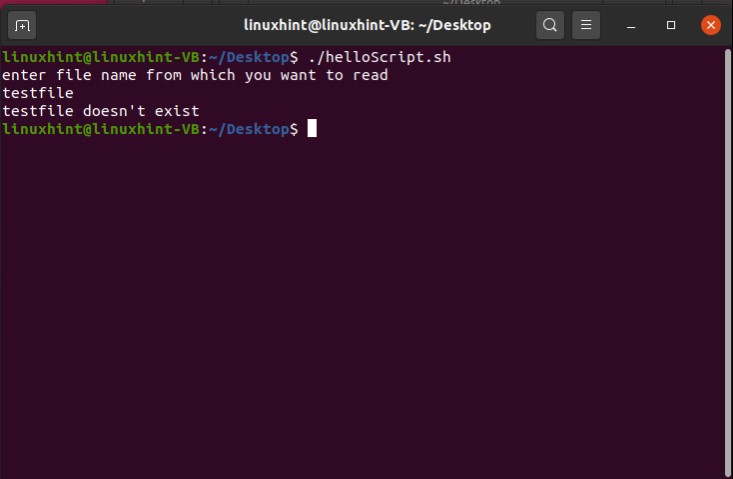
For appending the text in a file, we have to follow the same process. Step 1 is to get the file name from the terminal. Step 2 is to search for that file, if the program finds the file then asking to enter the text you want to append, else print that file doesn’t exist on the terminal. If the program finds out the file then t move towards the next step. Step 3 is to read that text and write the text in the searched file. As you can see, all of these steps are the same as that or file searching procedure, except for the text appending line. For appending text in the file you only have to write the following command ‘echo “$fileText” >> $fileName’ in your ‘helloScript.sh’
echo "enter file name in which you want to append text"
read fileName
if [ -f "$fileName" ]
then
echo "enter the text you want to append"
read fileText
echo "$fileText" >> $fileName
else
echo "$fileName doesn't exist"
fi
Execute the file to see the results.
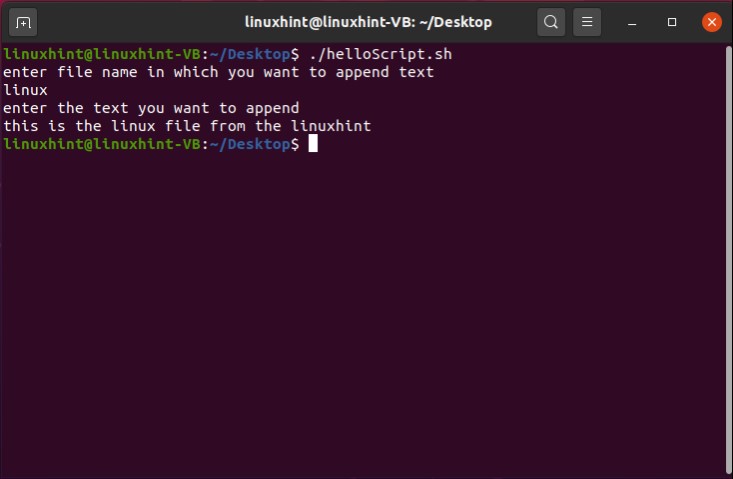
Now open the file to see if it worked or not.
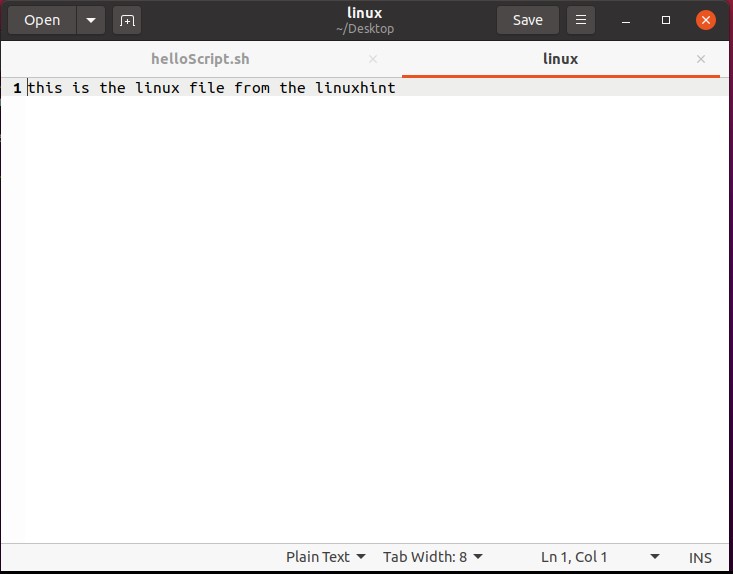
Execute the file again and append the second time to make sure.
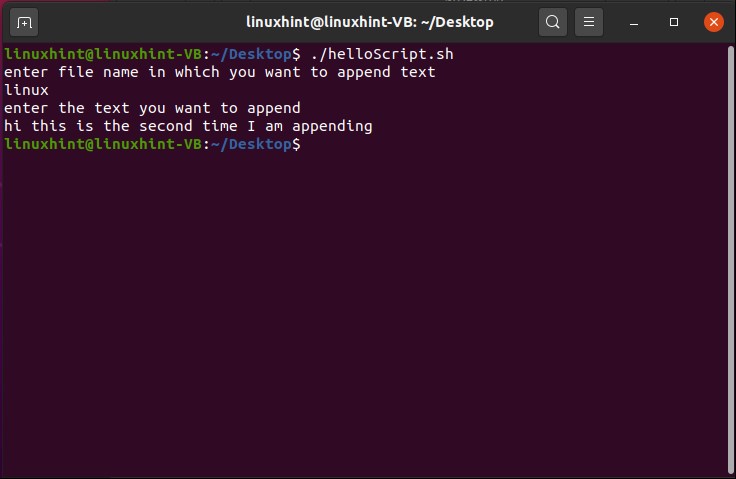

For replacing the content of the file with the text you want to give at the run time, the only thing you have to do is to use the symbol ‘>’ instead of ‘>>’ in the same script.
echo "enter file name in which you want to append text"
read fileName
if [ -f "$fileName" ]
then
echo "enter the text you want to append"
read fileText
echo "$fileText" > $fileName
else
echo "$fileName doesn't exist"
fi
Save this ‘helloScript.sh’ and run the file through the terminal. You will see that text has been replaced.
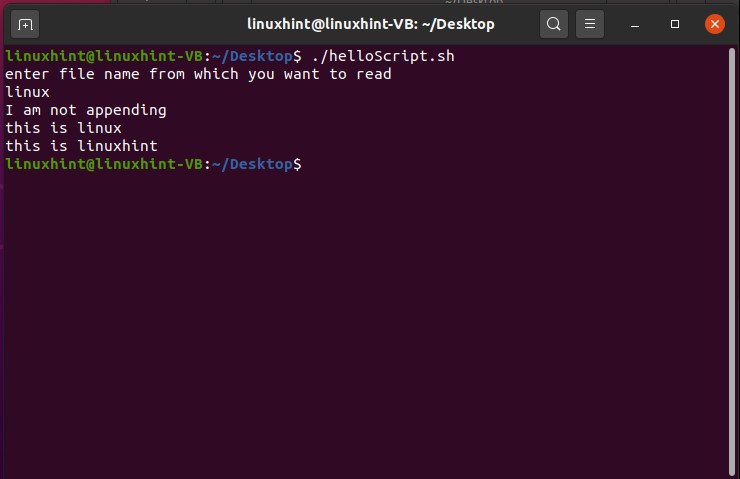
Open the file to see the changes.
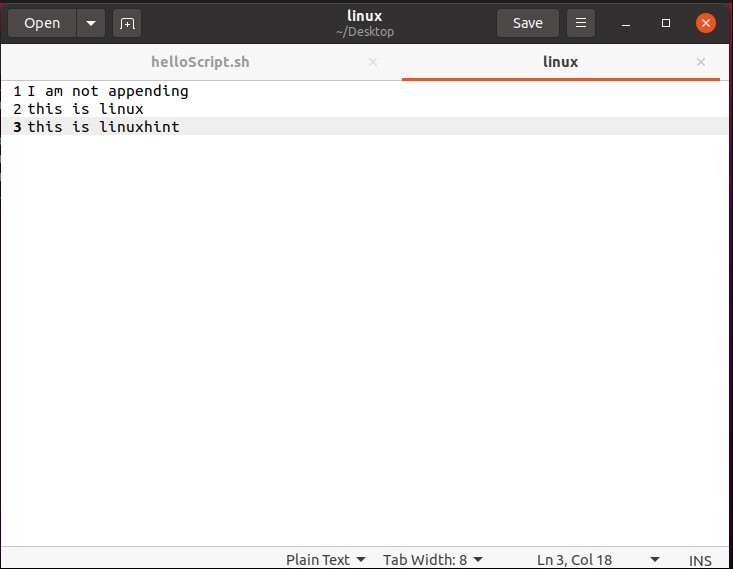
You can also read any file using the script. Follow the above method of finding the file. After that, use the while condition to read the file using the ‘read -r line’. As we are going to read the file so we will use this symbol ‘<’.
echo "enter file name from which you want to read"
read fileName
if [ -f "$fileName" ]
then
while IFS= read -r line
do
echo "$line"
done < $fileName
else
echo "$fileName doesn't exist"
fi
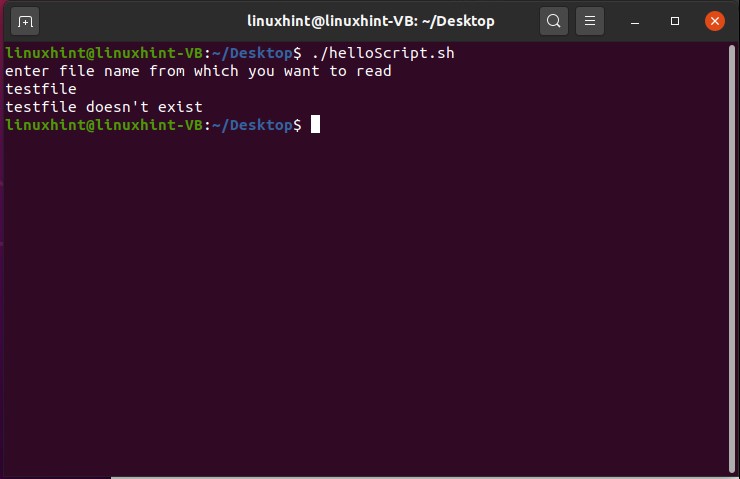
To delete a file, the first thing Is to find out that the file exists or not. After finding the file using the ‘rm’ command with the file name variable to delete it. For confirming its deletion use ‘ls -al’ to view the file system.
read fileName
if [ -f "$fileName" ]
then
rm $fileName
else
echo "$fileName doesn't exist"
fi
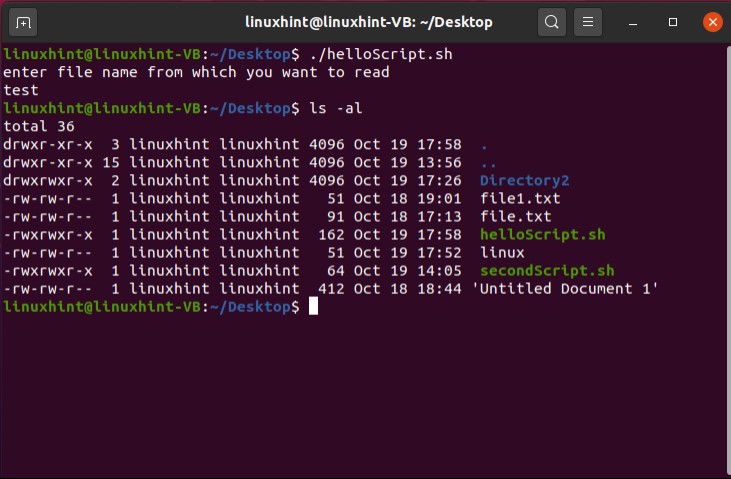
15. Sending email via script
There exist several methods for sending the email through the shell, but we are going to follow the simplest method of it. To work with your emails, the first thing you got to do is to install ‘ssmtp’
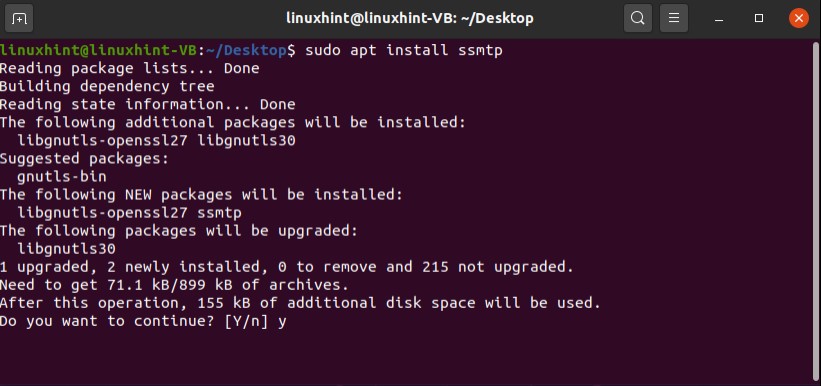
You can create a test email first for understanding the whole procedure. Here we have a testing email ‘[email protected]’.
Go to your Google account, under the ‘security’ tab turn on the option for ‘less secure app access’ and save the settings.
Next step is to edit the configuration file. Follow the commands given below to do it.
Or
Edit the following details in ssmtp.conf
mailhub=smtp.gmail.com:587
AuthUser=testingm731@gmail.com
AuthPass= (here you can give the password of your email)
UseSTARTTLS=yes
Now write the following lines of code in your ‘helloScript.sh’ file.
ssmtp testingm731@gmail.com
Open up the terminal and execute your ‘helloScript.sh’ and define the structure of your email. Give the following details for sending the test mail to your account by yourself.
To:testingm731@gmail.com
From:testingm731@gmail.com
Cc:testingm731@gmail.com
Subject:testingm731@gmail.com
bodytestingm731@gmail.com
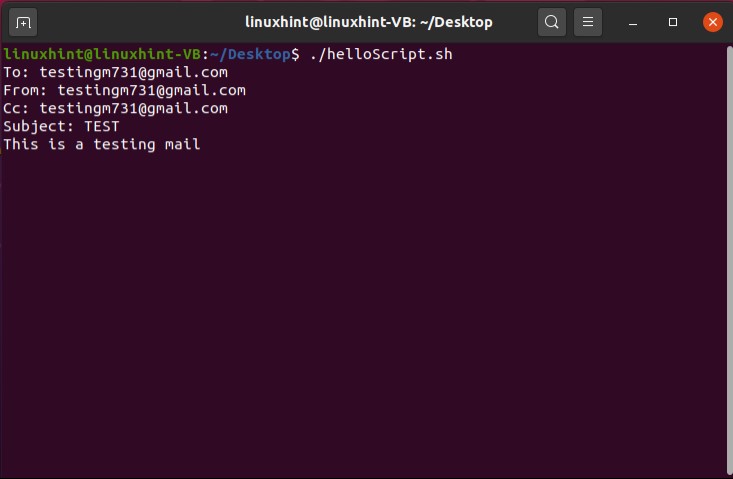
Go back to your email account and check you inbox.

As you sent a test mail to yourself, then it should be present in the sent items too, makes sense? right.

16. Curl in Scripts
Curls are used to get or send any data files that can have URL syntax. To deal with the curls what you have to do first is to install the curl using the terminal.
After installing curl, go back to your ‘helloScript.sh’ and write the code to download a test file using a url. To download a data file using curl you should know two steps. The first one is to have the complete link address of that file. Next thing is to store that address in a ‘url’ variable in your script, and then use the curl command with that url to download it. Here ‘-O’ indicated that it will inherit its file name from its source.
url="http://www.ovh.net/files/1Mb.dat"
curl ${url} -O
To give the downloaded file a new name, simply use the ‘-o’ flag and after that write the new file name as shown in the script below.
url="http://www.ovh.net/files/1Mb.dat"
curl ${url} -o NewFileDownload
Save this in ‘helloScript.sh’, execute the file and you will see the following output.

What if you want to download a file with the size of some hundreds of gigabytes? Don’t you think it will be easier for you if you know that you are downloading the right file or not. In this case, you can download a header file for confirmation. All you have to do is to write ‘-I’ before the url of the file. You will get the header of the file from which you can decide to whether download the file or not.
url="http://www.ovh.net/files/1Mb.dat"
curl -I ${url}
Save and execute the file using the command ‘./helloScript/sh’ then you will see the following output on the terminal.
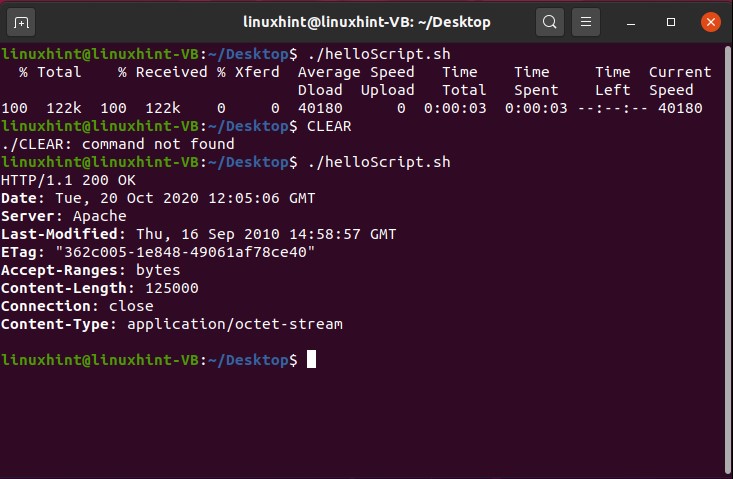
17. Professional Menus
In this topic, you are going to learn two basic things: the first one is how you can deal with the select loop and the other is how you can wait for the input.
In the first example, we are going to create a car menu in the script using the select loop and on its execution when you will select any options from the available, it will print out that option by displaying ‘you have selected ‘ plus the option which you give as an input.
select car in BMW MERCEDES TESLA ROVER TOYOTA
do
echo "you have selected $car"
done
Save the code in ‘helloScript.sh’ and execute the file for a better understanding of the select loop working.
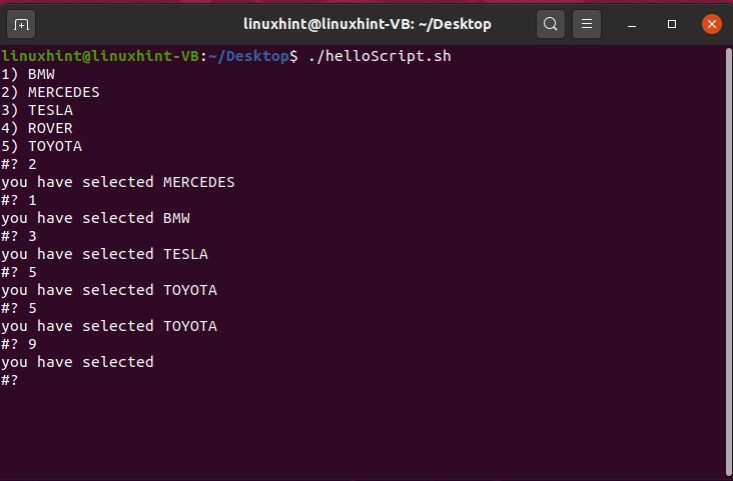
In this case, it will display the selected car option, but what if you give it another number except for the options it will do nothing. You can control this situation by using a switch case. Each case is used for a single menu option and in the case where the user input any other car option, it will display an error message that ‘Please select between 1 to 5’.
select car in BMW MERCEDES TESLA ROVER TOYOTA
do
case $car in
BMW)
echo "BMW SELECTED";;
MERCEDES)
echo "MERCEDES SELECTED";;
TESLA)
echo "TESLA SELECTED";;
ROVER)
echo "ROVER SELECTED";;
TOYOTA)
echo "TOYOTA SELECTED";;
*)
echo "ERROR! Please select between 1 to 5";;
esac
done
Save the script ‘helloScript.sh’ and execute the file using the terminal.
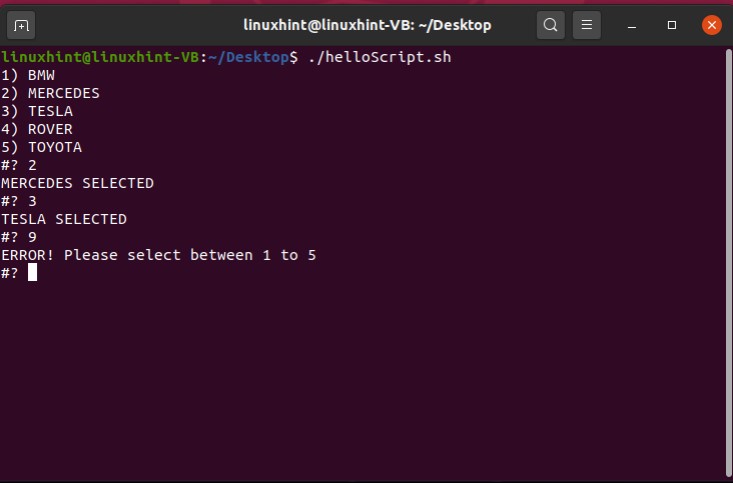
In professional menus, the program has to wait for the user input. You can also write a script for that. In this script ask the user to ‘press any key to continue’ and then send a reminder ‘waiting for you to press the key Sir’ to the user after every three seconds by using the command ‘read -t 3 -n 1’. In the other condition, check if the user pressed any key or not. This whole procedure is given below in a form of an example. Save this ‘helloScript.sh’ file, open up the terminal, and execute the file.
echo "press any key to continue"
while [ true ]
do
read -t 3 -n 1
if [ $? = 0 ]
then
echo "you have terminated the script"
exit;
else
echo "waiting for you to press the key Sir"
fi
done

18. Wait for filesystem using inotify
This topic will teach you to how to wait for a file and make changes in that file using inotify. inotify is basically ‘inode notify’. inotify is a Linux kernel subsystem that acts to extend filesystems to notice changes to the filesystem and report those changes to applications. To work with inotify, the first thing you have to do is to install inotify through the terminal.
You can try inotify on an imaginary directory to check how it will respond to that. For that, you have to write the following code in your ‘helloScript.sh’ file.
Inotifywait -m /temp/NewFolder
Save the script, execute it to check the behavior of inotify towards an imaginary file.

In the next part, you can create a directory to checks its functionality. The sample code is given below for doing this thing in your script.
mkdir -p temp/NewFolder
inotifywait -m temp/NewFolder
Save this ’helloScript.sh’ script, execute the file and you will see the following output on the terminal.

Now open that file side by side while checking the output on the terminal.

Here, you can see the working of the inotify as a monitor. Open another terminal window and create a file in that directory using ‘touch’ command, and then you will see inotify is watching all those actions which are currently happening in the filesystem.

Now try to write something in the ‘file1.text’ using the other terminal window and check the response from the terminal window working with inotify.
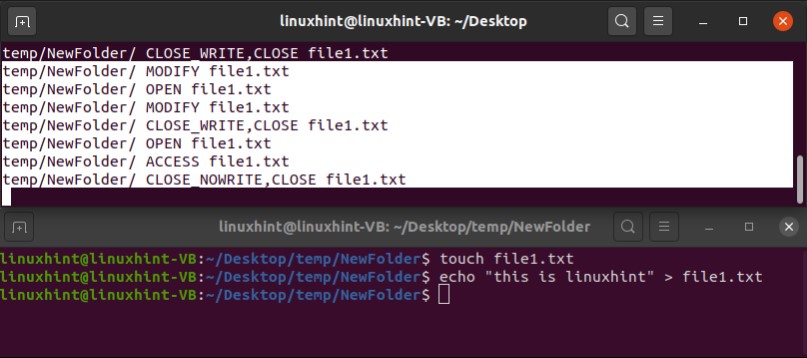
19. Introduction to grep
Grep stands for ‘global regular expression print’. This command is used to search a pattern within a file by processing the text line by line. First of all, we going to create a file named as filegrep.txt using the touch command. Type the following code in the terminal.
Open up the filegrep.txt and write the following content in the file.
This is Windows
This is MAC
This is Linux
This is Windows
This is MAC
This is Linux
This is Windows
This is MAC
This is Linux
This is Windows
This is MAC
Now, go back to your ‘helloScript.sh’ and now we are going to re-utilize the file searching code with a few changes according to our current program requirements. The basic method of file searching is discussed above in the topic of ‘Files and Directories’. First of all the script will get the file name from the user, then it will read the input, store that in a variable, and then ask the user to enter the text to search. After that, it will read the input from the terminal which is the text to search in the file. It will store the value in another variable named as ‘grepvar’. Now, you have to do the main thing which is the use of the grep command with the grep variable and file name. Ir will search the word in the whole document.
echo "enter a filename to search text from"
read fileName
if [[ -f $fileName ]]
then
echo "enter the text to search"
read grepvar
grep $grepvar $fileName
else
echo "$fileName doesn't exist"
fi
Save this ‘.helloScript.sh’ script and execute it using the command given below.
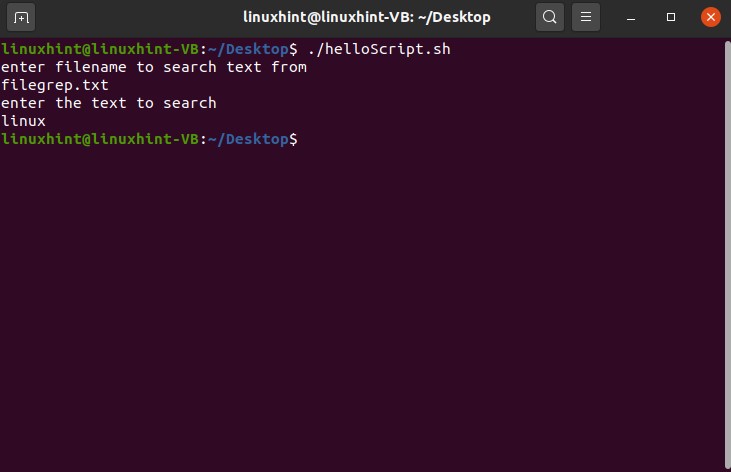
You cannot see anything after the searching procedure, because the input is ‘linux’ and the text in the file is written as ‘Linux’. Here you have to deal with this case-sensitivity issue by simply adding a flag of ‘-i’ in the grep command.
Now execute the script again.
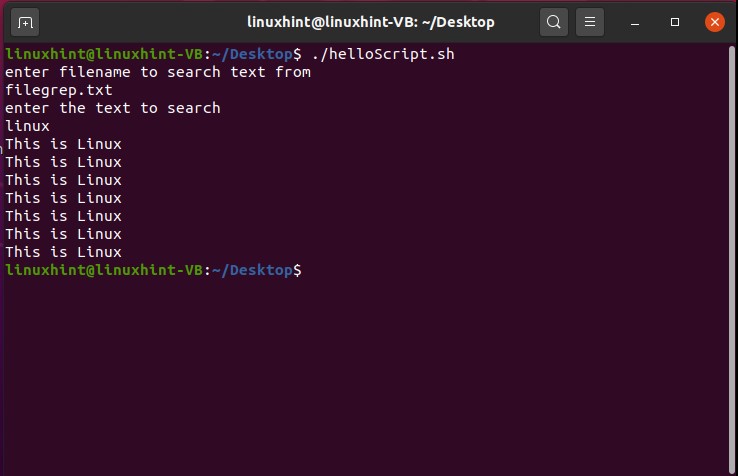
You can also extract the line number with the output. For this, you only have to add another flag of ‘-n’ in your grep command.
Save the script and execute the file using the terminal.
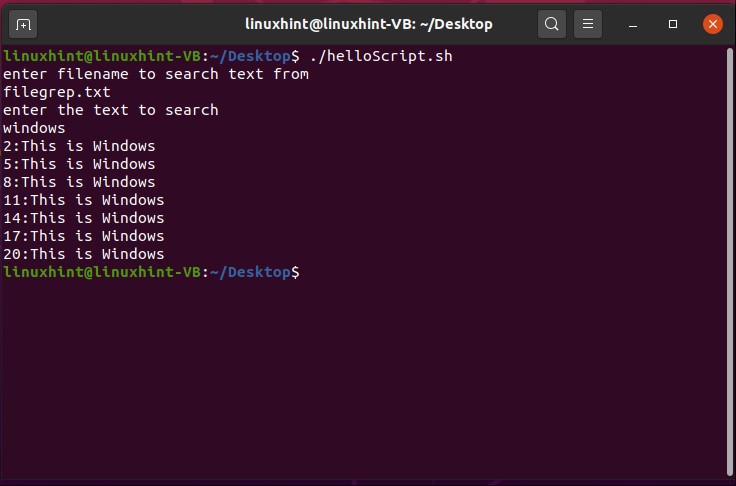
You can also retrieve the number of occurrences of that specific word in the document. Add ‘-c’ flag in the grep command ‘grep -i -c $grepvar $fileName’, save the script, and execute it using the terminal.

You can also check out different grep commands by simply typing ‘man grep’ on the terminal.
20. Introduction to awk
Awk is the scripting language that is used for manipulating data and writing reports. It requires no compiling and allows other users to use variables, numeric functions, string functions, and logical operators as well. You can take it as it is a utility that enables a programmer to write tiny but effective programs in the form of statements that define text patterns that are to be searched for in each line of a document and the action that is to be taken when a match is found within a line.
You could ask what is this ‘awl’ useful for? So the idea is that awk transforms the data files and it also produces formatted reports. It also gives you the ability to perform arithmetic and strings operations and to use conditional statements and loops.
First of all, we going to scan a file line by line using the awk command. In this example, you are also going to see the file search code, because it is essential for getting the required file. After that use the ‘awk’ command with the operation of print ‘{print}’ and the file name variable.
echo "enter a filename to print from awk"
read fileName
if [[ -f $fileName ]]
then
awk '{print}' $fileName
else
echo "$fileName doesn't exist"
fi
Save this ‘.helloScript.sh, and execute it through the terminal.
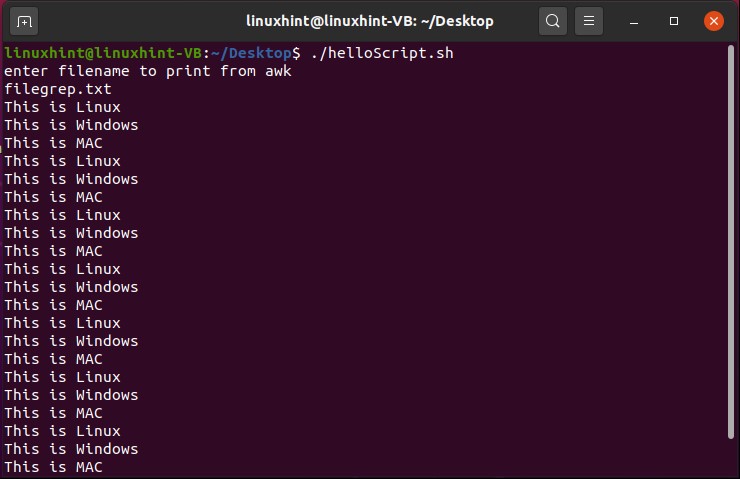
Don’t worry about the file name ‘filegrep.txt’. It is just a file name and ‘filgrep.txt’ name will not make this a grep file.
We can also search for a specific pattern using ‘awk’. For this what you have to do is simply replace the above awk command with this one ‘awk ‘/Linux/ {print}’ $fileName ’. This script will search for the ‘Linux’ in the file and will display the lines containing it.
echo "enter filename to print from awk"
read fileName
if [[ -f $fileName ]]
then
awk '/Linux/ {print}' $fileName
else
echo "$fileName doesn't exist"
fi
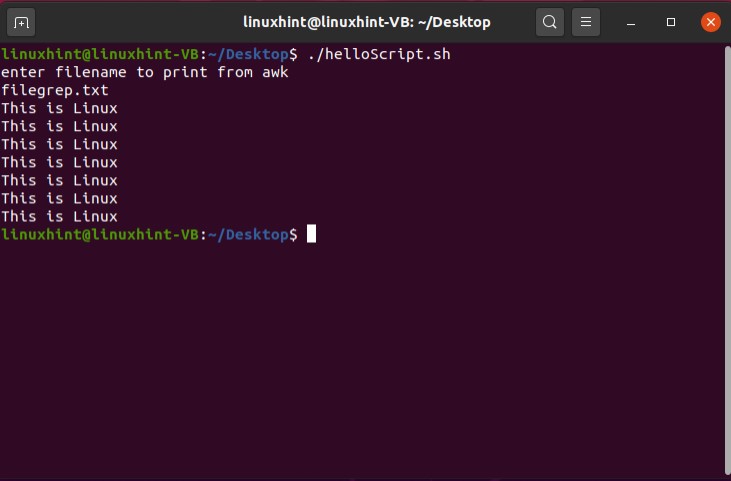
Now replace the content of the ‘filegrep.txt’ with the text given below for further experimentation.
This is Windows 3000
This is MAC 4000
This is Linux 2000
This is Windows 3000
This is MAC 4000
This is Linux 2000
This is Windows 3000
This is MAC 4000
This is Linux 2000
This is Windows 3000
This is MAC 4000
In the next example, you are going to see how we can extract the content from the lines, where the program found its targeted word. ‘$1’ represents the first word of that line, similarly ‘$2’ represents the second, ‘$3’ represents the third word and ‘$4’ represents the last word in this case.
echo "enter a filename to print from awk"
read fileName
if [[ -f $fileName ]]
then
awk '/Linux/ {print $2}' $fileName
else
echo "$fileName doesn't exist"
fi
Save the script above and execute the file to see if it print out the second word of the lines where the program found the word ‘Linux’.
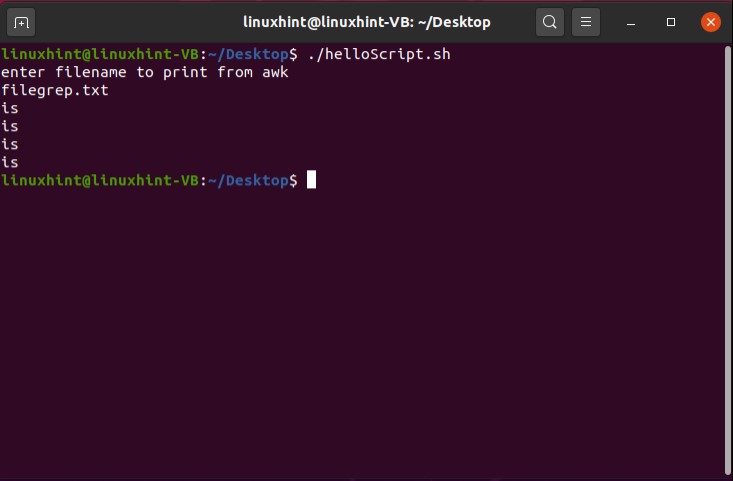
Now running the script with ‘awk’ command for retrieving the last word ‘$4’ of the lines where it found ‘Linux’.
echo "enter filename to print from awk"
read fileName
if [[ -f $fileName ]]
then
awk '/Linux/ {print $4} ' $fileName
else
echo "$fileName doesn't exist"
fi
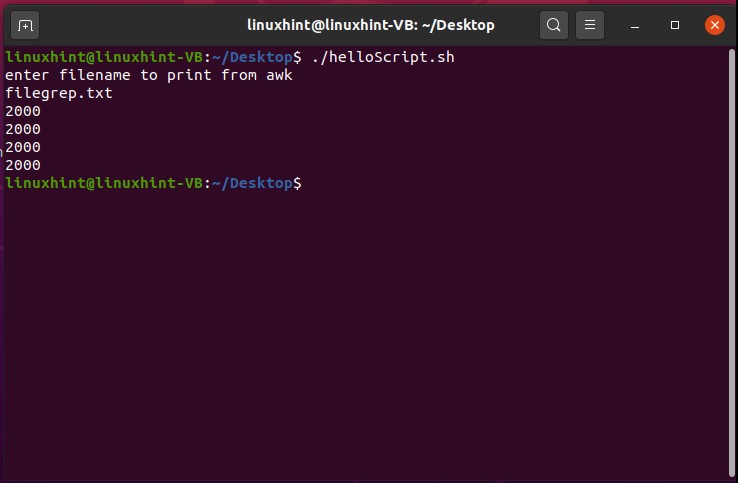
Now use ‘awk ‘/Linux/ {print $3,$4} ‘ $fileName’ command to see if it works for printing the second last and the last word of the lines containing ‘Linux’.
echo "enter filename to print from awk"
read fileName
if [[ -f $fileName ]]
then
awk '/Linux/ {print $3,$4} ' $fileName
else
echo "$fileName doesn't exist"
fi
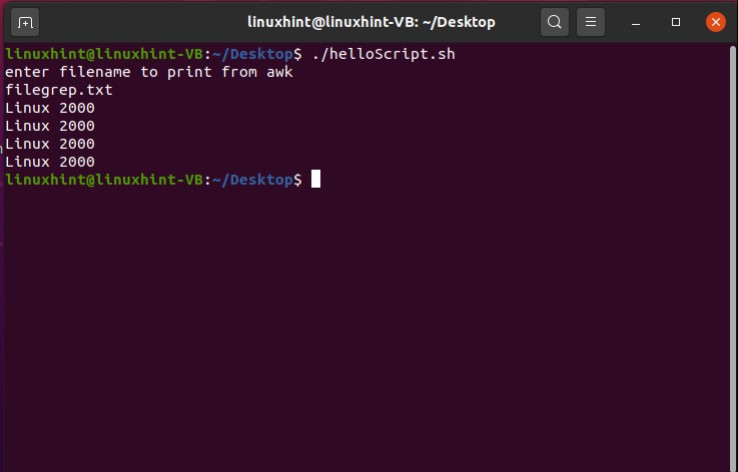
21. Introduction to sed
The sed command stands for stream editor, performs editing operations on text coming from standard input or a file. sed edits line-by-line and in a non-interactive way. This means that you make all of the editing decisions as you are calling the command, and sed executes the directions automatically. You are going to learn a very basic kind use of ‘sed’ here. Use the same script which we used for the previous task. We are going to substitute the ‘i’ with the ‘I’. For that simply write the following sed command ‘cat filegrep.txt | sed ‘s/i/I/’’, here cat command is used to get the content of the file and after the pipe ‘|’ sign, with the ‘sed’ keyword we specify the operation which is substitution this case. Therefore ‘s’ is written here with the slash and the letter which going to be substituted, then again slash and then the last letter with which we will substitute.
echo "enter filename to substitute using sed"
read fileName
if [[ -f $fileName ]]
then
cat filegrep.txt | sed 's/i/I/'
else
echo "$fileName doesn't exist"
fi
Save the script and execute the script using the terminal.
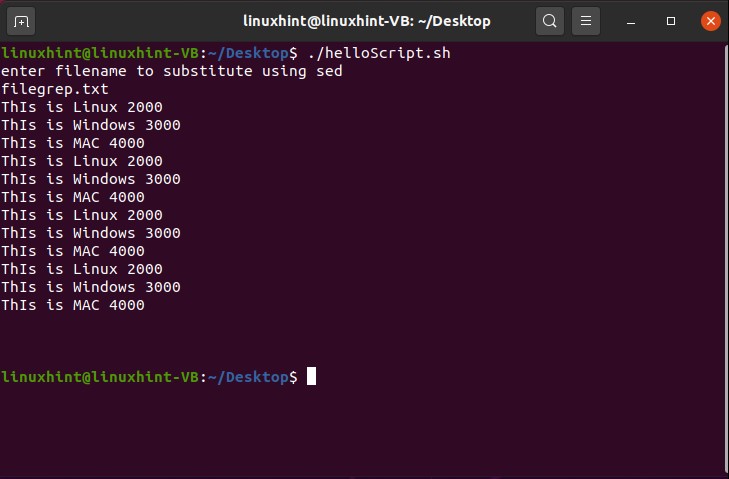
You can see from the output that only the first instance of ‘i’ has been substituted with the ‘I’. For the whole document’s ‘i’ instances substitution, what you have to do is to only write the ‘g’ (which stands for the global) after the last ‘/’ slash. Now save the script and execute it and you will see this change in the whole content.
echo "enter filename to substitute using sed"
read fileName
if [[ -f $fileName ]]
then
cat filegrep.txt | sed 's/i/I/g'
else
echo "$fileName doesn't exist"
fi
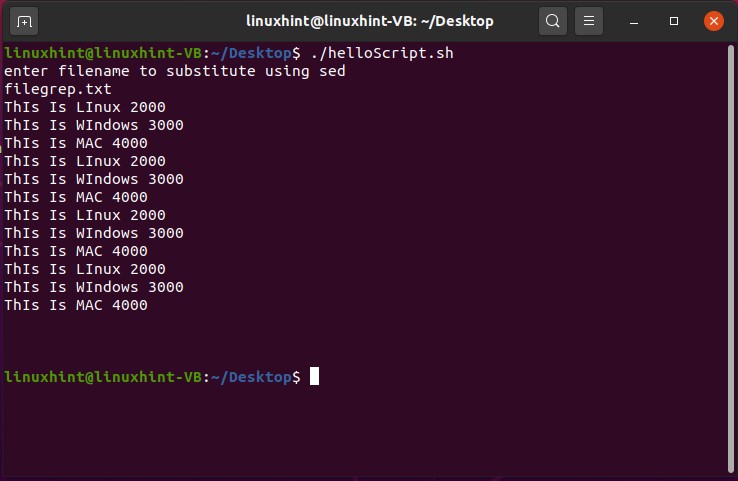
These changes are only made at the run time. You can also create another file for storing the content of the file displayed on the terminal by simply writing the following command in the ‘helloScript.sh’
You can also substitute the whole word with another. For example, in the script given below all the instances of the ‘Linux’ will be replaced with the ‘Unix’ while displaying it on the terminal.
echo "enter filename to substitute using sed"
read fileName
if [[ -f $fileName ]]
then
sed 's/Linux/Unix/g' $fileName
else
echo "$fileName doesn't exist"
fi

22. Debugging Bash Scripts
Bash offers an extensive debugging facility. You can debug your bash script and if something doesn’t go according to the plan, then you can look at it. This is the thing which we are going now. Let’s make an error intentionally to see the type of error we will get on the terminal. Save the following code in the ‘helloScript.sh’ file. Execute the file using the terminal and check out the result.
echo "enter filename to substitute using sed"
read fileName
if [[ -f $fileName ]]
then
sed 's/Linux/Unix/g' $fileName
else
echo "$fileName doesn't exist"
fi
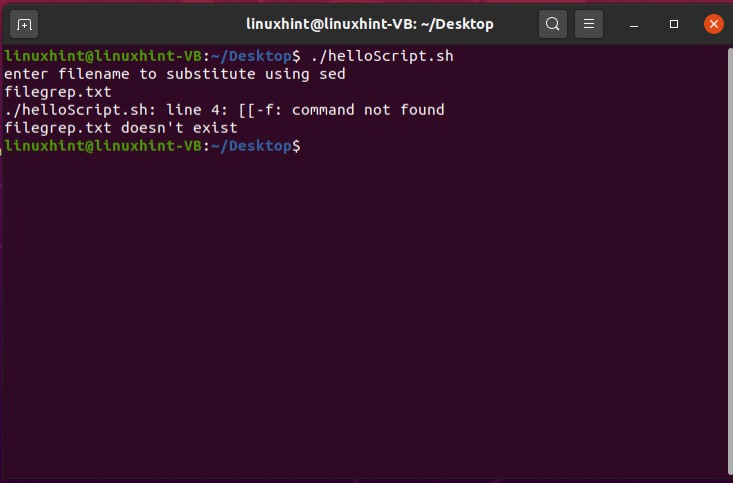
From the error, we can see that it exists at line 4. But when you have thousands of lines of code and you face multiple types of errors then this thing becomes so hard to identity. For that, what you can do is to debug your script. The first method is the step by step debugging using bash. For this, you only have to write the following command in your terminal.
Now run the script.
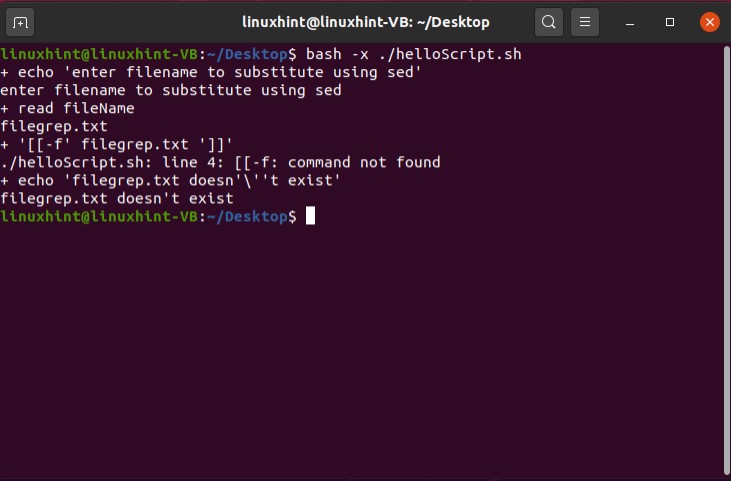
Simply put the ‘-x’ flag in the first line of the script after the bash path. In this method, you are going to debug your script, with the script.
echo "enter filename to substitute using sed"
read fileName
if [[ -f $fileName ]]
then
sed 's/Linux/Unix/g' $fileName
else
echo "$fileName doesn't exist"
fi

So in the final method, you can select the starting and ending points for the debugging. Write down the command ‘set -x’ at the starting point of the debugging and for ending it simply write ‘set +x’, save this ‘helloScript.sh’, execute it through the terminal, and check out the results.
set -x
echo "enter filename to substitute using sed"
read fileName
set +x
if [[ -f $fileName ]]
then
sed 's/Linux/Unix/g' $fileName
else
echo "$fileName doesn't exist"
fi
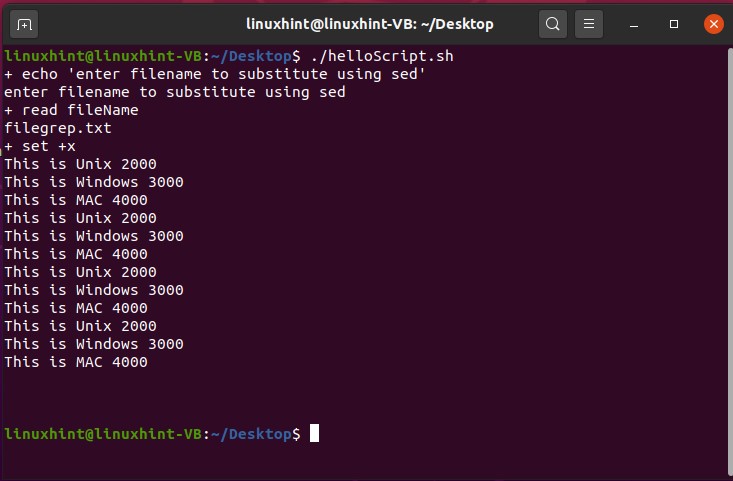
Watch 3 Hour BASH COURSE On YouTube:
Why bash is useful and who it is useful for?
If you want more control over your OS and want to perform different OS related tasks then bash is your way to go. By bash, we don’t only refer to the scripting language but also to the tools that come with Linux operating system. Every single tool on Linux has its work and each performs a different task individually. Bash is really useful whenever you need to combine all those tools and chain them together in such a way that they all work in harmony to accomplish a task which is really difficult to do otherwise. For example, anything that has something to do with the Linux OS can also be done in other programming languages such as Python or Perl but it’s very hard to accomplish different OS-related tasks. A simple, black & white and easiest way to do anything concerning Linux OS is by using bash. For anyone who wants to perform tasks that include the Linux OS tools (such as ls, cd, cat, touch, grep, etc.), it is really useful for him/her to learn bash instead of any other programming language.
How Bash compares to other programming languages?
If we talk about bash then we know that bash is not a general-purpose programming language but a command-line interpreter. Bash is really useful to perform tasks around different tools and processes with the ability to combine different processes together and make all of them work towards a single goal. Bash is really handy when it comes to dealing and manipulating the inputs and outputs which is a really difficult thing to do in other general-purpose programming languages such as python, C, etc. However, when it comes to data structures and complex tasks such as manipulating complex data, bash cannot handle such tasks and we have to look towards programming languages such as Python, Perl, C, etc. In programming languages, you can build software or a tool but you cannot build either of them in bash. However, you can use bash to run the tools or merge those tools together to run efficiently. It’s like building a rocket, if we consider this metaphor, programming languages will help you build the rocket while bash will help you drive the rocket and help you set its direction and help you land it to the moon or mars.
How to Create and Run Bash Scripts?
To create a bash script, you have to create a text file first with the extension of .sh at the end of the file name. You can create the bash scripting file using the terminal.

After typing in the above command, hit the enter key and you’d have a bash scripting file created in your current working directory. But that’s not it, we have created the scripting file but we have to perform certain actions to complete the script and run it. First of all, open the scripting file in a nano editor or gedit and on the very first line type in:

This is a standard first-line for every bash scripting file which helps it to be recognized as a bash script. Any script not having #!/bin/bash in the first line would not be considered as a bash script, so be sure to add this line to the top of every script. Once you have this line added, now you can start writing into the script. For example, I’d write here a simple echo command:

Once you have written this command, now you can go ahead save it, and go back to your terminal. Write in your terminal:

You can see ‘script.sh’ written in white color which is a sign that the script is a non-executable file as executable files are usually in green color. Further, take a look at the left side where we could see a pattern like “-rw-r–r–” which reflects that the file is only readable and writeable.
The first part containing ‘rw’ is the permissions for the owner likely the current user.

2nd part containing ‘r’ is the permission for the group in which we have multiple users.

While the 3rd part containing ‘r’ is permission for the public which means anyone can have these permissions for the mentioned file.

‘r’ stands for read permissions, ‘w’ stands for write permissions, ‘x’ stands for executable permissions. Clearly, we don’t see x against ‘script.sh’. To add executable permissions, there are two ways to do it.
Method 1
In this method, you could write a simple chmod command with ‘+x’ and it would add the executable permissions.

However, this is not the most efficient way to give executable permissions as it gives executable permissions not only to the owner but to the group and public as well which we certainly don’t want for security reasons. Take a look:

Method 2
In this method, you can use numbers to dictate the permissions of a file. Before we jump into that, I would like to give you a brief idea of what those numbers mean and how you can use them to manipulate permissions.
read = 4
write = 2
execute = 1
Permission numbers would be in three digits after the chmod command and each digit represents the permissions of the owner, group, and others(public). For example, to give read, write, and execution permissions to the owner and read permissions to the group and others would be something like this:

If you could notice, then you would come to a realization that we have added read, write and execute numbers for the owner in the first digit as 4+2+1=7, and for the group and others we use the digit of read i.e. 4.

Run a Bash Script
Now finally we have reached a mark where we can run the bash script. To run your bash script, you need to make sure that you are in the present working directory where your script resides. It’s not mandatory but that way it’s easy as you don’t have to write the whole path. Once you have done it, now go ahead and write in your terminal “./nameofscript.sh”. In our case, the name of the script is ‘script.sh’, so we would write:

3 Simple Examples of Bash Script
Hello LinuxHint
First of all, we would create a bash file in the present working directory:

Inside the file you need to write the following:
echo "Hello LinuxHint"

Once you have written it, now try to press Ctrl+O to write file changes then if you want to keep the name the same hit enter, otherwise edit the name, and then hit enter. Now press Ctrl+X to exit the nano editor. Now you would see a file named F_script.sh in your present directory.
To run this file you can change its permissions to make it executable or you can write:

Echo Command
When we talk about the echo command, it is simply used to print out pretty much everything that you want to print out as long as it is written inside the quotes. Normally when you run an echo command without any flag it leaves a line then prints out the output. For example, if we have a script:
echo "Print on the next line"
After it is saved, if we run it:

If we use the ‘-n’ flag with echo then it prints on the same line.
echo -n "Print on the same line"
After it is saved, if we run it:

Similarly, if we use ‘\n’ or ‘\t’ within the double quotes, it would print as it is.
echo "\nPrint on \t the same line\n"

However, if we use the flag ‘-e’, then it all not only goes away but it also applies the \n and \t and you could see the changes in the output below:
echo -e "\nPrint on \t the same line\n"

Comments in BASH
A comment is a line that doesn’t matter for the computer. Whatever you write as a comment is nullified or ignored by the computer and has no impact at all on the written code. Comments are usually considered more of a useful way for a programmer to understand the logic of code so that when he goes back to rework on the pieces of code, those comments could remind of him the logic and reasons why he has written code in a specific way. Comments can also be used by other programmers who might want to make changes to the code. If you have written a piece of code and you don’t want to remove it but you want to see the output without that specific piece of code then you can comment on that specific piece of code and go ahead and execute. Your program will run just fine, would get you good results while that extra code is still present in your script but it’s non-effective due to comments. Whenever you want to use that piece of code again, go ahead and uncomment those lines and you are good to go.
There are two ways you can write comments in bash; one way is to write single line comments while the other way is used to write multi-line comments.
Single Line Comments
In single-line comments, we use a ‘#’ sign that helps comment on the entire line. Anything written on the line followed by ‘#’ would be considered as a comment and would have no real value when we are executing the script. This single line comment can be used to communicate the logic and understanding of the code to someone who has access to the code.
echo -e "\nPrint on \t the same line\n"
#This script helps us apply the / combination of /n and /t


Multi Line Comments
Let’s say you want to comment a hundred lines in your script. In that case, it’d be difficult for you to use single-line comments. You don’t want to waste your time putting # on every line. We can use ‘:’ and then ‘whatever comments’. It would help you comment on multiple lines by just typing in 3 symbols which are handy and useful.
: ‘ This is script that makes sure
that \n and \t works and gets applied
in a way that we have the required output’
echo -e "\nPrint on \t the same line\n"


Take a look at 30 Examples of Bash scripts on Linuxhint.com:
6 Most Important lessons in Bash Scripting
1. Conditional Statement
The conditional statement is a very useful tool in decision making. It is widely used in programming languages. More often, we need to make decisions based on certain conditions. The conditional statement evaluates the given condition and takes the decision. In bash, we also use the conditional statement like any other programming language. The syntax of using the conditional statement in bash is a little bit different from the other programming languages. The if condition is the most commonly used conditional statement in bash and other general-purpose programming languages. The if condition evaluates the given condition and makes the decision. The given condition is also called a test expression. There are numerous ways to use the if condition in bash. The if condition is used with else block. In case, if the given condition is true, then the statements inside the if block is executed, otherwise the else block is executed. There are multiple ways of using the if condition statement in Bash which are the following:
- The if statement
- The if else statement
- The nested if statement
- The if elif statement
The if statement
The if statement only evaluates the given condition, if the given condition is true, then the statements or commands inside the if block is executed, otherwise the program is terminated. In bash, if the condition starts with the if keyword and ends with the fi keyword. The then keyword is used to define the block of statements or commands which execute when a certain condition is true. Let’s declare a variable and use the if condition to evaluate the value of the variable whether it is greater than 10 or not. The -gt is used to evaluate the greater than condition whereas, the -lt is used to evaluate the less than condition.
VAR=100
#declaring the if condition
if [ $VAR -gt 10 ]
then
echo "The $VAR is greater than 10"
#ending the if condition
fi

The if else statement
The if else statement is also used as a conditional statement. The statements or commands after the if condition is executed if the given condition is true. Otherwise, the else block is executed if the given condition is not true. The else block is followed by the if block and starts with the else keyword.
VAR=7
#declaring the if condition
if [ $VAR -gt 10 ]
then
echo "The $VAR is greater than 10"
#declaring else block
else
echo "The $VAR is less than 10"
#ending the if condition
fi

Multiple conditions can be evaluated by using the if condition. We can use the and operator (&) and or operator (II) to evaluate the multiple conditions inside a single if statement.
VAR=20
#declaring the if condition
if [[ $VAR -gt 10 && $VAR -lt 100 ]]
then
echo "The $VAR is greater than 10 and less than 100"
#declaring else block
else
echo "The condition does not satisfy"
#ending the if condition
fi

The nested if statement
In nested if statement, we have an if statement inside an if statement. The first if statement is evaluated, if it is true then the other if statement is evaluated.
VAR=20
#declaring the if condition
if [[ $VAR -gt 10 ]]
then
#if condition inside another if consition
if [ $VAR -lt 100 ]
then
echo "The $VAR is greater than 10 and less than 100"
#declaring else block
else
echo "The condition does not satisfy"
#ending the if condition
fi
else
echo "The $VAR is less than 10"
fi

The if elif statement
The if elif statement is used to evaluate multiple conditions. The first condition starts with the if block and the other conditions are followed by the elif keyword. Let’s consider the previous variable number example and implement the if elif statement in our bash script. The eq is used as an equal operator.
VAR=20
#declaring the if condition
if [[ $VAR -eq 1 ]]
then
echo "The variable value is equal to 1 "
elif [[ $VAR -eq 2 ]]
then
echo "The variable value is equal to 2 "
elif [[ $VAR -eq 3 ]]
then
echo "The variable value is equal to 2 "
elif [[ $VAR -gt 5 ]]
then
echo "The variable value is greater than 5 "
fi

2. Looping
Loops are the essential and fundamental part of any programming language. Unlike, the other programming languages, the loops are also used in Bash to perform a task repeatedly until the given condition is true. The loops are iterative, they are a great tool for automation of similar types of tasks. The for loop, while loop, and until loop is used in Bash.
Let’s discuss these loops one by one.
The while loop
The while loop executes the same statements or commands repeatedly. It evaluates the condition, and run the statements or commands until the condition is true.
This is the basic syntax of using a while loop in Bash.
While [ condition or test expression ]
do
statements
done
Let’s implement the while loop in our script.sh file. We have a variable VAR whose value is equal to zero. In the while loop, we have put a condition, that the loop should run until the value of the VAR is less than 20. The variable value is incremented by 1 after each iteration. So, in this case, the loop will start executing until the variable value is less than 20.
VAR=0
while [ $VAR -lt 20 ]
do
echo "The current value of variable is $VAR"
#incrementing the value by 1 in VAR
VAR=$((VAR+1))
done
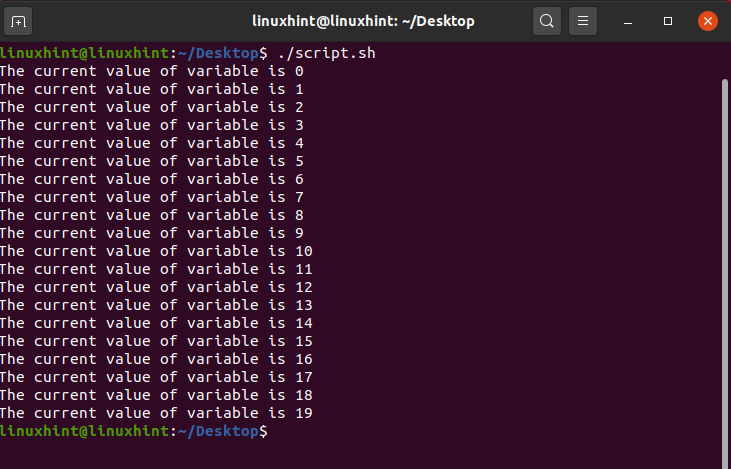
The for loop
The for loop is the most commonly used loop in every programming language. It is used to execute the iterative task. It is the best way to perform repetitive tasks. Let’s declare the for loop in our script.sh file and use it for performing a repetitive task.
VAR=0
for (( i==0; i<20; i++ ))
do
echo "Hello and welcome to the linuxhint"
#incrementing the variable i
i=$((i+1))
done
echo "This is the end of for loop"
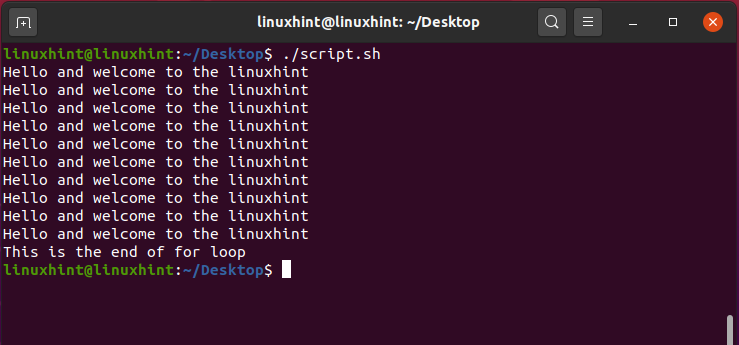
The until loop
The other type of loop that is used in Bash is until loop. It also performs or executes the same set of repeatedly. The until loop evaluates the condition and start executing until the given condition is false. The until loop terminates when the given condition is true. The syntax of the until loop is as follows:
until [ condition ]
do
statements
commands
done
Let’s implement the until loop in our script.sh file. The until loop will run unless the condition is false (The value of the variable is less than 20)
VAR=0
until [ $VAR -gt 20 ]
do
echo "Hello and welcome to the linuxhint"
#incrementing the variable i
VAR=$((VAR+1))
done
echo "This is the end of until loop"

3. Reading from the user and writing it on screen
The Bash gives the liberty to the user to enter some string value or data on the terminal. The user entered string or data can be read from the terminal, it can be stored in the file, and can be printed on the terminal. In the Bash file, the input from the user can be read using the read keyword and we store it in a variable. The variable content can be displayed on the terminal by using the echo command.
echo "Write something on the terminal"
#storing the entered value in VAR
read VAR
echo "You Entered: $VAR"

Multiple options can be used with the read command. The most commonly used options are -p and -s. The -p displays the prompt and the input can be taken in the same line. The –s takes the input in the silent mode. The characters of the input are displayed on the terminal. It is useful to enter some sensitive information i.e. passwords.
read -p "Enter email:" email
echo "Enter password"
read -s password

4. Reading and writing text files
Text files are the essential components to read and write the data. The data is stored in the text files temporarily and it can be read from the text file easily. First, let’s discuss writing the data into the text file and after that, we will discuss reading the data from the text files.
Writing the text files
The data can be written into a file in various ways:
- By using the Right Angle Bracket or greater-than sign (>)
- By using the double Right Angle Bracket (>>)
- By using the tee command
Right Angel Bracket Sign (>) to write data
it is the most commonly used way to write the data into the text file. We write the data and then put the > sign. The > sign points to the text file where we have to store the data. However, it does not append the file and previous data of the file is completely replaced by the new data.
#user enters the text file name
read -p "Enter file name:" FILE
#user enters the data to store in the text file
read -p "Write data to enter in file:" DATA
#storing data in the text file
# > points to the file name.
echo $DATA > $FILE

Right Angel Bracket Sign (>>) to write data
The >> is used to store the output of any command in the file. For example, the ls -al command shows the content and permissions of a file in a particular directory. The >> will store the output into the file.
#user enters the text file name
read -p "Enter file name:" FILE
#storing the command output in the file
ls -al >> $FILE

Using tee command to write data in the text file
The tee command in Bash is used to write the output of the command into a text file. It prints the output of the command on the terminal and as well as store it into the text file.
#user enters the text file name
read -p "Enter file name:" FILE
#storing the command output in the file using the tee command
ls -al | tee $FILE
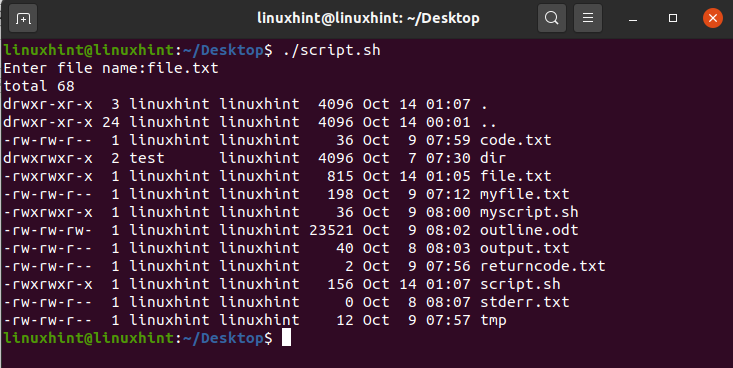
The tee command overwrites the existing data of the file by default. However, -a option with the tee command can be used to append the file.
#user enters the text file name
read -p "Enter file name:" FILE
#storing the command output in the file using the tee command
ls -al | tee -a $FILE

Reading the text files
The cat command is used to read data from the file. It is the most commonly used for this purpose. It simply prints out the content of the text file on the terminal. Let’s print the content or data of the file on the terminal using the cat command.
#user enters the text file name
read -p "Enter file name:" FILE
#reading the data from the text file
cat $FILE

5. Running other programs from bash
The Bash gives the authority to run other programs from the Bash script. We use the exec command to run the other programs from Bash. The exec command replaces the previous process with the current process and launches the current program. For example, we can open the nano, gedit, or vim editor from the bash script.
#running nano editor from Bash
exec nano
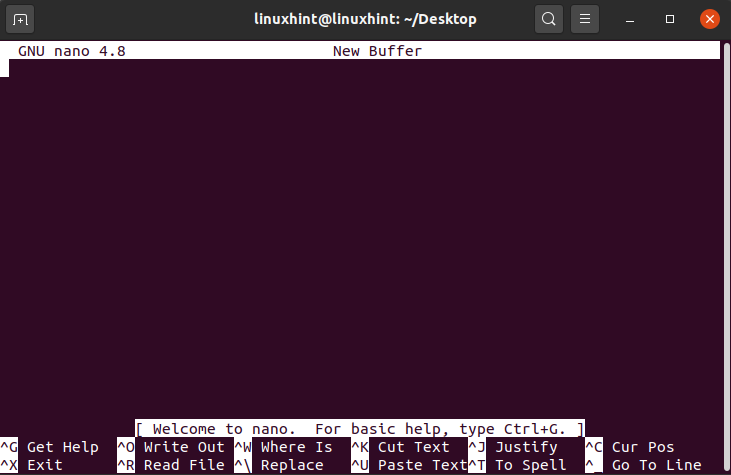
#running gedit from Bash
exec gedit
Similarly, we can run the browser application from the Bash as well. Let’s run the Mozilla Firefox browser.
#running firefox
exec firefox

Moreover, we can run any program from Bash using the exec command.
6. Command-line processing
The command-line processing refers to the processing of the data entered on the terminal. The command-line data is processed for many purposes i.e. reading user input, understating the commands, and reading the arguments. Previously, we have discussed the read command. The read command is also used for command-line processing. In this section, we will discuss the processing of command-line arguments. In Bash, we can process the arguments that are passed or written on the terminal. The arguments are processed in the same way as they are passed. Therefore, it is called positional parameters. In contrast with other programming languages, the indexing of the arguments in Bash starts with 1. The Dollar sign ($) is used to read the arguments. For example, the $1 reads the first argument, the $2 reads the second argument, and so on. The arguments can be parsed for various reasons like for taking input from the user.
echo "Enter your name"
#processing the first argument
echo "First name:" $1
#processing the second argument
echo "Middle name:"$2
#processing the third argument
echo "Last name:" $3
echo "Full name:" $1 $2 $3

Reading the data from the terminal using read, and parsing the arguments are the most suitable examples of command-line processing.
History of Bash and Comparison with Other Shells
The Bash is now the essential component of UNIX and Linux based systems. The Bourne Shell was initially developed by Stephen Bourne. The intended purpose of the Stephen Bourne shell was to overcome the limitations of the already existing shells at that time. Before the Bourne Shell, the UNIX introduced the Thompson Shell. However, the Thompson shell was very limited in processing script. The users were not able to run a sufficient amount of the script. To overcome all these limitations of the Thompson shell, the Bourne Shell was introduced. It was developed at the Bells Lab. In 1989, the Brian Fox revolutionized the Bourne shell by adding numerous other features and named it as Bourne Again Shell (BASH).
| Name of shell | Year | Platform | Description | Comparison with BASH |
| Thompson Shell | 1971 | UNIX | The automation of the script was limited. The user can only do a small amount of scripting. | The BASH overcomes the limitations of the Thompson shell and the user can write the large scripts. |
| Bourne Shell | 1977 | UNIX | It allows us to write and run a massive amount of scripts. The Bourne Shell does not provide the command editor and a greater number of shortcut facilities. | The BASH provides improvements in the design along with the command editor. |
| POSIX Shell | 1992 | POSIX | The POSIX Shell is portable. It provides many shortcuts and job control. | The BASH is popular for performing those tasks which do not require portability. |
| Z Shell | 1990 | UNIX | The Z Shell is feature-rich. It is a very powerful shell and provides features like command auto-completion, spelling correction, and autofill. | The BASH lacks some of the features that are provided by the Z Shell. |
Conclusion
BASH is a very powerful tool that allows us to run commands and scripts. A BASH script allows us to automate the daily tasks and commands. A BASH script is a combination of multiple commands. The BASH file ends with the .sh extension. Before running the BASH script, we need to update the file permissions and we need to provide the executable permission to the .sh file. This article explains the BASH and BASH scripting with the help of simple examples and important lessons. Moreover, it describes the history of BASH and compares its features with various other powerful shells.
]]>File Administration
- ls [options] [arguments] : List the files in a particular directory or present directory if used without options or arguments
- cd [options] directory: change the present directory
- ln [options] original file link file : Create links b/w files or b/w directories
- ln [options] original file : Create a link to the original file in the present directory
- mkdir [options] directory : Make a directory
- mv [options] source destination : Move and/or rename files and directories
- pwd [option] : prints the current working directory
- rm [options] file : Delete files or directories
- rmdir [options] directory : Remove empty directories
- tar [options] archivename [file(s)] : archive or extract files
- chgrp [options] group files: Change group ownership of one or more files & directories
- chmod [options]mode files: Change access permissions of one or more files & directories
- chown[options] new owner files : Change the ownership of one or more files & directories
- cp [options] source destination : Copy files and directories
- find [start-point] [search-criteria] [search-term] : find files
- gzip [options] filename : compress or expand files
- cat [options] [filenames] [-] [filenames] : Display, combine or create new files.
- cut [options] file : Cut out sections of each line of a file or files
- diff [options] from-file to-file : Display the differences between two files
- grep [options] pattern [file] : Search text and match patterns
- head [options] filename(s) : List the first part of a specified file
- less [options] filename : Display text files
- more [options] filename : Display a text file
- tail [options] filename(s) : List the last part of a specified file
Processes
- crontab [-u user] [-l | -r | -e] : Schedule a task to run at a particular time or interval
- kill [options] PID(s) : sends a signal to terminate a process or processes by PID
- killall [options] command name : sends a signal to terminate a processes by name
- ps [options] : displays a snapshot of the current processes
- top [options] : display system and process information in real time
Network
- ifconfig [arguments] interface [options] : Configure a network interface
- ifconfig [arguments] [interface] : View network interface details
- ip [options] object sub-command [parameters] : network configuration tool
- netstat [options] : network connection monitoring tool
- ping [options] remote server : checks the network connection to a remote server.
- curl [options] [URL] : download or upload files to remote servers.
- host [options] server : checks a computers IP address from its host-name or the reverse
- scp[options]user1@sourcehost:directory/filenameuser2@destinationhost:directory/filename : securely copy files between computers
- sftp [options] [user@] hostname [:directory] : interactively copy files between computers securely
- ssh [options] [login name] server : securely access a remote computer.
- traceroute [options] host-name : trace the route packets take to network host
- wget [options] [URL] : download or upload files from the web non-interactivly.
Miscellaneous
- apt-get install package-name : Install a package
- apt-get remove package-name : Un-install a package
- apt-get update : Update the database of available packages
- apt-get upgrade : Upgrade the packages on the system
- echo [options] [string(s)] : display text on the screen.
- groupadd [options] group : add a group account
- clear : clears the terminal screen.
- man [options] command : display the reference manual for a command.
- modprobe [options] modulename : Load or remove a Linux kernel module
- passwd [options] username : change the user password
- shutdown [options] [time] [message] : shut down or restart a system.
- su [options] [username] : switch to another user.
- sudo [options] command : Execute a command as the superuser
- usermod [options] username : Modify a users account configuration
- useradd [options] username : Add a user account
- who [options] : report the users logged onto the system.
- whoami [options] : report the current user.
File Systems
- fdisk [options] [device] : manipulate partition tables.
- mkfs [options] device : format a partition with a file system
- mount [options] type device directory : Mount storage onto the file system
- umount [options] device and/or directory : Unmount storage from the file system
System Information
- date [options] +format : display or set the date / time
- du [options] file : display the amount space used in files and directories
- free [options] : displays information about free and used memory on the system
- df [options] file : display the amount of free space on filesystems.
![]()
First of all, we have to install Dash on our system. Hit Ctrl+Alt+T on your Ubuntu, it would open up terminal. In order to run Dash applications on our system, we would install 4 to 5 packages using following command:
OR
When you will add -H it would not issue a warning because you would get to the Home variable by using -H in the command. Even if you don’t use it, it would be okay as it would display a warning but Dash would get installed anyway.
Now, you would go on to create a python script. Our first example of code would just display a simple output in our web browser on the server address and port mentioned above. In the example, first 3 lines would be the imports of dash, dash-core-components and dash-html-components respectively. Dash-core-components as dcc means that wherever we want to use dash-core-components we can use ‘dcc’ instead and similarly where we want to use dash-html-components, we can use ‘html’. Dash() is the built in class which holds the default code for Dash applications. ‘app.layout’ represents everything in web UI which means anything you want to display in the browser in Dash application, it has to be written in the operating zone of ‘app.layout’. Following our first simple code example which just displays a simple output:
Code Example#1:
import dash_core_components as dcc
import dash_html_components as html
app = dash.Dash()
app.layout = html.Div('LinuxHint YouTube Hi')
if __name__ == '__main__':
app.run_server(debug=True)
Output:

Second example is about creating a graph. We would use ‘dcc’ which essentially means dash-core-components and we would create a graph using it. In our example, we have drawn an example graph of Energy and Time with random values of ‘x’ and ‘y’ by giving a type of ‘line’ to Energy and a type of ‘bar’ to Time. We would do all of that inside a method dcc.Graph() in which we would name our both axis of the graph and set the title of graph as well.
Code Example#2:
import dash_core_components as dcc
import dash_html_components as html
app = dash.Dash()
app.layout = html.Div(children=[
html.Div(children='LinuxHint Youtube Hi'),
dcc.Graph(
id='graphss',
figure={
'data': [
{'x':[1,2,3,4,5,6,7], 'y':[11,12,22,23,24,44,55], 'type':'line', 'name':'Energy'},
{'x':[1,2,3,4,5,6,7], 'y':[13,15,26,27,34,44,65], 'type':'bar', 'name':'Time'},
],
'layout': {
'title': 'Graph for Time and Energy'
}
}
)
])
if __name__ == '__main__':
app.run_server(debug=True)
Output:

Pro Tip: While writing python script, use a python IDE or a smart text editor which indents the code automatically for you. Avoid using simple notepad or text editor for python scripts as indentation of code is an important factor in python while running it.
I will explain this in more details in video form as well.
]]>
What is a regular expression?
Before we move towards practical examples, we need to know what a regular expression really is. A regular expression is a sequence of characters which defines the structure of an input or a search pattern. Imagine putting in an email or password on some random website like Facebook, Twitter or Microsoft. Try putting it wrong and by wrong I mean try going against their convention. It will clearly point out those errors for you. You will not be allowed to go to the next step until your input matches the pattern that they have set in the backend. That specific pattern, which restricts you from putting any sort of additional or irrelevant information, is known as regex or regular expression.
Regular Expressions in Python
Regular expressions play no different part in python as in other programming languages. Python contains the module re which provides full support for the usage of regular expressions. Any time an unsuitable or unmatchable information is entered or any sort of error occurs, this re module is going to catch it as an exception which ultimately help solves the required problems.
Regular Expressions patterns
There are a lot of characters available written in a sequence which makes a specific regular expression pattern. Except for control characters, (+ ? . * ^ $ ( ) [ ] { } | \), all characters match themselves. However, control characters can be escaped by prewriting a backslash.
Following is a table which consists of a pattern and description about their working in python.
| Pattern | Description | |
| [Pp]ython | Match “Python” or “python” | |
| Tub[Ee] | Match “TubE” or “Tube” | |
| [aeiou] | Match any lower case vowel | |
| [0-9] | Match any digit between 0 to 9 | |
| [a-z] | Match any lowercase ASCII letter | |
| [A-Z] | Match any uppercase ASCII letter | |
| [a-zA-Z0-9] | Match any lowercase, uppercase ASCII letter or a digit between 0 to 9 |
|
| [^aeiou] | Match anything but not lowercase vowels | |
| [^0-9] | Match anything but not digit | |
| . | Match any character except new line | |
| \d | Match any digit: [0-9] | |
| \D | Match a non-digit: [^0-9] | |
| \s | Match white spaces | |
| \S | Match non-white spaces | |
| \A | Match beginning of string | |
| \Z | Match end of string | |
| \w | Match word characters | |
| \W | Match non-word characters | |
| […] | Match any single character in brackets | |
| [^…] | Match any single character not in brackets | |
| $ | Match the end of line | |
| ^ | Match the beginning of line |
Match and Search Functions in Python
Now, here we are going to see two examples with the two built in functions that exist in python. One is match and the other one is search function. Both of them take the same parameters which are as follows:
- Pattern – A regular expression to be matched or searched.
- String – A string which would be matched or searched in a sentence or in an input.
Before we jump into example part here is another thing that you need to know. Two methods can be used to get matching groups which are as follows:
- groups()
- group(num=0,1,2…)
What happens is that when match or search functions are used, it makes sub groups of all the related patterns found in strings and structure them at positions starting from 0. See the example below to get a better idea.
Match Function (Example)
In the following example, we have taken a list in which we have used a regular expression which checks the words starting with letter ‘a’ and will select only if both words start with the same letter i.e.: ‘a’.
arraylist = [“affection affect”, “affection act”, “affection Programming”]
for element in arraylist:
k = re.match(“(a\w+)\W(g\w+)”, element)
if k:
print((z.groups()))
Output:
(‘affection’, ‘act’)
Third element in the list will not be considered as it doesn’t match the regex which says that both words should start with ‘a’.
Search Function (Example)
This function is different from match. Search scans through the whole sentence while match does not. In the following example, Search method is successful but match function is not.
Input = “DocumentationNew”
v = re.search(“(ta.*)”, Input)
if v:
print(“result: ” v.group(1))
Output:
‘ta.*’ means anything after ‘ta’ which gives us our result as ‘tationNew’ from the searched Input “DocumentationNew”.
Conclusion
Regular Expressions are crucial to all software developers and now you can see easily how to use Regular Expressions in the Python programming language.
]]>In this article, we’ll look at the Requests module in python and its basic operation with some examples and then finally we will conclude.
Installation
Python versions 2.6-2.7 and 3.3-3.6 supports the request module. Request is an external module so you have to install it by writing the following in your command prompt or terminal:
Before we move on you need to make sure of two things:
– Requests library is installed properly if not follow the link (http://docs.python-requests.org/en/master/user/install/#install)
-Requests library is up-to-date if not follow the link to check (http://docs.python-requests.org/en/master/community/updates/#updates)
GET and POST Requests
Start off by importing requests. Now we are going to try to get a webpage using get request.
R_webpage = requests.get(‘http://www.dataversity.net/’)
R_webpage is a response object. All the information about the web page can be extracted from this object.
Now, if you want to make a post request:
R_post = requests.post(‘http://www.dataversity.net/’, data = {‘key’ : ‘value’})
See how easy it is to make requests. Let’s move on to passing parameters in URLs:
Passing parameters in URLs
Parameters in URLs can be passed in a formal way. Requests allow us to give these arguments as a dictionary of strings. params is the keyword to use in the arguments for that purpose.
See the following example to get a clear idea:
R_par = requests.get(‘http://www.dataversity.net’, params = {‘key0’ : ‘value0’ ,
‘key1’ : ‘value1’})
print(R_par.url)
print statement helps identify if the URL has been encoded correctly.
Response Content
Response of the server can be viewed completely as text:
R_Content = requests.get(‘http://www.dataversity.net’)
R_Content.text
The complete text will be decoded after getting it from the server and displayed as text.
Custom Headers
Custom headers can be added to requests. headers is the parameter which will have a dictionary passed by argument in order to specify the header.
R_head = requests.get(‘http://www.dataversity.net’, headers= {‘key’ : ‘value’})
In place of key and value, you can put your desired values throughout.
Conclusion
You were given a basic introduction of Python request module along with its working. Now, if you practice the above given examples on your own and add, eliminate and substitute things then you will get a better idea of its working. If you have made it here, congratulations because you have learned how to make basic requests to a server, passing parameters or arguments to the URLs, getting response content and showing it and passing custom headers. This will be very useful when you are trying to scrape webpages for information.
]]>